
Crear
AI Image and Video Tools for Photorealism: A Practical Guide
Nov 5, 2026
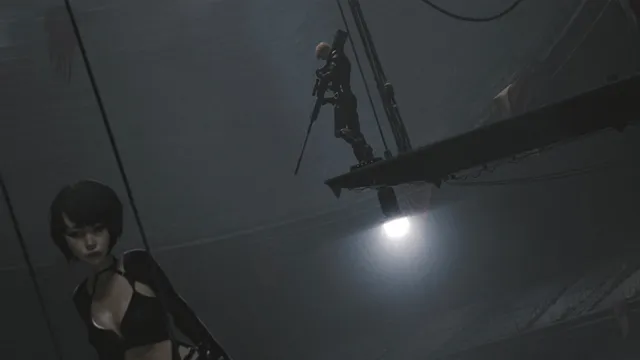

Photorealism in AI image and video synthesis is often treated as a single dial: either a tool has it or it does not. In practice, realism is a chain of decisions. A still can look convincing in a thumbnail and fall apart when the camera moves. A video can have beautiful lighting and a perfect face, then lose credibility when a hand passes in front of the lens. The useful question is not which tool wins in the abstract. It is which tool gets closest to a specific shot, under a specific deadline, with a specific finishing pipeline.
That distinction matters because generative models are improving faster than most review habits. Many current tools can produce skin pores, believable lens falloff, and complex reflections. The differences show up in consistency, control, and how much repair the output needs before it can sit beside real footage. A practical comparison should measure those qualities, not only the best frame from a batch of twenty.
Photorealism Is a Pipeline, Not a Preset
A photorealistic result usually comes from three layers working together. The first is the model: its training data, rendering behavior, and ability to follow prompts or image controls. The second is the operator: the references, camera language, and constraints supplied during generation. The third is post-production: grading, grain, stabilization, cleanup, sound design, and the edit. Weakness in any layer shows up as unreality.
This is why two teams can use the same tool and get very different results. One team prompts for a cinematic portrait and accepts a soft, flattering look. Another supplies a lens type, lighting diagram, wardrobe reference, and plate for compositing. The second team is not just writing a better prompt. It is reducing the number of decisions the model has to invent.
When comparing tools, separate generation quality from workflow quality. Generation quality covers anatomy, texture, light, and motion. Workflow quality covers controls, output resolution, iteration speed, batch review, and how easily the result moves into editing software. A model that produces one stunning clip per hour may be less useful than a model that produces ten good options with consistent framing and fewer artifacts.
What Viewers Notice First in AI Realism
Audiences rarely analyze a frame like a model benchmark. They notice mismatches. The face looks right, but the eyes do not track together. The lighting is dramatic, but the shadow under a shoe points the wrong way. The image is sharp, but the skin has no pores or variation. These are the signals to test.
Temporal coherence and character consistency
Temporal coherence is the ability to preserve identity, clothing, geometry, and lighting across frames. Watch for face drift, shifting hair, changing buttons, and backgrounds that breathe or warp. A useful test is a slow push-in on a speaking subject. If the jawline changes shape or the shirt collar morphs, the clip will feel synthetic even when individual frames are strong.
Character consistency is related but not identical. It includes costume, makeup, age, body proportions, and expression range. Image-first workflows often handle this better because you can lock a reference with a character sheet or a trained style. Video-first workflows may offer stronger motion, but they need a reference frame or a consistent seed strategy to avoid identity melt.
Light, shadow, and contact shadows
Lighting is one of the strongest realism cues. Look for believable falloff, soft shadows, reflected color, and highlights that match the material. Contact shadows matter more than dramatic shadows. Does the subject feel planted on the ground? Do fingers cast small shadows on a cup? Do glasses bend the light around the face? Missing contact shadows make a scene feel composited.
Global illumination is harder to judge in isolation. A good test is a mixed-light scene: warm interior lamps, cool window light, and a reflective surface. A strong model will preserve the color relationship between sources instead of washing everything into a neutral studio look. Reflections should also move with the camera, not slide across glass like a decal.
Resolution, micro-detail, and noise
Sharpness alone does not create realism. Over-sharpened images often look more artificial than slightly soft ones. Real footage contains sensor noise, lens imperfections, motion blur, and texture variation. Skin has pores and fine hair. Fabric has weave. Metal has smudges. A model that renders every surface as clean plastic will need texture work in finishing.
Resolution should be judged at the intended delivery size. A clip that looks detailed on a phone may reveal smeared edges on a television. Test at full resolution and at viewing distance. Lower-resolution generations can still work in a fast social edit, but they rarely hold up as hero footage without upscaling and grain management.
Motion physics and camera behavior
Video realism depends on weight and momentum. Cloth should lag, hair should react, feet should grip the ground, and objects should not float. Camera motion is equally important. A handheld shot needs micro-jitter and breathing. A dolly move needs consistent speed and parallax. AI video often fails when the camera moves faster than the scene can support.
A simple physics test is a subject walking toward camera while turning slightly. Check foot contact, shoulder movement, fabric drag, and background parallax. Then add a foreground element, such as a passing pole or a hand entering frame. That forces the model to handle occlusion, which is where many otherwise convincing clips break.
How to Compare Tools Without Wasting Time
The fastest way to compare synthesis tools is to build a small, repeatable test. Do not compare random prompts. Use the same brief across every tool and score the outputs against the same criteria.
Create a three-shot test brief
Use three shots that cover different failure modes. Shot one is a close-up portrait with natural skin and a slow push-in. Shot two is a full-body walk across a mixed-light room. Shot three is a product close-up with reflections and a hand entering frame. These three shots reveal face drift, motion problems, lighting weaknesses, and occlusion errors.
Keep the brief short but specific. State the lens, lighting, wardrobe, action, and camera move. If the tool accepts reference images, use the same references for every test. If it accepts control maps or depth passes, include them. The goal is to see how each tool handles constraints, not how well it guesses.
Use a weighted scorecard
Score each output from one to five on identity consistency, lighting accuracy, motion physics, texture detail, control adherence, and repair time. Give extra weight to the criteria that matter for your project. A social ad may care most about identity and speed. A product film may care most about geometry, reflections, and logo accuracy. A narrative sequence may care most about temporal coherence.
Repair time deserves special attention. A clip that looks slightly less impressive out of the box but needs ten minutes of cleanup can beat a flashier clip that needs an hour of face replacement. Keep notes on what failed and whether the tool offered a fix, such as a new seed, a stronger reference, or a different motion setting.
Test the edit, not just the clip
A single clip is not a sequence. Put the best outputs into a timeline with real footage or graphics. Add music, sound effects, and a grade. Judge whether the synthetic shots belong. This step exposes issues that isolated clips hide: mismatched grain, inconsistent color temperature, awkward cut points, and motion that feels too smooth.
If the synthetic clip needs to match a real camera, test a cut between the two. The eye is quick to notice a shift in sharpness, contrast, or noise. A tool that offers clean plates and stable color may be more valuable than one with a slightly better single frame.
Where Different Tool Families Excel
No single tool family dominates every task. The practical approach is to match the tool to the shot, then use finishing to unify the result.
Image-first tools for texture and lighting
Image-first workflows are strong for stills, character sheets, storyboards, product renders, and reference frames. Tools built around diffusion image generation, including Flux-based workflows, Midjourney, and Stable Diffusion setups with controls, give fine control over composition and texture. They are often easier to iterate with because you can generate many frames quickly and choose a direction before committing to motion.
For repeatable characters, train a style or character reference, or use a control image and inpainting. This is especially useful for ecommerce, editorial illustration, and campaign key art. The weakness is motion. Turning a great still into a great video still requires a video model or a carefully planned 2.5D camera move.
Video-first tools for motion, camera moves, and physics
Video-first tools such as Runway, Kling, Luma, PixVerse, MiniMax, Pika, and Sora-style systems are built for motion. Their strengths vary: some handle camera moves well, some handle human action, some produce more cinematic color, and some are better at stylized effects. The only reliable comparison is your own test brief.
Use video-first tools when the shot depends on movement: a walk, a product turntable, a reveal, or a camera push. Use them with a clean reference frame and a clear action description. Avoid overloading the prompt with story and style. If the tool supports motion brushes, depth maps, or camera controls, use them to reduce ambiguity.
Hybrid stacks for control and polish
Hybrid stacks are often the most reliable route to photorealism. Generate or select a strong still, refine it with inpainting or upscaling, then animate it with a video model. Use compositing to combine synthetic elements with real plates. Use tracking and grading to match the shot. This approach costs more steps but gives you a place to fix problems.
A hybrid stack also makes it easier to swap tools as they change. If your workflow depends on a single model, a new release can disrupt production. If your workflow is built around references, plates, and finishing, you can move the generation step without rebuilding everything.
A Practical Workflow for Photoreal Output
The following workflow works for a short ad, a narrative insert, or a product sequence. It assumes you have access to at least one image tool, one video tool, and an editor.
Step 1: Build a reference board before prompting
Collect real photographs that match the target look. Include lens references, lighting references, wardrobe, location, and material close-ups. If the shot must match existing footage, pull frames from the edit. Write a short shot note that describes the action, camera, and light in plain language.
Step 2: Control the variables
Choose one variable to test at a time. Start with a locked composition or reference frame. Add the action. Then add lighting and texture. If you change the prompt, seed, reference, and camera move at once, you will not know what caused the improvement or the failure.
Step 3: Generate and cull quickly
Generate a batch and cull aggressively. Look for the best face, the best motion, and the best lighting separately. You may combine a strong first frame with a better motion take. Name files clearly and keep notes on seeds or settings that worked.
Step 4: Repair continuity
Use the editor to fix small issues before they compound. Stabilize a shaky camera move. Retime a section. Replace a drifting face with a clean plate. Add a foreground element to hide an occlusion error. If a clip fails for more than a few seconds, regenerate rather than trying to rescue every frame.
Step 5: Finish like live footage
Add a consistent grade, subtle grain, lens blur, and sound. Real footage is rarely perfectly clean. A little texture can unify synthetic and practical shots. Be careful not to overdo it. Fake grain that does not move with the image can look worse than a clean digital image.
Common Failure Modes and Practical Fixes
Most AI realism problems are predictable. Once you know the pattern, you can design around it.
Face drift and identity melt
Use a locked reference frame and a consistent character description. Reduce motion complexity. If the tool supports character references or face locking, use them. In post, replace the face with a tracked clean plate or cut around the worst frames.
Plastic skin and over-clean surfaces
Add texture references and avoid prompts that imply beauty retouching. In finishing, introduce subtle noise and reduce sharpening. For stills, use inpainting to add pores, fabric weave, and surface imperfections.
Foot sliding and weightless motion
Choose shots with clear ground contact. Use a slower camera move and a simpler action. If the tool supports motion guidance, use it. In post, trim the moment before the foot slides or add a foreground element to distract from the error.
Bad shadows, reflections, and scale
Test mixed lighting before committing to a full sequence. Add a reference for the reflective surface. For products, use a real plate and composite the synthetic element. Check scale against a known object, such as a hand or a door frame.
Fake grain and over-sharpening
Match grain to the source footage and keep it moving. Sharpen less than you think you need. Compare the synthetic shot with a real shot on the same monitor at the same size. If the synthetic shot draws attention to its texture, soften it.
Decision Guide by Project Type
Use project needs to choose the workflow, not brand loyalty.
Stills and campaigns
Prioritize image tools with strong reference control and inpainting. Build a character or product sheet, then generate variations. Use video only for motion tests or animatics. Finishing should focus on texture, color, and typography integration.
Short social videos
Prioritize speed and identity consistency. A slightly stylized clip can outperform a hyper-real clip if it holds attention. Test vertical crops and captions early. Use video tools with fast iteration and simple motion controls, then finish with sound and pacing.
Narrative sequences
Prioritize temporal coherence and editability. Generate shorter shots and cut more often. Use real footage or practical plates wherever possible. Keep a continuity log for wardrobe, lighting, and screen direction. A hybrid stack with strong post-production is usually safer than one long generated take.
Product and architectural visualization
Prioritize geometry, reflections, and scale accuracy. Use image tools and compositing for hero frames. Use video tools only where motion adds value. Check logos, labels, and materials at full resolution. A clean, slightly conservative render often reads as more real than an ambitious shot with warped details.
Rights, Review, and Production Hygiene
Keep a record of references, prompts, model versions, and outputs. Review generated material for accidental logos, text artifacts, and recognizable faces. If a shot includes people, follow the same consent and usage rules you would use for a real production. Get a second pair of eyes on anything that could be mistaken for documentary footage.
Also keep a fallback plan. Generative tools can change unexpectedly. Save clean plates, reference frames, and project files so you can rebuild a shot if a model behaves differently later. A photoreal workflow is not just about generation. It is about making the result reviewable, editable, and repeatable.
FAQ
Is a video model always better than an image model for realism?
No. Image models often produce stronger texture, lighting, and composition. Video models add motion, but they can introduce drift and physics errors. The best route is usually to start with a strong still and animate it with controls.
Can I mix multiple tools in one sequence?
Yes, and many teams do. Use one tool for character stills, another for motion, and an editor for continuity. The key is to match grain, color, and camera behavior so the cuts feel intentional.
How many variations should I generate?
Generate enough to find a strong face, a strong motion take, and a strong lighting pass. For a critical shot, twenty to fifty options is not unusual. For a quick social edit, a smaller batch may be enough. Cull by failure mode, not by excitement.
Do I need a colorist or VFX artist?
For hero footage, yes. Small inconsistencies become obvious on a large screen. A colorist can unify synthetic and real shots, while a VFX artist can fix tracking, occlusion, and cleanup. For low-stakes social content, a good editor can handle most of it.
What is the fastest realism test?
Create a five-second close-up with a slow push-in, natural skin, and one foreground occlusion. If the face holds, the light behaves, and the occlusion works, the tool is worth a deeper test.
Why do AI clips look real in motion but strange on pause?
Motion masks small errors. When a clip pauses, the eye has time to inspect hands, teeth, fabric, and shadows. Always review key frames as stills before approving a shot.
Final Checklist
Before you call a shot photorealistic, check identity across frames, contact shadows, reflection behavior, skin and fabric texture, foot contact, camera speed, grain consistency, and how the shot cuts against real footage. If any of those fail, fix the weakest layer first. A better prompt will not repair a bad edit, and a better model will not replace a missing reference. The strongest results come from treating synthesis as one part of a controlled production pipeline.

Alexander
More Blogs
Read MoreFrom Text to Short Film: A Practical AI Video Workflow
Learn how to turn a written idea into a polished short film with AI video tools: scripting, model choice, shot consistency, sound design, and editing.
AI Transcription and Seamless Video Editing Workflows
Learn how AI transcription enables text-based editing, faster reviews, accessibility, and reliable post-production workflows from rough cut to final delivery.
Photorealistic AI Video Production: A Practical Workflow Guide
Learn a repeatable workflow for photorealistic AI video: model selection, shot planning, prompt design, continuity, audio, and quality control.