
Crear
AI Text-to-Video Workflow for Hyper-Realistic Scenes
Nov 6, 2026
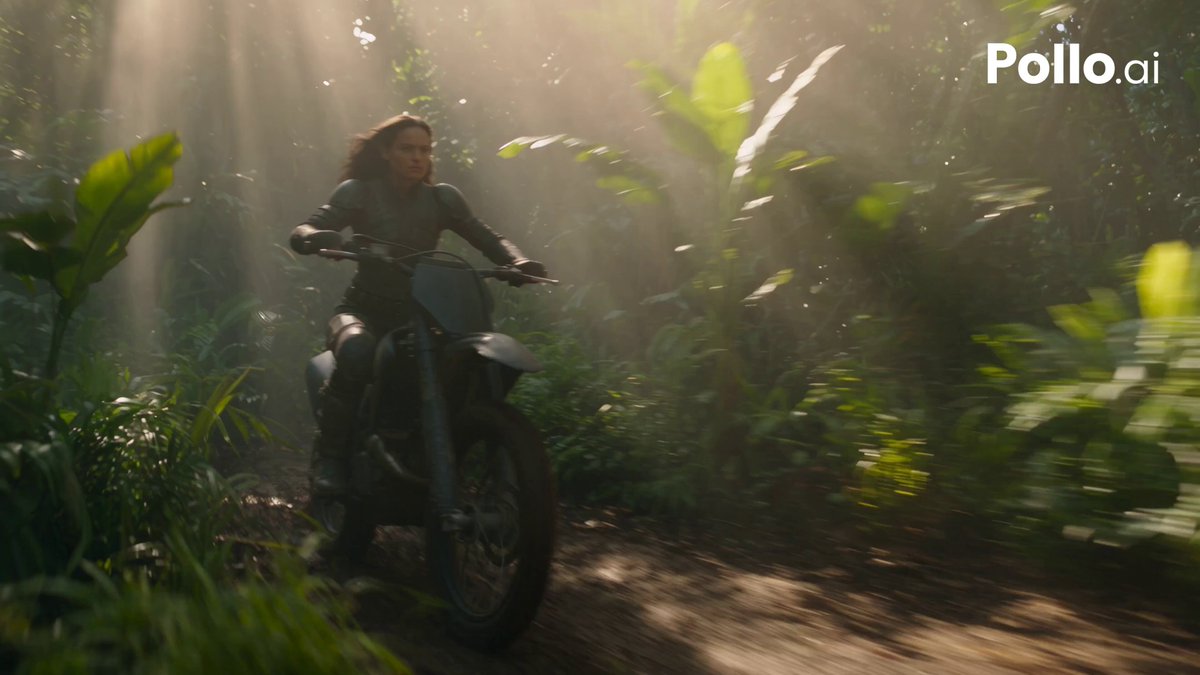
Text-to-video generation has moved from novelty clips to practical production support. A short prompt can now produce a usable establishing shot, a product close-up, or a stylized character beat, but the gap between a lucky result and a repeatable workflow is still wide. Teams that get reliable output do not rely on one magic prompt. They plan shots, control references, test variations, and edit generated footage with the same discipline they apply to camera footage.
This guide is a practical workflow for creating hyper-realistic AI video from text. It covers how to define realism, choose the right generator, write prompts that hold up, maintain continuity, build a review pipeline, fix common failures, and finish clips so they feel intentional rather than synthetic.
Why text-to-video changes production planning
The biggest shift is not that video can be generated. It is that planning, iteration, and versioning become the core creative work. A traditional shoot is constrained by location, weather, crew, and schedule. A generated sequence is constrained by prompt clarity, model behavior, reference quality, and the number of test renders you can review without losing momentum.
That changes the brief. Instead of writing a shot list for a camera crew, you write a shot list for a model. Each shot needs a subject, action, environment, camera position, lighting condition, motion direction, duration, and continuity notes. Vague direction such as 'make it cinematic' produces vague output. Specific direction such as 'slow dolly-in at eye level, overcast late-afternoon light, wet pavement reflections, subject walks left to right and stops' gives the model something testable.
The practical benefit is speed in previsualization. You can explore framing and mood before committing to a shoot, generate alternate backgrounds for a scene, or create social variants from one concept. The risk is false confidence. A beautiful still frame does not guarantee stable motion, and a good five-second clip may fall apart when extended. Treat generated video as a production material that still needs selection, editing, sound, and quality control.
What hyper-realistic means in generated video
Hyper-realism is not just sharpness. Viewers notice motion that feels physically wrong, faces that change subtly, textures that crawl, shadows that shift without a light source, and hands that fail under close attention. A realistic clip usually gets four things right: lighting logic, material behavior, motion weight, and continuity.
Lighting logic means the scene has a believable source and direction. A window should cast consistent shadows. A sunset should affect skin tones and反射 surfaces. Material behavior means skin, fabric, glass, water, and metal respond as expected. Motion weight means objects accelerate and settle with plausible mass. Continuity means the subject, wardrobe, props, and environment stay stable across cuts or extensions.
For many projects, photorealism is less important than plausibility. A stylized animated clip can be more convincing than a realistic clip with unstable faces. Decide early whether you need documentary realism, commercial polish, cinematic atmosphere, or stylized motion. That decision determines the generator, prompt style, reference needs, and review standards.
A practical text-to-video workflow from brief to final cut
A reliable workflow reduces random generation. The goal is to make each iteration answer a specific question: does the framing work, does the motion read, does the character stay consistent, does the lighting support the mood?
Write a shot brief before touching a prompt
Start with one page per shot. Include the story purpose, subject, action, setting, time of day, camera angle, lens feel, motion, duration, aspect ratio, and continuity notes. Add what must not appear, such as logos, extra limbs, recognizable locations, or text. This brief becomes the source for prompt variants and the checklist for review.
Split complex ideas into shots
One prompt should usually describe one clear action. If the idea requires a character to enter, pick up an object, speak, and leave, split it into separate shots or plan a simple continuous action. Short, controlled clips are easier to regenerate and edit. A sequence of reliable three-to-five-second shots often beats one ambitious ten-second generation that fails halfway through.
Build a prompt scaffold
Use a consistent order so you can compare results. A useful scaffold is: subject and wardrobe, action, environment, camera and lens, lighting, motion, mood, and technical constraints. Keep the scaffold stable and change one variable at a time. If you change camera, lighting, and action together, you will not know which change caused the improvement.
Generate small batches and compare
Generate a few variations rather than dozens. Review at normal speed first, then frame by frame only where something feels off. Score each clip for motion, anatomy, continuity, lighting, and editability. Save the best result and the prompt that produced it. A small, annotated library of successful prompts is more valuable than a folder of random clips.
Lock continuity with references
When a character or product appears in multiple shots, create a reference sheet with front, side, and detail views. Use consistent wardrobe, hair, prop placement, and color palette. Keep a continuity document with seed values if available, reference images, prompt versions, and notes about what changed. This is especially important for recurring social content, explainer series, and narrative scenes.
Upscale, interpolate, and edit
Generated clips often need finishing. Upscaling improves detail, frame interpolation can smooth motion, and editing controls pacing. Do not rely on the generator to deliver a final cut. Assemble selects on a timeline, trim before motion breaks, add sound design, and grade the sequence so shots feel related. The edit is where generated footage becomes a scene.
Choosing the right generator for the job
There is no single best text-to-video tool. The right choice depends on the shot. Build a short test reel before committing to a platform: one portrait with dialogue-like expression, one product rotation, one outdoor motion shot, one stylized action beat, and one shot requiring a specific camera move. Evaluate the results against your actual use case, not a highlight reel.
For photorealistic scenes, prioritize lighting consistency, skin texture, facial stability, and natural motion. For stylized work, prioritize shape control, color response, and tolerance for exaggerated motion. For fast iteration, prioritize queue speed, prompt history, and easy variation. For control, prioritize image-to-video support, camera controls, reference inputs, duration options, and export quality.
Also consider workflow fit. Does the tool support the aspect ratios you need? Can you organize projects? Are outputs easy to download and track? Does it handle the kinds of prompts your team writes? A tool that produces occasional stunning clips but slows down review can be worse than a less spectacular tool that fits the pipeline.
Prompt patterns that improve realism
Strong prompts read like shot directions, not poetry. They describe visible facts the model can render and avoid stacking contradictory instructions. Keep language concrete and use negative constraints only for common failures.
Subject, action, and environment
Name the subject, wardrobe, and defining details. Describe one action in plain language. Place the subject in a specific environment with foreground, middle ground, and background cues. For example: a middle-aged cyclist in a rain jacket coasts through a narrow city street, wet asphalt, parked scooters, steam from a vent, overcast morning.
Camera and lens language
Camera terms help when used consistently. Specify angle, height, distance, movement, and lens feel. 'Low-angle medium shot, slow push in, shallow depth of field' is more useful than 'epic camera.' Avoid combining incompatible moves such as a locked tripod shot with a fast orbit.
Lighting and time of day
Lighting is one of the strongest realism cues. State the source and quality: soft window light, hard midday sun, neon signage, practical streetlamps, overcast diffusion. Mention how light interacts with surfaces, such as reflections on wet pavement or rim light on hair.
Motion and physics
Describe speed and weight. A scarf should move with wind, a heavy door should close with resistance, water should splash with plausible force. If the model supports motion strength settings, test low and medium values before pushing high. Too much motion often causes warping.
Negative prompts and failure guards
Use negative prompts for repeated issues such as extra fingers, floating objects, text artifacts, flicker, duplicate limbs, or unwanted cuts. Keep the list short and update it only when a specific failure appears. A long negative list can make the prompt harder to control.
Maintaining character and object consistency
Consistency is a pipeline problem, not only a prompt problem. Create a small continuity bible for every recurring subject. Include reference images, wardrobe details, color values, distinguishing marks, typical camera angles, and approved prompt phrases. When a shot fails, note whether the issue was identity, wardrobe, environment, or motion.
For faces, use close reference images with neutral expressions and even lighting. Avoid references with heavy filters or dramatic shadows. For products, include label placement, material finish, and scale cues. For environments, keep a location sheet with architectural details, signage, and light direction.
Test continuity across shots before generating a full sequence. Generate the same character in three different setups: close-up, medium shot, and wide shot. If identity drifts immediately, simplify the scene or strengthen the reference set. Hands, jewelry, text, and complex patterns are common failure points, so frame around them when possible or plan extra review time.
Production pipeline and infrastructure
A generated video project needs a simple asset system. Use consistent file names that include project, shot, version, and status. Keep prompts next to outputs. Separate raw generations, approved selects, and edited sequences. If several people review, use a shared checklist so feedback is comparable.
Queue management matters. Batch similar shots together, but do not generate an entire sequence before reviewing the first result. Render a test frame or short clip, confirm the look, then scale. Track time per approved shot rather than time per generation. A shot that takes twenty quick failures but yields a clean five-second clip may still be efficient if it edits well.
Plan for review gates: concept approval, look approval, motion approval, and final edit approval. This prevents polishing a clip that does not serve the scene. Also confirm usage rights, disclosure requirements, and client expectations before publishing. AI-generated footage may need labeling depending on the platform, region, or campaign context.
Common mistakes and how to fix them
Warping and morphing usually come from too much motion, unclear subject boundaries, or conflicting instructions. Reduce motion strength, simplify the action, and shorten the clip. If a limb merges with clothing, describe the silhouette more clearly or change the camera angle.
Flicker and texture crawl often appear in fine patterns, foliage, crowds, and reflective surfaces. Simplify background detail, reduce camera movement, or generate at a higher quality setting if available. A slight shallow depth of field can hide unstable background textures.
Overloaded prompts are another common issue. When every sentence adds a new idea, the model averages conflicting directions. Cut the prompt to the essentials and move secondary details into a separate shot. If the result ignores a key detail, place it earlier and make it visually specific.
Mismatched audio and motion happens when sound is added after the edit without checking sync. Build a rough sound pass early, especially for footsteps, impacts, and dialogue-like beats. Unrealistic motion blur can be reduced by avoiding fast pans and by trimming before the blur becomes distracting.
Editing AI video into a believable sequence
Cut on motion whenever possible. If a subject is walking, cut during the step rather than after the movement stops. Use cutaways to hide weak frames. Keep shot durations appropriate to the action; a generated clip often feels more real when it is shorter than the model's maximum duration.
Sound design does more for realism than many visual tweaks. Add room tone, footsteps, cloth movement, distant traffic, and subtle impacts. Color grade the sequence as a whole so shots share contrast, saturation, and highlight behavior. Add practical details such as grain, lens vignetting, or atmospheric haze only when they support the scene.
Finally, watch the sequence without pausing. Viewers experience motion and rhythm, not isolated frames. If the sequence holds attention at normal speed, small imperfections matter less. If it feels wrong, identify whether the problem is story, motion, continuity, or sound before generating more clips.
FAQ
How long should a generated clip be?
Start with three to five seconds for complex motion and five to eight seconds for simple establishing shots. Shorter clips are easier to control and edit. Extend only after the core motion and identity are stable.
Can I get consistent characters across shots?
Yes, but it requires references, consistent wardrobe, simple scenes, and repeated testing. Keep a continuity document and avoid drastic changes in angle, lighting, or costume between shots unless you have strong reference coverage.
Do I need a powerful computer?
Many text-to-video tools run in the cloud, so local hardware matters less. Editing, upscaling, and storage still benefit from a capable machine, but the generator itself is often browser-based.
What makes AI video look fake?
Unstable faces, floating objects, inconsistent shadows, unnatural motion weight, texture flicker, and mismatched sound are the usual culprits. Fix the most obvious issue first rather than regenerating blindly.
Should I use one model or several?
Use one primary model for consistency, then bring in another for specific shots where it performs better. Keep prompts and references organized so the final edit feels coherent.
How do I keep prompts organized?
Use a shot brief, a naming convention, and a version log. Store the prompt beside each output, note the settings, and mark approved selects. This makes revisions and team review much faster.

Alexander
More Blogs
Read MoreFrom Text to Short Film: A Practical AI Video Workflow
Learn how to turn a written idea into a polished short film with AI video tools: scripting, model choice, shot consistency, sound design, and editing.
AI Transcription and Seamless Video Editing Workflows
Learn how AI transcription enables text-based editing, faster reviews, accessibility, and reliable post-production workflows from rough cut to final delivery.
Photorealistic AI Video Production: A Practical Workflow Guide
Learn a repeatable workflow for photorealistic AI video: model selection, shot planning, prompt design, continuity, audio, and quality control.