
Integrating Video, Voice, and Data into One AI Workflow
Nov 4, 2026
Why one pipeline beats five disconnected tools
Most AI video projects do not fail because a model produced a bad frame. They fail in the handoffs. A script lives in one document, prompts in a chat thread, renders in a downloads folder, narration in a separate voice tool, and the timing that ties them together exists only in someone's head. The output looks expensive for three seconds and then drifts: mouths move out of sync, a character's jacket changes color, the music swells over the wrong beat, and nobody can remember which version of the prompt produced the shot everyone liked.
Integrating video, voice, and structured data into a single workflow is not about buying one giant tool. It is about treating a production as one system with three layers that constantly exchange information. The visual layer answers "what do we see?" The audio layer answers "what do we hear, and when?" The data layer answers "what exactly did we ask for, and which version are we looking at?" When those three layers share the same source of truth, iteration becomes cheap and quality stops being accidental.
This guide walks through the architecture of that system in practical terms: how to plan it, which model families fit which jobs, how to build an audio layer that survives editing, and how to keep metadata clean enough that a project can be revised a month later without archaeologizing your own files.
Start with the data layer, before any generation
The temptation is to open a video generator immediately. Resist it for twenty minutes. The single highest-leverage change you can make is writing the shot sheet first and treating it as the project's database.
Write a shot sheet that doubles as a prompt library
A useful shot sheet has one row per shot and columns for: shot ID, duration in seconds, description in plain language, camera framing, lighting note, character or product reference, dialogue or narration line, and the prompt text you actually used. Add a column for the model and seed, and one for the accepted render filename.
This sounds bureaucratic until the first revision request arrives. With a shot sheet, "make shot 14 warmer and two seconds longer" is a five-minute job. Without one, it is a re-shoot.
Keep the plain-language description separate from the prompt text. Prompts are model-specific and disposable; descriptions are the creative intent and should survive a model change. When a new generator appears, you rewrite the prompt column and keep everything else.
Name and tag assets so you can find them later
Adopt a naming convention on day one: project_shotID_version_variant.ext. So coffee_s07_v03_altclose.mp4 tells you the project, the shot, the third attempt, and that it was an alternate framing. Pair it with a lightweight tag system — accepted, rejected, needs-audio, lip-sync-pending — and you have a searchable pipeline instead of a folder of mystery files.
If you work with a team, put the shot sheet somewhere shared and link the filenames directly in it. The goal is that any collaborator can open one document and know exactly which file is current.
Choosing a video model by the job it does
Model comparisons age quickly, so build your decision around capabilities rather than leaderboards. Three broad categories cover most production needs.
Photoreal cinematic coverage
Top-tier cinematic models excel at shallow depth of field, natural light falloff, and believable skin. Use them for hero shots, product beauty frames, and anything that will sit on screen for more than three seconds. They are usually slower and more expensive per second, so budget them for the shots the audience will actually study.
Practical tips: describe light direction and lens character in the prompt ("soft window light from camera left, 50mm, shallow focus"), avoid stacking more than two motion instructions, and generate two or three variants before committing. Cinematic models respond well to restraint.
Fast iteration and motion control
Mid-tier and fast models are for exploration, animatics, and anything requiring precise camera moves. Use them to test whether a sequence works before spending on final renders. A rough pass at low resolution that proves the edit rhythm is worth more than a flawless shot that gets cut.
Motion control matters here: if a model supports camera path or motion brush inputs, you can lock a dolly or a pan and reuse it across shots, which makes a sequence feel intentional rather than assembled.
Character and style continuity across shots
Continuity is the hardest problem in AI video and the main reason creators want integration in the first place. Look for models with reference-image conditioning, character locks, or style transfer from a fixed set of frames. The workflow that works reliably is: build a character sheet (front, three-quarter, profile, plus two expressions), generate a clean still for each setup, then animate from those stills rather than from text alone.
Whichever models you use, keep a written record of which one produced which accepted shot. Mixing three model families in one sequence is fine — visible inconsistency is not.
Building the audio layer
Audio is where amateur AI video gives itself away. Viewers forgive a slightly soft frame; they do not forgive a voice that lands half a beat late on every sentence.
Casting and directing synthetic voices
Treat voice selection like casting. Generate the same two lines with five candidate voices and listen on cheap speakers, not studio headphones. Most audiences watch on a phone, and a voice that sounds rich in isolation can turn muddy at low volume.
When you have a shortlist, test the hardest line in the script — usually a question or an exclamation — rather than the calm narration paragraph. Emotional range is where synthetic voices separate.
Then write for the voice. Short sentences, concrete nouns, and explicit punctuation for pauses. If your tool supports pacing controls, mark breaths and beats in the script itself rather than fixing them in the edit.
Timing, pacing, and lip sync
There are two reliable approaches to sync, and they solve different problems.
- Audio-first: generate the voice track, measure its exact duration, then build or extend the visual shot to match. This is the right choice for narration, explainers, and talking-head content, because speech rhythm is fixed and picture is flexible.
- Picture-first: lock the visual performance, then fit dialogue or dub to the visible mouth movements. This suits cinematic scenes where the visual moment matters more than the exact wording, and it is where lip-sync tools earn their keep.
Whichever direction you choose, conform to a consistent frame rate and sample rate before you start editing. Mismatched rates are the invisible cause of drift that appears ten seconds into a clip and gets blamed on the model.
Add room tone under every cut. A dead-silent gap between two voice lines reads as an error, while two seconds of quiet ambience reads as a pause.
Making video, voice, and data agree with each other
Integration is a synchronization problem before it is a tooling problem. Three artifacts must stay aligned: the timeline, the audio file, and the shot record.
The sync pass
Do one dedicated pass where you touch nothing but timing. Import all audio, lay it on the timeline, then drop picture against it. Do not judge color, do not rewrite prompts, do not fix a character's hair. Just make the rhythm right. Most projects need this pass twice: once after the first assembly and once after the fine cut, when trims have shifted everything by a few frames.
A simple metadata schema
You do not need a database platform. A spreadsheet with a stable ID per shot and four extra fields covers almost everything:
- timeline_in / timeline_out — where the shot sits in the current cut
- audio_ref — which voice file or music bed is underneath it
- prompt_version — the exact prompt text used
- status — draft, review, approved, delivered
When a client asks for a change to the second scene, you filter by timeline range, see which shots and audio files are involved, and you are editing instead of guessing.
A practical end-to-end workflow
Here is a sequence that works for a two- to three-minute piece and scales down to a thirty-second social cut.
Step 1: lock the script and the timing
Write the script, read it aloud with a stopwatch, and record rough timings per section. This rough timing map becomes the skeleton of your timeline. It also reveals immediately whether your script is too long for the target duration — a much cheaper discovery now than after rendering.
Step 2: generate keyframes and rough motion
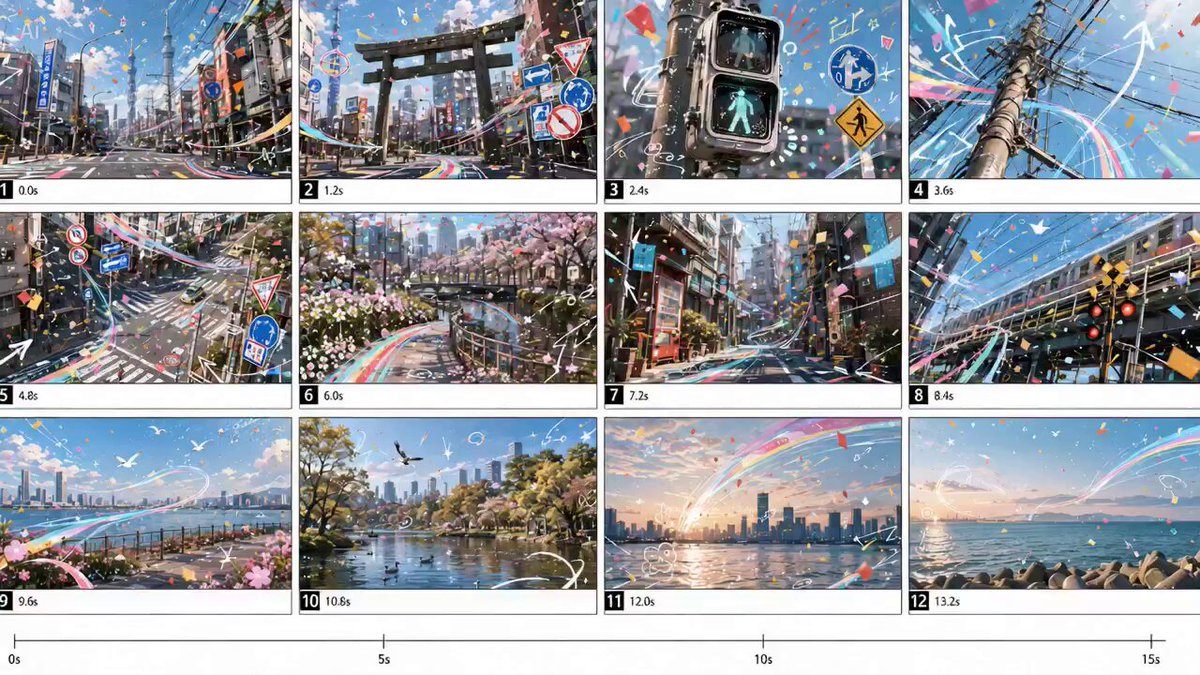
Produce stills for every shot before animating anything. Review them as a contact sheet. Continuity problems — wardrobe, hair, prop placement, color temperature — are obvious in a grid of stills and nearly invisible when you review clips one at a time.
Step 3: produce the voice from the locked script
Generate narration and dialogue after the script is final. Regenerating voice is cheap; regenerating a synchronized sequence is not. Save each line as a separate file named after its shot ID so the edit can drop them precisely.
Step 4: conform audio and picture
Lay voice first, then picture. Trim picture to audio rather than the reverse when speech is involved. Add music last, and duck it under dialogue by roughly six to nine decibels so words stay intelligible on phone speakers.
Step 5: polish and finalize
Color consistency, grain, and a subtle vignette do more to unify mixed-model footage than any single fix. Apply them globally rather than per shot, so the sequence reads as one camera package.
Step 6: package deliverables
Export the master, a caption-burned version, and a vertical crop. Write the shot sheet's final state into the project folder so the next person — often future you — inherits context rather than a pile of files.
Quality control checklist before you publish
Run this list every time. It catches most of what audiences notice.
- Watch once with sound off. Does the visual story still read?
- Watch once with your eyes closed. Does the audio make sense alone?
- Check the first and last two seconds of every shot for warping, extra fingers, or flickering backgrounds.
- Verify that a character's clothing, hair, and props match across cuts.
- Confirm no voice line gets clipped at either end.
- Check that captions do not cover a face or a product.
- Ensure the loudness is consistent between sections and matches your platform's normal range.
- Confirm every file in the final timeline exists in the project folder, not only on your desktop.
Common mistakes that quietly ruin multimodal projects
Generating video before writing the script. You end up with beautiful shots that cannot be edited into a story.
Changing two variables at once. If you alter the prompt and the seed together, you learn nothing. Change one thing per iteration.
Ignoring sample rate mismatches. Audio drift is almost always a technical mismatch, not a model flaw.
Over-prompting motion. Three simultaneous camera instructions produce mush. Pick one primary move per shot.
Skipping the contact sheet. Per-clip review hides continuity errors that a grid reveals instantly.
Treating metadata as optional. The project you cannot revise is the project that gets rebuilt from scratch.
Letting music carry the edit. Music should support rhythm, not hide cuts that do not work.
Planning compute and effort without surprises
Estimate in passes, not in single renders. A realistic multiplier for a finished minute is three to five times the number of shots, because most shots need at least one retry and some need three. Budget for exploration renders at low resolution, then final renders only on approved shots.
Track two numbers per project: shots attempted and shots accepted. The ratio tells you where the friction is. If acceptance is low on character shots but high on landscapes, the problem is your reference material, not your prompt phrasing.
Finally, reserve time for the sync pass and the QC pass as separate calendar blocks. They are consistently underestimated, and they are where the perceived professionalism of the final piece is actually decided.
FAQ
Do I need a single platform to do all of this?
No. What you need is a single source of truth — a shot sheet plus consistent file naming — that any set of tools can read and write to. Integration is a discipline, and a well-organized multi-tool stack often beats a single tool used carelessly.
How do I keep a character consistent across many shots?
Build a reference sheet with multiple angles and expressions, generate a still for each setup first, then animate from stills. Lock the character description in a reusable text block and reuse it verbatim instead of paraphrasing each time.
What order should I generate in?
Script, then timing, then stills, then motion, then voice, then conform, then polish. Voice sits late because it depends on a final script; picture sits early because it benefits from exploration.
How much of the voice work can be automated?
Synthesis and rough timing can be automated almost entirely. Performance judgment — where a pause should land, which line needs more energy — still benefits from a human ear, and that pass is usually the difference between adequate and convincing.
How do I handle multiple languages?
Keep the visual layer language-neutral where possible, generate each language's voice track separately from the same translated script, and store each version as a distinct deliverable. Doing a fresh sync pass per language is faster than trying to share one timeline across all of them.
What is the fastest way to improve a mediocre sequence?
Fix the audio timing first, then the shot order, then the color. Most sequences that feel "off" have a rhythm problem, not a visual one, and rhythm problems are the cheapest to solve.

Alexander
More Blogs
Read MoreBuilding a Personalized Video CRM Follow-Up Workflow
Learn how to integrate AI-generated personalized videos into CRM sales follow-up sequences, from data mapping and automation to metrics and quality control.
AI Video for Hard-Tech B2B: A Harsh-Climate Content Playbook
A practical workflow for producing AI-assisted video content about autonomous construction robotics, remote sites, and harsh-climate deployment.
Video Production for Construction Robotics in Harsh Climates
Plan technical video content for autonomous construction robotics in cold, remote sites, from search intent and scripts to AI-assisted visuals and metadata.