
Affiliazione
Inizia Gratis Ora
AI Makeup Photo Editing: A Practical Beauty Workflow Guide
Oct 13, 2026

Why AI Quietly Rewrote the Beauty Editing Rulebook
Retouching a makeup photo used to be a test of patience. You duplicated the background layer, dodged under the eyes, cloned stray lash hairs, painted soft light onto the cheekbones, and then undid half of it because the skin started looking like plastic. A single editorial frame could take two hours. A batch of thirty product shots could take a week.
AI changed the economics of that work without changing the goal. The goal is still a photograph that looks like the person in front of the camera on a very good day — not like a render. What changed is where your time goes. Instead of spending ninety percent of your session on mechanical labor (masking, frequency separation, dust cleanup, color matching), you now spend most of it on judgment: deciding how much texture to keep, whether a lip line reads as intentional or accidental, and whether the foundation tone matches the neck under the actual lighting of the shot.
That shift is why "which app is best" is the wrong first question. The right first question is: what does my workflow need to produce, at what volume, and at what level of consistency? A makeup artist posting three looks a week has completely different requirements than a beauty brand producing a seasonal campaign with twelve models, six lighting setups, and strict brand color standards. Both can use AI, but they should not use the same stack.
This guide walks through how the technology actually works, what separates a good tool from a frustrating one, and a step-by-step workflow you can repeat across an entire shoot without re-inventing your process every time.
How AI Makeup Editing Actually Works Under the Hood
Understanding the plumbing helps you predict where a tool will fail. Almost every modern beauty editor is a pipeline of several narrow models stacked together, not one magic button.
Face parsing and landmark detection
The first stage finds the face and maps roughly 68 to 478 landmark points: eye corners, brow arches, the philtrum, the outer lip contour, the jawline. This is what lets an app know that the region you want to smooth is cheek and forehead, not eyelashes and nostril edges. When a tool smears mascara into a grey blur, the landmark model lost track of the eye boundary — usually because of heavy shadow, motion blur, or hair crossing the face.
Skin segmentation and texture analysis
Next, the pipeline separates skin from non-skin and estimates how much high-frequency texture exists in each patch. Good tools use that estimate to preserve pore structure while reducing blotchiness. Weak tools apply a single blur radius everywhere, which is why cheap smoothing flattens the nose bridge and the cheeks into the same waxy surface.
Tone mapping and color science
Beauty editing is largely a color problem. Foundation that matches in person can drift orange or grey under mixed lighting. AI tone mapping reads the actual pixel distribution of the face, the neck, and the hands, then proposes corrections that keep the three regions consistent. This is the stage where a well-built tool saves you the most time, because mismatched skin tone is the single most common giveaway of an amateur edit.
Generative fill, relight, and makeup synthesis
This is the layer people mean when they say "AI makeup." Inpainting models fill selected regions — reshaping a lip contour, removing a sharp highlight, adding missing lashes. Relighting models estimate a light direction and intensity from the original image and re-render the face under a slightly different one. Makeup synthesis models apply pigment with a blend mode that approximates how product sits on skin: matte shadows stay matte, gloss keeps its specular hit.
The practical takeaway: when an edit looks wrong, you can usually trace it to one specific stage. Knowing the stages turns mysterious failure into a fixable problem.
What "Best" Should Actually Mean: Five Decision Criteria
Ignore feature lists for a moment. These five criteria predict whether you will still be using a tool six months from now.
1. Fidelity versus flattery balance
Every tool sits somewhere on a spectrum. At one end, you get aggressive beautification: bigger eyes, narrower jaw, luminous skin, zero pores. At the other end, you get tools that behave like a careful retoucher with a very steady hand. Professional beauty work almost always needs the second kind, with the option to push further when the creative calls for it. Test any app on the same portrait with a difficult feature — deep-set eyes, textured mature skin, or a strong colored eyeshadow — and see which side it defaults to.
2. Batch consistency
If you shoot fifty looks in a day, per-image perfection matters less than cross-image consistency. Look for the ability to save a preset with all AI modules toggled and tuned, then apply it across a folder with a single sync. Watch for tools that quietly re-detect faces and change intensity per image, which produces a catalog where image 4 looks noticeably different from image 12.
3. Granular control
A single strength slider is not control. You want separate intensities for skin, eyes, lips, brows, teeth, and geometry, plus a mask you can paint in or out. The best tools also let you split a single control into frequency layers — texture versus color — so you can even out blotchiness without touching pores.
4. Color management and export integrity
Check whether the app respects embedded color profiles and exports in the space you deliver in. A tool that only renders in its own viewer and exports a slightly shifted file will cost you more time than it saves. Test by exporting a frame with a saturated red lip and a neutral grey card in the same image, then compare the export to the original in a color-managed viewer.
5. Pipeline fit
Where does the edit happen? Phone-only creators need one app that captures, edits, and publishes. Studio teams need something that sits between the camera and a desktop retouch. Match the tool to the slot, not to the hype.
A Repeatable Workflow You Can Run on Any Shoot
The following sequence works in almost any editor. It is deliberately ordered so that each step is easier because the previous one is done.
Step 1: Capture deliberately
No AI can recover a photo where the light source was a single overhead bulb pointed at a shiny forehead. For makeup work specifically, three capture habits pay off endlessly: keep the key light at roughly 30 to 45 degrees from the face axis so texture reads but specular highlights stay controlled; shoot a neutral reference frame with a grey card; and get a clean, in-focus close-up of the eyes and lips for each look, even if the final image is a half-body shot.
Step 2: Non-destructive base correction first
Before any AI module runs, fix exposure, white balance, and lens profile. AI segmentation works dramatically better on a correctly exposed frame, because the model is not fighting a color cast to decide where skin ends. Do this in your raw processor and export a flat, slightly under-contrasted TIFF or PSD for retouching.
Step 3: Skin before makeup
Counterintuitive but essential: clean and even the skin first, then evaluate the makeup. Real makeup sits on real skin, and if you synthesize pigment onto blotchy skin, the pigment inherits the blotchiness. Order of operations:
- Blemish and stray-hair removal with a healing tool, small brush, hard edges.
- Even skin tone with an AI tone module at low strength — think 15 to 30 percent, not 80.
- Reduce temporary redness separately from general unevenness; they need different treatment.
- Re-introduce texture at the end if you over-smoothed. A 5 to 10 percent grain or high-frequency pass restores realism fast.
Step 4: Makeup-specific adjustments
Now work region by region, and resist the urge to touch everything.
- Lips: sharpen the natural lip line rather than inventing a new one, correct uneven pigment, and keep one specular highlight. Killing the highlight entirely is the fastest way to make a lip look like a sticker.
- Eyes: clean up eyeshadow fallout, brighten the sclera without bleaching it to pure white, and add lash definition rather than lash volume. Do not enlarge the iris; viewers detect it even when they cannot explain why the face feels off.
- Brows: fill gaps along the growth direction. Never blur the brow edge.
- Cheeks and highlight: recover blown highlights with a localized AI relight or a careful curve, then rebuild the shape with a soft dodge. Keep the highlight shape matched to the original light source.
- Foundation edges: check the jaw and hairline by zooming to 100 percent. A visible line between treated and untreated skin is the most common tell of AI assistance.
Step 5: Verify, then export
Verification is a distinct skill. Do these four checks before you deliver:
- Squint at the image at 25 percent zoom. If the face reads as a smooth mask, back off.
- Look at the neck and hands. Skin tone drift shows up there first.
- Flip the image horizontally. Symmetry errors and lopsided blending become obvious.
- Compare against the original at full size. If you cannot articulate what changed, you probably over-edited.
Tool Categories and Where Each One Fits
Rather than a ranking, think in categories. Most creators end up with one tool per category.
All-in-one mobile editors. Fast, single-image, great for social formats. Strengths: instant results, built-in templates, direct publishing. Weaknesses: limited masking, heavy compression, inconsistent output across devices. Best for daily posting and behind-the-scenes content.
Desktop retouching suites with AI modules. This is the workhorse for paid beauty work. Layer-based editing, non-destructive adjustment layers, frequency separation, and AI-assisted masking. Best for campaigns, print, and anything a client will inspect closely.
Generative and relight models. Powerful for recovering bad lighting, extending backgrounds, or creating an alternate lighting direction for a beauty shot. Treat them as repair tools, not as the core of the edit. Always keep the generated region small and re-blend edges manually.
Video-capable tools. If your makeup content includes short-form video, prioritize temporal stability and tracking over per-frame quality. A slightly less sharp smoothing filter that holds steady across 200 frames beats a perfect filter that flickers.
Specialized plugins. Single-purpose tools for skin, teeth, or garment cleanup can be faster than a general editor if you already have a batch pipeline. They are also the easiest to integrate without retraining an entire team.
Common Mistakes and How to Avoid Them
Mistake 1: Cranking the smoothing slider. If you can see that an AI was used, the strength is too high. Start at 20 percent and increase in 5 percent steps, comparing against the original every time.
Mistake 2: Editing at 100 percent zoom only. You will optimize imperceptible details and miss the overall read. Work at fit-to-screen and zoom in only for surgical fixes.
Mistake 3: Applying the same preset to every face. Different skin tones, undertones, and textures respond differently to the same skin module. Build two or three variants — light, medium, deep — and tune each once, properly.
Mistake 4: Ignoring the light direction. Adding a highlight where no light source exists creates an uncanny result. Before any AI relight, ask out loud where the light is coming from.
Mistake 5: No version history. Save numbered iterations (v01, v02, v03) so you can return to a version two steps back when a client asks for "the one before, but with less glow."
Mistake 6: Forgetting the makeup artist. If a look was designed with a specific pigment placement, an aggressive AI color correction can erase the creative intent entirely.
Ethics, Disclosure, and Client Trust
The industry conversation has matured past "is retouching allowed" into "what did you change, and did you say so." A few practical norms have settled into place:
- For commercial beauty advertising, keep structural changes (body shape, jawline, eye size) out of the edit unless the brief explicitly calls for it.
- Disclose AI-generated additions — an extended background, a synthesized lash line, a removed tattoo — when the image represents a product that a viewer might buy.
- Keep a clean before/after pair internally. It protects you if a client disputes the direction, and it trains your eye over time.
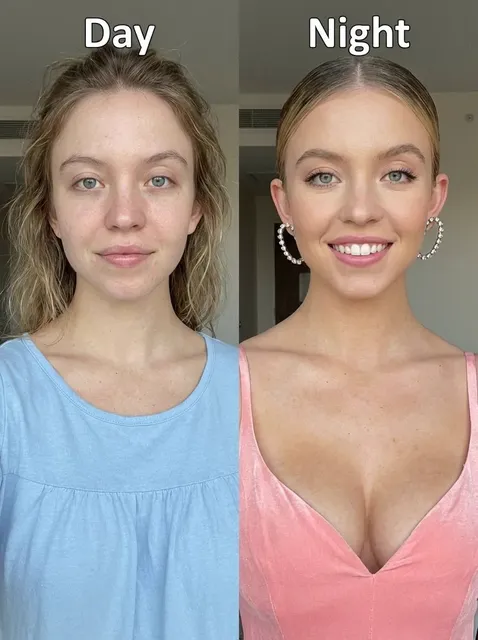
- For educational content, showing the process increases trust far more than hiding it. Audiences respond well to a side-by-side of the raw frame and the finished look.
Performance, Storage, and Team Habits
Long-form beauty work tends to accumulate files quickly. A few habits that pay off at scale:
- Standardize on one working color space and one export format across the team. Mixing them mid-project creates silent drift.
- Keep raw originals in a read-only folder. Editing software should never write to it.
- Use consistent naming: shoot date, model or look ID, sequence number, version. This matters more than any AI feature once you have more than a hundred images.
- For batch AI processing, run a small test of five images first and inspect two of them at 100 percent before committing the whole folder.
- Store presets in version control or a shared drive with a changelog, so a tweak to the skin module is documented.
FAQ
Can AI makeup editing look completely natural?
Yes, if you keep strength low, work on correctly exposed raws, and preserve texture. The most convincing AI edits usually change less than you would expect.
Should I edit skin before or after makeup?
Skin first. Makeup synthesis inherits whatever texture and blotchiness is already there, so a clean base produces a cleaner result.
How do I stop AI smoothing from looking plastic?
Split smoothing into a color layer and a texture layer. Reduce blotchiness aggressively but reduce texture only slightly, then add back a small amount of grain at the end.
Does AI work on deep and very deep skin tones?
Modern models handle a wide range, but default presets still skew light. Build your own tuned variants and test them on a reference set before using them in production.
Can I use the same preset across a whole shoot?
For exposure and color, yes. For skin and makeup modules, sync the preset and then spend thirty seconds per image on face-specific corrections.
Is AI editing fast enough for video?
Per-frame quality is usually acceptable; temporal consistency is the real constraint. Prefer tools that track the face across frames rather than processing each frame independently.
A Short Checklist Before You Deliver
Run this list every time, even when you are in a hurry:
- Exposure, white balance, and lens profile corrected on the raw file.
- Skin evened before makeup adjustments.
- Skin tone checked at the jaw, neck, and hands.
- Texture preserved — confirm by zooming into the cheek at 100 percent.
- Highlight shape matches a real, identifiable light source.
- Lips and eyes have at least one believable specular highlight.
- Image flipped horizontally and inspected for asymmetry.
- Original and final compared side by side.
- File named and versioned correctly.
- Disclosure handled where required.
The most useful mental model is that AI is a very fast junior retoucher with no taste. It can produce an even, technically clean result in seconds — and it will happily flatten a face into wax if you let it. Your job has not disappeared. It has moved up a level, from doing the labor to directing it, and that is the part clients are actually paying for. Choose tools that give you fine control rather than the loudest automatic results, build one workflow, and refine it over a whole season. That consistency, not the app name, is what makes beauty content look professional.

Alexander
More Blogs
Read MoreVidu Q4 Alternatives: 4K AI Video Models Compared (2026)
Vidu Q4 alternatives compared: Kling 4.0, Seedance 2.5, Wan 3.0, and Runway Gen-4 — 4K support, input modes, durations, audio, and what each costs in credits on Domer.
Top 4K AI Image Generators in 2026: 5 Models Compared on Real Costs
The top 4K AI image generators on Domer compared: Flux 3 Klein, Nano Banana 2.1, GPT Image 2.5, GPT Image 2, and Nano Banana Pro — 4K credit costs, reference limits, and speed.
Nano Banana 2.1 vs GPT Image 2.5: Which Image Model Should You Use? (2026)
Nano Banana 2.1 vs GPT Image 2.5 Flare compared: credit costs per resolution, aspect ratios, reference images, text rendering, and which tasks fit each model.