

Affiliazione
Inizia Gratis Ora
AI Transition Workflow in Premiere Pro: A Practical Guide
Oct 13, 2026

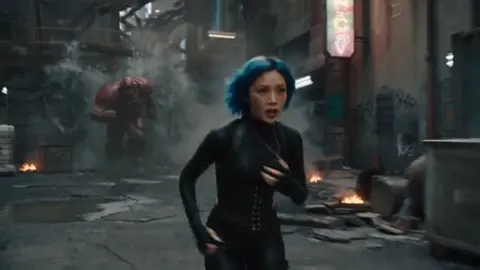
Why AI-Generated Footage Breaks Traditional Transition Habits
Most editors learn transitions in the context of continuity. Two angles of the same scene, shot minutes apart, lit by the same crew, captured on the same camera family. A dissolve works because the two images already belong to the same visual world. The cut hides inside similarity.
Generated video inverts that assumption. A single sequence might combine a wide establishing shot produced by one text-to-video model, a close-up refined by an image-to-video pass, and a slow push-in upscaled in a third tool. Each clip can carry a different grain structure, a different interpretation of lens compression, and a different idea of how motion should decay. Drop those clips into a Premiere Pro timeline and the transitions stop being stylistic choices. They become repair work.
That is the real shift this guide addresses. Instead of asking which transition looks best, you build a pipeline that decides where a transition is even needed, prepares assets so they can survive one, and automates the repetitive assembly work around them. The goal is not to remove the editor. The goal is to stop spending four hours on a six-second seam.
What follows is a practical, tool-agnostic workflow that works whether your generated clips come from a browser-based generator, a local diffusion setup, or a hybrid of both. Premiere Pro is the hub, but the same logic applies in other editors.
What a Transition Workflow Actually Means
It helps to separate the problem into three layers. Editors who struggle usually collapse all three into one and then blame the effect.
The asset layer covers everything that happens before import: resolution, frame rate, codec, color space, alpha channels, naming, and metadata. Most transitions that look broken are actually asset problems in disguise.
The timing layer covers where cuts land, how long a transition runs, and whether it is motivated by motion, dialogue, or music. This is editorial judgment, and it is where automation helps most because the decisions are repetitive.
The finishing layer covers the polish: matching grain, matching exposure, softening a morph, smoothing an audio seam, and rendering without artifacts.
When a transition fails, diagnose the layer. A flickering dissolve is an asset problem. A dissolve that feels random is a timing problem. A dissolve that looks plasticky is a finishing problem.
A decision framework you can reuse
Before applying any transition, ask three questions in order:
- Does the outgoing clip and the incoming clip share a visual anchor, such as a matching color, a matching motion direction, or a matching subject position?
- Does the story need a soft transition here, or does it need a hard cut for energy?
- Can the seam be fixed with a trim of four frames instead of an effect?
If the answer to the third question is yes, skip the effect entirely. Roughly half of the transitions in beginner AI edits exist only because a trim would have solved the problem faster.
Step 1: Standardize Generated Assets Before Import
Naming and metadata discipline
Generated clips arrive with names like output_0427_final_v2.mp4. That is fine for a folder and fatal for a timeline. Adopt a naming convention that encodes the information you will need later:
sc03_sh04_wide_dolly_1080p_24fps_v03.mp4
Scene, shot, framing, camera move, resolution, frame rate, version. This matters more than it sounds. When you are assembling forty clips across three acts, the filename is often the only reliable metadata you have. Many generators write nothing useful into the container.
If your pipeline allows it, add a sidecar file or a spreadsheet row with the prompt, seed, model version, and generation date. When a client asks for a variation of shot twelve, that seed value saves an entire day.
Resolution, frame rate, and color space
Pick one master specification for the project and force everything into it before editing. A common baseline for online delivery is 1920x1080 or 3840x2160, 23.976 or 24 fps, Rec.709, and a mezzanine codec such as ProRes 422 or DNxHR HQX.
Generated clips rarely respect that baseline. Many models output 24 fps at odd dimensions, or 25 fps, or square-ish aspect ratios. Upscaling and conforming on the timeline is possible, but it is expensive. Transcode once, at ingest, into your mezzanine format. Premiere Pro handles this well through a custom ingest preset, and the time you spend building that preset is repaid on the first project.
Frame rate deserves special attention. If a generated clip is 30 fps and your sequence is 24 fps, Premiere will conform it by dropping or duplicating frames. On slow camera moves this is invisible. On fast motion it produces a stutter that no transition can hide. Prefer footage that matches your sequence, and if it does not, retime deliberately with optical flow rather than letting the conform happen silently.
Alpha channels, mattes, and safe margins
If your generator can output alpha, treat it as a gift and treat it carefully. Premiere imports alpha cleanly from ProRes 4444 and PNG sequences, but not from every compressed format. When alpha is unavailable, generate a matte pass separately and use it as a track matte.
Also check safe margins. Generative models often place important detail near the very edge of the frame, which then gets clipped by broadcast safe areas or by platform UI overlays. A five percent crop at the asset stage is cheaper than discovering the problem after delivery.
Step 2: Build a Project Template That Automates the Boring Parts
Bin structure and sequence layout
Create a project template once and reuse it forever. A structure that scales well looks like this:
01_ASSETSwith sub-bins for video, audio, graphics, and mattes02_SEQUENCESwith sub-bins for scenes, assemblies, and exports03_TEMPfor renders, scratch, and test comps04_DELIVERYfor final exports and deliverables
On the timeline itself, reserve fixed track roles. V1 for primary picture, V2 for overlays and light effects, V3 for titles, V4 for adjustment layers, A1 for dialogue, A2 for effects, A3 for music. Knowing that track three is always graphics removes an entire category of accidental mistakes.
Ingest presets, proxies, and render settings
Build three presets and save them:
- An ingest preset that transcodes to your mezzanine codec and copies files into the project folder.
- A proxy preset at a low resolution for smooth scrubbing when you are working with 4K or higher.
- An export preset with your delivery codec, bitrate, and audio loudness target.
Proxy workflows matter more with generated footage than with camera footage, because generated files are often encoded with settings that decode slowly. A 4K clip encoded at a low bitrate with long GOP structure will stutter during playback even on a strong machine. Proxies eliminate that, and Premiere toggles between proxies and full resolution with a single button.
Step 3: Match Transitions to the Motion Inside the Shot
Transitions are not decoration. They are continuity devices, and continuity is about motion first and color second.
Match cuts and motion continuity
The strongest transition between two generated clips is usually a match cut: end the outgoing shot on a movement, begin the incoming shot on a movement traveling the same direction. A whip pan left into a whip pan left. A hand rising into a hand rising. When the motion matches, the audience reads a single continuous action and the seam disappears without an effect.
To build these reliably, note the motion vector of each generated clip as you review it. A simple tag like move:left, move:push-in, move:static in your bin or spreadsheet makes assembly dramatically faster because you can sort and pair clips by motion direction.
Dissolves, light effects, and wipes
When a match cut is not available, a dissolve is the default. Keep it short. On a 24 fps timeline, twelve to sixteen frames reads as a soft blend, while two seconds reads as a montage device. Generated footage often has mismatched grain, and long dissolves expose that mismatch. Layer a subtle film grain or noise adjustment over the transition region to unify the two sides.
Light-based transitions, such as a flash, a light leak, or a lens flare sweep, work well between clips that share nothing visually. They give the eye a brief, bright distraction. Use them sparingly. Three flash transitions in one minute feels like a nervous tic.
Wipes and geometric transitions are best reserved for graphic-driven content: explainers, product pieces, social edits. In narrative work they read as a style choice rather than continuity, so commit to them intentionally across the whole piece.
When no transition is the right transition
A hard cut is the most underused tool in AI editing. If two clips share a subject in roughly the same position, a hard cut simply works. If pacing needs energy, a hard cut on the beat is stronger than any effect. Before you open the effects panel, cut hard and watch it twice. If the cut does not bother you, keep it.
Step 4: Automate the Rough Cut Without Losing Editorial Control
Beat mapping and marker-driven assembly
If your project has music, map the beats first. Play the track on the timeline and drop markers on every downbeat. Then, when you place clips, snap cut points to markers. This single habit makes automated assemblies feel intentional, because pacing follows a structure the audience can feel.
In Premiere you can also generate a sequence from markers using the Automate to Sequence command, which places selected clips into a timeline in bin order at marker positions. It is a crude tool, but as a first pass on a long montage it saves real time.
Dialogue and narration timing
When narration or dialogue drives the piece, cut picture to the audio, not the reverse. Transcribe the audio, read the transcript, and mark sentence boundaries. Then place clips so each visual beat lands within the sentence it illustrates. Transitions should occur between sentences, never in the middle of one, unless you want the audience to feel interrupted.
Review gates
Automation is only safe when it has checkpoints. Use three gates on every project:
- Gate 1, asset review: every clip conforms to spec and passes a visual pass.
- Gate 2, assembly review: story order and pacing hold up with no transitions applied at all.
- Gate 3, finishing review: transitions, color, and audio are approved before export.
If a project fails at gate two, no amount of transition polish will rescue it. This is the most common mistake in AI-heavy editing: polishing seams in a sequence whose structure is wrong.
Step 5: Troubleshoot the Five Most Common Failures
Flicker and exposure pumping
If a dissolve brightens or darkens in the middle, the two clips have different luminance. Fix it by matching exposure in the Lumetri panel before the transition, using a scope rather than your eye. Aim for the mid-tone of both clips to land within a few IRE units of each other.
Morph warping around faces and hands
Optical-flow based transition tools search for corresponding pixels. Faces and hands confuse them because they deform so much between frames. Reduce the transition duration, or mask out the face region and let only the background morph. If the warp persists, use a light-based transition instead and hide the seam behind brightness.
Color and white balance drift
Generated clips frequently shift color temperature shot to shot, especially when the prompt changes. Build a reference still, then apply a correction layer to each clip so that skin tones, whites, and skies sit in the same neighborhood. A shared look layer at the top of the stack, using adjustment layers per scene, keeps everything coherent.
Audio seams
Hard audio cuts at picture transitions announce themselves. Cross-fade ambient sound over twenty to thirty frames, and keep music continuous underneath. If room tone differs between clips, record or generate a neutral ambience bed and run it under the entire scene.
Frame rate stutter
Stutter after conforming is usually a conversion problem. Interpret the footage at its native frame rate, then decide how to retime. For slow motion, optical flow works well. For fast motion, frame blending is often safer because it avoids the warping artifacts that optical flow creates around moving edges.
A Concrete End-to-End Example
Suppose you are cutting a ninety-second product film built from eighteen generated clips.
Start by transcoding everything to ProRes 422 at 1920x1080 and 23.976 fps using an ingest preset. Add a proxy preset so scrubbing stays smooth.
Tag each clip with framing, motion direction, and a one-word content description. Sort the bin by motion direction so you can see, at a glance, which clips visually flow into each other.
Lay the music track first and place markers on downbeats. Assemble a rough cut with hard cuts only, snapping every cut to a marker or to a narration boundary. Watch it once with no transitions at all and fix the story order.
Now apply transitions selectively. Use match cuts where motion allows, twelve-frame dissolves at scene changes, and one light-based transition at the act break. Nothing else.
Move to finishing. Match exposure and white balance clip by clip. Add a single grain layer over the whole sequence to unify the texture. Cross-fade ambience between scenes. Then export using your saved delivery preset.
Total time on transitions in that workflow: perhaps twenty minutes. The same project approached effect-first often takes several hours and still looks worse.
Quality Control Checklist Before Export
Run this list every time:
- Every clip matches the sequence frame rate and resolution.
- No transition is longer than sixteen frames unless it is an intentional montage device.
- Exposure and white balance match across each transition boundary.
- No morph transition crosses a face or hand at close range.
- Audio cross-fades exist wherever picture transitions occur.
- Grain or texture is consistent across the whole piece, not only in generated sections.
- The sequence plays back from start to finish without dropped frames at full resolution.
- Loudness targets are met and true peaks stay below the delivery ceiling.
FAQ
Do I need a dedicated AI editing tool to do this?
No. Premiere Pro plus a consistent asset standard covers most of it. Specialized tools help with upscaling, matting, and optical flow, but they are optional layers on top of a sound pipeline.
How long should a transition be between two generated clips?
Twelve to sixteen frames at 24 fps for dissolves. Longer only when you intend a passage of time. Match cuts and hard cuts have no duration at all, which is why they are so reliable.
Why do my generated clips look fine alone but wrong in a sequence?
Because the sequence exposes inconsistency. Individual clips are judged in isolation; a sequence is judged on continuity of motion, color, and texture. Standardizing those three variables fixes most of the problem before any transition is applied.
Should I apply transitions before or after color correction?
After. Grade the clips first so the two sides of the transition match, then place the effect. Applying a transition over ungraded footage only hides the mismatch until someone watches on a calibrated display.
Can automation choose transitions for me?
It can suggest them based on motion and audio analysis, and those suggestions are useful as a first pass. But the decision about whether a moment needs softness or a hard cut is editorial, and it should stay with a human.
What is the fastest way to improve an existing messy edit?
Delete every transition, watch the sequence with hard cuts only, fix the story and pacing, then reintroduce no more than three transition types across the whole piece.
Key Takeaways
Transitions between generated clips are a pipeline problem far more often than an effects problem. Standardize assets at ingest, keep one master specification, tag motion direction so match cuts become obvious, and automate assembly through markers rather than through effects. Apply transitions last, keep them short, and resist the urge to solve a pacing issue with a plugin. When the structure is right and the assets match, most seams disappear on their own, and the few that remain can be fixed in minutes rather than hours.

Alexander
More Blogs
Read MoreVidu Q4 Alternatives: 4K AI Video Models Compared (2026)
Vidu Q4 alternatives compared: Kling 4.0, Seedance 2.5, Wan 3.0, and Runway Gen-4 — 4K support, input modes, durations, audio, and what each costs in credits on Domer.
Top 4K AI Image Generators in 2026: 5 Models Compared on Real Costs
The top 4K AI image generators on Domer compared: Flux 3 Klein, Nano Banana 2.1, GPT Image 2.5, GPT Image 2, and Nano Banana Pro — 4K credit costs, reference limits, and speed.
Nano Banana 2.1 vs GPT Image 2.5: Which Image Model Should You Use? (2026)
Nano Banana 2.1 vs GPT Image 2.5 Flare compared: credit costs per resolution, aspect ratios, reference images, text rendering, and which tasks fit each model.