

Affiliazione
Inizia Gratis Ora
AI Transitions Beat Manual Cutting in Video Editing Apps
Oct 13, 2026

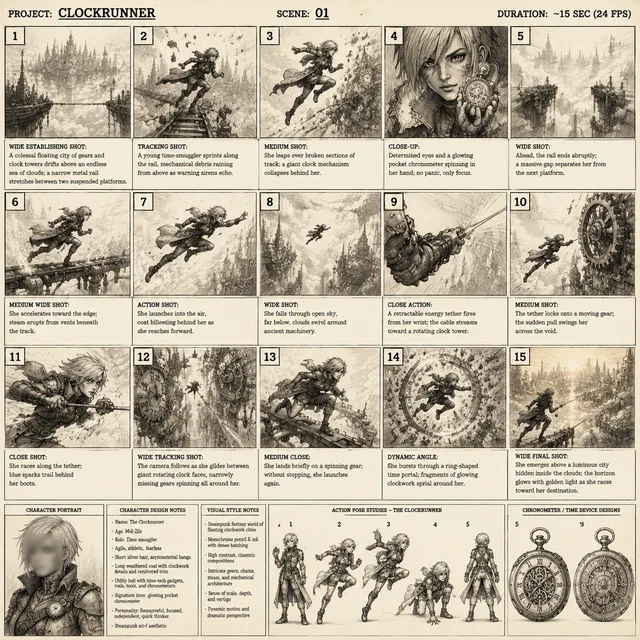
Why Transitions Decide Whether a Video Feels Professional
A viewer rarely notices a well-placed transition. They notice a bad one instantly. A cut that lands half a beat early, a dissolve that smears two unrelated backgrounds together, or a flashy zoom that interrupts a quiet interview — these small decisions accumulate into a gut-level judgment about production value. On short-form feeds, that judgment forms within the first three seconds, often before the first spoken sentence even finishes.
Transitions are not decoration. They carry meaning. They signal a passage of time, a change of location, a shift in perspective, or a jump in an argument. When they are chosen deliberately, the viewer stays inside the story. When they are chosen by habit, the viewer is pulled out of it and starts noticing the edit instead of the message. That is why the transition question matters more than most editing tutorials admit: it is a storytelling question wearing a technical costume.
This article looks at why manual transition work becomes a bottleneck as output volume rises, how automated pipelines now place and shape transitions using scene understanding, and how to decide which approach fits your production. It is written for editors, solo creators, marketing teams, and producers who publish consistently and cannot afford a week in the timeline for every deliverable.
What Good Transitions Actually Mean in Practice
The phrase "good transitions" is vague enough to be useless. Break it into three measurable qualities and it becomes something you can evaluate, teach, and automate: placement, motion continuity, and restraint.
Placement: the right frame, not the nearest frame
A transition works when it lands on a moment that already wants to be a boundary. That might be the completion of a gesture, the end of a blink, the moment a door closes, or the instant a subject finishes a sentence. Editors call this cutting on action. When the cut arrives two frames too early or four frames too late, the audience feels a small stumble even if they cannot name it.
Finding those frames manually is a skill built over years. It also scales poorly. A single 90-second promo assembled from 40 minutes of footage might contain 30 cuts, and each one deserves a considered decision about whether it stays a hard cut, becomes a short dissolve, or turns into a motion-led wipe.
Motion continuity: matching direction and speed
When two shots are joined, the viewer's eye is already moving somewhere. If the incoming shot continues that movement — same direction, similar speed, compatible framing — the join feels smooth. If it reverses or contradicts it, the viewer experiences a small jolt. This is the same principle behind the 180-degree rule and eyeline matching, applied at the level of individual frames.
Motion continuity is measurable. Frame-level analysis can estimate dominant motion vectors, subject position, and camera movement direction. That is precisely the kind of data an automated system can use, and precisely the kind of data a human editor usually estimates by scrubbing back and forth.
Restraint: few transitions, well chosen
New editors tend to over-transition. Every join becomes a spin, a glitch, or a light leak. Experienced editors move in the opposite direction. A useful working ratio for most narrative and commercial content is that 85 to 95 percent of joins should be hard cuts, with visible transitions reserved for genuine shifts in time, place, or tone. Restraint is what makes the visible transitions that remain feel intentional.
The transition families worth knowing
- Hard cut: the default. Invisible, cheap, and almost always correct.
- Dissolve or crossfade: signals elapsed time or a soft thematic link. Overused, it reads as a slideshow.
- Fade to black or white: a chapter break. Powerful once per video, tedious twice.
- Motion-matched wipe or whip pan: keeps energy high and hides imperfect continuity.
- Match cut: two shots linked by shape, motion, or subject. The most satisfying transition when it works.
- Audio-led joins (J and L cuts): the sound of the next scene starts before the picture changes, or lingers after. Invisible and enormously effective.
- Speed ramps and time remaps: energy tools that double as transitions.
- Stylized overlays: glitches, film burns, and zooms. Strong flavor, small doses.
If you can identify which of these a given join needs, you already understand the craft. The remaining question is who — or what — does the identification at scale.
Where Manual Cutting Breaks Down
Manual editing is not slow because editors are slow. It is slow because the work contains a large proportion of low-leverage decisions that still demand full attention.
The timeline grind
Imagine a weekly product channel publishing three short videos and one long-form piece. Each short comes from 20 to 30 minutes of raw capture. Before a single creative choice happens, someone has to ingest footage, sync audio, scan for usable takes, mark in and out points, and assemble a rough sequence. That assembly pass can consume an hour or more per video before the interesting work begins.
The grind compounds in a specific way: the more footage you shoot, the more time you spend watching footage you will not use. High-volume teams often respond by shooting less, which quietly reduces the odds of capturing the genuinely great moment.
Style drift across a team
When three editors work on the same series, they will each develop slightly different instincts about pacing. One prefers 1.5-second shots, another prefers 3-second shots. One dissolves between locations, another hard cuts. The result is a series that feels inconsistent even when every individual video is well made. Fixing drift means writing style guides, reviewing cuts, and re-editing — all manual overhead.
The re-edit spiral
Revision is where manual transition work gets expensive. A stakeholder asks for a different opening, which changes the pacing of the first 15 seconds, which invalidates the transition rhythm for the whole first act. An editor who built every join frame by frame now has to rebuild a chain of dependent decisions. Multiply that by three rounds of feedback and the cost of a single join becomes enormous.
How AI-Driven Transition Placement Actually Works
Understanding the mechanics matters, because it tells you where automated pipelines are strong and where a human still needs to intervene.
Semantic scene analysis
Modern systems analyze footage on multiple levels. At the visual level they detect shot boundaries, subject position, dominant motion, and exposure consistency. At the semantic level, models can classify what is happening — a person talking to camera, a product rotating, a landscape pan, a hand inserting a component. Once the system knows that shot A is a talking head and shot B is a macro detail shot, it can apply rules that match how editors actually think.
In practice this means the pipeline does not simply detect a scene change and insert a transition. It proposes a specific join type based on the relationship between the two shots.
Motion and composition matching
A good automated system compares the outgoing tail of shot A with the incoming head of shot B. If the camera is panning right in both, a directional wipe or an extended whip-pan move can bridge them convincingly. If the subject occupies the same third of the frame in both shots, a match cut becomes available. If the two shots are visually unrelated, the system should default to a hard cut rather than forcing a dissolve.
The strongest match-cut candidates are often discovered automatically: similar silhouettes, repeated gestures, aligned horizons, or a shared color region. Human editors find these by memory and luck. Automated analysis finds them by searching the whole bin.
Audio-aware pacing
Transitions live on the same timeline as sound, and sound usually leads. A beat map built from the music track gives the system a grid of rhythmic landing points. Speech transcripts give it sentence boundaries, pauses, and emphasis. Combining the two allows a join to land on a downbeat or exactly at the end of a phrase — the moments that make a cut feel deliberate.
This is also where audio-led joins become practical. If the next scene's room tone or music stem can start two seconds before the picture changes, the edit feels smoother than any visual effect could achieve.
Consistency rules across an entire series
Once transitions are described as rules rather than clicks, consistency becomes a setting rather than a discipline. A team can define: hard cuts between all same-location shots; a 12-frame dissolve only for time jumps over one day; whip pan only when camera motion exceeds a threshold; no stylized overlays in the first 10 seconds. Every project that inherits those rules looks like it came from the same channel, no matter who ran the export.
Comparing Three Editing Approaches
Most teams are choosing between three broad approaches, and they are not mutually exclusive. The comparison below focuses on where each approach earns its place.
| Approach | Strength | Weakness | Best fit |
|---|---|---|---|
| Manual timeline editing | Total control, ideal for complex narrative | Slow at volume, style drift, painful revisions | Films, documentaries, high-touch brand pieces |
| Template and preset libraries | Fast for repeatable formats | Rigid, easy to spot, limited to known structures | Talking-head series, simple explainers |
| AI-first pipelines | Fast assembly, consistent rules, strong at finding match points | Needs review, weaker on unusual creative intent | High-volume social, marketing, news, product content |
Manual timeline editing
Still the gold standard for anything with genuine narrative complexity. If your video depends on a subtle emotional turn or a carefully withheld reveal, hands-on editing remains the most reliable route. The cost is time, and the cost scales linearly with footage volume.
Template libraries
Templates solve the blank-page problem and enforce brand consistency. The limitation is that a template assumes a structure, and real footage rarely arrives pre-structured. Teams often end up forcing material into a shape it does not fit, which is visible on screen.
AI-first pipelines
These systems shine when footage is plentiful, turnaround is short, and the format is repeatable. They handle the assembly and join-selection pass at a speed no human can match, then hand the editor a rough cut with transition suggestions attached. The editor's job shifts from building to curating — a much higher-leverage activity.
A Practical Workflow: From Raw Footage to a Finished Cut
Here is a workflow that works for a weekly publishing cadence without sacrificing craft.
Step 1: Shoot with edit points in mind
Hold each shot two seconds longer than you think you need at both ends. Move the camera deliberately rather than randomly. Deliberate motion gives automated matching something to work with.
Step 2: Ingest and organize before creative work
Name folders by date and subject, sync external audio, and normalize loudness on import. Clean organization makes every later step — human or automated — faster and more accurate.
Step 3: Generate a transcript and a shot inventory
The transcript becomes your search index. A shot inventory with durations, motion direction, and content labels becomes the raw material for automated selection. This step replaces hours of manual logging.
Step 4: Let the system propose a rough assembly
Give the pipeline a target duration and a tone. It will select takes, order them, and attach proposed joins. Expect this pass to be roughly 70 percent usable. That is the point: 70 percent of the timeline appears in seconds, leaving your attention for the 30 percent that determines quality.
Step 5: Review joins in a dedicated pass
Do not review joins while also fixing content. Watch the assembled cut once without stopping, marking anything that feels wrong. Then go through the marks and decide: keep, swap the transition type, or move the cut point. Restricting yourself to these three decisions keeps the pass fast.
Step 6: Build the sound design on top of the picture lock candidate
Add music before finalizing transitions, then recheck the joins against the beat map. A cut that felt fine silently often feels late once music is in place.
Step 7: Color and finish
Grading changes perceived contrast at the join, which can make a previously invisible cut visible. Always review transitions after the grade, not before.
Step 8: Export platform variants
The same cut usually needs vertical, square, and widescreen versions, each with a different safe area. Because transitions near the edges of frame behave differently when reframed, check the vertical export separately rather than trusting the widescreen master.
Decision Criteria: Which Approach Fits Your Team
Output volume and turnaround
If you publish fewer than two videos a month, manual editing with a good preset library is entirely reasonable. If you publish daily or manage multiple accounts, the assembly pass will consume the majority of your labor budget, and automated placement pays for itself almost immediately.
Team size and collaboration
Small teams benefit most because they lack the redundancy of a large post house. When one person handles shooting, editing, and publishing, removing a full pass from the workflow is transformative. Larger teams should evaluate whether automated rules reduce review cycles or simply add another layer of approvals.
How much control you actually need
Be honest about this. Many teams insist they need frame-level control, then apply the same three transition types to every video. If your creative range is genuinely narrow, codifying it as rules is not a compromise — it is an upgrade in consistency.
Budget, hardware, and learning curve
The true cost of any tool is the time to first useful output plus the ongoing review time. Test with a real project, measure how long the assembly pass takes compared to your current method, and include the review pass in the measurement. A faster first draft that requires an hour of correction is not actually faster.
Format predictability
Repeatable formats benefit enormously from rules. Documentary and experimental work benefits from human judgment. Most channels sit somewhere in between and should adopt a hybrid: automate assembly and join selection, keep humans on structure and pacing.
Common Mistakes That Ruin AI-Assisted Transitions
- Accepting every suggested transition. Automation proposes; it does not decide. Reviewing the suggestions is the job.
- Using visible transitions where a hard cut belongs. A dissolve between two shots of the same subject in the same room reads as an error.
- Ignoring audio when judging a join. A cut that looks fine on a muted timeline can be half a beat off once the music lands.
- Stacking effects for energy. Three stylized transitions in ten seconds is noise, not excitement.
- Letting rules expire. A style rule set built for a fast-paced launch campaign will feel manic on a slower educational series. Review rule sets per series.
- Grading before finalizing joins. Contrast changes at a boundary can expose a cut you thought was invisible.
- Reframing without rechecking. A transition that works in widescreen may cut off the subject in vertical.
- Skipping the transcript check. Speech-led joins depend on sentence boundaries. If the transcript is inaccurate, those joins will be inaccurate too.
- Treating the rough cut as finished. The automated pass is a draft. The review pass is where quality comes from.
- Never measuring. If you do not track time-to-first-cut and time-to-publish, you cannot tell whether the workflow is actually helping.
Quality Control Checklist Before You Export
- Watch once at normal speed without pausing and note every moment that pulls you out.
- Watch once at double speed. Weak joins become obvious when pacing is compressed.
- Watch once with sound off, then once with picture minimized. Each pass reveals different continuity issues.
- Check the first three seconds and the final three seconds specifically; these carry disproportionate weight.
- Confirm no transition obscures essential information such as a product name, subtitle, or face.
- Verify captions do not collide with transition frames.
- Check loudness consistency across every join, not just overall loudness.
- Confirm the export matches the platform's safe area and frame rate.
FAQ
Do automated transitions replace editors?
No, they replace a repetitive pass. The judgment work — structure, pacing, tone, which moment deserves emphasis — remains human. In practice, teams that adopt automated placement spend more time on story and less on assembly.
Will AI-placed transitions make my videos look generic?
They will if you accept every default. They will not if you define rules that reflect your channel's taste. The output is only as generic as the rule set and the review discipline behind it.
What about long-form documentary work?
Use automation for logging, transcript search, and rough assembly, then take full manual control of the final cut. Documentary pacing depends on tension and restraint that are difficult to express as rules.
How do I keep transitions consistent across a series?
Write the rules down. Define which join types are allowed between which kinds of shots, and how long each transition should run. Then apply the same rule set to every episode and review exceptions deliberately rather than accidentally.
Can automated systems handle match cuts and audio-led joins?
Increasingly, yes. Visual similarity search can surface match-cut candidates across large bins, and transcript plus beat analysis makes audio-led joins practical. Both still benefit from human confirmation, since the best match cut is sometimes a joke or a thematic echo that pattern matching cannot evaluate.
What is the fastest way to test whether an automated workflow helps?
Pick one recurring format you publish weekly. Cut one episode the old way and time the assembly and review passes. Cut the next episode using automated assembly with a defined rule set, and time the same passes. Compare total time to publish, not just time to first draft.
How many transitions should a typical short video have?
For a 60-second vertical video, most strong examples contain somewhere between zero and three clearly visible transitions. Everything else is a hard cut. If you count more than five visible transitions, you probably have room to simplify.
The Bottom Line
The competitive advantage in video is no longer access to transition effects. Every editor ships with hundreds of them. The advantage is deciding quickly and consistently where each join belongs, then protecting that decision through revisions, reframes, and platform variants. Manual cutting gives you maximum control over a small number of joins. Rule-based automated placement gives you consistent, defensible decisions across thousands of them.
The practical answer for most teams is a hybrid: automate assembly and join selection, define style rules so the output matches your channel, and reserve human attention for the handful of moments per video that genuinely determine whether the audience stays. Do that, and transitions stop being a chore and start being what they were always meant to be — the punctuation that makes the story readable.

Alexander
More Blogs
Read MoreVidu Q4 Alternatives: 4K AI Video Models Compared (2026)
Vidu Q4 alternatives compared: Kling 4.0, Seedance 2.5, Wan 3.0, and Runway Gen-4 — 4K support, input modes, durations, audio, and what each costs in credits on Domer.
Top 4K AI Image Generators in 2026: 5 Models Compared on Real Costs
The top 4K AI image generators on Domer compared: Flux 3 Klein, Nano Banana 2.1, GPT Image 2.5, GPT Image 2, and Nano Banana Pro — 4K credit costs, reference limits, and speed.
Nano Banana 2.1 vs GPT Image 2.5: Which Image Model Should You Use? (2026)
Nano Banana 2.1 vs GPT Image 2.5 Flare compared: credit costs per resolution, aspect ratios, reference images, text rendering, and which tasks fit each model.