
Crea
Affiliazione
Inizia Gratis Ora
AI Video Generation Workflow: From Prompt to Final Cut
Oct 13, 2026
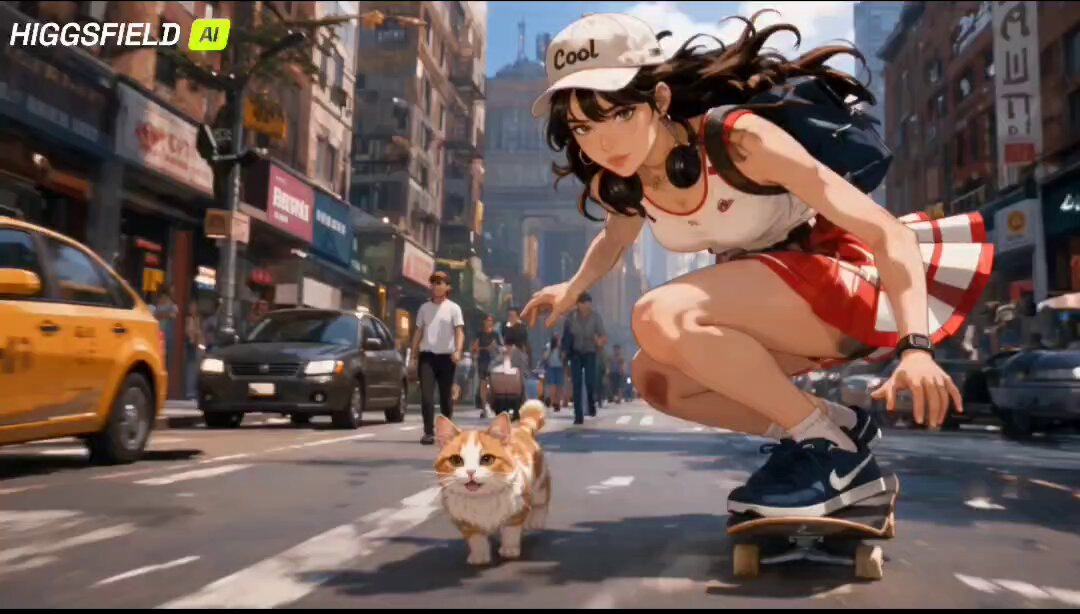
AI video generation has moved from experimental demos to practical production. The real challenge is not finding a button that creates a clip; it is building a repeatable workflow that turns an idea into a finished video. A strong workflow covers generation, selection, continuity, audio, editing, and delivery. This guide walks through that process using neutral, platform-agnostic methods that work across tools such as Kling AI, Runway, Pika, Luma Dream Machine, and others.
Why AI Video Generation Is a Workflow, Not a Button
Many new creators expect to type a sentence and receive a perfect scene. That expectation leads to frustration. AI video models are powerful, but they are also probabilistic. Each generation is a variation. The quality comes from directing those variations, not from accepting the first output.
Think of an AI video model as a virtual camera crew that speaks a strange language. Your prompt is the script, the reference image is the storyboard, and the settings are the lens and lighting. You still need to scout the scene, block the action, review takes, and edit the final cut.
A workflow mindset changes how you plan. Instead of asking what the model can do, ask what the scene needs. Does it need a specific camera move? Does it need a character to stay consistent? Does it need a particular lighting mood? Does it need dialogue, sound effects, or music? Each answer becomes a step in the pipeline.
Platform-agnostic workflows also protect you from tool churn. New models appear frequently, and features change. If your process depends on one interface, you lose time when the interface updates. If your process depends on clear inputs, review criteria, and editing discipline, you can move between tools without starting over.
The strongest AI video teams treat generation as one stage among many. They write shot lists, prepare reference images, generate multiple takes, tag the best outputs, assemble in an editor, and finish with sound. That structure is what separates a random clip from a usable video.
Core Generation Methods and When to Use Each
AI video tools offer several generation modes. Each mode solves a different problem. Understanding when to use each one prevents wasted effort.
Text-to-Video
Text-to-video is the most flexible mode. You describe a scene, and the model creates moving visuals. It works well for concept exploration, abstract sequences, establishing shots, and quick prototypes.
Use text-to-video when you do not have existing footage or reference images. It is also useful for brainstorming. You can generate several interpretations of a scene to see which visual direction feels right.
The limitation is control. Characters, props, and camera angles can drift between generations. For narrative work, text-to-video is often best for inserts, backgrounds, and mood pieces rather than complex character performances.
Image-to-Video
Image-to-video starts with a still image and animates it. This mode gives you more control because the first frame is fixed. You can use a photograph, a digital illustration, a product render, or an AI-generated still.
Use image-to-video when you need a specific composition, product look, or character design. It is excellent for turning a storyboard frame into a moving shot. It also helps maintain continuity because the visual anchor is already defined.
The key is to choose a source image with clear depth cues. A flat image with no foreground or background separation gives the model little to animate. An image with a distinct subject, midground, and background gives the model room to create parallax and motion.
Video-to-Video and Style Transfer
Video-to-video takes an existing clip and transforms it. You might change the visual style, enhance resolution, adjust color, or apply a new aesthetic. This mode is useful for restyling live-action footage, creating animated versions of real scenes, or matching a brand look.
Style transfer works best when the source motion is already clean. If the original clip is shaky or poorly lit, the model may amplify those problems. Stabilize and color-correct the source before applying a heavy style.
When choosing a generation mode, ask what you can control before the model runs. Text-to-video offers the most freedom but the least control. Image-to-video balances both. Video-to-video offers the most control because you provide the motion and composition.
A Practical End-to-End AI Video Workflow
A reliable workflow has four main stages: planning, generation, assembly, and finishing. Each stage has checkpoints that prevent rework.
Step 1: Define the Brief and Shot List
Start with a one-paragraph brief. Who is the video for? What should they feel or do? Where will they watch it? A vertical social clip needs different framing than a widescreen product demo.
Next, break the video into shots. A shot is a single continuous camera view. For a thirty-second piece, you might have six to twelve shots. For a longer explainer, you might have twenty or more.
For each shot, write four details: subject, action, camera, and mood. For example: a ceramic mug on a wooden table, steam rising, slow push-in, warm morning light. That sentence is enough to guide a generation and to review the result.
Step 2: Write Prompts That Control Motion, Lens, and Mood
Prompting is not about writing poetry. It is about giving the model constraints. A useful prompt includes the subject, the environment, the action, the camera move, the lens, the lighting, and the style.
Keep the prompt focused. If you include too many competing ideas, the model may blend them into a confusing scene. If you want a complex scene, generate it in stages or use a reference image.
Write prompts in a consistent order. For example: subject, action, camera, lighting, style. Consistency makes it easier to compare outputs and identify which variable caused a problem.
Step 3: Generate, Select, and Maintain Continuity
Generate more takes than you need. For important shots, generate four to eight variations. Review them against the shot list, not against your mood. Does the take show the right subject? Is the motion believable? Is the framing usable?
Tag each generation with the shot number and take number. Save the prompt and settings alongside the output. When you need to recreate a look, you will have a record.
Continuity is the hardest part. Keep a continuity sheet with character details, wardrobe, props, lighting direction, and color palette. If a character appears in multiple shots, use the same reference image or a consistent character description. If the location repeats, keep the same environmental cues.
Step 4: Edit, Add Audio, and Finish
Bring your selected takes into a video editor. Trim each clip to the strongest moment. Arrange shots to create rhythm. A cut on motion feels smoother than a cut on a static frame.
Add temporary music and a scratch voiceover. This helps you judge pacing before you invest in final audio. Adjust shot lengths until the story flows.
Then finish the sound. Replace the scratch track with final voiceover, sound effects, and music. Mix levels so dialogue is clear and music supports without overpowering. Add titles and graphics only after the picture lock.
Prompt Engineering for Motion, Camera, and Continuity
Prompt engineering for video is different from prompting for still images. You are not just describing a scene; you are describing how the scene changes over time.
Motion cues
Motion cues tell the model what should move. Examples include steam rising, hair blowing, waves crashing, a person walking, a car turning, or fabric rippling. Use one primary motion per shot. Multiple strong motions can confuse the model.
If you want a subtle motion, say so. A slow drift, a gentle sway, or a slight push-in is often more cinematic than dramatic action. Subtle motion also hides artifacts better.
Camera cues
Camera language gives the model a role. You can request a static shot, a slow pan, a tilt, a dolly in, a dolly out, an orbit, a handheld feel, or a drone move. Not every model supports every move, but most respond to clear directional language.
Use camera moves to support emotion. A slow push-in builds intimacy. A pull-back reveals context. A handheld shot adds urgency. An orbit adds energy. Choose the move that matches the beat.
Style and lighting
Style words set the visual grammar. You might specify cinematic, documentary, anime, claymation, product photography, or archival footage. Lighting words include golden hour, overcast, neon, candlelight, softbox, hard shadows, or volumetric rays.
Be careful with mixed styles. Asking for photorealistic anime or documentary fantasy can produce inconsistent results. Pick a lane and reinforce it with references.
Negative prompts and constraints
Negative prompts tell the model what to avoid. Common negatives include blurry, distorted, extra limbs, flickering, text artifacts, watermarks, and jitter. Use negatives sparingly. A long negative list can make the model timid or unpredictable.
Instead of listing every possible flaw, focus on the most common problem for your shot. If faces are distorting, add a negative for facial distortion. If backgrounds are warping, add a negative for morphing shapes.
Image Preparation and Pre-Processing
Image-to-video quality depends heavily on the source image. A strong source image saves generations and improves consistency.
First, check resolution. The image should be large enough for the target video resolution. Upscaling a small image can introduce softness. If you need a 1080p shot, start with an image that has enough detail.
Second, separate the subject from the background. The model uses contrast and depth to understand what should move. If the subject blends into the background, the animation may be muddy. Add subtle separation with lighting or color.
Third, correct obvious flaws before generation. Remove distracting objects, fix the horizon, and clean up edges. The model will animate whatever you give it, including mistakes.
Fourth, consider aspect ratio. Vertical video needs a vertical source. Cropping a horizontal image into a vertical frame can cut off important details. Generate or compose for the final aspect ratio from the start.
Finally, keep a library of approved reference images. Characters, locations, products, and props should have consistent references. This reduces drift between shots and makes batch generation more reliable.
Audio, Voice, and Sound Design
Audio transforms AI video from a moving image into a story. Many creators treat audio as an afterthought, but it is often what makes a video feel professional.
Start with a scratch voiceover. You can record yourself reading the script or use a text-to-speech tool. The scratch track helps you time shots and identify awkward transitions. It does not need to be perfect.
For final voiceover, choose a voice that matches the tone. A warm conversational voice suits a tutorial. A confident authoritative voice suits a product launch. A playful energetic voice suits social content. Listen for pacing, pronunciation, and emotional fit.
Sound effects add physicality. Footsteps, clicks, whooshes, ambient room tone, and nature sounds make scenes feel real. Add them on separate tracks so you can adjust each element. A subtle room tone under dialogue prevents the audio from feeling sterile.
Music sets emotion. Choose a track that supports the edit without competing with the voice. If the music has a strong melody, cut shots on the beat or use the melody as a transition cue. Keep music lower during dialogue and let it rise in montage sections.
Mixing is the final step. Normalize dialogue to a consistent level. Reduce harsh frequencies. Add a light compressor if needed. Check the mix on phone speakers, laptop speakers, and headphones. Most viewers watch on phones, so the phone test matters.
Consistency, Fusion, and Scene Continuity
Consistency is the difference between a collection of clips and a coherent video. AI models can drift in character appearance, lighting, color, and environment. You need systems to catch and correct that drift.
Create a continuity bible. It can be a simple document with reference images, descriptions, and notes. Include character age, hair, wardrobe, accessories, and distinguishing features. Include location layout, time of day, weather, and key props.
Use the same seed or reference image when possible. Some tools let you reuse a seed to reduce variation. Others let you provide a character reference or style reference. Use these features deliberately, not randomly.
Check color continuity between shots. A warm scene followed by a cool scene can feel like a jump in time. If that is not intentional, color-match the shots in your editor. Most editors have a match color or color wheels tool.
Check motion continuity. If a character is walking left in one shot, they should not suddenly walk right in the next unless the cut motivates the change. Keep a simple direction map for action scenes.
For complex sequences, generate transitions separately. A match cut, a whip pan, or a fade can hide small inconsistencies. You can also use a short bridge shot, such as a close-up of a hand or a detail of the environment, to reset the viewer's attention.
Batch Production and Team Collaboration
When you move from one video to many, batch production becomes essential. Batch production means generating multiple shots or variations in a structured session rather than one at a time.
Group similar shots together. If you need five product angles with the same lighting, generate them in one session with a consistent prompt template. This reduces setup time and improves consistency.
Use naming conventions. A simple system like project_shot_take works well. For example, launch_s03_t02. Add tags for status: approved, alternate, reject, needs-fix. This keeps large libraries manageable.
For teams, define roles. One person can own prompt writing, another can own generation and selection, and another can own editing and audio. This division prevents bottlenecks and ensures each stage gets expert attention.
Share a prompt library. When someone finds a prompt structure that works, save it as a template. Include the variables that change, such as subject, action, and camera. Templates speed up production and make results more predictable.
Review sessions should be short and criteria-based. Instead of asking whether a take feels good, ask whether it meets the shot list. Does it have the right framing? Is the motion clean? Is the character consistent? Criteria-based review reduces subjective debate.
Quality Control Checklist and Common Mistakes
Before you approve a shot, run a quick quality check. Look for flicker, warping, morphing, extra limbs, shifting backgrounds, unstable text, and unnatural motion. Check the first and last frames, because AI video often degrades at the edges.
Check resolution and aspect ratio. A shot that looks sharp in a small preview may fall apart on a large screen. Check audio sync if the shot includes dialogue or lip movement. Even a few frames of drift is noticeable.
Common mistakes include:
- Using prompts that are too long and contradictory.
- Accepting the first generation without comparing takes.
- Ignoring continuity between shots.
- Forgetting to prepare reference images.
- Adding music before the edit is locked.
- Using camera moves that fight the subject.
- Relying on one tool for every task.
- Skipping the phone-speaker audio test.
Avoid these by slowing down at the planning stage. A clear shot list and a good reference image prevent more problems than any prompt trick.
FAQ
How many generations should I create per shot?
For simple B-roll, two to four takes may be enough. For hero shots, character shots, or complex motion, generate six to ten. The goal is not volume; it is having enough options to choose a take that meets the brief.
What makes a good AI video prompt?
A good prompt is specific but not crowded. It names the subject, action, camera, lighting, and style in a clear order. It uses one primary motion and avoids contradictory instructions.
How do I keep characters consistent across shots?
Use a consistent reference image or character description. Keep a continuity document. Reuse seeds or style references when available. Review each shot against the reference before approving it.
Do I still need a video editor?
Yes. AI video tools generate clips, but editors assemble them. Editing controls pacing, rhythm, audio, color, titles, and final delivery. A simple editor is enough for most projects.
When should I use image-to-video instead of text-to-video?
Use image-to-video when composition, character design, or product appearance must be precise. Use text-to-video for exploration, abstract shots, and scenes where you do not have a reference.
How do I fix flickering or morphing artifacts?
Shorten the clip, reduce the amount of motion, simplify the prompt, or use a different take. You can also generate a longer shot and trim away the unstable frames. If the problem persists, change the reference image or the model.
What audio should I add first?
Start with a scratch voiceover to establish timing. Then add sound effects for physical actions. Add music after the picture is locked. Finish with a mix that prioritizes dialogue clarity.
Can I use AI video for client work?
Yes, but check the licensing terms of each tool and the rights to any reference images, music, and voices you use. Keep records of your sources and permissions. Deliver a final file that meets the client's format and quality requirements.

Alexander
More Blogs
Read MoreVidu Q4 Alternatives: 4K AI Video Models Compared (2026)
Vidu Q4 alternatives compared: Kling 4.0, Seedance 2.5, Wan 3.0, and Runway Gen-4 — 4K support, input modes, durations, audio, and what each costs in credits on Domer.
Top 4K AI Image Generators in 2026: 5 Models Compared on Real Costs
The top 4K AI image generators on Domer compared: Flux 3 Klein, Nano Banana 2.1, GPT Image 2.5, GPT Image 2, and Nano Banana Pro — 4K credit costs, reference limits, and speed.
Nano Banana 2.1 vs GPT Image 2.5: Which Image Model Should You Use? (2026)
Nano Banana 2.1 vs GPT Image 2.5 Flare compared: credit costs per resolution, aspect ratios, reference images, text rendering, and which tasks fit each model.