
Affiliazione
Inizia Gratis Ora
Best AI Video Generators: A Practical Workflow Comparison
Oct 13, 2026

Start with the Shot, Not the Tool
Most AI video generator comparisons rank tools by demo reel. That is the least useful way to choose one. A demo reel shows what a model can do under ideal conditions: a carefully written prompt, a lucky seed, and an editor quietly fixing the weak frames afterward. Your project rarely looks like that. You need a specific shot — a product rotating on a table, a character walking through rain, a presenter speaking to camera — and you need it usable on the third attempt, not the thirtieth.
Reframing the question changes the answer. Instead of asking which generator is best overall, ask which generator is best at this shot type, at this duration, with the control you actually need. Text-to-video, image-to-video, and video-to-video are different problems, and very few tools are equally strong at all three.
This guide is a working comparison framework: how current models behave, which criteria predict production success, how to prompt and iterate, and how to assemble a workflow that holds up under a deadline.
How Modern Text-to-Video Models Behave
Coherence and Clip Length
Early generators produced flicker, warping faces, and motion that dissolved after two seconds. The current generation, built largely on diffusion transformer architectures with temporal attention, produces five to ten second clips with believable subject motion and reasonably stable backgrounds. Longer sequences are usually assembled from shorter generations: you extend a clip, chain keyframes, or cut between shots the way an editor would.
The practical consequence is that you should plan in shots, not in minutes. A sixty-second piece is typically eight to fifteen separate generations stitched together, with transitions covering the seams.
The Control Surfaces That Actually Matter
Almost every tool offers a prompt box and a duration selector. The differences show up in the second layer: camera controls such as dolly, pan, orbit, and crane; motion strength; seed locking; negative prompts; aspect ratio and resolution options; and whether you can supply a reference image, depth map, or pose guide. If a tool cannot lock a seed, you cannot reliably reproduce a good take — and reproducibility is what separates a toy from a tool.
Model Specialization Is Normal
Different models have different aesthetic instincts. Some lean photoreal, with strong skin and fabric detail. Others excel at illustration, anime, or painterly looks. Some are better at human motion, others at environments and landscapes. Professional workflows route each shot to whichever model suits it, then bring everything into one timeline. Treating any single generator as the answer to every shot is how projects stall.
Eight Criteria for Comparing AI Video Generators
| Criterion | What to test | Why it matters |
|---|---|---|
| Prompt adherence | Does it render the object, action, and setting you asked for? | Fewer retries per shot |
| Motion realism | Walking, hands, liquids, crowds | Human motion breaks first |
| Temporal stability | Flicker, texture crawl, identity drift | Determines usable clip length |
| Controllability | Camera moves, seeds, negative prompts | Reproducibility and direction |
| Input flexibility | Text, image, multi-image, video, depth | Shot variety in one project |
| Output specs | Resolution, aspect ratios, max duration | Delivery requirements |
| Audio integration | Voice, lip sync, ambience, music | Fewer tool handoffs |
| Iteration speed | Time per attempt, queue behavior | Usable takes per hour |
Test with your own material, not with the tool's showcase prompts. Write five prompts that represent the shots you actually need, run each through the candidate tools, and score the results blind. Two hours of structured testing beats two weeks of scrolling through reviews.
Pay particular attention to motion realism and temporal stability, because those two drive retry counts, and retry counts drive everything else — time, budget, and morale. A tool that nails nine out of ten prompts but melts faces during movement is less useful than one that renders ordinary scenes without drama. Boring reliability wins in production.
Prompt Design: The Highest-Leverage Skill in the Pipeline
A Repeatable Prompt Structure
The prompts that work best follow a predictable order: subject, action, setting, camera, lighting, style, technical notes. For example: a ceramic mug on a wooden counter, steam rising, shot at eye level with a slow push in, warm morning window light, shallow depth of field, photorealistic, high detail, no text overlays. Every element answers a question the model would otherwise guess about.
Keep sentences short. Models handle three or four concrete clauses better than one long descriptive paragraph. If a detail matters — hair color, logo placement, weather — state it explicitly rather than implying it.
Negative Prompts and Disliked Elements
Most platforms accept a list of things to avoid: extra fingers, warped text, jittery motion, oversaturated colors, watermark artifacts. Maintain a personal negative-prompt preset, because the same artifacts tend to recur across projects. If a tool lacks negative prompting, plan to fix those artifacts in the edit instead.
Iterating Without Losing a Good Take
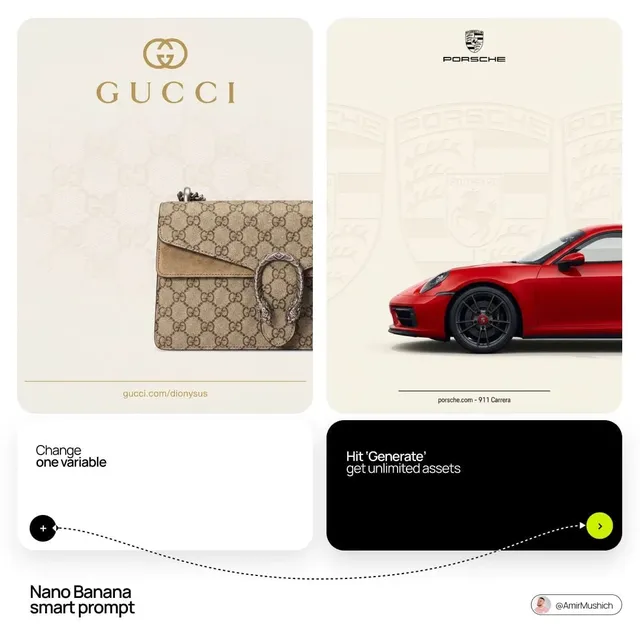
Change one variable at a time. If a take is eighty percent right but the camera moves too fast, adjust the motion setting only, and keep the seed fixed. Save every prompt and seed in a simple document or spreadsheet alongside the output file name. When a client asks for the same look three weeks later, that log is the difference between a one-hour job and a full re-exploration.
Image-to-Video, Fusion, and Cross-Shot Consistency
The First-Frame Advantage
Supplying a starting image is the single biggest quality upgrade available in most pipelines. When the model begins from a frame you control — a character design, a product photo, a storyboard sketch — composition and identity are already solved, and the model only has to animate. Image-to-video consistently beats pure text-to-video for brand work, because the brand assets stay recognizable.
Multi-Image and Video Fusion
Several tools let you combine references: one image for the character, another for the environment, a third for the visual style. Others accept an existing clip and restyle or extend it. Fusion is powerful but fragile — mismatched lighting between references produces strange color mixing, so choose references that already agree on direction and color temperature.
Edits and Style Transfer Inside the Workflow
You almost always need small fixes: remove a stray object, change a jacket color, swap a background, or push an entire sequence toward a new grade. Some of this belongs in the generator, and some belongs in traditional editing software. A good rule: fix motion and identity problems at generation time, fix color and cleanup in post. Re-rendering to change a sweater wastes hours; a mask and a color adjustment takes minutes.
Audio, Voice, and Timing
Video without sound feels unfinished, so plan audio before you render the last shot. Three layers matter: dialogue or narration, ambience, and music.
For narration, modern voice synthesis is natural enough for explainers, ads, and internal training material, and the best results come from writing for spoken rhythm — short sentences, no clauses stacked four deep. Generate the voice first, measure its duration, then generate or trim video to match. Doing it in the reverse order produces constant stretching and awkward pauses.
Lip sync tools have improved to the point where a talking-head shot with a clean, front-facing frame is usually convincing. Profile angles and heavy occlusion still break sync, so keep presenters square to camera when accuracy matters.
For ambience and music, layer quiet beds under the mix rather than relying on a single track. Footsteps, room tone, and weather sit under visuals and make generated footage feel grounded, even when the motion is not perfect. If a shot feels floaty, the missing element is often sound rather than pixels.
A Practical End-to-End Workflow
- Write the shot list. One line per shot: what we see, how long, and what the camera does. If a shot is not on the list, it does not get generated.
- Lock the look. Decide aspect ratio, resolution, frame rate, and color direction before generating. Mixed specs create a nightmare in the edit.
- Create reference frames. Generate or photograph stills for characters, products, and key environments. Approve them before animating them.
- Draft prompts and presets. Save a negative-prompt preset and a preferred camera vocabulary so output stays consistent across sessions.
- Generate in batches. Run several variations per shot with different seeds. Two to four candidates is usually enough to find one that works.
- Review against motion, identity, and continuity. Watch each clip twice at normal speed and once frame by frame to catch flicker.
- Assemble and cover the seams. Cut on motion, use short transitions, and place sound across the joins.
- Add audio and finish. Voice, ambience, music, then a light grade to unify clips that came from different models.
- Export at delivery specs and archive the project. Keep prompts, seeds, and source frames with the final file.
Steps five and six matter most. Generating many candidates and culling hard is faster than endlessly refining one prompt, and a strict review pass catches continuity errors while they are still cheap to fix. Teams that skip the cull stage end up repairing footage in post, which is always slower than rejecting it at the source.
Quality Control Before You Publish
- Watch on a phone screen, not only on a monitor. Small errors disappear; large ones become obvious.
- Check hands, faces, and text for artifacts. These are the three most common failure points.
- Verify continuity: clothing, props, weather, time of day, and direction of movement between shots.
- Confirm audio levels and whether narration matches the on-screen timing.
- Check that no generated frame accidentally includes distorted logos or unreadable signage.
- Confirm the file meets the platform's aspect ratio, duration, and loudness expectations.
A two-minute checklist before export prevents the most embarrassing class of mistake: publishing a beautiful clip with six fingers in the third shot.
Choosing Between Tools by Use Case
Social shorts reward speed and vertical output. Prioritize fast generation, strong style presets, and reliable caption-friendly framing.
Advertising and brand work reward control. Look for image-to-video, seed locking, reference-driven consistency, and higher resolution output, even if generation is slower.
Explainers and training videos reward audio integration and stable, simple motion. Talking heads, diagrams, and slow camera moves are all easier than dynamic action.
Narrative and character-driven pieces reward consistency tooling. If a tool cannot keep a face recognizable across multiple generations, it will cost you more time in post than it saves.
Product visuals reward precision. Image-to-video, clean backgrounds, and stable macro motion matter more than creative flair.
Pick two tools rather than one: a dependable default and a specialist for the shots your default handles poorly. That pairing covers most projects without turning your software stack into a research project.
Common Mistakes That Burn Render Time
- Writing a paragraph-long prompt with contradictory instructions.
- Changing five variables at once, then being unable to tell what improved.
- Generating before approving reference frames.
- Mixing aspect ratios or frame rates across shots and discovering it during the edit.
- Extending a clip that already shows identity drift; the drift compounds with every extension.
- Skipping audio until the end, then discovering the narration does not fit the cut.
- Ignoring a tool's limits. If a model is weak at hands, do not build a shot around a hand.
FAQ
Do I need more than one AI video generator?
Usually yes. A dependable main tool plus one specialist covers almost every case, and the second tool often solves a single stubborn shot type that the first cannot handle.
How long should a generated clip be?
Five to eight seconds is the sweet spot for most models. Longer clips are usually built by extending a strong take or by cutting between separate generations.
Is image-to-video worth the extra setup?
Yes, when the subject must stay recognizable. The first frame does a lot of work, and approving a still image is much cheaper than re-rendering motion over and over.
Why does the same prompt give different results?
Generation is probabilistic. Seeds, model versions, and sampling settings all shift the outcome, which is exactly why saving prompts and seeds alongside your files matters.
Can I use generated footage commercially?
Check the terms of each tool you use, along with the licensing of any input images, voices, or music. Rules vary between platforms and change more often than tutorials do.
How do I keep a character consistent across shots?
Lock a reference image, reuse the same seed where possible, keep lighting and camera language consistent, and avoid drastic changes in framing between consecutive shots.
What is the fastest way to improve output quality?
Simplify prompts, add reference frames, and generate more candidates per shot. Those three habits produce more usable footage than any setting you can toggle.

Alexander
More Blogs
Read MoreVidu Q4 Alternatives: 4K AI Video Models Compared (2026)
Vidu Q4 alternatives compared: Kling 4.0, Seedance 2.5, Wan 3.0, and Runway Gen-4 — 4K support, input modes, durations, audio, and what each costs in credits on Domer.
Top 4K AI Image Generators in 2026: 5 Models Compared on Real Costs
The top 4K AI image generators on Domer compared: Flux 3 Klein, Nano Banana 2.1, GPT Image 2.5, GPT Image 2, and Nano Banana Pro — 4K credit costs, reference limits, and speed.
Nano Banana 2.1 vs GPT Image 2.5: Which Image Model Should You Use? (2026)
Nano Banana 2.1 vs GPT Image 2.5 Flare compared: credit costs per resolution, aspect ratios, reference images, text rendering, and which tasks fit each model.