

Affiliazione
Inizia Gratis Ora
AI Video Generator Without Restrictions: Practical Workflow Guide
Oct 13, 2026

Why Unrestricted AI Video Is a Workflow Problem, Not a Button
When creators search for an AI video generator without restrictions, they are usually reacting to a specific frustration: a tool that blocks a prompt, changes a character between shots, limits clip length, or hides essential controls behind simplified presets. The desire is understandable. You want the model to follow your creative direction, not fight it. But the real solution is rarely a single unrestricted button. It is a workflow that combines model choice, prompt structure, asset preparation, iteration, and editing discipline.
Public forums often frame the problem as a hunt for one perfect tool. In practice, the creators who get the most consistent results treat AI video generation as a production pipeline. They know which model to use for a talking head, which one handles cinematic camera moves, and which one preserves a character face across scenes. They also know when to stop generating and start editing. That shift in mindset is what turns a random collection of clips into a finished video.
This guide is a neutral, practical walkthrough for building that pipeline. It covers what unrestricted really means, how to evaluate tools, how to prompt for control, how to keep characters and styles consistent, how to scale batch work, and how to troubleshoot common failures. The goal is not to chase away every limitation. The goal is to understand where the limits are, work around them intelligently, and keep creative authority in your hands.
What No Restrictions Actually Means in Practice
The phrase no restrictions gets used loosely. Sometimes it means the platform allows mature themes. Sometimes it means the tool does not watermark exports, does not cap clip length, or does not force a specific aspect ratio. Sometimes it means the user can bring custom models, train personal styles, or connect external APIs. Before you choose a tool, separate the concept into three layers.
Input freedom
Input freedom is about what you can give the generator: text prompts, reference images, depth maps, pose data, audio, video clips, and style references. A flexible tool lets you mix these inputs. For example, you might provide a character portrait, a mood board, and a rough camera move description. If the tool only accepts a short text box, your control is limited no matter how powerful the underlying model is.
Output freedom
Output freedom covers resolution, duration, frame rate, aspect ratio, and export format. A tool may generate beautiful five-second clips, but if it cannot export a clean file without overlays, it becomes a bottleneck. Check whether you can download source-quality files, batch-render variants, and separate audio from video. If you plan to edit in another application, export flexibility matters more than in-app effects.
Platform and policy limits
Every mainstream platform applies some content policy. That is not automatically a bad thing. The important question is whether the policy is clear and predictable. A tool that blocks violence, sexual content, or real public figures is not the same as a tool that randomly rejects innocent prompts. Look for transparent guidelines, an appeal process, and a way to understand why a generation failed. If you need content for education, art, or genre filmmaking, choose platforms that publish clear rules rather than vague warnings.
How to Choose an AI Video Generator Without Locking Yourself In
A good generator is not just a model. It is a workspace around a model. When you evaluate options, compare them on the following criteria.
Model variety and switching
Different models excel at different tasks. One may produce realistic skin and lighting, another may handle anime or illustration, and another may be strong at camera movement. A platform that lets you switch models without rebuilding your entire project gives you more creative range. Look for a visible model library, version history, and the ability to route separate shots to separate models.
Prompt and asset controls
Strong controls include negative prompts, seed locking, motion strength, camera direction, style strength, and reference image weight. If you can save presets, even better. A preset for product shots, a preset for character dialogue, and a preset for landscape establishing shots will save hours. Also check whether the tool supports image-to-video, video-to-video, and multi-image fusion. These features often matter more than raw text-to-video quality.
Export, format, and commercial terms
Read the terms that apply to your use case. If you create client work, you need to know whether you can use the output commercially, whether you must disclose AI generation, and whether the platform claims any rights over your uploads. Export options should include common resolutions and codecs. A clean alpha channel or separate audio track can be valuable for compositing and post-production.
Reliability and review features
Generation speed matters, but reliability matters more. Can you queue multiple jobs and come back later? Does the tool preserve project history? Can collaborators leave comments on specific clips? If you work with a team, these features prevent the chaos of sending files back and forth. A shared workspace with versioned generations is often worth more than a slightly better single model.
The Core Workflow: From Idea to Finished Clip
A repeatable workflow reduces randomness. The exact steps depend on your project, but the following sequence works for short films, ads, social clips, and explainer videos.
Step 1: Write a shot-first brief
Start with a one-page brief that lists the purpose, audience, tone, and key message. Then break it into shots. Each shot should have a subject, action, setting, camera angle, lens feel, lighting, and duration. Do not write paragraphs of mood. Write a shot list that a cinematographer could read. This becomes your generation plan.
Step 2: Build a visual bible
Create a folder with reference images: character portraits, color palettes, location references, wardrobe, props, and title style. If the story has multiple characters, include several angles for each. The visual bible keeps you from describing the same person differently in every prompt. It also helps you evaluate whether a generated clip fits the intended look.
Step 3: Generate keyframes before motion
Most consistency problems begin before animation. Generate still keyframes first. Use image generation or extract frames from reference footage. Check composition, expression, lighting, and costume. Fix the still image until it is right. Then send that image into an image-to-video model. This single habit prevents many wasted motion generations.
Step 4: Animate with image-to-video
Use the keyframe as the first frame. Add a concise motion prompt: subject action, camera move, and environmental motion. Keep the prompt short. The image already carries appearance and style. Motion prompts should describe movement, not re-describe the entire scene. For complex shots, generate several short clips and edit them together rather than forcing one long generation.
Step 5: Refine style, motion, and pacing
Review each clip at normal speed and at half speed. Look for flicker, warping, limb distortion, and sudden identity changes. Regenerate with a different seed, a lower motion strength, or a tighter prompt. If the clip is mostly good but has a bad section, consider cutting around it instead of regenerating from scratch. Editing is often faster than perfect generation.
Step 6: Finish in an editor
Bring clips into a video editor. Add music, sound design, color correction, captions, and transitions. AI-generated footage often benefits from a slight grade to unify color across shots. Add subtle film grain or texture if the clips feel too smooth. The final polish is what makes the output feel intentional rather than generated.
Prompting for More Control and Better Consistency
Prompting for video is different from prompting for still images. You are describing change over time. A strong prompt balances subject, action, camera, lighting, and style without overloading the model.
Text-to-video prompt formula
Use a simple structure: subject and appearance, action, setting, camera movement, lighting, mood, and style. For example: a pastry chef with short dark hair, rolling dough on a marble counter, morning light from a window, slow push-in, warm documentary style. Notice that the prompt does not stack twenty adjectives. It gives the model a clear scene and a clear camera instruction.
Image-to-video prompt formula
When you start from an image, focus on motion. Describe what moves, how fast, and in which direction. Add camera behavior and atmospheric motion. For example: the woman turns her head toward the window, hair moves gently, camera slowly arcs left, dust particles in the light. This gives the model enough direction without fighting the reference image.
Negative prompts and safety rails
Negative prompts help with common artifacts: extra fingers, distorted faces, floating limbs, text, watermarks, and jump cuts. But too many negatives can confuse the model. Choose a short list of the worst offenders for your project. If the platform has safety rails, work with them rather than trying to bypass them. Use fictional characters, clear context, and non-graphic language when your subject is sensitive.
Multi-Image Fusion, Style Transfer, and Consistent Keyframes
Advanced generators increasingly support multi-image workflows. These features are useful for creators who need more than a single reference.
Multi-image fusion
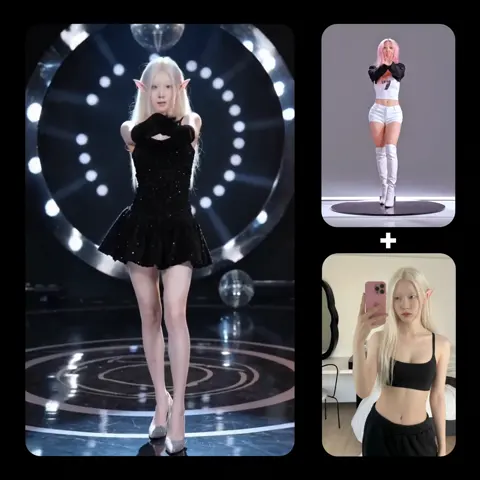
Multi-image fusion lets you combine several references: a character face, a costume, a location, and a lighting reference. The model blends them into a new composition. This is powerful for concept art, thumbnails, and previsualization. The key is to assign each image a role in your prompt. State which image controls identity, which controls wardrobe, and which controls environment. Otherwise the model may blend features unpredictably.
Style transfer
Style transfer applies the look of one image or artwork to a generated scene. It can unify a project quickly, but it can also overpower character identity. Use style strength controls. Start low, review the result, and increase gradually. For branded content, create a style reference from your own assets rather than borrowing a living artist's signature style. That keeps the work distinctive and reduces ethical risk.
Consistent keyframes
Consistent keyframes are the backbone of multi-shot storytelling. Generate a master reference for each character and location. Use the same seed, model, and prompt structure when creating new angles. If the tool supports character reference or face lock, use it. Then verify consistency at the keyframe stage. It is much easier to fix a still image than to fix a moving clip where the face changes halfway through.
Multi-Scene Storytelling Without Losing Continuity
Longer videos require continuity across scenes. A character may appear in a kitchen, a street, and a car. The lighting changes, but the person should not.
Scene bible
Create a scene bible with one page per location. Include time of day, weather, color temperature, key props, and camera style. Add reference frames for each scene. When you generate a new shot, compare it against the scene bible before approving it. This prevents the common problem of a scene that looks great in isolation but wrong in context.
Shot continuity
Track continuity details: wardrobe, hair, props, screen direction, and eyeline. If a character exits frame left, they should enter the next shot from frame right unless you intentionally break the rule. Use a spreadsheet or a kanban board. Mark each shot as planned, generated, selected, and edited. This simple tracking system catches continuity errors before they reach the final cut.
Themes and tone
Themes are not just for writers. In visual terms, theme can be expressed through color, pacing, lens choice, and sound. If the story is about isolation, use wider shots, cooler colors, and slower cuts. If it is about momentum, use closer shots, warmer accents, and quicker edits. Keep a note of these choices so every generated clip supports the same emotional direction.
Scaling Up: Batch Generation, Review, and Asset Management
As projects grow, generation becomes a logistics problem. You need to manage many clips, versions, and collaborators.
Batching
Batch generation lets you queue multiple prompts or variations at once. Use it for exploration, not for final output. Generate several seeds for the same shot, then review them side by side. Keep the best two or three. Do not try to review fifty clips at once. A focused batch of six to twelve variants is usually more productive.
Naming and versioning
Use a consistent naming convention: project_scene_shot_version. Add a short descriptor if needed. Avoid final_final_v2. Store selected clips in a separate folder from raw generations. If a model or prompt changes, note it in a log. When a client asks for a revision, you can trace exactly how the shot was made.
QA
Quality assurance for AI video includes technical and creative checks. Technical checks cover resolution, frame rate, audio sync, and export settings. Creative checks cover character consistency, continuity, pacing, and tone. Watch the full sequence without stopping. Pause only when something pulls you out of the story. Those moments are your revision list.
Team review
If you work with others, use a review tool that supports time-coded comments. Ask reviewers to focus on specific questions: Does the character feel consistent? Is the pacing too slow? Does the ending land? Open-ended feedback like I don't like it is not actionable. Specific notes lead to specific fixes.
Common Mistakes and Troubleshooting
Most AI video problems have practical causes. Here are the most common issues and how to address them.
Overstuffed prompts
When a prompt includes too many subjects, actions, and style references, the model prioritizes unpredictably. Simplify. Keep one main action per clip. Move secondary details into the negative prompt or into the edit. If you need a complex scene, break it into multiple shots.
Wrong model for the job
A model that excels at photorealistic landscapes may fail at cartoon dialogue. A model that handles fast motion may struggle with subtle facial expression. Test each model on a short benchmark before committing to a long project. Create a one-sentence test for each model: same subject, same action, same camera. Compare the results. Then assign models to shots where they are strongest.
Flicker, morphing, and warping
Flicker often comes from high motion strength or unstable references. Lower the motion setting, use a cleaner keyframe, and avoid complex overlapping movements. Morphing around hands and faces can be reduced with negative prompts and shorter clips. If a clip warps at second four, cut at second three and use a different shot for the remainder. The audience will not miss what they never see.
Audio and lip-sync drift
If you generate dialogue, keep lines short. Long monologues increase the chance of lip-sync drift. Generate the audio separately, then animate the face with a dedicated lip-sync tool or a model that accepts audio input. Match the performance to the audio rhythm. If sync still drifts, hide the mouth with camera angles, props, or cutaways.
Inconsistent characters
Character inconsistency usually comes from changing too many variables at once. Lock the seed. Reuse the same character reference. Keep wardrobe descriptions identical. Generate new angles from the same keyframe rather than from text alone. If the character still changes, build a small turnaround sheet with front, side, and three-quarter views. Use those images as references for every shot.
Ethical, Legal, and Platform Guardrails
Unrestricted does not mean unaccountable. If you publish AI-generated video, you are responsible for what you make. Avoid using real people's likenesses without permission. Do not create content that harasses, defrauds, or impersonates. Follow platform disclosure rules. If your video could be mistaken for real footage of a real event, label it clearly. When using reference images, make sure you have the rights to them. When training custom styles, use your own work or work that is licensed for that purpose. These guardrails protect your reputation and keep your creative options open.
FAQ
Are unrestricted AI video generators safe to use?
Safety depends on how you use them. A tool with fewer creative constraints can still have clear policies against harmful content. Read the terms, use fictional subjects when appropriate, and avoid uploading sensitive personal data. The safest approach is to treat the tool as a production instrument, not as an anonymity shield.
Can I use AI video for commercial projects?
Many platforms allow commercial use, but the terms vary. Check whether you need a paid plan, whether attribution is required, and whether the platform claims rights over your output. For client work, get written confirmation if the terms are unclear. Also consider whether the final video needs disclosure under advertising or platform rules.
How do I stop characters from changing between shots?
Start with a strong character reference. Lock the seed when possible. Reuse the same model and prompt structure. Generate keyframes first and approve them before animation. If the tool supports character lock or face reference, enable it. Finally, keep a turnaround sheet and compare every new shot against it.
What is the best workflow for long videos?
Build the video in scenes, not in one giant generation. Create a shot list, generate keyframes, animate short clips, and edit them together. Use a scene bible for continuity and a naming system for versions. Review the sequence as a whole, then fix only the moments that break immersion. Long videos are won in pre-production and editing, not in one perfect prompt.
Do I need multiple tools?
Often, yes. One tool may be best for text-to-video, another for image-to-video, another for lip sync, and another for editing. The key is to choose tools that export clean files and fit into a shared workflow. Avoid tools that trap your assets or make it difficult to move between stages. A modular pipeline is more resilient than a single all-in-one platform.
A Practical Checklist for Your Next Project
Before you generate, confirm your shot list, visual bible, and model choices. During generation, use keyframes, short motion prompts, and batch variants. After generation, review for consistency, fix technical issues, and edit with sound and color. Keep a log of what worked and what failed. Over time, your own notes become the most valuable guide you have.
The search for an AI video generator without restrictions is really a search for creative control. The most reliable way to get that control is to build a workflow that does not depend on any single model or preset. When you can move between models, prepare references, prompt with precision, and edit with intent, you stop waiting for the perfect tool. You start making the video you imagined.

Alexander
More Blogs
Read MoreVidu Q4 Alternatives: 4K AI Video Models Compared (2026)
Vidu Q4 alternatives compared: Kling 4.0, Seedance 2.5, Wan 3.0, and Runway Gen-4 — 4K support, input modes, durations, audio, and what each costs in credits on Domer.
Top 4K AI Image Generators in 2026: 5 Models Compared on Real Costs
The top 4K AI image generators on Domer compared: Flux 3 Klein, Nano Banana 2.1, GPT Image 2.5, GPT Image 2, and Nano Banana Pro — 4K credit costs, reference limits, and speed.
Nano Banana 2.1 vs GPT Image 2.5: Which Image Model Should You Use? (2026)
Nano Banana 2.1 vs GPT Image 2.5 Flare compared: credit costs per resolution, aspect ratios, reference images, text rendering, and which tasks fit each model.