

Affiliazione
Inizia Gratis Ora
Best AI Photo Editing Software for Windows: A Pro Guide
Oct 13, 2026
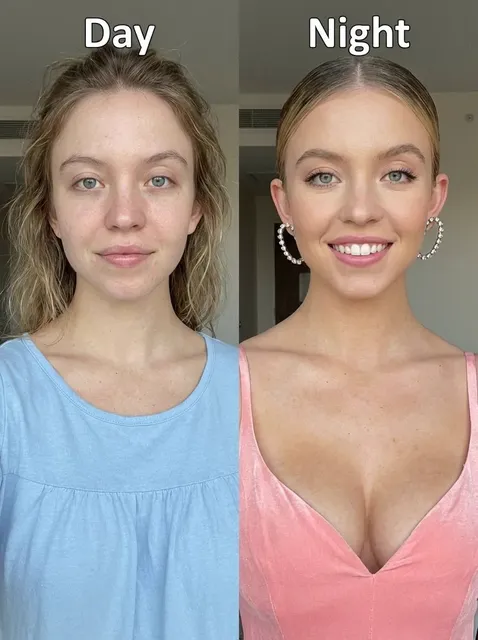

How AI Quietly Became the Backbone of Photo Editing
Photo editing on Windows spent decades rewarding patience more than taste. You learned curves, channel masks, frequency separation, and luminosity blending because there was no real alternative — every correction had to be drawn by hand. That era is largely over. Modern editors now ship with models that recognize faces, separate subjects from backgrounds, estimate depth, rebuild texture, and synthesize pixels that never existed in the original frame. The result is not that craft disappeared. It is that craft moved upward. Time that used to go into masking is now spent on decisions about mood, color, and story.
The practical effect on a Windows workflow is significant. A portrait that once required twenty minutes of dodging and burning can now reach a strong baseline in about ninety seconds, leaving the rest of the session for the parts only a human can judge. A noisy concert photo that would have been discarded is now usable. A product shot with a stray cable can be repaired without a reshoot.
The catch is that AI features are not interchangeable. Some tools are brilliant at noise reduction, some at generative repair, some at cataloging, and almost none are genuinely best-in-class at everything. Choosing well means understanding which job each application is actually doing — and then refusing to pay for the jobs you never perform.
What Actually Matters When Choosing an Editor
Match the tool to the work you do most
Start with an honest inventory of your last fifty edits. If most of them were portrait retouching, then subject masking, skin work, and eye enhancement matter more than panorama stitching. If you shoot architecture, perspective correction and generative expand deserve the most weight. If you process sports or wildlife, denoising at high ISO and burst culling will dominate your time.
Editors tend to over-buy. A general-purpose suite with one excellent AI feature usually beats three specialized applications that each do one thing marginally better, simply because moving files between applications costs attention and produces version chaos.
Local processing versus cloud processing
AI features generally run in one of three places: entirely on your machine using the GPU, entirely in the cloud, or a hybrid where the preview is local and the final render is remote. This matters for three reasons — speed, privacy, and reliability.
Local processing means no upload wait, no data leaving your drive, and no dependency on an internet connection. It also means your GPU determines how pleasant the experience is. Cloud processing unlocks heavier models on modest hardware but introduces latency and raises questions about where your client images are stored. For commercial work under confidentiality agreements, local is almost always the safer default.
Non-destructive editing is not optional
Any tool worth installing should keep your original file untouched and store edits as instructions rather than baked pixels. Generative features make this more important, not less, because AI results are unpredictable by nature. You want to be able to switch a generative layer off, compare it against the original, and revert without losing earlier adjustments.
Catalog, metadata, and Windows integration
If you manage more than a few thousand images, the catalog is the real product and the editor is the bonus. Look for fast thumbnail generation, keyword and face search, color labels, and the ability to write metadata into sidecar files rather than a proprietary database you cannot export. On Windows, also confirm that the application handles your monitor's color profile correctly and supports hardware-accelerated rendering through DirectX or your GPU vendor's drivers.
Licensing shape matters more than sticker price
Perpetual licenses appeal to photographers with irregular income, while subscriptions make sense when you need continuous updates and cross-device sync. Read the terms carefully: some plans meter cloud-based generative operations, others include them in the base tier, and a few restrict commercial use of AI-generated output. Understand the model before you commit a year of work to it.
The Five AI Capabilities Worth Paying For
Generative fill and expand
This is the headline feature of the current generation. You select a region, describe what belongs there, and the model paints it in with plausible lighting and texture. It is excellent for removing distracting objects, extending a canvas to fit a different aspect ratio, and rebuilding the edges of a cropped frame. It is weakest when asked to invent something specific and structural, such as a precise piece of architecture or readable text.
Denoise and detail recovery
Modern denoising models do not merely blur noise away; they distinguish between noise and fine detail and rebuild the latter. For anyone shooting indoors, at dusk, or with a telephoto lens, this single feature can justify the entire purchase. The best implementations let you control how much raw detail the model preserves, which prevents the plastic sheen that older noise reduction produced.
Subject, sky, and background masking
Automatic masking is the quiet workhorse. Selecting a person's hair, a tree line, or a graduated sky in one click changes how you edit, because local adjustments become cheap. When masking is fast, you stop avoiding complicated images.
Portrait retouching
Face-aware tools can smooth skin while retaining pores, brighten eyes, reshape a jawline, and even adjust gaze direction. The best ones work on a separate layer and let you dial the effect back to something believable. Subtlety is the whole game here.
Upscaling and sharpening
Super-resolution models can multiply pixel dimensions while inventing plausible detail. This is transformative for old files, heavy crops, and print work — but only when applied after noise reduction and before final output sharpening. Doing it in the wrong order amplifies artifacts instead of fixing them.
Software Breakdown for Windows Photographers
Adobe Photoshop with generative features
Photoshop remains the most complete single environment for image manipulation. Its generative fill, generative expand, neural filters, subject selection, and content-aware tools cover nearly every category above, and the layer model makes non-destructive editing natural. The trade-offs are a subscription requirement, cloud dependency for the heaviest generative operations, and a learning curve that still punishes newcomers. If you already work in the Adobe ecosystem, there is little reason to leave.
Luminar Neo
Luminar Neo targets photographers who want strong AI results without a layer-based mental model. Its sky replacement, relighting, portrait, and enhancement modules are fast and often impressive, and the interface is approachable enough for someone migrating from phone editing. It is less capable than Photoshop at precise compositing, and heavy use of its generative modules can produce repetitive-looking results if you lean on presets without adjusting them.
Topaz Photo AI
This is the specialist's specialist. Denoising, sharpening, and upscaling are its core competencies, and it handles each with more control than general-purpose suites typically offer. Photographers often run it as a companion to a main editor rather than a replacement. The workflow benefit is real: process the difficult file once in a dedicated tool, then finish color and composition elsewhere.
ACDSee Photo Studio Ultimate
ACDSee combines asset management, RAW development, and layered editing in one Windows-native package, which makes it a compelling choice for photographers who dislike juggling applications. Its AI features — subject detection, skin smoothing, sky replacement, and noise reduction — are competent rather than spectacular, but the integration between browsing and editing saves meaningful time on large archives.
DxO PhotoLab, ON1 Photo RAW, Capture One, and Affinity Photo
DxO PhotoLab is prized for lens corrections and its deep-prime denoising, which handles extreme ISO files exceptionally well. ON1 Photo RAW offers a broad AI toolkit including masking, sky replacement, and upscaling in a single non-destructive environment. Capture One is the choice for tethered studio work and color-critical commercial shoots, with strong color tools and increasingly capable AI masking. Affinity Photo provides a one-time-purchase alternative to Photoshop with solid selection and retouching tools, though its generative capabilities are less developed.
Free and low-cost options
GIMP with third-party plugins, darktable, and RawTherapee can all produce professional results, and darktable's denoising profiles have improved considerably. What you give up is convenience: automatic masking, one-click generative repair, and integrated catalogs generally require assembling several tools and accepting more manual work.
A Repeatable AI Workflow for Windows
Order of operations determines whether AI helps or hurts. Applying the right tool at the wrong stage produces artifacts that are painful to unwind.
Step 1 — Ingest, cull, and back up
Copy files to a working drive, generate previews, and cull hard. AI-assisted culling that scores sharpness and detects closed eyes saves hours on a wedding or sports shoot. Back up before you edit anything; generative operations can rewrite files in ways you did not intend.
Step 2 — RAW conversion and global correction
Set white balance, exposure, and baseline contrast in your RAW processor. Resist the urge to reach for AI features yet. Global corrections establish the reference point against which every later adjustment will be judged.
Step 3 — Denoise before sharpening, always
Run denoising on the RAW data whenever possible rather than on an exported JPEG. Noise removed early stays removed; noise amplified by sharpening becomes permanent texture damage. If your main editor's denoising is weak, round-trip to a dedicated tool and return a 16-bit TIFF.
Step 4 — Masks, subject selection, and local adjustments
Now use AI masking to build the local adjustments that define the image: brightening the subject, darkening a distracting background, shaping light across a face. Because masking is fast, you can be more ambitious than you would be by hand.
Step 5 — Generative repair
Remove distractions, fill edges, and reconstruct missing areas. Work in small selections rather than selecting half the frame; models produce more coherent results when the task is tightly scoped. Always check the result at 100 percent before moving on, and keep generative edits on their own layer.
Step 6 — Portrait refinement
Apply skin, eye, and hair work at reduced opacity. The goal is a photograph that still looks like the person in front of your lens. If a viewer can tell the retouching happened, you have overshot.
Step 7 — Upscale, sharpen, and export
If the final output is a large print or a heavy crop, upscale now — after noise reduction and before output sharpening. Then produce format-specific exports: sRGB JPEGs for web, wide-gamut TIFFs for print, and a full-resolution archive copy.
Step 8 — Version and archive
Keep the layered master, the exported deliverables, and a short note about which AI operations you applied. Future you, or a client asking for a re-edit, will be grateful.
Tuning Windows for Smooth AI Performance
AI features are GPU-hungry, and a machine that feels fast in a browser can feel sluggish in a photo editor. A few adjustments go a long way.
- Update your GPU driver directly from the manufacturer rather than relying on Windows Update, which often lags behind by months.
- Set your scratch disk to a fast NVMe SSD with plenty of free space, and keep cache directories off slower mechanical drives.
- Confirm the application is actually using your discrete GPU in the graphics settings panel; laptops frequently default to integrated graphics and silently halve performance.
- Cap preview resolution while editing and render at full resolution only on export.
- Disable background cloud sync during heavy editing sessions so it does not compete for disk and network throughput.
- Calibrate your monitor and make sure the application is using the correct ICC profile, or your carefully judged color will not survive contact with a printer or a phone screen.
Common Mistakes That Undo AI Gains
Sharpening before denoising. The single most common error. You end up sharpening noise and then trying to remove it, which destroys detail.
Pushing generative edits too far. Models hallucinate when asked to invent large, complex structures. Small repairs look seamless; large inventions look uncanny.
Using maximum strength on every slider. Denoising at 100 percent, portrait smoothing at 100 percent, and upscaling at 100 percent produces the waxy, over-processed look that gives AI editing a bad reputation. Start around 30 to 50 percent and increase only as needed.
Editing on an uncalibrated display. No model can fix a color decision made on an inaccurate screen.
Ignoring the original. Save a reference copy and compare side by side. AI output is seductive, and it is easy to drift far from what the scene actually looked like.
Assuming every AI result is final. Treat generative output as a draft. Refine, blend, and mask it like any other layer.
Choosing Between One Suite and a Stack
There are two viable strategies. The integrated route uses a single application for cataloging, RAW development, editing, and AI features. It is simpler, cheaper, and produces fewer version conflicts. ACDSee, ON1, Luminar, and Lightroom-style environments fit here.
The stacked route pairs a primary editor with two or three specialists: one for denoising and upscaling, one for generative repair, one for color grading. It produces better results at the margins but demands discipline about file naming, color space, and which application owns the master file.
Choose the stack only if you can name the specific problem your main editor cannot solve. Otherwise the integrated route will get you to a finished image faster, and finishing images is the point.
Frequently Asked Questions
Do I need a powerful GPU to use AI photo editing on Windows?
For local denoising, masking, and upscaling, a mid-range discrete GPU with at least 8 GB of video memory makes a noticeable difference. Generative features are the heaviest load; if your hardware is modest, a hybrid tool that renders on remote servers is a reasonable compromise.
Is AI editing acceptable for client and commercial work?
Yes, provided you disclose it when relevant and respect the licensing terms of the software and any stock or archival material involved. For photojournalism and documentary work, many outlets restrict or prohibit generative alterations, so check the applicable standards before publishing.
Can AI replace learning the fundamentals?
No. AI accelerates execution; it does not supply judgment. Photographers who understand light, composition, and color get dramatically better results from the same tools because they know what the finished image should look like.
Should I use several AI editors at once?
Use as few as possible. Each additional application adds a conversion step, a color-management risk, and another place for versions to diverge. Two or three well-chosen tools cover nearly every realistic need.
Will AI features run on an older laptop?
Some will. Masking and basic enhancement are usually fine, while generative fill and heavy upscaling may be slow or unavailable. Check the system requirements carefully before buying, and prefer tools with a cloud fallback if your machine is aging.
How do I keep AI edits looking natural?
Work at reduced strength, compare against the original constantly, zoom to 100 percent to inspect texture, and stop one step earlier than feels satisfying. Restraint is the difference between a polished photograph and an obvious composite.
Where to Go From Here
Start with a single difficult image — the noisy, awkward, almost-good frame you have been avoiding. Run it through the workflow above in whatever software you already own. You will quickly discover which stage is weakest: denoising, masking, generative repair, or color. That discovery tells you exactly which tool to add next, and it costs nothing but an evening.
The broader shift is worth internalizing. AI has not made photo editing easier in the sense of requiring less thought; it has made it faster in the sense of removing mechanical labor. The photographers who benefit most are the ones who treat these features as a production assistant rather than an oracle — delegating the repetitive work, keeping the judgment, and never letting a model decide what the photograph is about.

Alexander
More Blogs
Read MoreVidu Q4 Alternatives: 4K AI Video Models Compared (2026)
Vidu Q4 alternatives compared: Kling 4.0, Seedance 2.5, Wan 3.0, and Runway Gen-4 — 4K support, input modes, durations, audio, and what each costs in credits on Domer.
Top 4K AI Image Generators in 2026: 5 Models Compared on Real Costs
The top 4K AI image generators on Domer compared: Flux 3 Klein, Nano Banana 2.1, GPT Image 2.5, GPT Image 2, and Nano Banana Pro — 4K credit costs, reference limits, and speed.
Nano Banana 2.1 vs GPT Image 2.5: Which Image Model Should You Use? (2026)
Nano Banana 2.1 vs GPT Image 2.5 Flare compared: credit costs per resolution, aspect ratios, reference images, text rendering, and which tasks fit each model.