

Affiliazione
Inizia Gratis Ora
Photorealistic AI Video: Benchmarks and Workflow Guide
Oct 13, 2026
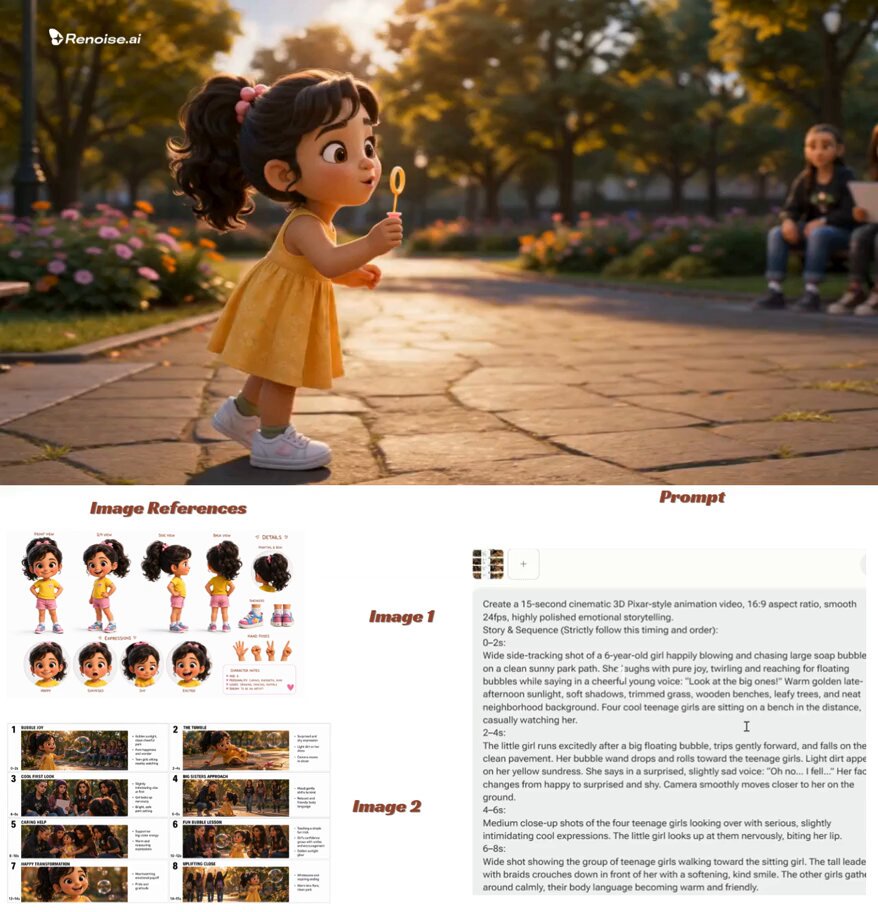

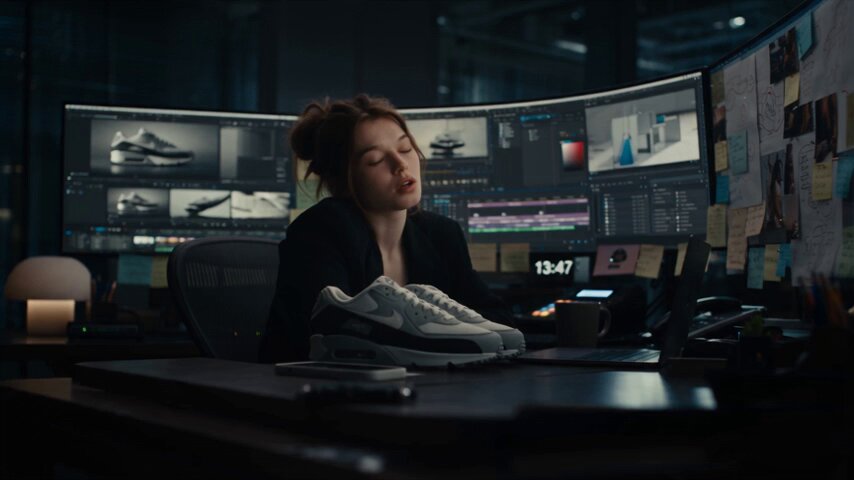
Photorealism in AI video is rarely a single switch you can flip. It is the sum of many small behaviors that have to hold together over time: skin that keeps its texture, shadows that stay attached to the objects casting them, motion that respects weight, and a camera that behaves like a camera rather than a slideshow with a drift. Because those behaviors are distributed across the whole pipeline, asking which model is best on its own is the wrong question. The useful question is narrower and more technical: best at what, under which conditions, and measured how?
That is where a performance baseline earns its keep. A baseline is not a leaderboard you read once. It is a small, deliberate test rig you build for your own work, with fixed inputs, written scoring criteria, and stored results. It turns vague enthusiasm about photorealism into something you can compare, debug, and improve. This guide walks through how to build one, how to score it, and how to fold it into a production workflow that keeps working when the models underneath you change.
Why a Baseline Beats Gut Feeling
Ask five editors to review the same generated clip and you will usually get five verdicts. One praises the lighting, another notices the left hand, a third says the whole thing feels fake without being able to say why. Impressions shift with prompt wording, seed, resolution, playback size, and how tired the reviewer is. A baseline is the antidote to that noise: a fixed test set, a defined rubric, and a saved record of what happened.
Three properties make a baseline useful. First, fixed inputs. The same prompts, the same seeds, the same reference images, the same duration and aspect ratio, run in the same order. Second, defined scoring. Every quality axis has written anchors, so two reviewers working separately tend to land in the same range. Third, stored results. Scores, settings, and the clips themselves stay together, so a comparison months later is actually possible rather than reconstructed from memory.
A baseline also changes how a team talks. Instead of arguing about which model feels more cinematic, you point at a table: identity held for the first four seconds then drifted, texture crawl appeared around frame 90, contact shadows broke the moment the subject sat down. That is no longer a taste dispute. It is a solvable problem with a location, and problems with a location can be routed to a fix.
Finally, a baseline protects you from silent regressions. Hosted generation endpoints get updated without a press release. Resolution handling changes, safety filters get stricter, motion priors shift. If you never recorded what your shots used to look like, you will not notice that the shot type you built your whole opening sequence around quietly got worse.
The Five Axes of Photorealistic Video Quality
Photorealism is not one property. It decomposes into at least five behaviors that fail independently, and a clip can score well on one while falling apart on another. Evaluating them separately is what makes a rubric possible.
Temporal Coherence
Temporal coherence is whether the image stays the same image from frame to frame. Watch for high-frequency flicker on fine texture such as hair, foliage, fabric weave, and gravel; boiling or crawling backgrounds where static detail re-renders every frame; and slow warping where a straight edge bends over a second or two. A good stress test is a locked-off shot with a slow push-in on a textured subject. Nothing moves except the camera, so any shimmer is the model inventing detail it cannot hold.
The reason this axis matters so much is that it is far more visible in motion than in a still frame. A single exported frame can look flawless while the sequence reads as underwater. Always evaluate temporal coherence at playback speed, not scrubbed frame by frame.
Identity and Style Consistency
Identity consistency is whether the same person, product, or location survives the shot. Faces drift: jawlines widen, eye spacing shifts, freckles relocate. Wardrobe changes between cuts. A logo subtly redraws itself. Style consistency is the same problem at a broader scale: color grade, lens character, and grain need to match across a sequence, not just within a single generation.
This is where reference-driven approaches pay off. Character sheets with several angles, a locked seed, and multi-image conditioning give the model more to anchor to than a text description alone. When you score this axis, separate short-horizon consistency (does it hold for two seconds) from long-horizon consistency (does it hold for ten, and does it still match a reference image taken from a different angle).
Physics and Scene Interaction
Physical plausibility is the axis that most often gives away generated footage to a trained eye. Feet slide instead of planting. Cloth moves like rubber. Liquid pours in a direction gravity does not support. Objects pass through each other or fail to occlude correctly. Contact shadows are missing under a character who is clearly standing on the ground.
A useful test is a short interaction: a hand picking up a glass, a person sitting down, an object dropped onto a table. The moment of contact is where physics priors are weakest and where audiences notice subliminally even if they cannot name the problem.
Lighting, Materials, and Skin
This axis covers how light behaves and how surfaces respond to it. Look for consistent light direction across the frame, specular highlights that sit on the right part of a curved surface, and materials that read correctly at a glance: wet versus dry, matte versus glossy, metal versus painted plastic. Skin is the hardest material of all because it is translucent, textured, and slightly oily, and audiences have a lifetime of reference data for it.
Practical tests include a slow rotation of a reflective object, a change in light position during the shot, and a close-up portrait with raking side light that reveals pore-level detail.
Camera Language and Motion Realism
A camera that behaves like a camera is a huge part of perceived realism. Focal length should affect compression and perspective in a physically plausible way. Moving the camera should produce parallax, not a flat zoom. Motion blur should match shutter angle, so fast motion smears rather than strobing. Handheld should have micro-jitter, not a smooth sine wave.
Score this axis by naming the intended camera move before generation and checking whether the result performs it. A shot that drifts pleasantly but does not do what the edit needs is a failure, however pretty it looks.
Designing a Test Suite That Exposes Weaknesses
A baseline is only as good as the prompts in it. The goal is not to find prompts that look impressive; it is to find prompts that break models in informative ways. Build the suite once, then reuse it, because reuse is what makes scores comparable.
Prompt Families
Cover the shot types you actually deliver, plus a few pressure tests. Six families work well as a starting set:
- Portrait and dialogue: a person speaking or reacting, medium close-up, minimal motion, heavy emphasis on face and skin.
- Product and object: a tabletop item rotating slowly under studio lighting, stressing material response and edges.
- Environment and landscape: a wide shot with foliage, water, or moving grass, stressing texture stability.
- Interior with light change: a room where a window brightens or a lamp turns on mid-shot, stressing consistency under changing illumination.
- Physical interaction: hands, contact, cloth, or liquid, stressing physics priors.
- Camera-led movement: a tracking or orbiting move through a space with depth, stressing parallax and geometry.
Controlled Variables
Change one thing at a time. Same seed across models, same duration, same resolution, same aspect ratio, same prompt text. If you must vary resolution because a model only accepts one size, note it in the record so you do not mistake a resolution artifact for a quality difference.
Shot-Length Ladders
Generate each test at two, five, and ten seconds where the model supports it. Failures compound with time, and models that look identical at two seconds often separate sharply at ten. A model that holds identity perfectly for four seconds and then drifts is a different tool from one that degrades gradually from frame one, even if both look similar in a short clip.
Turning Impressions into Scores
Scores only work if the anchors are written down before you look at results. Use a five-point scale per axis and define what each point means in observable terms.
| Axis | What a 5 looks like | What a 3 looks like | What a 1 looks like |
|---|---|---|---|
| Temporal coherence | No visible flicker at playback speed; static texture stable | Minor shimmer on fine detail at full size | Obvious boiling, crawling, or geometric warping |
| Identity and style | Character and grade match references across the full duration | Slight drift late in the shot | Subject unrecognizable or style inconsistent between cuts |
| Physics and interaction | Contact, weight, and occlusion read correctly | One questionable contact moment | Floating, sliding, or intersecting geometry |
| Lighting and materials | Light direction consistent; materials correct | One flat or plasticky surface | Lighting contradicts itself; materials nonsensical |
| Camera and motion | Performs the requested move with plausible parallax and blur | Performs an approximation of the move | Ignores the intended move or produces impossible motion |
Weight the axes by what your project needs. A dialogue-driven short should weight identity and temporal coherence heavily. A product spot should weight materials and camera motion. Write the weights down; a rubric that shifts to favor whichever model you already like is not a rubric.
Use two reviewers where possible and record both scores. What matters most is not the absolute number but the delta between two versions of the same pipeline. A one-point improvement across six shot families is meaningful. A one-point difference on a single gloriously lucky generation is not.
A Repeatable Workflow From Reference to Final Shot
Benchmarks measure the model. A workflow makes the shot. Here is a sequence that keeps quality predictable and gives you places to intervene before the result is baked in.
-
Look development. Define the shot in still images first, using whatever tool gives you fast iteration. Lock the framing, the lighting direction, and the color palette before you spend generation time on motion.
-
Reference package. Assemble character sheets, location stills, and style frames. Three to five well-chosen references usually beat twenty mediocre ones, because contradictory references create contradictory output.
-
Motion draft. Generate at low resolution and short duration. The goal is timing and camera movement, not detail. Evaluate against the baseline rubric at this stage, because fixing a broken camera move is cheaper here than later.
-
Lock the edit. Cut the draft into the sequence and confirm it serves the story. Do not polish a shot that gets trimmed to four frames.
-
Upscale and refine. Move to higher resolution, then apply repair passes: inpainting problem regions, rotoscoping a drifting sleeve, replacing a bad hand with a controlled plate. Repairs are normal, not a sign of failure.
-
Grade and finish. Match contrast, grain, and color across cuts. Light film grain often does more for perceived realism than a resolution bump, because it hides small inconsistencies the eye would otherwise catch.
-
Archive everything. Store the final clip, prompt, seed, model version, control inputs, and scores together. This is the step everyone skips and the one that saves the most time a month later.
Choosing the Right Model for the Shot
Different model families excel at different axes. Instead of crowning a winner, map shot types to strengths and keep two or three tools available.
| Shot requirement | What to prioritize | Practical signal |
|---|---|---|
| Talking head, dialogue | Identity lock, lip movement, face stability | Baseline portrait family scores 4 or above on identity |
| Product rotation | Material accuracy, edge sharpness, control of camera | Control-layer support for exact motion paths |
| Wide landscape | Texture stability, long-duration coherence | Low flicker score at ten seconds, not two |
| Complex interaction | Physics priors, contact shadows | Interaction family scores at least 3 without repairs |
| Stylized realism | Style reference adherence, consistent grade | Multi-image conditioning that respects style frames |
| Fast turnaround | Speed and predictability | Cold-start reliability across repeated runs |
Decision criteria beyond quality: how controllable is the tool, how reproducible is a given result, how fast is iteration, and how well does it integrate with your editing and compositing stack. A slightly weaker model that accepts depth and pose control can outperform a stronger one that only takes text, because control reduces the number of takes you need.
Also consider failure mode predictability. A model that fails the same way every time is easier to work with than one that occasionally produces brilliance and occasionally produces mush, because you can plan repairs around a known failure pattern.
Control Layers and Multi-Image Fusion
Control inputs are how you stop relying on luck. Depth maps constrain geometry. Pose skeletons constrain limb placement. Edge or lineart passes constrain silhouettes and architectural detail. Segmentation masks constrain where the subject ends and the background begins. Style references constrain palette and rendering character.
When you combine several of these, weight them deliberately. Depth is usually the strongest geometry constraint and should dominate when the camera move matters. Pose is essential when limbs need specific placement but can fight depth on ambiguous foreshortening. Style references should shape rendering without overriding the reference imagery that defines identity.
The most common mistake is stacking controls until they conflict, then blaming the model for a stiff result. If two constraints disagree, the output will show tension: melted joints, warped geometry, or a subject that looks like a copy of a copy. Two clean constraints usually beat four competing ones.
Multi-image fusion works the same way. A character sheet with front, three-quarter, and profile views gives the model a coherent identity to fuse. Add a lighting reference and a style frame and you get a richer but less consistent signal. Test fusion weight settings on a short clip before committing to a full sequence.
Asset and Metadata Infrastructure
Baselines die from disorganization faster than from bad measurement. Twenty generations across three tools with hand-typed filenames become unusable within a week.
Adopt a naming convention that encodes the essentials. Something like project_shot_variant_model_take resolves most confusion: feature_opening_0103_b_widepush_004. Keep the prompt text in a sidecar file next to the clip, not in your memory.
Store a small record per generation with these fields: shot identifier, model and version, prompt text, negative prompt, seed, resolution, duration, control inputs and weights, reference images used, reviewer scores per axis, and a free-text note about what broke. A spreadsheet handles this fine at small scale. A lightweight database with a proper schema handles it better once you are tracking hundreds of takes, especially when you want to query across shot types.
Plan storage in tiers. Keep final approved clips and their sidecar records in fast, backed-up storage. Keep working drafts on a larger, slower volume with a retention policy. Keep the ability to reproduce a shot even if you delete the intermediate files: prompt, seed, model version, and control inputs are small and worth keeping forever.
Common Failure Modes and Fixes
Flicker and Texture Crawl
Cause: the model re-synthesizes fine detail every frame with no temporal memory. Fix: shorten the shot and edit two shorter generations together, lower the motion intensity, or reduce the resolvable detail by softening the background with depth of field. Adding a light grain pass in the grade also masks residual shimmer.
Face Drift and Identity Slip
Cause: insufficient reference conditioning, or a camera move that changes the viewing angle beyond what the references cover. Fix: add a three-quarter and a profile reference, lock the seed, keep the shot short, and avoid large head rotations within a single generation.
Melting Hands and Blown Contact
Cause: weak physics priors and small on-screen size where detail is ambiguous. Fix: frame hands larger, avoid complex object manipulation, and use a control pass for pose. Where repair is impractical, composite a plate or a practical shot for the interaction.
Unmotivated Camera Movement
Cause: motion priors that favor pleasant drift over specified moves. Fix: use depth or camera-path controls, specify the move in concrete physical terms, and generate several takes at low resolution before refining the one that matches the edit.
Plastic Skin and Over-Smoothing
Cause: denoising and upscaling that flatten pore-level texture. Fix: reduce denoise strength, apply detail-preserving upscaling, and add grain in the final grade. Compare a 100 percent crop against real footage before deciding you are finished.
FAQ
How many clips do I need for a useful baseline? Six to ten shot families with three durations each gives a solid rig. Fewer than that and a single lucky or unlucky result dominates your conclusions.
Should I re-run the baseline when a model updates? Yes, and keep the old clips. Comparing before and after on identical inputs is the only reliable way to catch regressions you would otherwise discover in the middle of a deadline.
What resolution should the tests run at? Match your delivery resolution where possible. Test at low resolution for timing and motion, then confirm the leading candidates at full resolution, because some artifacts only appear when the model has more pixels to invent.
Is a higher score always the right choice? No. Controllability, reproducibility, and iteration speed often matter more than a half-point of quality. A predictable tool that needs two takes is usually better than an unpredictable one that occasionally produces a masterpiece.
How do I score if I am working alone? Write the anchors first, score in random order without looking at filenames, and re-score a few clips a day later to check your own consistency. Your deltas will still be more useful than your absolutes.
Do repairs invalidate a benchmark result? No, but record them. If a model needs three repair passes and another needs one, that is a real cost difference and belongs in your notes, not just in your quality score.
What is the fastest way to improve perceived realism? Usually grade and grain, followed by fixing camera motion. Audiences forgive small texture imperfections far more readily than an impossible camera move or a flat, digital-looking image.
How often should the test suite change? Rarely. You can add a family when your work shifts, but keep the original set intact so old scores remain comparable. Retire prompts instead of rewriting them.
Photorealism in generated video is ultimately a production discipline, not a model feature. The teams that ship convincing work are rarely the ones with the single best tool. They are the ones who know precisely how their tools fail, because they measured it, wrote it down, and built a workflow that routes around the weaknesses. Start small: six prompts, one rubric, one spreadsheet, one afternoon. Then let the baseline grow alongside the work.

Alexander
More Blogs
Read MoreVidu Q4 Alternatives: 4K AI Video Models Compared (2026)
Vidu Q4 alternatives compared: Kling 4.0, Seedance 2.5, Wan 3.0, and Runway Gen-4 — 4K support, input modes, durations, audio, and what each costs in credits on Domer.
Top 4K AI Image Generators in 2026: 5 Models Compared on Real Costs
The top 4K AI image generators on Domer compared: Flux 3 Klein, Nano Banana 2.1, GPT Image 2.5, GPT Image 2, and Nano Banana Pro — 4K credit costs, reference limits, and speed.
Nano Banana 2.1 vs GPT Image 2.5: Which Image Model Should You Use? (2026)
Nano Banana 2.1 vs GPT Image 2.5 Flare compared: credit costs per resolution, aspect ratios, reference images, text rendering, and which tasks fit each model.