

Affiliazione
Inizia Gratis Ora
Synthesia Video Setup on Windows and Mac: Beginner Guide
Oct 13, 2026
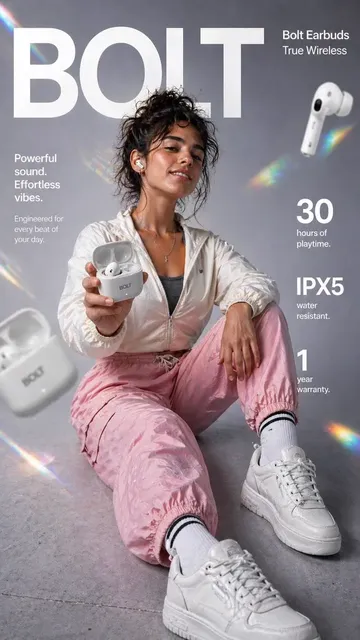

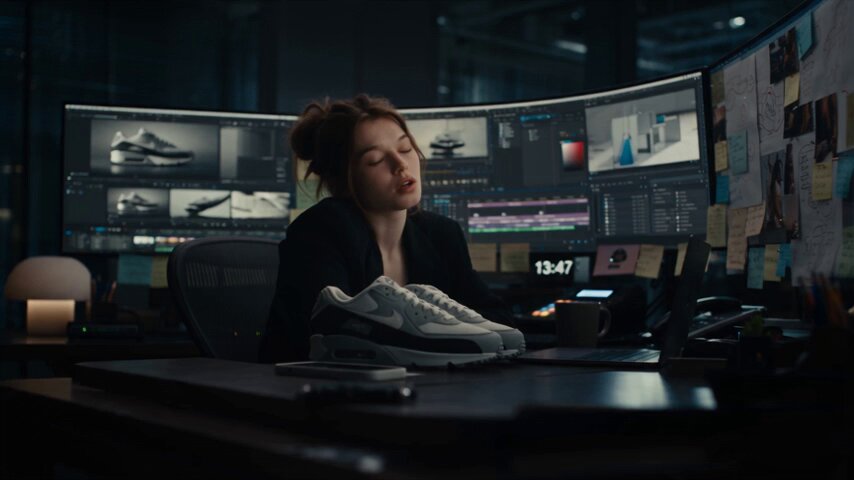
AI video creation has become one of the fastest ways to turn an idea into something watchable. Tools like Synthesia let you type a script, choose an AI presenter, add slides or screen recordings, and export a finished video without opening a traditional editing suite. The catch is that beginners often lose time on setup details: browser permissions, microphone settings, avatar choices, brand assets, captions, and export settings. A clean setup removes most of that friction. This guide walks through a practical setup and configuration workflow for Windows and Mac users, then shows how to move from first launch to a publishable video with fewer mistakes.
The best approach is not to chase every advanced feature on day one. Instead, configure the essentials, build a short prototype, review the result, and then expand. That sequence keeps the first session productive and gives you a repeatable process for marketing, education, onboarding, and internal communication projects.
Why Browser-Based AI Video Tools Change the Setup Conversation
Traditional video software often required a heavy installation, driver updates, codec packs, and enough local storage for large project files. Browser-based AI video platforms work differently. Most of the processing happens remotely, so your Windows or Mac computer mainly needs a modern browser, a stable internet connection, and enough screen space to work comfortably.
That shift matters for beginners because it removes many technical blockers. You do not need to install a render engine or manage GPU drivers. You do need to understand what runs locally and what runs in the cloud, because that affects troubleshooting. Local issues usually involve browser permissions, microphone input, webcam access, or bandwidth. Cloud issues usually involve rendering queues, avatar generation, or export processing.
A cloud-first workflow also makes collaboration easier. You can share a project link with a teammate, collect comments, and revise the script without sending large files back and forth. The main trade-off is that you need reliable internet during editing and export. For most marketing and educational teams, that is a reasonable exchange for faster setup and easier version control.
What You Need Before Your First Project
Before you open any AI video tool, spend five minutes preparing your environment. This prevents the common first-session problems that make beginners think the software is difficult when the real issue is a missing asset or a browser setting.
Windows readiness checklist
On Windows, use a current version of Chrome, Edge, or Firefox. Check that your operating system has the latest updates, especially browser security patches. If you plan to record your own voiceover, go to Settings, Privacy, and Microphone, then confirm that your browser is allowed to use the microphone. If you plan to use a webcam for a screen-and-face recording, check camera permissions as well.
Close unnecessary applications before rendering. Video export can be memory-intensive in the browser, and too many background apps can slow down uploads. Keep at least a few gigabytes of free disk space for downloaded exports and project assets. Finally, test your headset or USB microphone in another app before using it in the AI video platform.
macOS readiness checklist
On macOS, use Safari, Chrome, or Firefox. In System Settings, open Privacy and Security, then Microphone and Camera. Make sure your browser has permission. If you use screen recording, macOS may ask for Screen Recording permission the first time. Approve it, then restart the browser if the prompt does not appear again.
Mac users should also check that iCloud Drive or another sync service is not locking a folder you plan to upload from. If assets are still syncing, uploads may fail or show outdated versions. Use a local folder for source files, then sync or archive after export.
Workspace and asset preparation
Create a simple project folder with subfolders for scripts, images, logos, music, and exports. Name files consistently, such as product-launch-script-v1, product-launch-slide-01, and product-launch-logo. This makes it easier to replace assets later without breaking the project.
Gather your brand colors, fonts, logo files, and any approved background music. For educational projects, collect slides, diagrams, screenshots, and assessment questions. For marketing projects, collect product images, campaign messaging, calls to action, and legal disclaimers. Having these ready before you start means you can focus on storytelling rather than file hunting.
First Launch Configuration for Beginners
When you first open Synthesia or a similar AI video platform, avoid jumping straight into a complex project. Configure the workspace, then create a short test video. This teaches you the interface while producing something useful.
Choosing a template or blank project
Templates are ideal for first-time users because they show how scenes, text, and media fit together. Pick a template that matches your use case, such as product explainer, training module, or social media short. If you prefer full control, start with a blank project and add a title scene, a presenter scene, and an ending scene.
The key decision is whether the template structure helps or limits you. For a quick prototype, use a template. For a recurring series, build a custom template that matches your brand and approval workflow.
Avatar and voice setup
Choose an avatar that fits the tone of the video. A formal presenter works for compliance training, while a friendly, casual avatar suits social media explainers. Preview several voices before committing. Listen for pacing, pronunciation, and warmth. If your script includes technical terms, acronyms, or product names, test those words in a short sample.
Many platforms let you adjust voice speed, pitch, and emphasis. Make small changes rather than extreme ones. A slightly slower voice often sounds more authoritative and is easier to caption accurately.
Brand kit and format defaults
Set your brand colors, fonts, logo placement, and intro or outro style once. Then reuse them across every project. This is the difference between a one-off video and a scalable content system. Define default aspect ratios as well. A 16:9 horizontal video works for websites and webinars, while 9:16 vertical video suits mobile-first social platforms. Square formats can work well for feeds and learning management systems.
If your team has accessibility guidelines, set caption styles and minimum font sizes now. It is much easier to configure these at the start than to fix every scene later.
How to Prototype a Video Script That Works with an AI Presenter
AI presenters are not human actors. They deliver the script you provide, so the script must carry the energy, clarity, and structure. Write for the ear, not the eye.
Write for spoken rhythm
Keep sentences short. Use one idea per sentence. Avoid nested clauses that sound natural on a page but confusing when spoken. If a sentence is longer than about twenty words, split it. Use contractions where appropriate to make the delivery sound more natural, but stay consistent with your brand voice.
Read the script aloud. If you stumble, the avatar will likely sound awkward too. Mark pauses with punctuation or scene breaks, and remove filler words that add no meaning.
Break the script into scenes
Each scene should have a single purpose: introduce the problem, show a feature, explain a process, or call the viewer to action. A typical beginner video might have five to seven scenes. A training module might have more, but shorter scenes are easier to update later.
Give each scene a short internal title, such as Problem, Solution, Demo, and Next Step. These titles do not appear in the final video, but they keep your project organized and make collaboration easier.
Add visuals that support the narration
Visuals should clarify, not decorate. Use screenshots for software walkthroughs, diagrams for processes, product photos for marketing, and simple text cards for key statistics. Avoid dense paragraphs on screen. If the viewer is reading, they are not listening.
For character consistency across scenes, use the same avatar, outfit, and lighting style. If you upload multiple images of the same person, test how the platform handles them before building a full sequence. Small inconsistencies become obvious when scenes are played back-to-back.
Editing, Captions, and Review Without a Video Editor
One advantage of AI video platforms is that editing is mostly script editing. When you change the text, the avatar performance updates. That makes revisions faster, but it also means mistakes in the script become mistakes in the video.
Captions and subtitles
Turn on captions for every public video. They improve accessibility, help viewers watch without sound, and can improve search visibility when the platform provides a transcript. Review auto-generated captions carefully, especially for names, technical terms, and numbers. Fix pronunciation in the script if the avatar says a word incorrectly, then regenerate the scene.
Music and pacing
Background music should support the message without competing with the voice. Use instrumental tracks with a consistent volume level. If the platform allows ducking, enable it so music lowers automatically when the presenter speaks. For training videos, keep music minimal or omit it entirely.
Pacing matters more than music. Use short pauses between scenes, but do not leave dead air. If a scene feels slow, cut a sentence rather than speeding up the voice. Faster speech can sound unnatural and reduces comprehension.
Feedback loops
Share a draft link with one or two reviewers rather than a large group. Ask specific questions: Is the opening clear? Is any scene confusing? Does the call to action make sense? Collect feedback in one place, then make a single round of revisions. Multiple rounds of small changes can create version confusion and delay publication.
Export and Delivery Settings That Prevent Rework
Export settings are where many beginner projects go wrong. A video that looks great in preview can look soft on a large screen or get cropped on social media if the aspect ratio is wrong.
Resolution and aspect ratio
For web, webinar, and learning platforms, 1080p at 16:9 is a safe default. For mobile social platforms, export 9:16 at 1080 by 1920. For feeds that support square video, use 1:1. Match the export to the destination rather than exporting one file and hoping it fits everywhere.
File format and naming
MP4 with H.264 video and AAC audio is widely supported. It plays on Windows, Mac, mobile devices, and most learning management systems. Use a naming convention that includes the project, version, language, and aspect ratio, such as onboarding-module-en-16x9-v3.mp4.
Publishing destinations
If you publish to a learning management system, check file size limits and caption requirements. If you publish to social media, add a thumbnail and write platform-specific copy. If you embed on a website, test autoplay settings and captions. A short pre-publish checklist saves hours of re-exporting.
Troubleshooting Setup and Rendering Problems
Even a simple setup can run into issues. Most beginner problems fall into a few categories, and each has a practical fix.
Browser permissions and camera access
If the microphone or camera does not work, check the browser address bar for a blocked permission icon. Allow access, then refresh the page. On Windows, also check system privacy settings. On macOS, check Privacy and Security. If the problem continues, try a different browser or a private window to rule out extension conflicts.
Audio and sync issues
If the avatar audio sounds out of sync with captions, preview the scene alone. Regenerate that scene after fixing the script. If you uploaded your own voiceover, confirm that the audio sample rate matches the platform recommendation and that there is no long silence at the beginning of the file.
Slow rendering and upload failures
Rendering delays are often caused by large image files, unstable internet, or too many browser tabs. Compress images before uploading, close unused tabs, and use a wired connection if possible. If an upload fails repeatedly, rename the file without special characters and try again. Very large video files should be trimmed before upload if the platform only needs a short clip.
Practical Workflow Recipes for Marketing and Learning Teams
A setup guide is more useful when it connects to real work. Here are three workflows that beginners can run after their first successful test video.
Rapid campaign concept test
Write a thirty-second script that presents one problem and one solution. Choose a marketing-friendly avatar, add two product images, and export a vertical video. Share it with stakeholders to test the hook before investing in a full campaign. If the concept works, expand it into a longer explainer with customer proof and a clear call to action.
Onboarding module with multilingual captions
Create a five-scene module that covers company mission, tools, first-week expectations, and key contacts. Use the same avatar for consistency. Add captions in the languages your team needs, or duplicate the project and translate the script. Keep visuals simple: org charts, screenshots, and short text summaries.
Product update explainer
Use a three-part structure: what changed, why it matters, and how to use it. Add screen recordings for the how-to section. Export a horizontal version for the help center and a vertical version for social. This repurposing approach gets more value from one script and keeps messaging consistent.
Best Practices for Scaling AI Video Production
Once the first videos work, the next challenge is consistency. Scaling is not about making more videos quickly; it is about making reliable videos repeatedly.
Build a template system
Create templates for recurring formats: product update, customer welcome, compliance training, and social short. Lock down fonts, colors, logo placement, caption styles, and scene order. Leave room for variable content such as titles, screenshots, and calls to action.
Maintain a script and asset library
Store approved scripts, voice settings, avatars, images, and music in a shared library. Tag assets by campaign, product, language, and usage rights. Before creating a new video, search the library first. Reusing approved assets reduces review time and avoids inconsistent branding.
Set review and versioning rules
Define who approves scripts, who checks legal claims, and who publishes final files. Use version numbers in project names and export file names. Keep a simple changelog for major revisions. When multiple people edit the same project, assign one owner for the final pass to prevent conflicting changes.
FAQ: Synthesia Setup and Beginner AI Video Creation
Do I need a powerful computer to use Synthesia on Windows or Mac?
No. Because the heavy processing happens remotely, a standard modern laptop with a current browser and stable internet is usually enough. More memory and a larger screen make editing more comfortable, but they are not strict requirements.
Can I use my own voice instead of an AI voice?
Many platforms support uploaded voiceover or recorded audio. You can also use an AI voice and edit the script until the pronunciation sounds right. For highly technical or brand-sensitive content, recording your own voice may provide more control.
How long should a beginner AI video be?
Start with thirty to sixty seconds. This length is enough to practice script writing, avatar selection, captions, and export settings without becoming overwhelming. Once the workflow feels natural, move to two- to five-minute training or explainer videos.
Why does my avatar mispronounce a word?
Pronunciation depends on the voice model and the spelling in the script. Try phonetic spelling for unusual names, add a pause, or split the word into syllables. Test the change in a short scene before regenerating the entire video.
Should I export captions as a separate file?
Yes, when the destination platform supports it. Separate caption files give you more control over styling and accessibility. If the platform requires burned-in captions, review them carefully before export.
What is the biggest mistake beginners make?
Writing a script that is too long, too formal, or too dense with information. AI presenters work best with clear, conversational language and one idea per scene. Treat the script as the most important part of the production, not an afterthought.
Final Thoughts: Start Small, Systemize Later
Setting up Synthesia or any AI video platform is less about installing software and more about preparing a repeatable workflow. Check your browser and microphone permissions, organize your assets, choose a simple template, and write for spoken delivery. Build a short prototype before investing in a full production. Review the result, fix the script, and export for the destination where viewers will actually watch.
Once that first video is live, turn the process into a system. Create templates, save approved assets, define review rules, and reuse what works. The teams that get the most from AI video generation are not the ones with the most complicated setup. They are the ones with a clear, boring, reliable process that lets them move from idea to published video without starting over every time.

Alexander
More Blogs
Read MoreVidu Q4 Alternatives: 4K AI Video Models Compared (2026)
Vidu Q4 alternatives compared: Kling 4.0, Seedance 2.5, Wan 3.0, and Runway Gen-4 — 4K support, input modes, durations, audio, and what each costs in credits on Domer.
Top 4K AI Image Generators in 2026: 5 Models Compared on Real Costs
The top 4K AI image generators on Domer compared: Flux 3 Klein, Nano Banana 2.1, GPT Image 2.5, GPT Image 2, and Nano Banana Pro — 4K credit costs, reference limits, and speed.
Nano Banana 2.1 vs GPT Image 2.5: Which Image Model Should You Use? (2026)
Nano Banana 2.1 vs GPT Image 2.5 Flare compared: credit costs per resolution, aspect ratios, reference images, text rendering, and which tasks fit each model.