
Crea
Affiliazione
Inizia Gratis Ora
How to Turn Images Into Photorealistic AI Video: A Workflow Guide
Oct 13, 2026
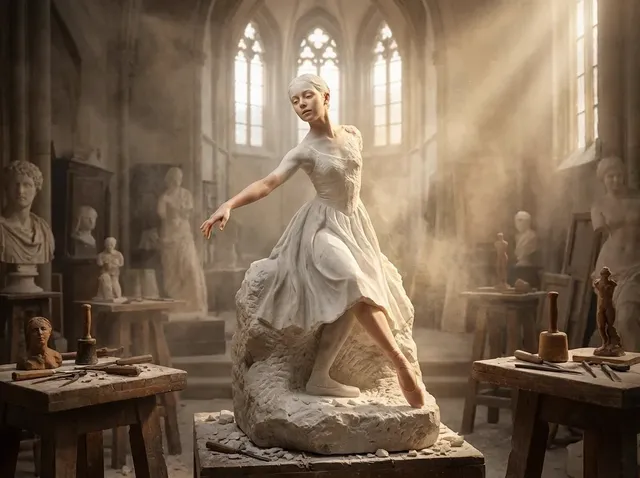

Why Stills Are Becoming the Starting Point for Video
For decades, moving pictures required a camera pointed at something that moved. A photographer who wanted video had to learn a second craft: lighting for motion, capturing clean audio, managing timecode. That barrier is gone. Image-to-video generation takes a single frame — a portrait, a product shot, a landscape, a piece of concept art — and extrapolates plausible motion from it. The still becomes the storyboard, and the storyboard becomes the shot.
The practical consequence is that photographers, illustrators, and product marketers now hold the raw material for video without renting a rig. A wedding photographer's best frame becomes a five-second cinematic push-in. A furniture catalogue image becomes a looping lifestyle clip. A concept artist's keyframe becomes a title sequence.
But 'generate motion from an image' is not one button, and the gap between a wobbly morph and a shot that reads as real footage comes down to four things: the source asset, the motion direction, the generation settings, and the cleanup pass. This guide walks through all four in the order you will actually use them, with decision criteria and the mistakes that waste the most time.
The Real Challenge: Inferring the Missing Temporal Dimension
A photograph is a two-dimensional projection of a three-dimensional scene at one instant. Everything that makes video convincing — parallax, occlusion, how fabric folds as a body turns, how light shifts across a face — lives in the dimension the photograph never recorded. The model has to invent it, and invent it consistently, because viewers notice instantly when an earring switches sides or a sleeve melts into a hand.
That is why photorealism in image-to-video is not mainly about texture quality. Modern generators produce skin pores and lens flares easily. The hard part is temporal coherence: keeping invented geometry stable across a hundred frames while still producing believable change.
Three failure modes dominate:
- Identity drift. Faces, logos, and jewellery slowly change shape. The fixes are usually a shorter clip, lower motion amplitude, or more reference images of the same subject.
- Geometric warping. Straight lines bend, hands gain fingers, backgrounds slide independently. This often means the model ran out of context: the source was too tight, too low-resolution, or ambiguous about depth.
- Flicker and texture crawl. Fine detail shimmers frame to frame. Some of it is fixable with temporal denoising; some of it requires a slower, smaller move.
Knowing which of these you are fighting tells you what to change. Rewriting a prompt when the real problem is a 400-pixel source image is the most common way to lose an afternoon.
Choosing the Right Image-to-Video Approach
Not every project needs the same technique. Three broad approaches solve different problems, and picking the wrong one is a bigger mistake than picking the wrong tool.
Single-image animation
You supply one still and a motion description. The model animates in place, holding the composition while adding camera drift, environmental movement, or subtle subject motion. It is the fastest route and the best fit for landscapes, interiors, product hero shots, and portraits that do not need to walk or turn.
Use it when the shot is under about six seconds, the composition is already final, and the motion you need is atmospheric rather than narrative.
Keyframe interpolation
You supply a start frame and an end frame, and the model fills the motion between them. This is how you get a controlled push-in that lands on a specific composition, a reveal, or a match cut between two shots. It is far more directable than single-image animation because you define the destination, not just a vibe.
Use it when the shot has a job in the edit — a transition, a before/after, a reveal. It costs more preparation because you need two carefully matched frames, but the predictability is worth it for client work.
Reference-based character consistency
You supply several images of the same subject — different angles, expressions, or lighting — and the model uses them to hold identity across a shot or a sequence. This is what makes narrative clips possible, and it is the technique that fails most visibly when done badly.
Use it when the same person, character, or product appears in multiple shots. Three to six references with consistent lighting and a neutral background beat twenty chaotic ones.
A useful rule of thumb: if the viewer must believe a specific person or object persists across cuts, invest in references. If they only need to feel motion in a single moment, single-image animation is enough.
Step 1: Preparing Source Assets for Photorealistic Results
The quality ceiling is set here. Generation can sharpen and extrapolate, but it cannot recover detail that was never in the file.
Resolution. Aim for at least 1280 pixels on the short edge, ideally 1920 or more. Upscale before generation, not after — a clean, high-resolution input gives the model more information to work with. Avoid aggressive sharpening; halos get animated along with everything else.
Sharpness and depth of field. A little background blur is fine. Heavy bokeh over the subject — a portrait with one soft eye — gives the model ambiguous edges, and those edges are exactly where warping starts.
Lighting logic. Stick to one dominant light direction with a clear key and fill. Mixed lighting such as window light from the left plus a warm lamp on the right produces flicker and colour shifts as the camera moves.
Composition with headroom. Leave room for the move you plan. A tightly cropped image cannot support a dolly out, and a subject pressed against the frame edge drags the background awkwardly on a push-in.
Edge complexity. Hair, fur, foliage, and chain-link fences are classic troublemakers. Choose sources with cleaner separation, or accept a gentler move.
Sequence consistency. If multiple shots will cut together, match white balance, lens character, and light direction across the source images. Mismatched sources are the main reason a sequence feels like a compilation instead of a scene.
Cleanup first. Remove watermarks, stray text, dust spots, and duplicated limbs. Anything left in the frame gets animated, including the artefacts.
Step 2: Directing Motion With Prompts
A good motion prompt reads like a shot note from a director, not a wish list. Break it into four slots and fill them in order.
Camera. Choose one primary move: locked-off, slow push in, pull out, pan, tilt, orbit, crane, or handheld drift. One. Combining a pan with a zoom and an orbit confuses the model and produces a smear. For compound moves, describe the order: 'starts as a slow push in, then settles into a gentle handheld hold.'
Subject. Use small physical verbs. 'She blinks, turns her head slightly left, and her hair moves in the breeze' works. 'She is happy and alive' does not, because it gives the model no geometry to animate. Quantify amplitude too: subtle, barely perceptible, dramatic.
Environment. Ambient motion sells realism more than subject motion does: steam rising from a cup, leaves shifting, rain on glass, distant traffic, a curtain breathing at the edge of frame. Add one or two, not five.
Atmosphere and grade. Name the light and texture you want held: 'warm late-afternoon sun, soft haze, shallow depth of field, subtle grain.' Keep it consistent with the source. Asking for golden hour on a shot lit like an overcast morning invites colour drift.
Then add a short negative list. The terms that matter most: warping, morphing faces, extra fingers, distorted hands, flicker, jitter, text artefacts, duplicated limbs, background sliding.
Two habits matter here. Keep a prompt log — exact string, source file, settings, outcome. And change one variable at a time. If you alter camera, subject, and amplitude together, you learn nothing when the result improves.
Step 3: Duration, Frame Rate, and Aspect Ratio
Duration. Three to five seconds is the sweet spot. Drift, warping, and texture crawl accumulate over time, and short clips rarely show them. If a scene needs twenty seconds, build it from four or five shots — the edit will be more interesting anyway. Longer single generations work better with keyframe interpolation, where the endpoint constrains the model.
Frame rate. Match the destination. Twenty-four frames per second reads as cinematic and hides small imperfections. Thirty is a safe default for web and social. Fifty or sixty is worth it only if you intend to slow the footage in the edit; otherwise you are paying for frames nobody perceives.
Aspect ratio. Decide before you generate, not after. A 16:9 clip reframed to 9:16 crops the sides of every camera move, which is often exactly where the motion lives. If you need vertical, generate vertical — or generate a wider frame with the subject centred and plenty of room on both sides.
Shot list first. Write the beats before generating anything: what the viewer should understand at second one, three, and five. A two-minute shot list saves an hour of sorting through near-identical clips.
Step 4: Post-Production for Temporal Coherence
Watch it twice. Once at normal speed to judge the feeling, once frame by frame near the start and the end. The opening frames are usually the least stable, so trimming a quarter-second off the head is often the cheapest quality boost available.
Fix flicker before sharpening. Apply temporal denoising or deflicker first. Sharpening a flickering clip amplifies the flicker into visible crawling texture.
Upscale gently. Use a dedicated video upscaler and keep the sharpening amount low. Aggressive upscaling produces a waxy, synthetic look that reads as generated even when the geometry is perfect.
Unify the grade. Small exposure and white-balance differences become obvious in sequence. One adjustment layer with matched contrast, saturation, and a light grain pass does more for realism than generating another dozen takes.
Design sound. Audiences forgive a lot of visual imperfection when the audio is specific and grounded. Room tone, footsteps, cloth movement, a distant car, plus a music bed that does not fight the ambience — this is often the difference between 'AI clip' and 'footage.'
Common Mistakes That Break Photorealism
- Five camera moves in one prompt. The model averages them into a wobble. One move per shot.
- Animating a heavily stylised source and expecting photographic realism. The output inherits the source's visual language.
- Too-tight framing. Every move then fights the frame edge.
- Extreme facial motion from a single reference. Identity morphs fastest here. Keep faces small and build drama elsewhere.
- Ignoring the first half-second, where most warping happens. Trim it.
- Mixing light directions across a sequence. Viewers read it as a continuity error even if they cannot name it.
- Compressed screenshots as sources. Screenshot compression destroys the fine detail the model depends on.
- No shot list and no prompt log. You end up re-solving yesterday's problem instead of finishing today's.
- Skipping audio. Silent photoreal footage still feels like a test render.
A concrete example. A furniture brand has one catalogue photograph of a linen sofa in a sunlit room: 3000 pixels wide, clean edges, one clear window light. The prompt asks for a locked-off camera with a barely perceptible handheld drift, dust motes in the sunbeam, and a curtain breathing at the edge of frame. Duration is four seconds, generated twice for takes. In post, the first eight frames are trimmed, temporal denoise is applied, a warm grade matches the brand's other shots, and room tone plus a soft fabric rustle sits underneath. There is no subject motion at all — and it reads as real footage, because ambient detail is doing the work.
Evaluating Tools and Building a Repeatable Pipeline
Tool choice matters less than pipeline discipline, but the differences are real. Score candidates on:
- Source fidelity — does it preserve the original composition and colour, or improve it into something else?
- Motion controllability — camera moves, keyframes, or motion regions, rather than free-text wishes.
- Consistency support — can it take multiple references for one subject?
- Usable duration — not the advertised maximum, but the length before drift becomes visible.
- Output quality — resolution, frame rate, and whether upscaling is built in.
- Commercial licensing — check terms before you build a campaign on a tool.
- Integration — batch processing, an API, and export formats that fit your editor.
A fast, fair test: take one representative source image, write five prompts that vary only the camera move, and generate the same clip with each candidate. Judge them in a sequence alongside your other footage, not in isolation. Footage that looks impressive alone often falls apart next to real camera work.
Then write the pipeline down: asset prep rules, prompt template, default duration and frame rate, post-production order, export settings. Repeatability is what turns a lucky generation into a service you can deliver on a deadline.
FAQ
Can a single still really produce convincing video?
Yes, for short shots where the motion is ambient rather than narrative. A locked-off or gently drifting camera with environmental movement can look genuinely photographic. Walking, turning, and interacting are the moments where you need keyframes or multiple references.
Why does the face change over the clip?
The model reinvents the face in every frame from imperfect information. Shorten the clip, reduce facial motion amplitude, use a sharper source frame, add reference images, or constrain the endpoint with keyframe interpolation.
How long should generated clips be?
Three to five seconds for single-image animation. Longer only with keyframe control or a very static shot.
How do I keep a character consistent across shots?
Build a reference set of four to six images of the same person with consistent lighting and a neutral background, and keep the description of them identical in every prompt. Match wardrobe, light direction, and lens feel between sources.
What source resolution do I need?
At least 1280 pixels on the short edge; 1920 or more is better. Upscale before generating rather than after.
How many attempts does a usable shot take?
Plan on three to eight generations per finished clip while learning the tool, dropping to two or three once your prompt template is dialled in.
Can I use the output commercially?
Check the licence of each tool you use. Terms differ on commercial use, training data, and attribution. For brand work, log the tool and version used for every delivered clip.
Bringing Still Photography Into Motion
The skill that matters here is not prompt poetry. It is the discipline a director of photography brings to a set: control the light, leave room for the move, decide what the shot is for, and clean up in post. Image-to-video compresses that discipline into an afternoon instead of a production day.
Start with one strong photograph, one camera move, one ambient detail, and four seconds. Watch the result frame by frame. Fix the weakest element — usually the source, occasionally the prompt, rarely the tool. Then repeat with the next shot, and keep the log. Within a week you will have a template that produces reliable photorealistic motion from stills, and a library of clips that cut together like they were shot on the same afternoon.

Alexander
More Blogs
Read MoreVidu Q4 Alternatives: 4K AI Video Models Compared (2026)
Vidu Q4 alternatives compared: Kling 4.0, Seedance 2.5, Wan 3.0, and Runway Gen-4 — 4K support, input modes, durations, audio, and what each costs in credits on Domer.
Top 4K AI Image Generators in 2026: 5 Models Compared on Real Costs
The top 4K AI image generators on Domer compared: Flux 3 Klein, Nano Banana 2.1, GPT Image 2.5, GPT Image 2, and Nano Banana Pro — 4K credit costs, reference limits, and speed.
Nano Banana 2.1 vs GPT Image 2.5: Which Image Model Should You Use? (2026)
Nano Banana 2.1 vs GPT Image 2.5 Flare compared: credit costs per resolution, aspect ratios, reference images, text rendering, and which tasks fit each model.