
Affiliazione
Inizia Gratis Ora
Video to Video AI Generators: A Seamless Transformation Workflow
Oct 13, 2026

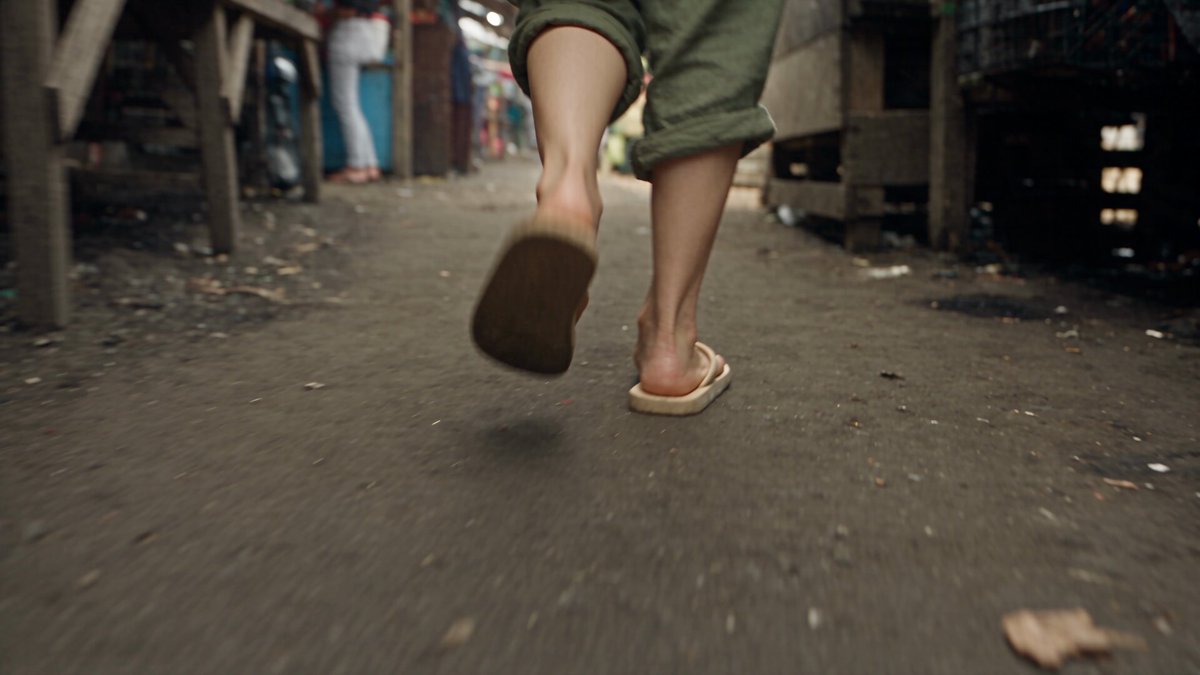
Video to video AI has quietly become the most practical corner of generative media. Text-to-video is still a lottery of physics and motion; video-to-video starts from footage you already trust and regenerates its surface. That inversion — keeping the performance and replacing the pixels — is what makes it usable on real deadlines.
This guide is a workflow-first look at how these systems behave, where they break, and how to build a repeatable pipeline around them. No hype, no vendor pitch: just the decisions that determine whether a render looks seamless or looks like a filter.
What Video to Video AI Changes About Editing
Most editing problems are surface problems. The performance is right, the framing works, the timing lands — but the light is wrong, the location reads as ordinary, the wardrobe does not match the brand, or the footage looks like it was shot on a phone in a stairwell. Historically, fixing surface problems meant a second shoot, a heavy compositing session, or a compromise.
Video to video AI changes that trade-off. Instead of building a shot from nothing, you hand a model existing footage and ask it to re-render each frame while keeping the underlying motion, framing, and timing intact. You are not generating a new performance; you are repainting one.
Three practical consequences follow.
First, source footage becomes an asset library. A clip of an actor walking through a parking garage can become a neon alley, a foggy moor, or a sterile laboratory, provided the geometry and motion read correctly in the source.
Second, iteration gets cheap. Changing a shot from warm documentary to cold thriller takes minutes rather than a reshoot.
Third, the failure modes change. Instead of missing coverage, you get temporal flicker, identity drift, warped hands, or textures that boil between frames. Learning those failure modes is most of the skill.
Where video to video does not help: pacing, performance, sound, and structure. A weak scene does not become strong because it is stylized. Treat the tool as a reimagining and finishing layer, not a screenwriting one.
How the Models Work: A Practical Mental Model
You do not need to read papers to get good results, but you do need a working mental model of what the model is doing to your frames. Otherwise you will blame the tool for problems that live in your source footage or your settings.
Diffusion Pipelines
Most current video-to-video systems are diffusion models. They take a frame (or a latent representation of it), add structured noise, and then denoise it repeatedly while being conditioned on two things: your source frames and your text or image guidance. Control adapters — depth maps, edge maps, pose skeletons, optical flow — act as scaffolding that tells the model where edges, bodies, and motion should stay put.
In practice this means the model has a strong bias toward the structure you feed it. If your depth estimate is wrong because the scene has low contrast, the output will drift. If your pose estimate fails on unusual body shapes, limbs will smear.
GAN and Hybrid Pipelines
Some systems use GAN-based or hybrid architectures. They are often faster and can look razor sharp on a single frame, but they are more prone to temporal instability — a shimmer or crawl that is hard to remove later. Hybrid pipelines mix both: a GAN-style refiner on top of a diffusion base, or the reverse.
Temporal Layers and Why Flicker Happens
Temporal consistency comes from mechanisms that look at neighboring frames: optical-flow warping, cross-frame attention, and latent caching between frames. Flicker appears when those mechanisms disagree — usually because the source has fast motion, rapid exposure changes, or a hard cut that the model tries to smooth over as if it were continuous motion.
Four variables dominate output quality:
- Source bitrate and resolution. Compressed, noisy plates give the model less to work with.
- Motion speed. Slow, controlled movement transforms cleanly; whip pans and handheld chaos do not.
- Control signal quality. Better depth and pose estimation means tighter structural lock.
- Seed and settings stability. Changing settings mid-shot guarantees inconsistency.
Matching the Technique to the Job
Not every transformation needs the same pipeline. Choosing the right one before you render saves hours.
| Goal | Best approach | Main risk |
|---|---|---|
| Stylization (anime, painterly, clay, comic) | Style transfer with a strong reference image | Texture boiling in busy backgrounds |
| Wardrobe or product swap | Region masking plus appearance guidance | Edges and reflections reveal the swap |
| Time of day or weather change | Relight pass with depth control | Shadows that contradict the new light |
| Character or face replacement | Multi-reference identity guidance | Identity drift over long clips |
| Restoration (denoise, deblur, upscale) | Restoration model, light settings | Over-sharpening and plastic skin |
| Frame rate interpolation | Dedicated interpolation pass | Warped motion on fast action |
| Previsualization | Rough stylization with low render count | Over-investing in throwaway shots |
Age progression and likeness work deserve a separate paragraph: they carry consent, disclosure, and legal obligations that vary by jurisdiction. Get written permission, keep records, and disclose synthetic likeness where your audience or platform requires it.
Preparing Source Footage for Clean Transformations
Prep is where most quality is won. A model cannot rescue footage that fights it.
Shoot for the Model, Not Just the Edit
- Prefer a slightly higher shutter speed than you would for a cinematic look; heavy motion blur confuses temporal warping.
- Lock exposure and white balance for the duration of a take. Automatic exposure creates rolling brightness shifts that the model interprets as motion.
- Avoid aggressive zoom and whip pans unless the shot is short and you intend to take the stutter.
- Give faces and hands enough light and enough pixel area. Small, dark, moving faces are the hardest thing in this field.
Split Every Shot at Every Cut
Run each shot as its own render. A single clip with three internal cuts forces the model to either smooth across the cut or flicker at it. Splitting also lets you reuse settings per shot type instead of compromising one global preset.
Work Near Native Resolution
Rendering at the model's native resolution and upscaling after is usually cleaner than feeding a giant frame that gets downsampled internally and then upscaled again. Keep a clean, untouched master of every plate. You will want it when a render fails.
Plan Around Known Weak Spots
Fine text, thin structures, reflective glass, intricate jewelry, and rapidly overlapping limbs are structurally difficult. Either frame them out, increase control signal fidelity, or accept that this shot needs a manual fix in post.
Prompting and Control Signals That Hold Up Over Time
A prompt for video to video should describe the look, not retell the action. The action is already in your footage. Models respond badly to prompts that contradict their structural conditioning.
A reliable prompt has six parts: subject identity, environment, lighting, camera character, grade and texture, and constraints. For example:
A weathered fisherman in a wool sweater, standing on a rain-soaked wooden pier at blue hour, overcast diffuse light with a single practical lamp behind him, handheld 35mm lens character, muted teal shadows with warm highlights, fine grain, no text, no logos, realistic skin texture.
Notice what is missing: no verbs describing motion, no camera moves, no numbers of people. The source clip supplies those.
Keep Prompts Stable Across Shots
Changing the prompt between shots is the fastest way to break continuity. Lock a base prompt, then vary only one clause per shot — for example, the environment clause — while keeping lighting, grade, and texture identical.
Use Reference Images Aggressively
Text is a blunt instrument. A single style reference image communicates more about lighting, palette, and material behavior than three sentences. If your tool supports multiple references, split them by role: one for subject appearance, one for wardrobe, one for environment and grade. Feeding conflicting references is worse than feeding one clear one.
Negative Guidance Matters
If the tool supports exclusions, use them. Common entries: oversaturated colors, plastic skin, warped fingers, text artifacts, lens flare, watermark, low detail. Keep the list short; a long exclusion list can flatten the output.
Keyframe Control, Scene Consistency, and Temporal Drift
Temporal drift is the slow decay of consistency over a long clip. A character's face changes, a jacket's color wanders, and the grade slowly shifts. It is the single most common reason a render gets rejected.
Anchor the Beginning and the End
If your tool accepts first-frame and last-frame references, use them. Defining both ends constrains the middle and dramatically reduces drift. For moving shots, pick the two frames with the clearest subject detail.
Freeze the Seed
The moment you change a seed, the model's internal noise pattern changes and with it, the texture character of every frame. Lock the seed for a sequence and treat any change as a deliberate creative decision.
Multi-Reference Fusion
When a subject must stay consistent across many shots, supply several references of the same subject from different angles and lighting states. The model averages them into a stable identity. This is also the correct approach for products: front, three-quarter, and detail shots.
Handle Long Takes with Overlap
For takes longer than the model's maximum clip length, split into chunks with 12 to 24 frames of overlap. Render each chunk, then blend the overlap in your editor with a cross-dissolve or a short morph. This is far more reliable than hoping two independently rendered chunks line up.
A Repeatable Production Workflow, Step by Step
Here is the pipeline that holds up across projects.
Step 1: Define the Deliverable
Write down resolution, frame rate, aspect ratio, total duration, and where the content will be viewed. A vertical social cut and a wide cinematic cut demand different source framing and different render settings.
Step 2: Build a Look Bible
Collect three to five reference stills and one paragraph of written direction. This becomes your style reference set and your prompt source. Get it approved before rendering anything.
Step 3: Prepare and Split Source Clips
Conform the edit first. Then export individual shots with handles — extra frames at the head and tail for trims and blends.
Step 4: Run a Test Grid
Render two-second samples across three or four settings combinations: strength, guidance scale, control signal weight, seed. Compare side by side. This is the cheapest hour you will ever spend.
Step 5: Lock and Batch
Once settings are locked, batch render every shot with identical parameters. Log the settings per shot; you will need them for pickups.
Step 6: Assemble and Match
Bring renders into the timeline, match color between shots, and hide the seams at your overlap blends. Add any elements that did not survive the render — text overlays, logos, VFX — as conventional layers.
Step 7: Sound and Finishing
Audio resets the audience's perception of image quality. A render with slight textural instability lands perfectly over a confident sound design, and a technically perfect render can feel hollow with weak sound.
Quality Control: Checks, Mistakes, and Fixes
The QC Checklist
Watch every render twice: once at normal speed for feel, once frame by frame for artifacts.
- Flicker: brightness or texture pulsing across frames.
- Identity drift: facial structure, age, or wardrobe wandering over a long clip.
- Edge warping: halos around hair, shoulders, and fast-moving objects.
- Texture boiling: flat surfaces such as walls and skies that crawl.
- Hand and finger artifacts: extra digits, fused shapes.
- Judder and stutter: repeated or dropped frames after interpolation.
- Color mismatch: shots that no longer cut together.
- Resolution shimmer: detail that sharpens and softens cyclically.
Common Mistakes
Over-ambitious prompts. Asking the model to change everything at once produces mush. Change one dimension per render pass: look, then relight, then repair.
Rendering long clips. Ten-second clips drift. Two to four seconds per pass is where consistency lives.
Switching model or settings mid-shot. Even small setting changes read as a visible seam.
Skipping overlap handles. Without them, blends become obvious jumps.
Ignoring motion blur. Shots with heavy blur produce smeared, painterly output that usually gets rejected.
Jumping straight to final resolution. Test small, finish large. Rendering full resolution during experimentation wastes time and hides problems in scale.
Not archiving plates and settings. Reproducing a look six weeks later is impossible without a log.
Fixes That Work
For flicker, lower the transformation strength and increase temporal smoothing. For drift, add a last-frame reference and lock the seed. For edge warping, raise the weight of the depth or edge control signal and slow subject motion. For texture boiling, reduce guidance scale or add a slightly noisy reference to stabilize flat areas. For color mismatch, fix it in post rather than re-rendering — a simple grade match between shots is faster and often better.
Choosing Tools: Decision Criteria That Actually Matter
Feature lists all look similar. These criteria are the ones that determine whether a tool survives a real production.
Control signal support. Look for depth, edge, pose, and flow guidance. Tools limited to text and image guidance will wander.
Clip length and seed control. If you cannot fix a seed or render longer than a few seconds, you are stuck doing manual blending for every shot.
Reference handling. Multi-image and multi-role references are the difference between a stable character and a different person every four seconds.
Batch throughput and predictability. You need to know how many shots you can render in an evening and how long a retry takes. Unpredictable rendering kills iteration.
Source fidelity. Check whether the tool preserves fine detail such as fabric weave, or smooths everything into wax.
Export and color handling. Confirm codecs, bit depth, and color space. A beautiful render in the wrong color space is a reshoot in post.
Licensing and commercial rights. Read the terms for commercial use, model outputs, and any restrictions on likeness or sensitive content.
Privacy and hosting. For client work under NDA, know where your footage is processed and how long it is stored.
API and automation. If you render dozens of shots per week, scriptability matters more than a polished interface.
A practical evaluation method: take one five-second, moderately difficult clip — a person walking and turning — and run it through three tools with matched settings. Compare face stability, edge quality, flicker, and time to a usable result. This single test tells you more than any feature comparison.
FAQ and Where This Is Heading
Do I need a powerful machine to work this way?
Not necessarily. Many pipelines run in the cloud, which shifts the constraint from hardware to render time and budget. Local options exist but demand strong GPUs and patience. The deciding factor is usually how many iterations per day you need.
How long does a short clip take to render?
Expect anywhere from a minute to several minutes per second of output at working resolution, depending on the model, guidance complexity, and hardware. Test renders at low resolution can be up to ten times faster, which is why the test grid step matters so much.
Can video to video fix badly shot footage?
It can improve lighting, color, noise, and resolution convincingly. It cannot recover content that is not there: blown highlights, lost shadow detail, severe rolling shutter, and out-of-focus faces all remain problems. Restoration models help subtly; they do not reconstruct reality.
Does it work on phone footage?
Yes, and often impressively, because modern phone footage is sharp, well exposed, and heavily stabilized — all friendly to control signal estimation. The limiting factors are low-light noise and heavy computational blur on skin.
What happens to the audio track?
Video renders usually return video only. Reconnect your original audio in the edit, then adjust timing if the render shifted the frame rate or duration.
How do I keep a character consistent across many shots?
Use multiple references from different angles, lock the seed, anchor first and last frames, and keep lighting direction consistent between source shots. Consistency is easier to preserve than to repair.
Can this replace a VFX team?
For stylization, cleanup, environment changes, and previz, yes, on many mid-budget projects. For precise simulation, physics-accurate destruction, or anything that must match a plate exactly, it complements rather than replaces traditional compositing.
Is disclosure required?
In many jurisdictions and on many platforms, synthetic or heavily manipulated likenesses must be disclosed, especially for realistic depictions of real people. Establish a policy before the first render, not after the first complaint.
Where This Is Heading
The direction of travel is clear: more control, shorter iteration, and tighter integration with editing timelines. Expect stronger keyframe conditioning, better motion transfer between reference performances, and more reliable long-form consistency. The practical result is that the skill premium shifts even further toward preparation and judgment — how you light, how you frame, how you split a sequence, and how well you can tell the difference between a render worth keeping and one worth redoing.
The teams that get the most from video to video AI will not be the ones with the most exotic settings. They will be the ones with clean plates, locked settings, disciplined test renders, and a QC pass that never gets skipped. Everything else is decoration.

Alexander
More Blogs
Read MoreVidu Q4 Alternatives: 4K AI Video Models Compared (2026)
Vidu Q4 alternatives compared: Kling 4.0, Seedance 2.5, Wan 3.0, and Runway Gen-4 — 4K support, input modes, durations, audio, and what each costs in credits on Domer.
Top 4K AI Image Generators in 2026: 5 Models Compared on Real Costs
The top 4K AI image generators on Domer compared: Flux 3 Klein, Nano Banana 2.1, GPT Image 2.5, GPT Image 2, and Nano Banana Pro — 4K credit costs, reference limits, and speed.
Nano Banana 2.1 vs GPT Image 2.5: Which Image Model Should You Use? (2026)
Nano Banana 2.1 vs GPT Image 2.5 Flare compared: credit costs per resolution, aspect ratios, reference images, text rendering, and which tasks fit each model.