
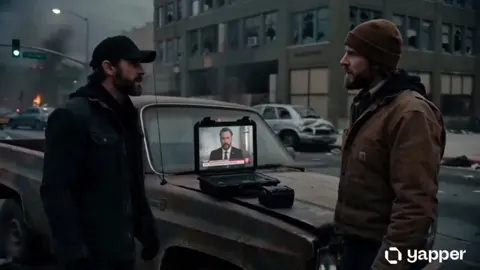
AI Animation Video Generators: A Complete Creative Workflow
Oct 13, 2026
Why AI Animation Became a Practical Production Tool
For most of its history, animation was gated by three things: time, money, and specialized skill. A thirty-second explainer with clean motion typically required a storyboard artist, an animator, a compositor, and a sound designer, and every handoff added days. Generative video models have not eliminated that pipeline, but they have collapsed the first half of it. A solo creator can now move from script to a rough animated sequence in a single afternoon, then spend their remaining attention on the parts that actually differentiate the work.
What changed is not simply image quality. Three capabilities matured at roughly the same time:
- Temporal consistency. Frames now hold together across a shot. Earlier models produced beautiful stills that dissolved into noise the moment they moved.
- Controllability. Camera moves, motion strength, depth cues, and pose references are exposed as inputs rather than hidden randomness.
- Access. Most of this runs in a browser. You no longer need a workstation-class GPU to test an idea.
The practical promise is worth stating precisely: these tools reduce the cost of iteration, not the need for craft. A generator will happily produce hundreds of mediocre seconds of footage. Deciding which twenty seconds are worth keeping is still editorial work, and it is still the difference between a demo reel and something people watch to the end. The rest of this guide is about building a repeatable process around that reality.
What AI Animation Generators Actually Do (And What They Don't)
Before comparing tools, separate the categories. Most AI animation products are one of four things, and conflating them leads to choosing the wrong one.
The core generation modes
Text to video. You describe a shot and get a clip. Best for exploration, mood boards, and shots where you do not need exact control over composition.
Image to video. You supply a still and the model animates it. This is the workhorse for controlled production, because the still locks composition, character design, and lighting before a single frame moves.
Video to video. You supply existing footage and restyle, relight, or re-time it. Useful for turning live-action reference into stylized animation, or for matching a client's existing brand footage.
Audio-driven generation. Talking heads, lip sync, and performance transfer. Relevant for explainers, training content, and character dialogue.
Where quality still breaks down
Be honest about failure modes, because they shape how you plan shots:
- Hands and complex interaction. Objects passed between characters, fingers gripping tools, and overlapping limbs remain the most common artifacts.
- Text inside the frame. Signs, labels, and interface screens usually need to be composited in post rather than generated.
- Long continuous takes. Quality drifts over duration. Four to eight second shots behave far better than thirty-second ones.
- Character identity over time. A face can shift subtly between shots, which reads to an audience as a recast.
- Physical continuity. Splashes, smoke, cloth, and fluid motion are improving but still unpredictable.
The practical takeaway is a shot-length rule: design your scene as a sequence of short, purposeful shots rather than one continuous take. That constraint matches how animated films are actually cut, so it costs you less than it sounds like.
Choosing the Right Generator for Your Project
Decision criteria that matter more than hype
Ignore the leaderboards for a moment and score candidates against your actual deliverable:
- Maximum clip length per generation. Anything under four seconds is a storyboard tool, not a production tool.
- Resolution and aspect ratio support. Vertical, square, and ultrawide all need to be native, or at least croppable without losing your subject.
- Control inputs. Depth maps, pose, edge detection, camera paths, and motion brushes separate tools you can direct from tools you can only prompt.
- Consistency features. Reference image slots, seed locking, and character memory materially change how much rework you do.
- Iteration speed. A fast model with average output often beats a slow model with excellent output, because you will generate a couple of dozen variations to find one.
- Licensing clarity. Know what you can use commercially, and keep the documentation.
- Export and interoperability. Clean high-bitrate files, alpha where needed, and metadata that survives a round trip through your editor.
Matching the tool to the deliverable
Different projects weight those criteria differently. A useful rough mapping:
- Vertical social loops. Prioritize stylization, speed, and native 9:16 output. Runway, Pika, and Luma-class tools are common picks here.
- Narrative shorts and previsualization. Prioritize shot length and camera control. Kling, Veo-class systems, and Sora-style models are built for this.
- Character-led animation. Prioritize identity consistency and reference conditioning over raw image quality.
- Local, repeatable pipelines. Prioritize open models you can run yourself, such as Stable Video Diffusion, AnimateDiff, or Wan inside a ComfyUI graph, where every parameter is a node you can version.
- Style transfer over existing footage. Prioritize video-to-video fidelity and temporal stability.
Most experienced creators end up with two tools: a hosted model for speed and ideation, and a controllable pipeline for final shots. Budget for that combination rather than searching for one perfect product.
Pre-Production: Turning a Script into Shots
The shot list is the real productivity hack
Generating video without a shot list is how you burn an afternoon and end up with nothing usable. Write the list first, in a plain table:
| # | Shot | Duration | Camera | Motion | Notes |
|---|---|---|---|---|---|
| 1 | Wide establishing, harbour at dawn | 5s | Locked off | Slow water drift | Gradient sky, no people |
| 2 | Medium, courier walks left to right | 6s | Tracking | Steady pace | Must match costume in shot 4 |
| 3 | Close-up, hands open a crate | 3s | Static | Subtle | Risk: hands, allow extra takes |
| 4 | Medium, courier enters workshop | 5s | Push in | Slow dolly | Warm interior light |
Two things happen when you work this way. First, you can tell which shots are risky and generate extra variations for them. Second, you notice continuity problems on paper, where fixes are free.
Style references and character sheets
Collect eight to twelve reference images before you generate anything: lighting, palette, costume, face, environment. Group them into a look board and a character sheet. Then write the style in words as a short paragraph you paste into every prompt. Consistency across a sequence comes more from repeating the same description than from hoping the model remembers.
Prompt Design for Animation and Motion
Describe motion, not just subjects
Static descriptions produce static-looking video. Compare:
- Weak: a woman in a forest
- Strong: medium shot, a woman in a red coat walks left to right through a birch forest, camera tracks sideways at her pace, mist drifts across the frame, soft overcast light, shallow depth of field
The second version specifies subject, action, direction, camera behaviour, atmosphere, and light. Motion verbs and camera verbs do most of the work.
Camera language models understand
Use standard film vocabulary, and use it sparingly: dolly in, dolly out, truck left, crane up, orbit, tilt, whip pan, rack focus, locked off, handheld. One camera instruction per shot. Stacking three moves produces a wobbling, incoherent result that is difficult to rescue in the edit.
Build prompts in layers
A reliable order: subject, action, environment, camera, lighting, style, technical constraints. Keeping the order stable makes controlled experiments possible. Change one layer, hold the rest, compare outputs, and keep the version that wins.
Negative prompts and constraints
Most tools accept a negative list. Useful entries include blur, warping, extra fingers, duplicated limbs, flickering, text artifacts, logo distortion, jitter, and morphing faces. Keep the list short and specific. Long negative lists tend to fight the positive prompt and flatten motion.
A Repeatable Production Workflow
Step 1 - Lock the script and shot list. No generation until the list is stable. Rewrites after generation are expensive in a way that rewrites before generation are not.
Step 2 - Generate stills first. Use an image model for every shot. Fix composition, costume, and lighting here, where each iteration takes seconds instead of minutes.
Step 3 - Animate from stills. Feed each approved still into an image-to-video model with a short motion prompt. This is the highest-leverage habit in the entire workflow.
Step 4 - Generate variations and keep a library. Four to six takes per shot is normal. Name files by shot number and take, and keep the rejects. A rejected take often solves a later problem.
Step 5 - Assemble a rough cut early. Drop the best takes into your editor before the sequence is complete. Seeing shots next to each other reveals pacing and continuity issues that are invisible in isolation.
Step 6 - Re-render only what fails. Do not regenerate whole sequences. Fix the two shots that break the rhythm.
Step 7 - Finish. Upscale, stabilize, grade, and add sound. This is the stage most people skip, and it is where amateur output becomes presentable.
Consistency: The Hardest Problem in AI Animation
Character identity
Use a reference image or character slot every time, keep the same model and version across a sequence, and avoid unnecessary wide shots of faces. When a face drifts, fix the still and re-animate rather than trying to correct it in motion.
Style consistency
Lock one look paragraph, one palette, and one grain treatment. Applying the same grade and a subtle grain pass across every shot hides small model differences surprisingly well.
Motion continuity
Match direction and speed between adjacent shots. If a character exits frame right in shot two, they should enter from frame left in shot three. That single rule sells more continuity than any technical trick.
Environment continuity
Generate a master establishing image for each location and use it as a reference for every shot in that location. Weather, time of day, and props should be stated explicitly for each shot, not assumed.
Editing, Sound, and the Final Polish
Generated footage has no sound, and sound is what makes animation feel real. A practical post pipeline:
- Cut for rhythm. Short shots create energy; longer holds create emotional beats. Cut on motion wherever possible.
- Stabilize and retime. Warp stabilizers and slight speed changes, between roughly 90 and 110 percent, iron out small inconsistencies.
- Layer ambience first. Room tone, wind, city hum. Ambience glues disconnected shots into one space.
- Add spot effects. Footsteps, cloth movement, whooshes on camera moves. Even approximate effects raise perceived quality dramatically.
- Score last. Music sets pace, so do not let it dictate the edit too early.
- Grade and grain. Unify color, match black levels across every clip, and add a light grain pass.
- Deliver per platform. Vertical at the destination's preferred resolution, captions burned in or supplied as files, and loudness normalized to standard targets.
Common Mistakes and Quality Control Checklist
The recurring mistakes are predictable:
- Writing a shot list after generating footage instead of before.
- Using long, wandering prompts with multiple camera moves.
- Mixing model versions inside one sequence, which creates visible style seams.
- Ignoring audio until the end.
- Rendering at final resolution while still exploring, which multiplies cost and wait time.
- Forgetting to verify licensing before publishing.
A short checklist to run before export:
- [ ] Every shot under eight seconds, or intentionally held for a reason
- [ ] Character face consistent across all appearances
- [ ] Screen direction consistent between adjacent shots
- [ ] No visible warping, extra limbs, or text artifacts
- [ ] Color and grain consistent across the whole sequence
- [ ] Audio levels normalized and ambience continuous
- [ ] Aspect ratio and safe areas verified for each destination
FAQ
Do I need animation experience to use these tools? Not to start, but editing and storytelling experience matters more than animation skill. Knowing how to cut a sequence and where to place a beat is what separates watchable output from random clips.
How long should each generated shot be? Four to eight seconds is the sweet spot. Longer shots drift; much shorter shots are hard to cut with rhythm.
Why do my characters change between shots? Identity drift comes from inconsistent reference material and mixed model versions. Lock a character sheet, reuse the same seed or reference image, and keep one model per sequence.
Can I use generated animation commercially? Usually yes, but terms vary by tool and by plan. Read the license for every product you use and keep documentation of your source assets.
Should I use text-to-video or image-to-video? Use image-to-video for anything that needs control over composition or character. Text-to-video is best for exploration and mood.
How many takes should I generate per shot? Four to six during exploration, two to three once your prompt template is dialed in and your reference images are locked.
What software do I need alongside a generator? A non-linear editor with stabilization and color tools, plus a sound effects and ambience library. Most of the quality gain in AI animation happens outside the generator itself.
How do I make generated animation look less synthetic? Shorten shots, cut on motion, add ambience and spot effects, unify color with a grade, and add subtle grain. Consistency across shots reads as craft, and craft is what viewers notice.
Is a local pipeline worth the setup time? If you need repeatability, exact parameter control, and no per-render limits, yes. If you are still experimenting and need speed, hosted tools get you further faster. Many creators run both: hosted models for ideation, a local graph for final delivery.

Alexander
More Blogs
Read MoreMontaggio video rapido: transizioni e software per l'AI
Guida pratica al montaggio video rapido con AI: transizioni fluide, software, workflow, coerenza visiva, errori da evitare e FAQ operative.
Building an AI Video Production Workflow From Concept to Cut
A practical guide to planning, generating, editing, and finishing AI-assisted videos with consistent characters, clear shot lists, and reliable review loops.
A Repeatable Post-Production Workflow for Polished AI Video
Build a repeatable AI video post-production pipeline: organize assets, cut story-first, design transitions, refine audio, and review versions calmly.