
Utwórz
AI Video Generation Workflow: From Prompt to Viral Clip
Oct 13, 2026
Why AI video generation changed the production math
A decade ago, a single branded video required a camera package, a crew, a location, a lighting plan, a sound recordist, and a post-production schedule measured in weeks. Today, a small team of two or three people can produce a visually credible thirty-second spot in a single afternoon, then generate nine variations of it before lunch the next day. That shift is not about replacing craft. It is about changing the cost of iteration.
The real change is not that machines can paint moving pixels. It is that the feedback loop collapsed. When a shot costs almost nothing to attempt, creative decisions become empirical rather than theoretical. You stop arguing about whether a slow dolly push will feel cinematic and simply generate three versions of it. You stop guessing whether the audience prefers a talking-head hook or a dramatic cold open, because you can publish both and read the retention graph.
But cheaper generation does not mean easier outcomes. It moves the bottleneck. Instead of struggling to shoot, teams now struggle to choose, organize, and finish. Generated footage arrives fast and inconsistent: lighting drifts between shots, characters change wardrobe, hands behave strangely, and camera movement ignores your instructions. The teams that win with these tools are not the ones with the most spectacular prompts. They are the ones with the most disciplined pipelines.
This guide lays out a practical, tool-agnostic workflow you can run with Kling AI, Runway, Pika, Luma, Veo, Wan, or whatever model ships next quarter. The names will keep changing. The pipeline should not.
The building blocks of an AI video pipeline
Before you write a single prompt, understand the three fundamental generation modes and what each one is actually good at. Most failed projects come from using the wrong mode for the job.
Text-to-video, image-to-video, and video-to-video
Text-to-video turns a written description into a moving clip. It is the most flexible mode and the least controllable. Use it for establishing shots, abstract transitions, mood plates, backgrounds, and B-roll where precise subject identity does not matter. It is a poor choice for anything requiring a specific face, logo, or product model to remain consistent.
Image-to-video animates a still frame you supply. This is the workhorse of professional AI video work because it gives you total control over composition, casting, wardrobe, and branding before a single frame moves. You can produce the still in a photo editor, an image model, or with a real camera, then let the video model add motion, parallax, and atmosphere. If you want a consistent character across twelve shots, image-to-video with a locked reference set is almost always the answer.
Video-to-video restyles or modifies existing footage. It is useful for stylistic passes, day-for-night conversion, cleanup, and turning phone footage into something more stylized. It is also the mode most likely to introduce artifacts, because the model is fighting the original motion rather than inventing its own.
Choosing a model for the shot, not for the hype
Every few months a new model tops a leaderboard, and every few months teams rebuild their entire pipeline around it, only to discover it is worse at the thing they actually need. Evaluate models against a short checklist instead:
- Motion realism. Does it handle human movement, cloth, and hair without melting?
- Prompt adherence. Does it follow camera direction and subject placement, or does it improvise?
- Duration per generation. Longer native clips reduce stitching work later.
- Reference consistency. Can it hold a character or product across multiple shots?
- Aspect ratio support. Vertical, square, and widescreen all matter if you publish across platforms.
- Watermark and licensing terms. Commercial clearance should be verified before you build a campaign on top of it.
- Iteration speed. A model that returns results in ninety seconds is often more valuable than a prettier one that takes ten minutes, because it lets you explore more.
A practical habit: keep a small test reel of five standard shots, and run every new model through the same reel before adopting it. Compare side by side. This takes twenty minutes and saves weeks.
Prompt structure that survives a generation
Vague prompts produce vague video. A reliable prompt has six slots, and you should fill them in the same order every time so your team can review and edit prompts quickly:
- Subject — who or what, with one or two distinguishing details.
- Action — the single motion happening in the shot.
- Setting — location, time of day, weather, atmosphere.
- Camera — framing, angle, movement, lens feel.
- Lighting and color — key light direction, contrast, palette.
- Style and pacing — film reference, texture, speed.
A finished example reads like this: A weathered fisherman in a yellow raincoat pulls a rope hand over hand, standing on a wet wooden dock, overcast dawn, medium shot from a low angle with a slow handheld drift, soft diffused light with cool blue shadows, muted documentary color grade, 24fps filmic texture.
Notice what is missing: no mention of resolution, no stack of disconnected adjectives, and no instruction to include text or logos, which almost every model handles badly. If you need on-screen text, add it in the edit, not in the generation.
A repeatable eight-stage workflow
This is the core of the system. Run it end to end on small projects until it becomes muscle memory, then scale it.
Stage 1: Brief, hook, and success metric
Write one sentence describing who the video is for, one sentence describing what they should feel or do, and one number that defines success. A retention target, a click-through rate, a save rate, a lead count. Without a number, you cannot tell whether a creative choice worked, and the whole iterative advantage of AI video disappears.
Stage 2: Shot list and storyboard
Convert the script into a shot list before generating anything. Each row should specify shot number, duration, mode (text-to-video or image-to-video), prompt, and reference asset. Then build rough storyboard frames — even crude ones — so you can sequence the story visually. This is the step teams skip when they are excited, and it is the step that saves the most time.
Stage 3: Reference preparation
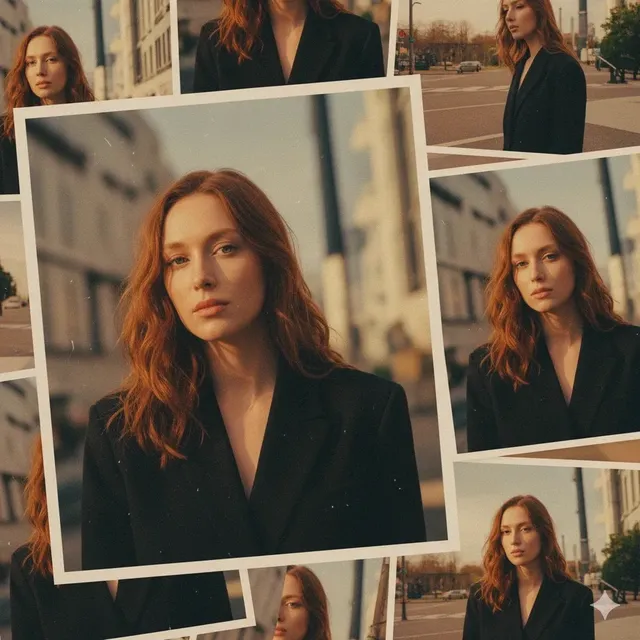
For any project with recurring characters or products, prepare reference images first. Generate or shoot a clean, well-lit still of your subject from a few angles. Lock wardrobe, hair, and lighting. These references become the anchor for every subsequent shot, which is what keeps a series from looking like it was assembled from unrelated stock footage.
Stage 4: Generation and selection
Generate in batches of three to five per shot, not one at a time. Review with a simple rubric: does it match the storyboard, is the motion clean, does the lighting match adjacent shots? Keep a rejection reason for each discard. After twenty rejections, patterns appear — usually the model is failing on a specific type of motion or lighting — and you can adjust the prompt template rather than guessing repeatedly.
Stage 5: Assembly, sound, and graphics
Cut the selects to a temp music track. Generated clips rarely carry usable audio, so build the sound design yourself: ambient bed, movement whooshes, music, and voiceover. Add captions. Corrections — color matching, speed ramps, stabilizing, removing a bad frame — are normal and expected. Budget roughly one hour of editing for every ten seconds of finished AI footage if you are aiming for a polished result.
Stage 6: Localization and cutdowns
The same asset should yield a vertical cut, a square cut, and a widescreen cut, plus a six-second loop and a fifteen-second version. Reframe rather than regenerate where possible; regenerating breaks visual continuity and wastes time.
Stage 7: Publishing with platform-native packaging
The first three seconds decide everything. Write the hook as a text overlay, not just a spoken line. Match the aspect ratio, caption style, and pacing to the platform. Upload natively rather than linking out.
Stage 8: Review loop
Twenty-four hours after publishing, record retention at three seconds, average watch time, and the point where the audience leaves. Feed that back into Stage 1 for the next asset. This is the loop that separates channels that grow from channels that plateau.
Prompt patterns that fix common problems
Most AI video frustration is repetitive. The fix is a small library of patterns you apply when a specific failure appears.
| Problem | Likely cause | Prompt or workflow fix |
|---|---|---|
| Subject morphs mid-clip | Model lacks identity anchor | Switch to image-to-video with a locked reference frame |
| Motion is too fast | Action word is ambiguous | Specify speed: "slow, deliberate motion" and one action only |
| Camera ignores direction | Too many instructions at once | One camera instruction per generation, keep it first |
| Lighting jumps between shots | No lighting vocabulary | Standardize lighting phrases across the whole shot list |
| Hands and fingers distort | Model limitation | Reframe to a wider shot or keep hands out of frame |
| Output looks plastic | Over-stylized prompt | Add texture words: grain, natural skin, filmic, documentary |
| Clip ends mid-motion | Duration mismatch | Generate longer, then trim to the usable segment |
Two additional habits help. First, write negative guidance where the tool supports it — no text overlays, no extra limbs, no camera shake, no warping. Second, keep a running prompt log with the output quality rating, so your team builds an internal knowledge base instead of rediscovering the same lessons.
Editing and finishing: where generated footage becomes a real video
Raw generated clips almost never carry a finished video on their own. The craft layer is where quality is decided.
Color matching is the most valuable skill in this workflow. Generated shots drift in white balance and contrast. Apply a light grade — a shared look-up table, matched black levels, consistent saturation — and suddenly twelve unrelated clips read as one film.
Sound design does more for perceived quality than pixel detail. A convincing ambient layer makes a flat clip feel real. Add room tone, footsteps, cloth movement, a distant city hum. Then place music that supports the emotional arc rather than fighting it.
Pacing should be faster than you think. AI footage often looks best in two-to-three second pieces intercut with real footage, graphics, or text. Long uninterrupted AI shots draw attention to their own imperfections.
Text and motion graphics are your safety net. Lower thirds, kinetic captions, progress bars, and product callouts hide weak frames and add information density that keeps viewers watching.
A useful finishing rule: every final video should contain at least three distinct visual sources — generated footage, real footage or stills, and designed graphics. The mix is what makes the result feel intentional rather than synthetic.
Platform-native distribution and cutdown strategy
Distribution is not a final step; it is a design constraint. Decide the platforms before you generate, because aspect ratio and duration requirements should shape the shot list.
For short-form vertical platforms, the winning structure is usually: hook in under two seconds, one clear idea, escalating visual change every two to three seconds, and a payoff or loop at the end. For long-form platforms, AI video works best as illustration inside a larger narrative — an opening sequence, a metaphor segment, a visual explainer — rather than as the entire runtime.
Cross-promotion should be deliberate. Turn a long-form video into six short vertical clips. Turn a short clip into a carousel of storyboard frames. Turn comments and questions into the next video's hook. Publish a consistent cadence rather than a burst followed by silence, because recommendation systems reward predictability as much as quality.
If you collaborate with creators or brand partners, give them finished assets, not raw prompts. A packaged clip with captions, a suggested hook text, and a suggested caption is far more likely to be published unchanged, which keeps your visual identity consistent across every channel it touches.
Measuring what matters and iterating
Vanity numbers — total views, follower counts — tell you very little about whether the workflow is working. Track four metrics instead:
- Three-second retention. Fixes belong in the hook, not the middle of the video.
- Average watch percentage. Tells you whether the pacing holds.
- Engagement quality. Saves, shares, and comments that reference specific moments.
- Conversion events. Clicks, signups, or purchases attributed to the video.
Run structured tests, one variable at a time. Same footage, two different hooks. Same hook, two different openings. Same opening, two different lengths. After a dozen tests you will know more about your audience than any trend report can tell you, and you will stop producing content on instinct alone.
Common mistakes and how to avoid them
Chasing novelty over consistency. A brand-new model is not a strategy. Consistency of look, tone, and cadence compounds; novelty resets.
Generating before storyboarding. Producing thirty beautiful clips with no structure wastes effort. Write the shot list first.
Ignoring continuity. Characters that change appearance between shots break immersion faster than low resolution ever will. Lock references early.
Overloading prompts. Three good instructions beat twelve contradictory ones. One action, one camera move, one lighting mood per generation.
Underestimating post-production. The generation is maybe 30 percent of the work. Editing, sound, captions, and grading are the rest.
Publishing without a hook. A great clip with a weak first second performs worse than a mediocre clip with a strong one.
Skipping rights review. Confirm commercial usage terms, model training disclosures, and any watermark requirements before you attach a brand to generated footage.
Workflow blueprints for three levels of ambition
Solo creator, fast turnaround. One model, image-to-video only, five shots per video. Prepare three reference stills, generate batches of three, edit in a single afternoon, publish daily. Optimize for volume and learning speed.
Small team, campaign quality. Two models for redundancy, a shared shot list template, one editor, one sound designer. Fourteen to twenty shots per piece, two publishing days per week, and a structured test calendar. Optimize for repeatable quality.
Studio pipeline, multi-channel output. Multiple models routed by shot type, a reference library with version control, a review checklist, and a localization step. One hero asset feeds a dozen cutdowns across platforms and languages. Optimize for reach per production hour.
Each level uses the same eight stages. The difference is depth per stage, not a different philosophy.
FAQ
Do I need to be a video editor to make this work? You need basic editing literacy: cutting to music, timing, color matching. Those skills are learnable in a few weeks and matter more than prompt writing.
How many generations should I plan per finished shot? Assume three to five, and more for anything with human faces or complex motion. Batch them to keep review efficient.
Which is better, text-to-video or image-to-video? Image-to-video for anything requiring consistency and control. Text-to-video for atmosphere, backgrounds, and abstract transitions.
Can AI video replace real footage entirely? It can for some formats, especially stylized short-form and explainer content. Hybrid approaches — real product footage intercut with generated sequences — usually outperform either source alone.
How do I keep characters consistent across a series? Build a locked reference set of stills for each character, reuse the same prompt template, and never introduce a new reference mid-project without regenerating the earlier shots.
What is the fastest way to improve results? Improve the first three seconds. Hook strength drives retention, and retention drives how far the platform distributes everything else you publish.
Should I generate audio with the video? Use AI audio for temp timing only. Record or license final voiceover and music for anything public-facing.
How often should I revisit my model stack? Quarterly is enough. Testing constantly burns more time than it returns.
The tools will keep improving, faster and cheaper, and the flood of generated video will only increase. What will remain scarce is judgment: knowing which shot to make, which to cut, and which hook earns the next three seconds of someone's attention. Build the pipeline once, and it will carry you across every model that arrives after it.

Alexander
More Blogs
Read MoreVidu Q4 Alternatives: 4K AI Video Models Compared (2026)
Vidu Q4 alternatives compared: Kling 4.0, Seedance 2.5, Wan 3.0, and Runway Gen-4 — 4K support, input modes, durations, audio, and what each costs in credits on Domer.
Top 4K AI Image Generators in 2026: 5 Models Compared on Real Costs
The top 4K AI image generators on Domer compared: Flux 3 Klein, Nano Banana 2.1, GPT Image 2.5, GPT Image 2, and Nano Banana Pro — 4K credit costs, reference limits, and speed.
Nano Banana 2.1 vs GPT Image 2.5: Which Image Model Should You Use? (2026)
Nano Banana 2.1 vs GPT Image 2.5 Flare compared: credit costs per resolution, aspect ratios, reference images, text rendering, and which tasks fit each model.