
Anime AI Video Generator Workflow: A Practical Creator Guide
Oct 13, 2026

Why Anime-Style AI Video Is a Workflow Problem, Not Just a Prompt
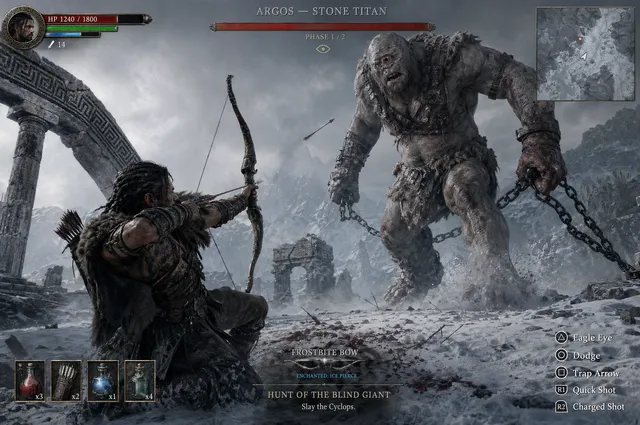
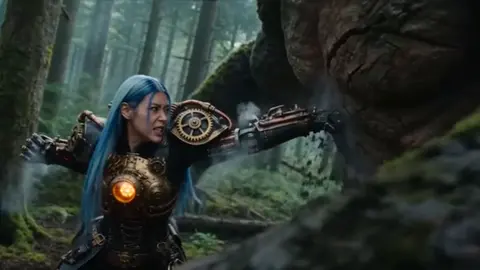
Anime-style AI video generation has moved from novelty to a practical production option. The appeal is obvious: you can go from a script idea to moving characters, dynamic backgrounds, and atmospheric camera work without building a full traditional animation pipeline. But the gap between a single impressive clip and a watchable episode is not filled by a better prompt alone. It is filled by a workflow.
Anime has a specific visual grammar. Clean line work, limited but intentional color palettes, expressive character faces, dramatic speed lines, and carefully timed pauses all matter. A general-purpose video model may produce beautiful motion but miss the aesthetic. An anime-specialized model may nail the look but struggle with complex camera moves or character continuity. The practical answer is to treat AI as a production department, not a vending machine. You still need script breakdown, shot design, reference management, review passes, and post-production.
The current landscape includes text-to-video, image-to-video, video-to-video, and hybrid tools. Some are strong at stylized keyframes, others at motion interpolation, others at lip sync or background generation. The most reliable creators combine them. They use still image tools for character design, a video model for motion, an upscaler for detail, and an editor for rhythm. This article lays out that workflow with decision criteria, examples, common mistakes, and quality checks.
The Core Building Blocks of Anime AI Video
Before choosing a tool, understand the components you are assembling.
Character sheets and reference logic
A character sheet is not just a pretty drawing. It is a control document. It should include front, side, and three-quarter views; color swatches; hair and eye details; outfit variations; and expression notes. When you use image-to-video or reference-conditioned generation, these images become anchors. If you skip this step, the model will reinterpret the character in every shot, which is the fastest route to an incoherent project.
Shot grammar and keyframes
Anime storytelling relies on shot types: extreme wide, wide, medium, close-up, extreme close-up, insert, and over-the-shoulder. Each shot has a purpose. AI video generation works best when you define the start frame, the end frame, and the motion between them. Think like an animator: what changes from frame A to frame B? Is it a head turn, a cape flutter, a camera push, or a background parallax? The more clearly you define that delta, the less the model improvises.
Motion, timing, and in-between thinking
Anime often uses limited animation. That is a strength for AI. You do not need every frame to be physically simulated. You need key poses, holds, and snappy transitions. Use AI for the hardest parts: complex backgrounds, crowd motion, particle effects, and camera moves. Keep character acting readable. Timing is editorial. A cut that lands on a beat feels intentional; a cut that lands randomly feels artificial.
Audio and subtitle planning
Video is not finished until sound is locked. Plan voice tracks, ambient loops, impact sounds, and music early. AI voice tools can generate scratch dialogue, but final performance still benefits from direction. Subtitles should be designed with the same care as the visuals: readable font, safe margins, and consistent timing. If your anime short will be viewed on mobile, test subtitle size before you export.
Choosing the Right Toolchain for Your Anime Project
There is no single best anime AI generator for every task. Build a chain.
Text-to-video vs image-to-video vs video-to-video
Text-to-video is best for exploration, mood boards, and background plates. Image-to-video is best for character shots, because you control the initial design. Video-to-video is best for style transfer, rotoscoping, and re-timing live-action reference. Many creators start with text-to-video, then move to image-to-video once the character and location bibles exist.
Model strengths
Some models excel at 2D anime line art and flat shading. Others produce semi-realistic anime with richer lighting. Some are strong at dynamic action but weak at dialogue scenes. Some handle camera motion well but drift on faces. Test each model on the same five-shot sequence: a wide establishing shot, a medium dialogue shot, a close-up reaction, a fast action beat, and a slow atmospheric shot. Score them on character consistency, line stability, background coherence, and motion naturalness.
Supporting tools
You will likely need an image generator for character and location design, an upscaler for resolution, a frame interpolation tool for smoother motion, a background remover for compositing, and a lip-sync tool for dialogue. An editor with good color management and audio tools is mandatory. A simple project management board or spreadsheet helps track shots, versions, and approvals.
Decision criteria
Use these criteria when selecting tools:
- Control: Can you provide reference images, masks, poses, and camera directions?
- Consistency: Does it preserve faces, costumes, and line style across shots?
- Resolution and aspect ratio: Does it support the delivery format you need?
- Speed: Can you iterate on a shot without waiting too long?
- Cost model: Is pricing predictable for your volume? What counts as a generation pass, and how many retries are typical?
- Export and integration: Can you get clean frames into your editor?
- Licensing and usage: Are you clear on commercial rights and content policies?
A Repeatable Production Workflow from Script to Final Cut
This workflow works for a 30-second short, a music video, or a multi-episode series.
1. Script and beat sheet
Write the script in beats, not just dialogue. Each beat should describe what changes: a character realizes something, a fight shifts, a location is revealed. Then break each beat into shots. A useful rule is one idea per shot. If a shot contains two ideas, split it.
2. Character and location bibles
Create a folder for each character and each location. Include reference images, color palettes, height comparisons, and notes about clothing and props. For locations, include time-of-day variations, camera angles, and lighting moods. These bibles become the source material for every prompt and reference image.
3. Storyboard and animatic
Even a rough storyboard saves time. Use simple sketches, AI stills, or photo references. Assemble them into an animatic with scratch audio. This is where you catch pacing problems before generating video. If the animatic is boring, the final video will be boring.
4. Prompt and reference preparation
For each shot, write a prompt that specifies subject, action, camera, style, lighting, and motion. Attach the relevant character and location references. Use negative prompts to exclude common artifacts such as extra limbs, blurry lines, watermark text, and unwanted 3D shading.
5. Shot generation and batch testing
Generate multiple variations of each shot. Do not try to perfect one shot in isolation. Generate a batch, compare them side by side, and pick the best starting point. For complex shots, generate the start and end frames first, then use image-to-video to bridge them.
6. Selection, retake, and continuity control
Review shots in context, not individually. A shot that looks great alone may break the flow when placed next to others. Check eyelines, screen direction, costume details, and lighting continuity. Keep a retake list with specific notes: reduce head turn speed, keep hair color warmer, remove background text.
7. Editing, sound, and finishing
Edit for rhythm first. Cut on action, match cuts, and use J-cuts and L-cuts for dialogue. Add sound design: footsteps, cloth movement, wind, room tone, and music. Then color grade for consistency. Finally, add titles, subtitles, and export masters in the required formats.
Prompting for Anime Coherence
A good anime prompt is structured, not poetic. Use a consistent order:
- Subject and action
- Character reference or style reference
- Camera angle and movement
- Lighting and time of day
- Line quality and color palette
- Motion description
- Negative constraints
Example structure:
Medium shot of a young swordfighter in a red cloak, standing on a cliff at sunset, anime line art, cel shading, soft rim light, slow camera push-in, wind moving the cloak, clean outlines, limited color palette, no extra fingers, no text.
Notice that the prompt does not rely on a single magic word. It provides production instructions. If you want a specific animation style, describe it: limited animation with held frames, smooth 24fps motion, snappy action cuts, or melancholy atmosphere with slow parallax.
Common prompt mistakes
- Overloading the model with too many characters in one shot.
- Mixing incompatible style terms, such as photorealistic and chibi.
- Forgetting to describe motion, then blaming the model for a static result.
- Using vague camera terms like cinematic without specifying angle or movement.
- Ignoring aspect ratio. A prompt designed for a vertical short will not compose well in widescreen.
Managing Continuity and Character Consistency
Consistency is the hardest part of AI anime production. Treat it as a data problem.
Use reference images consistently
Always attach the same character reference to every shot featuring that character. If the tool supports multiple references, use one for face, one for outfit, and one for full-body pose. Keep the reference images clean, well-lit, and free of conflicting styles.
Seeds, adapters, and trained styles
Many image and video models support seeds, style adapters, or trained character models. A fixed seed can reduce randomness, but it is not a substitute for reference images. If you need a very specific character, train a small model or adapter using a curated set of images. For motion, pose and depth guides can keep anatomy stable during action.
Color scripts and lighting continuity
Create a color script for each scene. Note the dominant colors, light direction, and contrast level. If one shot is warm sunset and the next is cold moonlight, make sure the transition is intentional. AI models love to drift toward generic lighting. Your color script is the correction.
Face and hand checks
Zoom in on faces and hands before approving a shot. AI models often distort eyes, fingers, and small accessories. If a hand is important, generate a dedicated close-up and composite it, or use a pose reference. Do not assume the viewer will not notice. They will.
Common Pitfalls and How to Fix Them
Flicker and texture crawl
Flicker happens when the model reinterprets details between frames. Fix it by reducing motion complexity, using a stronger reference, increasing temporal consistency settings, or applying a deflicker pass in post. Sometimes re-generating at a higher frame rate helps.
Morphing and identity drift
If a character's face changes, the model lacks enough identity constraints. Use a face reference, reduce the shot length, and avoid extreme head angles. If the drift is severe, split the shot into two shorter shots and edit them together.
Background instability
Backgrounds often warp during camera moves. Generate the background as a separate plate, then composite the character. For parallax, create layers in an image editor and animate them with simple transforms rather than relying on the video model to invent depth.
Over-animation and unnatural motion
AI models sometimes animate everything at once. Real anime often holds still. Specify limited motion, only the hair moves, or subtle breathing. If a shot feels busy, remove motion instructions and let the camera movement carry the scene.
Audio-visual mismatch
A beautiful shot can feel wrong if the sound does not match. Record or generate sound effects before final animation. A sword swing needs a whoosh; a quiet scene needs room tone. If dialogue feels disconnected, adjust the timing of the mouth animation or use a wider shot that hides lip-sync imperfections.
Quality Control Checklist Before Export
Use this checklist before you publish.
- Story clarity: Can a new viewer follow the action without explanation?
- Character consistency: Do faces, outfits, and proportions remain stable?
- Shot continuity: Are eyelines, screen direction, and lighting coherent?
- Motion quality: Is there flicker, morphing, or unnatural speed?
- Background integrity: Are there warped lines, melting objects, or text artifacts?
- Audio mix: Are dialogue, music, and effects balanced? Is loudness consistent?
- Subtitles: Are they readable, timed correctly, and within safe margins?
- Resolution and aspect ratio: Do they match the platform?
- Color: Is the grade consistent across shots?
- File naming and archive: Can you find the source project later?
Scaling a Small Anime Studio or Solo Channel
AI does not remove the need for production discipline. It increases the value of it.
Build a reusable asset library
Save character sheets, location plates, prompt snippets, color scripts, sound effects, and title templates. A good library turns a two-week project into a two-day project. Tag assets by character, location, mood, and shot type.
Use templates and checklists
Create a shot template that includes fields for prompt, reference images, camera, motion, duration, audio, and status. Use a review checklist for each stage: script, storyboard, generation, edit, sound, and export. Templates reduce decision fatigue.
Batch generation and review gates
Generate in batches by scene, not by random shot. Review at gates: after storyboard, after first assembly, after sound design, and before final export. This prevents you from polishing a shot that will be cut later.
Version control for creatives
Name versions clearly: shot_01_v01, shot_01_v02, shot_01_final. Keep a change log. If a model update changes the look, you can trace which shots need regeneration. This is especially important for episodic content.
Ethical and legal considerations
Check the usage rights for every model and asset you use. Be careful with character likenesses, copyrighted styles, and music. If you are publishing commercially, keep documentation of your sources and licenses. AI is a tool, but you are still the author and the responsible publisher.
FAQ
How many AI-generated shots do I need for a short anime video?
For a 60-second short, plan 12 to 25 shots, depending on pace. Action scenes need more shots; atmospheric scenes need fewer. Start with a storyboard and count the beats, not the seconds.
Do I need drawing skills to make anime AI video?
Drawing helps, but it is not mandatory. You do need visual literacy: composition, color, timing, and editing. You can use reference images, 3D bases, or AI stills to create character sheets. The more you study anime framing and animation principles, the better your results.
How do I stop characters from changing between shots?
Use consistent reference images, fixed character sheets, seeds where available, and short shot durations. Review continuity in context. If a character still drifts, reduce extreme angles and split complex shots into simpler ones.
What resolution and frame rate should I use?
Match your delivery platform. For web video, 1080p at 24 or 30 frames per second is a solid baseline. For vertical shorts, use 1080x1920. For cinematic projects, consider 24 fps and a widescreen aspect ratio. Test before generating a full scene.
Can I use AI anime video for commercial projects?
It depends on the tool and the assets you use. Read the license terms for each model, image, voice, and music source. Keep records. If you use a recognizable character or style, you may need permission. When in doubt, consult a legal professional.
How long does a project take?
A 30-second short can take a few days for a solo creator who already has a workflow. A multi-minute episode can take weeks. The biggest time sinks are continuity fixes, sound design, and re-generating shots that do not fit the edit. A good animatic reduces wasted generation time.
Final Thoughts
The best anime AI video generator is not a single app. It is a workflow that combines the right models, clear references, disciplined shot design, and patient post-production. Start small: one character, one location, one 20-second scene. Build your character bible, generate an animatic, test five shots, and edit them with sound. Once that sequence feels coherent, scale the process. The creators who succeed with AI anime are not the ones with the most tools. They are the ones with the clearest pipeline and the willingness to revise.

Alexander
More Blogs
Read MoreMontaggio video rapido: transizioni e software per l'AI
Guida pratica al montaggio video rapido con AI: transizioni fluide, software, workflow, coerenza visiva, errori da evitare e FAQ operative.
Building an AI Video Production Workflow From Concept to Cut
A practical guide to planning, generating, editing, and finishing AI-assisted videos with consistent characters, clear shot lists, and reliable review loops.
A Repeatable Post-Production Workflow for Polished AI Video
Build a repeatable AI video post-production pipeline: organize assets, cut story-first, design transitions, refine audio, and review versions calmly.