

Best AI Video Special Effects Apps for Android: A Guide
Oct 13, 2026
Why AI Special Effects on Android Finally Feel Practical
A few years ago, adding convincing visual effects to a phone-shot video meant either paying for a desktop suite or accepting a clip that looked obviously filtered. The gap between what a phone could capture and what it could convincingly transform was simply too wide. That gap has closed fast, and the reason is not better filters. It is a shift in how effects are generated.
Older mobile effects were deterministic: a blur, a color curve, a warp, a chroma key that required a physical green screen and flat lighting. Modern effects are inferential. A model looks at each frame, estimates depth, segments the subject, predicts motion, and then synthesizes new pixels that never existed. That changes what is possible on a bus ride home.
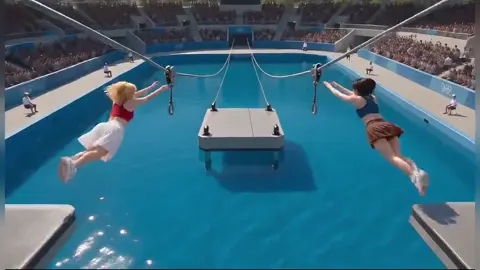
The practical consequence is that effects now survive imperfect shooting conditions. You can replace a cluttered background without a green screen. You can remove a passerby from a street shot. You can turn daytime footage into a stylized night scene. You can generate a short establishing shot that you never filmed at all.
This guide is written for people who edit on Android and want results they are not embarrassed to publish. It covers what AI effects genuinely do well, how the processing pipeline works on a phone, how to choose an app, four workflows you can copy today, and the mistakes that quietly ruin otherwise good footage.
What AI Video Effects Can and Cannot Do
Before comparing apps, it helps to know which category of effect you actually need. Most tools bundle several, but they are not equally mature.
Effects that are reliably good
- Background segmentation and replacement. Separating a person from a background is now fast and accurate in decent light, even without a green screen.
- Style transfer. Applying a painterly, comic, anime, or film-stock look across a clip while keeping motion coherent.
- Object removal and generative fill. Deleting a logo, a lamp post, or a stray pedestrian and filling the hole with plausible texture.
- Frame interpolation and slow motion. Smoothing 24 fps footage into 60 fps or creating slow motion from normal footage.
- Upscaling and denoise. Making soft, grainy indoor footage look sharper and cleaner for larger screens.
- Auto captions and audio cleanup. Not visual effects in the classic sense, but they determine whether effects clips feel professional.
Effects that still need supervision
- Text-to-video generation. Useful for B-roll and abstract inserts; less reliable for anything requiring precise continuity between shots.
- Full-body motion tracking. Holds up on simple movement, drifts on fast limbs, hair, and objects crossing the subject.
- Relighting. Convincing at mild strength, artificial when pushed hard, especially on faces.
- Long lip-sync clips. Fine for a few seconds; uncanny over a minute.
A simple rule: the more an effect depends on understanding exactly what an object is and how it moves, the more you should plan to shoot for it rather than fix it in post.
The three tiers of effect quality
Think in tiers rather than pass or fail. Tier one is invisible cleanup — removal, denoise, stabilization — which viewers never notice but which makes everything else look better. Tier two is stylistic transformation, where the effect is visible and intentional. Tier three is generative invention, where the footage is partly synthetic. Most professional-looking phone edits lean heavily on tier one, use tier two sparingly, and reserve tier three for short inserts.
How the Mobile Processing Pipeline Works
Understanding the pipeline explains most of the frustrating behavior you will encounter — the heat, the waiting, the sudden drop in quality halfway through an export.
On-device versus cloud inference
The first decision is where the model runs. On-device processing is private, works offline, and costs nothing per clip, but it is limited by the phone's chip, memory, and thermal budget. Cloud processing handles heavier models and longer clips, but it depends on upload speed and typically imposes limits on clip length or export resolution.
Many apps use a hybrid approach: a lightweight model previews the effect locally so you can see roughly what you will get, then the final render happens remotely at full quality.
The typical pipeline
- Decode. The app reads frames from your video file. High-bitrate 4K footage is already heavy here.
- Analyze. Models estimate depth, segment subjects, and track motion across frames. This is the most compute-intensive step.
- Synthesize. New pixels are generated for the effect layer.
- Composite. The effect is blended with the original, often with masking and feathering.
- Encode. The result is written back to a compressed file.
Bottlenecks usually appear at step two. That is why a ten-second clip can take longer to process than a sixty-second clip with a simpler effect.
What this means in practice
- Analyze once, reuse the mask. Many apps re-run segmentation every time you change a parameter, which wastes minutes. If the app supports saving a mask or a project state, use it.
- Match resolution to output. Working at 1080p and exporting at 1080p is dramatically faster than round-tripping through 4K.
- Respect thermals. Four minutes of heavy processing is usually fine; twenty minutes will throttle. Process in short batches and let the phone cool.
How to Choose the Right Android Effects App
App stores are full of near-identical editors, so judge them on the things that actually determine whether you keep using them after a week.
Decision criteria
| Criterion | Why it matters | What to look for |
|---|---|---|
| Effect quality at your resolution | A great demo at 720p may fall apart at 4K | Sample exports at your real output size |
| Non-destructive editing | Effects often need adjustment after the fact | Reversible layers, saved projects |
| Export control | Platform limits choke your workflow | Bitrate, codec, resolution options |
| Processing location | Affects privacy, speed, and cost | Clear labeling of on-device vs cloud |
| Masking tools | Determines how clean composites look | Brush, feather, keyframe masks |
| Audio handling | Bad audio destroys good visuals | Separate audio track editing, noise reduction |
| Stability | Crashes on long projects are fatal | Recovery, autosave, recent reviews |
Questions to ask before committing
- Can I export without a watermark at full resolution?
- Does it handle variable frame rate footage from phone cameras?
- What happens when a ten-minute project exceeds a processing limit?
- Can I import a separate audio file and align it manually?
- Are there hard caps on clip length, project count, or export size?
A realistic app stack
Most Android creators do not use one app. A practical stack is three tools: a capture app for manual control over exposure and frame rate, an AI effects app for segmentation and generative layers, and a finishing editor for timing, sound, and captions. Trying to make one app do all three usually means compromising on the step that matters most for your specific content.
Four Practical Workflows You Can Copy
These workflows assume a mid-range or better Android phone, decent lighting, and an app with segmentation plus generative fill.
Workflow 1: Stylized short-form clip
Goal: a 15 to 30 second clip with a consistent visual identity.
- Shoot in flat light with the subject mid-frame. Avoid harsh backlight; style transfer exaggerates contrast problems.
- Trim to the strongest 20 seconds before applying anything. Effects on unused footage waste time.
- Apply a single style to the whole clip rather than mixing styles between shots. Consistency reads as intentional; variety reads as random.
- Reduce effect strength to roughly 60 to 75 percent. Full strength on skin looks plastic.
- Add a subtle grain or film texture layer to hide the smoothness that AI stylization creates.
- Export at the highest resolution your target platform accepts without re-compression.
Why it works: one style, one subject, one idea. The eye is not asked to process two aesthetics at once.
Workflow 2: Cleanup and object removal
Goal: remove something distracting that you cannot reshoot.
- Identify the shortest possible segment containing the object. Removal cost scales with duration.
- Lock the camera if possible. Static shots fill far more convincingly than moving ones.
- Run the removal on a copy of the clip, never the original.
- Watch the result at full speed, not frame by frame. Invisible artifacts at 1x are the only ones that matter.
- If the fill shimmers, shorten the clip or reposition the removal area to overlap a simpler background.
Why it works: generative fill is best when the missing region is textured and unremarkable — pavement, sky, grass, brick. It struggles with repeating patterns and complex geometry.
Workflow 3: Background replacement without a green screen
Goal: put yourself somewhere you are not.
- Light your subject and the background separately, even mildly. A phone light behind the subject helps segmentation enormously.
- Avoid clothing that matches the background color. Green shirt on a green wall is a segmentation trap.
- Keep the subject's edges in motion — hair, sleeves, loose fabric — to a minimum during the take.
- Apply the mask, then check the edges at 100 percent zoom before rendering.
- Match the replacement's color temperature and grain to your subject. Unmatched grain is the most common giveaway.
- Add a soft shadow beneath the subject if the new background implies ground contact.
Why it works: most bad composites fail on lighting and grain matching, not on mask accuracy.
Workflow 4: Generative B-roll and inserts
Goal: cover a cut or set a mood without filming extra footage.
- Write a short, concrete prompt describing subject, motion, and camera angle.
- Generate three or four variations rather than one perfect try.
- Use each insert for two to four seconds. Longer clips expose inconsistencies.
- Grade the inserts to match your main footage before placing them.
- Cut on motion. A generated clip that moves in the same direction as your preceding shot feels continuous.
Why it works: generated footage is strongest as connective tissue, not as the main event.
Shooting Footage That AI Can Actually Work With
The quality ceiling of any AI effect is set at the moment of capture. A few habits pay off disproportionately.
- Lock exposure and white balance. Auto adjustments between takes confuse tracking models and create flicker that effects amplify.
- Shoot a beat longer than you need. Effects need handles at the start and end of every edit.
- Avoid digital zoom. Interpolated pixels are exactly what upscaling models struggle to reconstruct.
- Keep the shutter speed sane. Motion blur from very slow shutters makes segmentation mushy.
- Record clean audio separately if it matters. Phone microphones pick up wind and handling noise that cleanup can only partially repair.
- Capture a background plate. Ten seconds of the empty scene makes removal and replacement dramatically easier.
A practical rule: if you would not want to edit the shot manually, an AI effect will not rescue it.
Finishing: Timing, Sound, Color and Export
AI effects get attention, but finishing decides whether a clip feels professional.
Timing. Cut on action and keep shots shorter than feels comfortable. Effects-heavy clips benefit from faster pacing because the eye has more to process.
Sound. Build three layers: dialogue or primary audio, ambience, and music. Effects sequences usually need more ambience than you expect because synthetic visuals feel hollow without a sound bed.
Color. Apply a single grade across the whole timeline after effects are baked in. Grading before effects means re-doing it later.
Export. Match the codec and bitrate to the destination. Vertical short-form platforms re-encode aggressively, so export at a higher bitrate than the platform recommends rather than a lower one.
Check on a phone screen and a larger display. Artifacts invisible on a phone can be obvious on a television, and vice versa.
Common Mistakes That Ruin AI Effects
- Stacking too many effects on one clip. Each layer adds artifacts and processing time. Two well-executed effects beat six stacked ones.
- Pushing strength to maximum. Most models look best between 50 and 80 percent.
- Ignoring grain and noise matching. A perfectly clean composite over grainy footage looks fake instantly.
- Rendering at the wrong resolution. Upscaling after effects is not the same as generating effects at a higher resolution.
- Editing the original file. Always work on copies; AI tools sometimes overwrite source footage.
- Trusting the preview. Preview modes often run at lower quality than the final render. Judge the result after export.
- Never testing the export. Export a five-second sample before committing to a long render.
Privacy, Rights and Platform Rules
Three concerns deserve a moment before you upload anything.
Where your footage goes. On-device processing keeps files local. Cloud processing means your video leaves the phone, which matters for confidential work, client footage, or anyone visible on camera who has not consented.
What you can publish. Backgrounds, logos, artwork, and recognizable people in generated or replaced footage raise the same questions as ordinary filming. Generative fill does not create permission.
What platforms require. Some destinations require disclosure of synthetic or manipulated media, particularly for realistic depictions of people or events. Read the policy for each platform you publish to, and label when in doubt. A short label rarely hurts reach; a removed post always does.
FAQ
Do I need a flagship Android phone for AI video effects?
No, but expectations should scale. Mid-range phones handle segmentation, stabilization, captions, and denoise well at 1080p. Heavy generative work, 4K processing, and long renders benefit noticeably from faster chips and more memory.
Is cloud processing better than on-device?
It depends on the trade-off you prefer. Cloud handles heavier models and longer clips, but depends on upload speed and usually imposes limits. On-device is faster for short clips, works offline, and keeps footage local.
Why does my phone get hot during processing?
Analysis and encoding are sustained heavy loads. Thermal throttling slows the render and can even reduce output quality in some apps. Process in short batches, keep the phone out of a case while rendering, and avoid charging during long exports.
How long should an effects clip be?
For short-form vertical video, 15 to 45 seconds is the sweet spot. Effects are most convincing in short bursts, and pacing benefits from brevity. Longer content works better with effects used as accents rather than continuous treatment.
Can I remove a green screen requirement entirely?
For most talking-head and product shots, yes, if you separate the subject from the background with light and avoid color clashes. For fast motion, fine hair, or transparent objects, a physical screen still produces cleaner results.
Should I shoot in 4K or 1080p if I plan to use AI effects?
Shoot 4K if your phone handles it without overheating and you have storage, because extra resolution gives you room to crop and stabilize. Edit and apply effects at 1080p, then export at your platform's target size.
How do I keep effects looking consistent across multiple shots?
Fix your look before editing: one style, one strength value, one grade. Save the settings as a preset and apply the identical values to every clip. Consistency across shots matters more than any single shot looking impressive.
What is the fastest way to improve results without new gear?
Improve your lighting and lock your camera settings. Better lighting improves segmentation, tracking, and upscaling simultaneously, and it costs nothing.
Putting It Together
The best Android setup is not the one with the longest feature list. It is the one where capture, effects, and finishing each do their job without fighting the others. Start with clean, well-lit footage. Apply invisible cleanup first, stylistic effects second, and generative inserts last. Export a sample before every long render, and judge results on the file you will actually upload rather than on a preview.
Do that consistently, and AI effects stop being a novelty you play with and start being a normal part of how you make video — one that saves hours and, used with restraint, makes your work look like it was shot by someone with a much bigger budget.

Alexander
More Blogs
Read MoreMontaggio video rapido: transizioni e software per l'AI
Guida pratica al montaggio video rapido con AI: transizioni fluide, software, workflow, coerenza visiva, errori da evitare e FAQ operative.
Building an AI Video Production Workflow From Concept to Cut
A practical guide to planning, generating, editing, and finishing AI-assisted videos with consistent characters, clear shot lists, and reliable review loops.
A Repeatable Post-Production Workflow for Polished AI Video
Build a repeatable AI video post-production pipeline: organize assets, cut story-first, design transitions, refine audio, and review versions calmly.