
Utwórz
Cinematography Key Concepts: A Study Guide for Film Students
Oct 15, 2026
Cinematography is less a collection of camera tricks than a grammar for controlling what an audience notices, feels, and believes. Students preparing for written and practical exams often memorize vocabulary without connecting it to decisions: why a fill light gets dialed down, why a 35mm lens flatters a two-shot, why a slow push-in lands harder than a cut. This guide rebuilds that connection.
It walks through the concepts that appear most often in coursework and assessments — light, exposure, lenses, movement, composition, and coverage — and then shows how the same vocabulary transfers directly into AI-assisted video workflows, where precise language is often the only lever you have.
Why the Fundamentals Still Matter
Automation has changed how images get made, but it has not changed why they work. A generator can produce a plausible frame in seconds; it cannot decide that the frame should be a low-angle medium shot with a hard key from camera left, because that choice comes from story logic, not from pixels.
Exams test this layer of judgment. A question rarely asks you to define "backlight." It asks you to describe how you would light a scene to reveal a character's isolation, or to explain what changes when you move from a 24mm to an 85mm lens in the same blocking. Those answers require a mental model, not a glossary.
The practical payoff is portability. Whether you are operating a camera, animating a shot list, or writing a prompt for a text-to-video tool, you are making the same six decisions: where the light comes from, how much of the frame is sharp, what the lens does to space, how the camera moves, where the subject sits in the frame, and what coverage the edit will need.
Light: The Vocabulary of Mood and Exposure
Lighting is the fastest way to change meaning without changing a single word of dialogue. Two identical setups with different key-to-fill ratios read as comedy and thriller respectively.
Three-point lighting and its variants
The classic setup uses a key light, a fill light, and a backlight. The key establishes direction and shape; the fill controls how much shadow detail survives; the backlight separates the subject from the background. Ratios matter more than the lights themselves: 2:1 reads natural and open, 4:1 reads dramatic, 8:1 and above reads harsh or noir.
From that base, learn the named patterns — Rembrandt (triangle of light on the cheek), loop, split, and butterfly — and understand that each is a variation on angle and height. Also learn motivated lighting: a lamp, a window, or a screen inside the story justifies the source. Unmotivated light is not wrong, but you should know when you are breaking the rule.
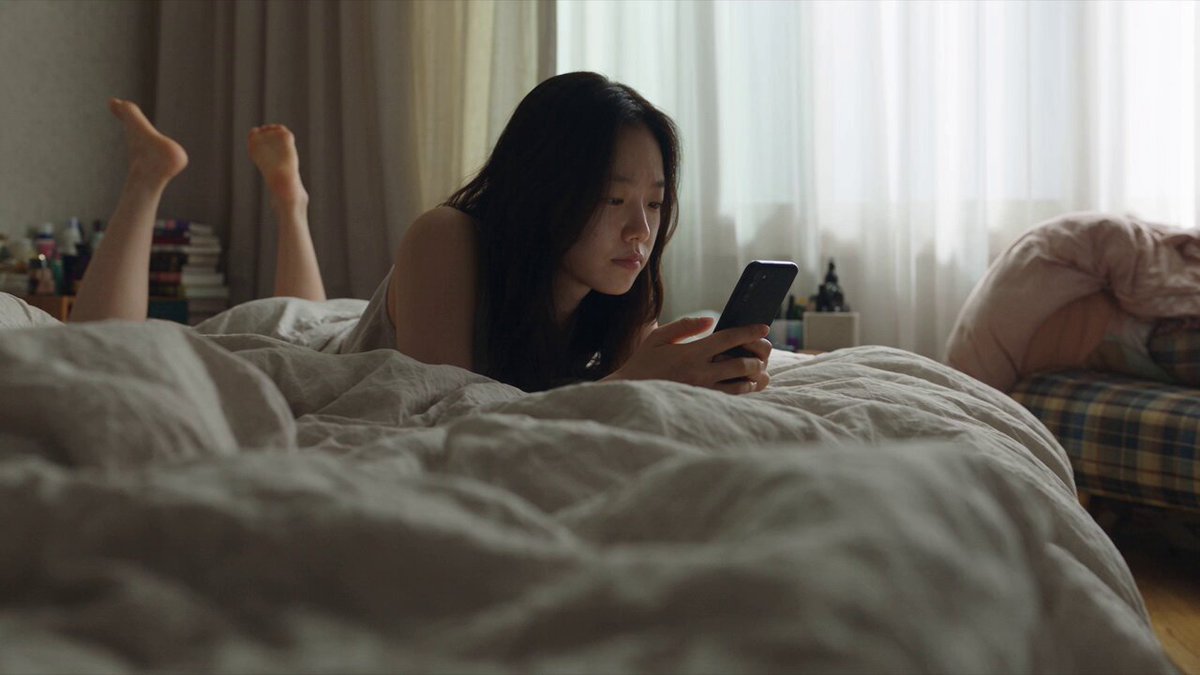
High-key lighting fills shadows for an even, optimistic look. Low-key lighting protects shadows and lets darkness carry the mood. Practicals — lamps visible in frame — anchor realism and give color contrast without extra units.
The exposure triangle in practice
Aperture, shutter speed, and ISO form the triangle. Aperture controls both light and depth of field. Shutter speed controls light and motion rendering; the 180-degree rule (shutter at roughly double the frame rate) keeps movement looking natural. ISO controls sensitivity and adds noise as it climbs.
Learn the exposure tools, not just the theory: waveforms for luminance, false color for fast judgment, and zebras for highlight warnings. Practice exposing for highlights when the background is bright and for midtones when skin tone matters most. Know that clipping in a window is usually acceptable, while clipping on a face rarely is.
Also distinguish f-stops from t-stops. F-stops are geometric; t-stops measure actual light transmission and matter when matching lenses. Exam questions love this distinction.
Color temperature and white balance
Color temperature is measured in Kelvin. Tungsten sits near 3200K, daylight near 5600K. Setting white balance to match the source neutralizes color; setting it deliberately off-balance creates a stylistic cast. Mixed sources in one frame force a choice: correct one, correct both with gels, or lean into the clash.
Color also carries continuity risk. If your white balance drifts between setups, the edit will show it. Build a habit of noting the color setting alongside every shot so a reshoot or a generated insert can match.
Lenses: Framing Perspective Before You Move
A lens is not just a magnification tool. It defines how space behaves.
Focal length families
Wide lenses (roughly 14–24mm) expand space, exaggerate distance, and pull the viewer into the scene. Normal lenses (35–50mm) approximate human perception and feel neutral. Portrait lengths (85mm) compress features pleasantly. Telephoto lengths (135mm and up) flatten depth and isolate subjects from busy backgrounds.
The exam-friendly way to think about it: wide lenses make relationships feel bigger, long lenses make them feel closer emotionally.
Distortion, compression, and faces
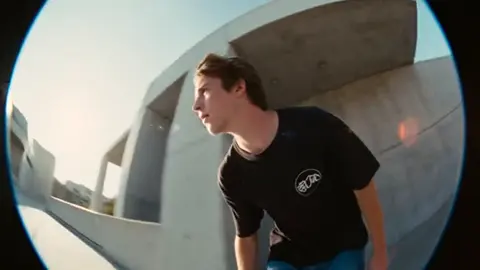
Wide lenses close to a face produce barrel distortion and enlarged noses; the same lens further back looks normal. Telephoto lenses compress, stacking background elements behind the subject. The dolly zoom exploits this by moving the camera while zooming the opposite way, keeping the subject the same size while the world warps — a visual shorthand for realization or dread.
Lens breathing, where framing shifts slightly as focus changes, is worth knowing because it reveals whether a shot was designed or improvised.
Depth of field and focus
Depth of field depends on aperture, focal length, distance to subject, and sensor size. Shallow depth of field isolates; deep focus lets foreground, midground, and background all carry information at once. Deep-focus staging is a legitimate style, not a mistake.
Focus pulling is a performance in itself. Mark your focus points, rehearse the pull, and decide whether the pull should be visible or invisible. Split diopters allow two planes to stay sharp simultaneously — a stylized tool worth naming in an essay.
Camera Movement: Motivation Over Decoration
Movement should answer a question: why now, and why this direction?
Static versus moving
Locked-off frames give the audience time to scan and give the editor clean coverage. Handheld communicates immediacy and instability. Gimbals and Steadicams create smooth motion through space. Dollys and cranes move the camera physically, which produces parallax — the sense that the world has depth.
Moves and what they communicate
Pans and tilts reorient attention. Dolly in intensifies; dolly out releases or reveals isolation. Trucks and tracking shots follow action laterally. Arcs circle a subject and can signal shifting allegiance. Crane reveals deliver geography and scale. Push-ins usually mark a realization; pull-outs usually mark consequence.
Critically, know the difference between a zoom and a dolly. A zoom changes magnification without changing perspective; a dolly changes perspective because the camera moves. That single distinction appears in more exam papers than almost any other.
Speed and easing matter too. A slow, constant move feels observational. A fast, accented move feels emotional. Match the move to the beat of the scene rather than to the desire to look dynamic.
Composition and Coverage
Framing rules and intentional breaks
The rule of thirds, leading lines, symmetry, headroom, and lead room are conventions that manage attention. Also study balance, negative space, and depth layering — placing elements in foreground, midground, and background so the frame has dimensionality rather than flatness.
Aspect ratio shapes composition before anything else. A 2.39:1 frame encourages horizontal staging and wide landscapes; a 4:3 or 9:16 frame pushes subjects toward the center and rewards vertical compositions.
Conventions exist to be broken, but the break should be legible. A centered subject can read as confrontational or ceremonial; an unbalanced frame can create unease. If you cannot articulate why you broke the rule, the frame is just improvised.
Coverage strategy that survives the edit
Coverage is the insurance policy of a scene. A typical pattern: establishing shot, master, over-the-shoulders, singles, inserts, and cutaways. Respect the 180-degree rule to keep screen direction stable, and use the 30-degree rule to avoid jarring jump cuts between similar angles.
Shot progression matters. Starting wide and moving to close-ups generally builds intimacy; starting tight and pulling wide generally builds context. Know which direction your scene needs and shoot coverage that supports it.
Shot lists and storyboards
A shot list records shot number, size, lens, movement, lighting note, and purpose. Storyboards add spatial clarity. Overhead blocking diagrams are the fastest way to prove you understand screen direction, because they show the line the camera cannot cross.
Translating Cinematography into AI Video Prompts
The same concepts become literal instructions in text-to-video and image-to-video tools. Precision beats poetry.
Camera language as prompt tokens
A strong prompt names shot size, angle, lens feel, lighting, movement, and mood: "low-angle medium shot, 35mm perspective, shallow depth of field, hard key from camera left, soft fill, warm practicals in the background, slow dolly in." Each clause maps to a decision from earlier sections.
Keep one camera idea per shot. Prompts that stack contradictory moves — "slow push-in while orbiting with a whip pan" — usually produce mush.
Lighting and lens descriptions
Describe light direction, quality, and color separately. Hard versus soft, warm versus cool, motivated versus stylized. For lenses, reference focal length family and depth of field rather than brand names, which carry little meaning to a generator.
Consistency across shots
Consistency comes from a style bible: fixed character descriptions, fixed lighting phrases, fixed lens language, and the same ordering of clauses in every prompt. Where the tool supports reference images or seeds, use them. Break long scenes into a shot list first, then generate shot by shot so each clip has one clear job.
A Study Routine That Survives Exam Week
Active recall and spaced repetition
Flashcards work best when each card pairs a term with a decision and a film example. "Backlight — separates subject from background — use when wardrobe matches the wall." Retrieval practice beats rereading.
Scene analysis journal
Pick one scene per session and write three columns: what the light does, what the lens does, what the camera does. Then add a fourth line explaining the emotional result. Twenty of these will teach you more than any summary sheet.
Constrained practice
One lens, one light, five shots. Recreate a film still with whatever you have. Match a reference clip's movement without copying its content. Constraints expose which concepts you actually understand.
Common Mistakes and How to Fix Them
- Memorizing definitions without connecting them to decisions. Fix: attach every term to a shot you would actually use it in.
- Confusing zoom with dolly. Fix: remember that only one changes perspective.
- Ignoring the 180-degree rule. Fix: draw overhead diagrams before shooting.
- Overlighting every scene. Fix: start with one source and add only what the story needs.
- Using shallow depth of field everywhere. Fix: ask whether the background should be readable.
- Treating coverage as random. Fix: define the progression of shot sizes before the shoot.
- Writing AI prompts that stack contradictions. Fix: one movement, one lens idea, one lighting idea per clip.
Practical Exercises to Lock It In
- Light one subject three ways — Rembrandt, split, and butterfly — and shoot each at 2:1 and 8:1 ratios.
- Shoot the same dialogue scene with a 24mm and an 85mm lens and compare how the relationship reads.
- Execute a three-shot sequence with an invisible focus pull and note your marks.
- Build a six-shot coverage plan for a two-page scene, including an overhead diagram.
- Write five AI video prompts for a single scene, varying only the lens and lighting language, then compare results.
FAQ
What does SC mean in a cinematography course? Some course outlines use shorthand such as SC for scenario composition and scene coverage — the shot-planning side of cinematography, as opposed to operating technique.
How do I memorize the exposure triangle quickly? Learn it as trade-offs rather than numbers. Aperture trades depth of field, shutter trades motion rendering, ISO trades noise. Once you can name the trade, you can solve any exposure question.
Do I need expensive gear to practice? No. A single light, a tripod, and one lens can teach ratio, angle, movement, and composition. Constraint usually produces faster learning.
How many shots should a scene have? Enough to give the edit choices: an establishing shot, a master, and coverage of each character plus inserts. Quantity is not the goal; optionality is.
How does AI video change what I need to know? It raises the value of vocabulary. Tools execute descriptions, so the person who can specify shot size, lens, light quality, and movement gets usable results instead of generic ones.
What is the fastest way to improve composition? Analyze one film still per day, then recreate it. Copying forces you to notice staging, headroom, and depth layering that passive viewing skips.
Key Takeaways
Light ratio shapes mood, exposure is a set of trade-offs, and lenses define how space feels. Movement should be motivated, coverage should be planned against the edit, and composition should be intentional whether it follows convention or breaks it. Finally, the same vocabulary that earns marks in an exam is the vocabulary that gets precise results from AI video tools — which is why fundamentals remain the highest-leverage thing a film student can study.

Alexander
More Blogs
Read MoreVidu Q4 Alternatives: 4K AI Video Models Compared (2026)
Vidu Q4 alternatives compared: Kling 4.0, Seedance 2.5, Wan 3.0, and Runway Gen-4 — 4K support, input modes, durations, audio, and what each costs in credits on Domer.
Top 4K AI Image Generators in 2026: 5 Models Compared on Real Costs
The top 4K AI image generators on Domer compared: Flux 3 Klein, Nano Banana 2.1, GPT Image 2.5, GPT Image 2, and Nano Banana Pro — 4K credit costs, reference limits, and speed.
Nano Banana 2.1 vs GPT Image 2.5: Which Image Model Should You Use? (2026)
Nano Banana 2.1 vs GPT Image 2.5 Flare compared: credit costs per resolution, aspect ratios, reference images, text rendering, and which tasks fit each model.