
Utwórz
Cinematography Key Concepts: A Study Guide for Film Students
Oct 15, 2026
Why Cinematography Still Matters in an AI-Assisted Era
Cinematography began as a craft of chemistry, glass, and patience. Camera operators learned exposure by ruining film, framing by watching dailies, and lighting by hauling flags and stands across a set at four in the morning. Today a film student can generate a believable dolly shot from a single sentence, which changes the job description without changing the fundamentals. What separates a forgettable clip from a shot that lingers is still a short list: where the camera stands, what it chooses to see, how the light falls, and how long the audience is asked to hold still.
This guide treats cinematography as a study discipline first and a production skill second. Each concept is paired with how it behaves in AI-assisted workflows, because most new filmmakers will spend at least part of their time there, even if they also shoot with real cameras. Two ground rules before we start. First, generative models are tools, not authors — they execute intent you have to supply. Second, every technical choice must trace back to an emotional one. If you cannot explain why the camera is low, either lower it for a reason or raise it.
The demand side has changed as well. Serialized content, vertical shorts, brand documentaries, and game cinematics all compete for the same attention, and audiences have become fluent in visual shorthand. They read a slow push-in as tension, a handheld frame as urgency, and a wide anamorphic field as loneliness. That fluency does not disappear when the image is synthesized. If anything, it becomes stricter, because synthetic footage has no documentary authority to lean on. A generated shot lives or dies on its composition and its light.
The Visual Language Toolkit: Composition and Framing
Composition is the deliberate arrangement of elements inside the frame in order to steer attention and carry subtext. Students often treat it as a rulebook — rule of thirds, golden ratio, leading lines — but rules are compression artifacts of deeper principles: balance, contrast, rhythm, and hierarchy. Learn the principles and you can break the rules deliberately instead of accidentally. Every strong frame answers three questions: what is the subject, what is the relationship between subject and environment, and where does the eye travel after it finds the subject?
Depth Cues and Perspective Control
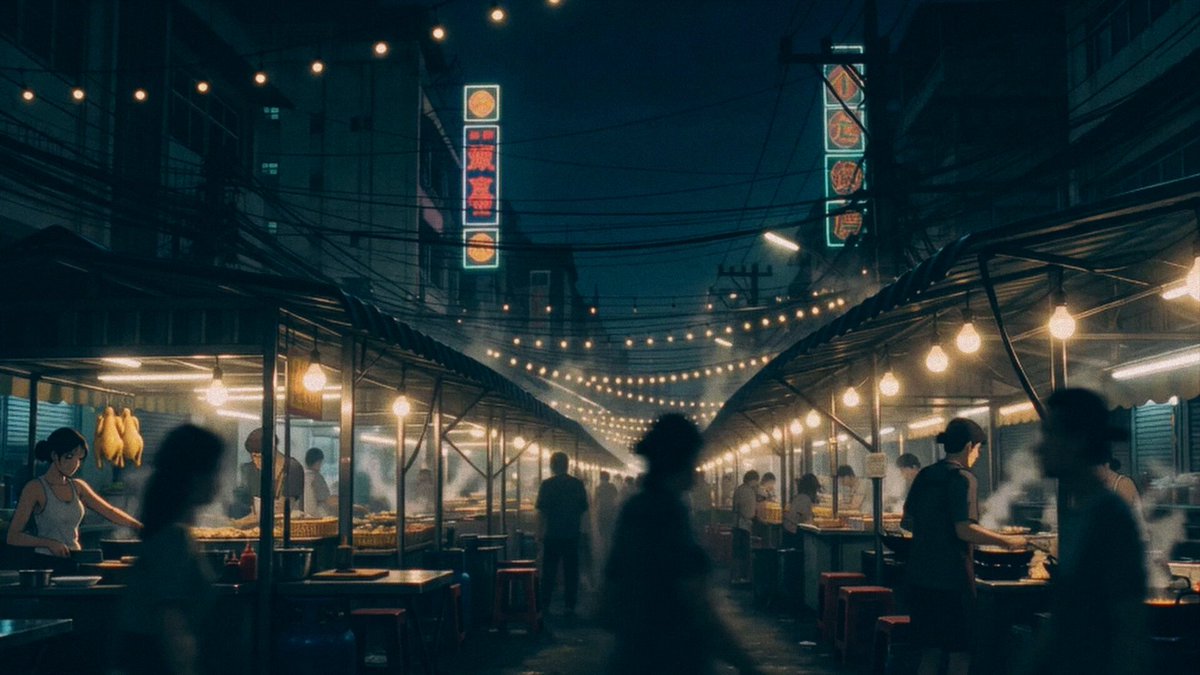
Depth is manufactured, not recorded. Even on a real camera, depth comes from overlapping planes, relative scale, linear perspective, atmospheric haze, texture gradient, and motion parallax. When you build a scene for generation, you are choosing which of those cues to encode. A prompt that says "a woman in a market" gives the model nothing to organize. A prompt that says "foreground: hanging fabric, out of focus; midground: the woman at a stall, sharp; background: receding corridor of umbrellas, hazy" gives it three planes and a focal plan.
A practical drill that pays off quickly: pick a still you admire and sketch its planes as flat shapes with no detail. You will usually find three to five. Then rebuild the same scene as a prompt with the planes listed explicitly. This single habit fixes more flat, lifeless images than any pile of style keywords.
Aspect Ratios and Screen Coverage
Format is a psychological decision before it is a technical one. A 2.39:1 widescreen frame isolates characters inside vast environment and suggests landscape, distance, or epic scale. A 1.85:1 frame is a comfortable theatrical middle ground. A 16:9 frame is the language of broadcast and online video. A 4:3 frame feels intimate, nostalgic, or claustrophobic, and it works beautifully for faces. A 9:16 vertical frame puts bodies and objects in close proximity and suits portraits and product detail. A 1:1 square is graphic, editorial, and rhythmically even.
Ask a simple question: how much environment does the story need in the frame at the same time? Wide formats push characters apart; taller formats compress them together. Distribution matters too. Shoot once but plan for the crops. Center-weighted composition with protected margins survives rescaling from widescreen to vertical and square. If you know a piece will live in a vertical feed and a widescreen player, compose for the narrow frame first, then expand, because you can always add environment but you cannot recover a subject you cropped out.
Subject Placement and Visual Hierarchy
Where you place a subject determines who the audience thinks is winning. Center is confrontational and formal. Placed high in the frame, a subject looks pressured or helpless. Placed low, a subject looks dominant, with space above to grow into. Negative space works like punctuation: it slows the reading of the image and creates loneliness when a character looks away from it.
Hierarchy comes from more than position. Brightness, contrast, color saturation, sharpness, and motion all pull the eye. Decide the number-one element in each shot and make sure the other five are not fighting it. In AI generation, that means writing an explicit emphasis: the single brightest or sharpest object should be the thing you care about, and everything else should be quieter. If three elements are equally loud, the viewer reads noise.
Light as Story: Physical and Simulated Illumination
Lighting is the most powerful and least forgiving tool in the kit. It does three jobs: it reveals form, it directs attention, and it implies a source outside the frame. Students who treat lighting as a mood slider never learn to build a world. Students who treat it as architecture start making images that feel inhabited.
Three-Point Lighting as a Mental Model
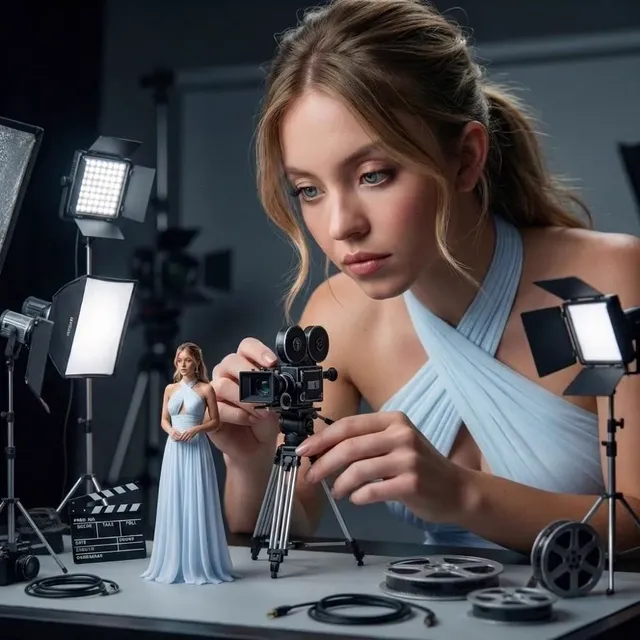
Key, fill, backlight. The key establishes direction and shape. The fill controls how much shadow detail survives. The back or rim light separates the subject from the background. The ratio between key and fill is your contrast, and it carries tone: high key suggests comedy, safety, and openness; low key suggests threat, secrecy, and intimacy.
Even if you never touch a lamp, this vocabulary lets you describe an image precisely: strong key from camera left at 45 degrees, minimal fill, hard rim from behind, background two stops darker. Adding practicals — lamps, screens, windows, neon in frame — gives the audience an explanation for the light even when the real source is off camera. Generated images often look uncanny because the light has no plausible origin. Anchor it: a window, a phone screen, a fire, a doorway.
Color Temperature, Mood, and Palette Discipline
Kelvin values describe warmth and coolness in physical terms: candlelight around 1800K, tungsten around 3200K, daylight around 5600K, overcast around 7000K, open shade bluer still. Mixing them in one frame is a choice, not an accident. A warm interior against a cold exterior window says safety inside and threat outside, or the reverse, depending on the story beat.
Palette discipline matters more than color variety. Choose a dominant, a secondary, and one accent that gets used sparingly. Sodium orange and steel cyan. Sage green and bone white. Dusty rose and charcoal. This makes a body of work feel authored rather than filtered, and it makes synthetic frames look intentional instead of sampled from the average of the internet.
Lighting Ratios and Dynamic Range
A lighting ratio is the difference in exposure between the lit side and the shadow side, expressed in stops. A 1:1 ratio is flat and clinical. A 2:1 ratio gently models a face. A 4:1 ratio is dramatic and filmic. An 8:1 ratio and above reads as near-blackness with a hot edge. Dynamic range is how much of that spread a camera — or a model — can hold. Blown highlights and crushed shadows are not automatically errors, but they should be deliberate. Clipping a window to white behind a subject can be beautiful if the audience reads the face instead.
With generative tools, ask for the ratio directly: low-key portrait, key-to-fill ratio around 4:1, deep shadows, highlight on the cheekbone only. Descriptive exposure language often works better than camera brand names, which models may associate with arbitrary visual trends.
Camera Movement and Perspective
Classical Angles and Subjective Distance
Eye level is neutral and honest. A low angle gives power. A high angle gives vulnerability or overview. A Dutch tilt destabilizes. An over-the-shoulder frame creates complicity. A point-of-view frame puts the audience inside the body. Distance matters just as much: wide shots are objective and social, medium shots are conversational, close-ups are psychological, and inserts are obsessive.
When a scene is not landing emotionally, the fix is often that the camera is in the wrong relational position, not that the performance is weak. Before you reshoot or regenerate, ask whether the audience is standing next to the character, in front of them, or inside their head.
Movement Vocabulary: Pan, Tilt, Dolly, Crane, Handheld
A static frame means patience, observation, or dread. A pan or tilt reveals, connects two subjects, or simulates a glance. A dolly changes the relationship between subject and background: a push-in increases pressure, a pull-out increases isolation. A tracking shot conveys accompaniment and momentum. A crane gives scale, overview, or release. Handheld gives immediacy, chaos, or documentary truth. A stabilized moving frame feels confident and present.
Speed and easing matter as much as direction. A dolly that starts fast and settles slowly feels like relief. A slow push that suddenly accelerates feels like an intrusion. Name the easing in your notes and in your prompts; it is the difference between a shot with a mood and a shot with a direction.
Writing Movement into a Prompt
Describe movement with four components: subject action, camera action, speed with easing, and end state. For example: a cyclist rides left to right; the camera tracks parallel at walking pace, matching speed; gentle ease-in from static; ends with the subject in the right third of the frame. That is far more controllable than "cinematic tracking shot."
Keep one movement per shot, because models blur compound motion into mush and human crews struggle to execute it cleanly too. If a shot genuinely needs two movements, cut it into two shots. Also commit to a lens and a camera height: 35mm equivalent, chest height, slight handheld float. Height alone changes the emotional reading of a frame more than most students expect.
Lenses, Sensor Size, and the Optics of Feeling
Focal length is a social distance. Wide lenses in the 18–28mm range exaggerate space, pull the viewer into the room, distort faces at close range, and make interiors feel larger. Normal lenses around 35–50mm approximate human vision and are the default for dialogue. Long lenses from 85mm to 200mm compress distances, isolate subjects, flatter faces, and turn backgrounds into soft color fields. Macro lenses reveal texture the eye usually ignores.
Depth of field depends on aperture, focal length, subject distance, and sensor size. Shallow depth of field is a spotlight: it removes context and forces intimacy. Deep focus keeps multiple planes readable and invites the audience to scan the frame, which is a democratic image and useful for ensembles and social realism.
Format size affects field of view and depth characteristics. Large formats give smoother falloff and richer tonal transitions. Smaller formats give deeper focus and greater mobility. In AI workflows, you simulate these by describing optical behavior rather than hardware: shallow depth of field with the background dissolved into bokeh, deep focus with foreground and background both sharp, long lens compression with a crowded background. Optical language gives the model a physical problem to solve instead of a stylistic label to imitate.
A Study Workflow: From Script to Shot List
A cinematography study routine should move through the same stages a production does, so that practice builds transferable skill rather than isolated pretty images.
- Intent pass. Read the scene and write the emotional arc as one sentence per beat. Decide where the audience should feel close and where they should feel far.
- Reference board. Collect ten to twenty stills that solve similar problems. Annotate each with why it works: composition, light direction, palette, lens.
- Shot list. Define size, angle, movement, lens, and lighting for every shot. Assign each shot exactly one job.
- Translation. Convert each shot into either a lighting diagram or a generation prompt, using the four-component movement structure and explicit plane descriptions.
- Rough version. Produce a cheap test — either a low-resolution generation pass or a phone test shoot — and watch it once with sound off, then once with sound on.
- Review. Use a fixed checklist: is the subject clear, is the light motivated, does the movement mean something, does the cut land?
- Iterate one variable. Change composition or light or lens, never all three at once, or you will not know what caused the improvement.
Keep a shot journal with the prompt or setup, the result, and one sentence on what you would change. After twenty entries you will have your own personal cinematography manual, which is worth more than any generic list of rules.
A Practical Exercise: Build One Shot, Three Ways
Take a single fifteen-second beat — a character receives bad news in a kitchen — and produce three versions that differ only in cinematography.
- Version A: intimacy. 50mm, close-up, eye level, static, warm practical lamp in frame, key-to-fill ratio around 2:1, shallow depth of field. The audience sits with the character.
- Version B: pressure. 35mm, medium shot, slow push-in, key from above, harder shadows at roughly 4:1, background clutter visible. The audience leans in.
- Version C: isolation. 24mm, wide, high angle, static, cold daylight from a window, deep focus, the character small in the lower third. The audience watches from outside.
Same dialogue, same room, three different films. Run this exercise once a week with a different beat and you will internalize the emotional weight of technical choices faster than any lecture can teach it. When you work with AI video tools, this exercise becomes even cheaper, which means you can afford to test variants you would never have budgeted for on a real set.
Common Mistakes Film Students Make
- Chasing style keywords before intent. "Cinematic" is not a decision. Decide what the audience should feel, then find the technical means.
- Moving the camera because stillness feels unprofessional. Stillness is a choice that costs nothing and often reads as confidence.
- Lighting everything. If every corner is readable, nothing is emphasized. Let shadows do work.
- Ignoring the delivery format. A gorgeous widescreen composition can die in a vertical crop. Protect your subject.
- Overloading a prompt. Ten style references and four camera moves produce average mush. One idea per shot.
- Judging a shot in isolation. A shot only exists in a sequence. Watch it in context before deciding it failed.
- Neglecting sound. A slow push with a rising room tone lands twice as hard as the same push in silence.
- Confusing beauty with meaning. A beautiful frame that says nothing is a wallpaper, not a shot.
- Never reviewing your own work. Without a consistent critique habit, you will repeat the same three solutions forever.
Building a Practice Routine and Portfolio
A sustainable study routine beats an intense weekend every time. A workable weekly structure looks like this: two hours analyzing three stills in writing, two hours drafting a ten-shot sequence for a scene you did not write, one hour drawing a lighting plan, one hour running a movement drill, and one hour watching your own previous work with a checklist. That is roughly seven hours a week, which is achievable alongside other coursework.
Portfolio-wise, sequence work impresses more than single frames. Instead of posting twenty disconnected images, post five sequences of five to eight shots each with a one-paragraph statement of intent. Show range across format: one widescreen piece, one vertical piece, one intimate 4:3 piece. Include a lighting diagram or a prompt sheet alongside the visuals; it demonstrates that you think in terms of decisions rather than luck.
Finally, learn to critique without ego. Describe what you see before you judge it. Separate the technical observation (the fill is hot on the left cheek) from the interpretive claim (the scene reads as insincere). Most arguments about cinematography are actually arguments about which layer the two people are discussing.
FAQ: Cinematography Questions Students Ask Most
How do I study cinematography without equipment?
Use your phone, a lamp, and a white wall. Study stills obsessively and write down why they work. Recreate one frame a week with whatever you have. The camera is the least expensive part of learning; attention is the expensive part.
Are AI video tools enough to learn cinematography?
They are enough to learn composition, light direction, palette, and movement intent quickly, because iteration is nearly free. They are not a substitute for understanding lenses, exposure, and on-set problem solving, because those skills come from constraints. Use both: generate to test ideas fast, shoot to test ideas under pressure.
How many lighting setups do I really need to know?
Five cover most situations: three-point for dialogue, single-source with negative fill for drama, backlit silhouette for mood, soft overhead for beauty, and practical-only for realism. Master those five before collecting more.
Should I learn vertical framing first?
Learn it early, but do not learn it exclusively. Vertical teaches proximity and subject clarity. Widescreen teaches environment and scale. A cinematographer who can do both is far more employable than one who can only do the format they grew up with.
How do I stop my generated shots from looking generic?
Specify the planes, the light source, the ratio, the lens behavior, and the movement easing. Generic output usually comes from generic input. Also pick one distinctive constraint per project — a palette, a format, or a single lens — and hold it across every shot.
What belongs in a shot list?
Size, angle, movement, lens, lighting note, and the dramatic job of the shot. If a line does not help you or your collaborators make a decision on set or in a prompt, it does not belong in the list.
How do I critique my own footage objectively?
Watch it muted, then watch it once at double speed, then watch it with a stranger. Muting reveals composition and light problems. Speed reveals pacing and movement problems. A stranger reveals whether the story reads at all. Then write three notes and act on only one per revision pass.

Alexander
More Blogs
Read MoreVidu Q4 Alternatives: 4K AI Video Models Compared (2026)
Vidu Q4 alternatives compared: Kling 4.0, Seedance 2.5, Wan 3.0, and Runway Gen-4 — 4K support, input modes, durations, audio, and what each costs in credits on Domer.
Top 4K AI Image Generators in 2026: 5 Models Compared on Real Costs
The top 4K AI image generators on Domer compared: Flux 3 Klein, Nano Banana 2.1, GPT Image 2.5, GPT Image 2, and Nano Banana Pro — 4K credit costs, reference limits, and speed.
Nano Banana 2.1 vs GPT Image 2.5: Which Image Model Should You Use? (2026)
Nano Banana 2.1 vs GPT Image 2.5 Flare compared: credit costs per resolution, aspect ratios, reference images, text rendering, and which tasks fit each model.