
How to Choose an AI Video Generator: A Practical Comparison
Oct 13, 2026


Why AI Video Generation Became a Production Tool, Not a Toy
A few years ago, generating video with a text prompt was a party trick. Clips lasted two or three seconds, faces melted between frames, and hands looked like pasta. The output was impressive in the way a magic trick is impressive: fun to watch, impossible to use. That era is over. Modern generators can hold a character's face across multiple shots, follow a camera instruction like "slow dolly in," and produce footage that survives being cut into a real edit with music and captions on top.
The practical consequence is that the question has changed. It is no longer "can AI make video?" It is "which generator fits the way I actually work, and where does it belong in my pipeline?" That second question is harder, because the tools differ in ways that only show up after you have committed a week to one of them.
This guide is written for the person who has to make a decision: a solo creator building a content engine, a marketing team that needs a steady flow of short-form video, a learning designer producing training modules, or a producer who wants to previsualize a scene before spending money on a shoot. Instead of a scoreboard, you get a framework, a workflow, and a list of failure modes that cost people the most time.
The Capabilities That Actually Decide Whether a Generator Is Usable
Every marketing page lists the same features. What separates a tool you keep paying for from one you abandon is how those features behave under real constraints: deadlines, brand guidelines, and the need to match a shot you already made yesterday.
Text-to-Video: Prompt Literacy Beats Prompt Length
Text-to-video is the headline feature, and it is also the most misunderstood. Beginners write paragraph-long prompts stuffed with adjectives, then blame the model when the result is generic. Experienced users write short, structured prompts that describe five things: subject, action, environment, camera behavior, and lighting or mood.
Compare the two approaches. A weak prompt reads like a wish list: "a beautiful cinematic amazing video of a happy businesswoman in a modern office with great lighting, ultra realistic, 8k, masterpiece." A working prompt reads like a shot note: "Medium shot, woman in a grey blazer walking toward a glass wall, morning light from camera left, slow tracking shot, shallow depth of field." The second one gives the model decisions to make, not vibes to interpret.
Also pay attention to how each tool handles duration. Some generate short bursts that you extend iteratively; others aim for longer single takes with more drift in the middle. Neither is universally better. Short bursts are easier to control and cheaper to retry; longer takes save editing time when they land.
Image-to-Video and Multi-Image Fusion
Image-to-video is where most professional work actually happens, because it moves control upstream. You generate or photograph a still, approve it, and only then ask for motion. That single change removes most of the randomness people complain about, since you are no longer gambling on composition and motion at the same time.
Multi-image fusion takes this further: you supply several reference images and the model blends them into one continuous sequence. This is how teams keep a product looking identical across a scene, or how a character's outfit stays consistent from wide shot to close-up. The quality of fusion depends heavily on how similar your references are in lighting and angle. Mixing a hard midday photo with a soft studio render usually produces a strange, gliding artifact that is hard to fix later.
Scene Consistency and Shot-to-Shot Continuity
Continuity is the hardest problem in AI video and the one most likely to derail a project. A single clip can look stunning; three clips of the "same" person can look like three different people. Tools handle this in different ways, and you should test it before you commit:
- Character reference locking: you register a face or character sheet and reuse it across generations.
- Seed reuse: keeping the same seed and prompt skeleton reduces variation between takes.
- Style presets: a saved look that applies the same color, grain, and lens character to every shot.
- First-frame and last-frame control: you specify start and end frames so two clips can be cut together seamlessly.
If a tool has none of these, it can still be useful for standalone b-roll, but it will be painful for narrative work.
Model Choice, Style Control, and Reusable Presets
The better platforms let you choose among several underlying models or modes, each with a different personality: one is photoreal and slow, another is stylized and fast, a third is optimized for animation or anime. The practical benefit is that you stop trying to force one model to do everything.
The feature that saves the most time, though, is boring: presets. If your brand uses a specific aspect ratio, caption font, color grade, and intro card, a saved preset turns a 40-minute setup into a two-click step. When comparing tools, ask how much of your repeated work can be stored and reused. That answer often matters more than a marginal bump in visual fidelity.
A Practical Workflow From Brief to Final Cut
Tools change; workflow transfers. This sequence works whether you are using a browser-based generator or a desktop pipeline.
Step 1: Convert the Brief Into a Shot List
Before opening any generator, write the video as a list of shots. Six to ten shots is a realistic target for a 30-to-60-second piece. For each shot, note the subject, the action, the framing, and the purpose in the edit. If a shot does not serve a purpose, delete it. Most AI video projects fail because someone generated 40 clips and then had to guess which ones belonged together.
Step 2: Generate Stills Before Motion
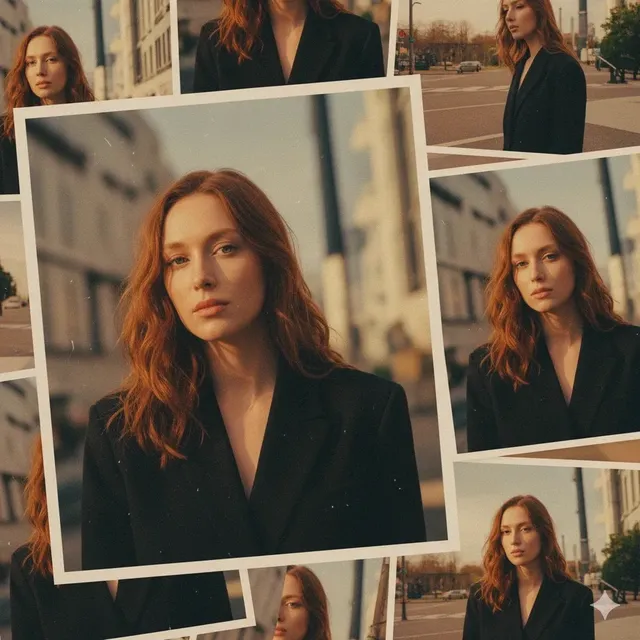
Produce a still for every shot on your list. Review them as a contact sheet, in order, at thumbnail size. This is the cheapest possible moment to catch problems: a character who looks inconsistent, a color palette that drifts, a composition that will not cut with its neighbors. Fixing a still takes seconds. Fixing twenty seconds of video takes minutes.
Step 3: Animate Selectively
Not every shot needs motion. In real editing, static shots are breathing room. Animate the shots that carry the story and leave the rest as stills with a subtle push or parallax added in the edit. This reduces generation time, reduces cost, and paradoxically makes the result feel more deliberate.
When you do animate, change one variable at a time. Keep the prompt stable and adjust only the camera move, then compare. Randomly rewriting the whole prompt makes it impossible to learn what the model responded to.
Step 4: Edit, Caption, and Mix
Bring everything into a normal editor. Trim to the beat, add captions, layer music and ambience, and apply a light color grade that unifies the clips. AI footage often arrives with slightly different contrast and sharpness per clip; a single grade plus a subtle grain overlay does more for perceived quality than generating ten more takes.
Captions deserve special attention. A large share of short-form video is watched with sound off, so burn in or upload captions that are accurate and readable at phone size. If your generator produces speech, verify pronunciation of names and brand terms manually.
Step 5: Version, Archive, and Reuse
Save the project with the prompts, seeds, and reference images attached. Six weeks later, when someone asks for the same video in a different aspect ratio or language, that archive turns a rebuild into a revision. Teams that skip this step regenerate from scratch every time and quietly lose the compounding advantage.
A Comparison Framework You Can Apply to Any Tool
Rather than ranking products, score each candidate against your own requirements. Use a simple one-to-five scale and weight the criteria that matter for your work.
- Control inputs: Does it accept text only, or also images, keyframes, masks, and camera instructions?
- Continuity tools: Can you lock a character, reuse a seed, or save a style preset?
- Output specs: Resolution, frame rate, aspect ratios, codecs, and whether exports are clean enough for further grading.
- Duration behavior: How long is a single generation, and how well does extension work without visible seams?
- Iteration speed: How long from prompt to preview, and how much does a retry cost in time?
- Audio support: Native dialogue or sound effects, or do you always finish in a separate edit?
- Collaboration: Shared workspaces, comments, version history, and permissions for larger teams.
- Rights and usage terms: Whether commercial use is allowed and what restrictions apply to generated likenesses.
- Learning curve: How long until a new team member produces a usable clip without supervision?
Score honestly. A tool that wins on visual quality but loses on iteration speed may still cost you a project if your deadline is Friday.
Matching the Tool to the Job
Short-Form Social Content
Here, speed and volume beat polish. You want fast generation, vertical output, easy captioning, and cheap retries. Stylized models often outperform photoreal ones because viewers scroll past realism but stop for a distinctive look.
Marketing and Product Explainers
Product accuracy is non-negotiable: the device, the packaging, the interface must match reality. Image-to-video built from approved product renders is the safe route, and any tool without reference-image support should be ruled out immediately.
Training and Education
Clarity wins. Simple compositions, consistent presenters, and readable on-screen text matter more than cinematic camera moves. Consistency features and preset styles are worth more here than raw resolution.
Prototyping and Previsualization
Before an expensive shoot, generate the whole sequence roughly. The goal is not beauty; it is alignment. A producer can use a rough AI cut to show clients what a scene will feel like and to get notes before anyone books a crew.
Cost, Speed, and Quality: The Real Trade-offs
Every generation decision trades one of three things against the others. High quality usually means slower renders and more retries. High speed usually means smaller output and looser adherence to the prompt. Low cost usually means fewer attempts, which lowers the odds of a great take.
The practical move is to budget your attempts. Decide in advance how many generations per shot you will allow, and stop when you hit the ceiling. Without that discipline, a single hero shot can consume an entire afternoon and the rest of the video gets rushed.
Also think in terms of cost per finished second of video, not cost per generation. A tool with generous limits that produces unusable clips is more expensive than a stricter one that lands the first or second attempt. Track your own numbers for a week: generations attempted, clips accepted, minutes of usable footage. The ratio tells you more than any feature list.
Mistakes That Quietly Ruin AI Video Projects
- Writing a script first and a shot list never. If every generation is a fresh interpretation of a paragraph, you will never get continuity.
- Chasing photorealism for everything. Stylized, illustrated, or graphic approaches often look better and hide artifacts more gracefully.
- Ignoring the first frame. Whatever the first frame looks like sets audience expectations; a soft or garbled opening reads as a broken video.
- Animating everything. Constant motion is exhausting. Static shots with good composition feel intentional.
- Skipping the audio plan. Silent placeholder tracks force a late scramble that changes the edit rhythm.
- Never testing continuity early. Test with three connected shots on day one, before you build a whole project on a tool that cannot hold a character.
- Ignoring aspect ratio context. A composition that works in 16:9 is often ruined when cropped to 9:16, because the subject sits exactly where the interface overlays go.
Quality Control Checklist Before You Publish
Run every finished piece through the same list:
- Watch it once with sound off, at phone size. Is the story clear from visuals and captions alone?
- Check frames at the start and end of each clip for morphing, extra limbs, or text that turned to gibberish.
- Confirm the character, wardrobe, and product look identical across every shot they appear in.
- Verify captions against spoken words, especially names and numbers.
- Check loudness consistency and that music does not mask dialogue.
- Confirm the aspect ratio and safe areas for each platform you are posting to.
- Confirm usage rights for any generated likeness, voice, or trademarked element.
FAQ
How long does it take to learn an AI video generator?
Basic text-to-video takes an afternoon. Producing consistent, publishable sequences usually takes one to two weeks of daily practice, because most of the skill is prompt structure, reference preparation, and iteration discipline rather than interface knowledge.
Do I still need a video editor?
Yes, for anything professional. Generators output clips, not finished videos. Trimming, pacing, captions, sound design, and color matching are what turn a collection of generations into something people watch to the end.
Is image-to-video always better than text-to-video?
Not always, but it is more predictable. Use image-to-video when composition and continuity matter; use text-to-video for exploration, abstract b-roll, and discovering ideas you had not imagined.
How many generations should I plan per finished shot?
For simple b-roll, two to four. For shots with a visible face or complex motion, six to twelve. Budget accordingly and stop when you hit the cap rather than hoping the next one is perfect.
What is the biggest quality difference between tools?
Continuity control and iteration speed. Most modern generators can produce one beautiful clip. Far fewer can produce six clips that cut together, and fewer still can do it before your deadline.
Can AI video replace live-action shooting entirely?
For explainers, social content, and abstract sequences, often yes. For authentic testimonials, complex human interaction, and anything requiring precise physical performance, live action still wins, and hybrid approaches usually produce the best results.
Where to Start This Week
Pick one project, not a category. A 30-second product teaser or a single training module is a better test bed than an ambitious short film, because it forces you to solve continuity, text, and sound early.
Then run a two-day trial: day one, generate stills for a six-shot list and build a contact sheet; day two, animate three of those shots and cut them with music and captions. If the process feels controlled by the end of day two, the tool fits. If you are still guessing which clips belong together, the problem is usually workflow, not the generator, and that is a much cheaper thing to fix.
Treat AI video as a production capability rather than a novelty, and the comparison question answers itself: you keep the tool that makes your next deadline easier, and you let the rest go.

Alexander
More Blogs
Read MoreVidu Q4 Alternatives: 4K AI Video Models Compared (2026)
Vidu Q4 alternatives compared: Kling 4.0, Seedance 2.5, Wan 3.0, and Runway Gen-4 — 4K support, input modes, durations, audio, and what each costs in credits on Domer.
Top 4K AI Image Generators in 2026: 5 Models Compared on Real Costs
The top 4K AI image generators on Domer compared: Flux 3 Klein, Nano Banana 2.1, GPT Image 2.5, GPT Image 2, and Nano Banana Pro — 4K credit costs, reference limits, and speed.
Nano Banana 2.1 vs GPT Image 2.5: Which Image Model Should You Use? (2026)
Nano Banana 2.1 vs GPT Image 2.5 Flare compared: credit costs per resolution, aspect ratios, reference images, text rendering, and which tasks fit each model.