
Utwórz
In-App AI Video Effects: A Shortcut Workflow for Reels
Oct 13, 2026
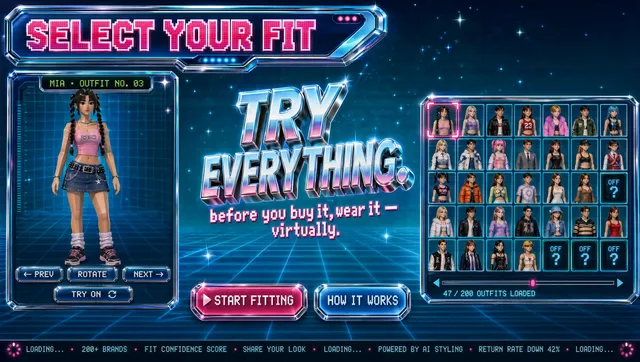

Why phone-first AI effects became the default shortcut
Short-form video rewards velocity. A creator who publishes five iterations of an idea in a week learns more about their audience than one who polishes a single clip for a month. That pressure is the reason effect generation migrated out of desktop editing suites and into the apps where people actually publish.
The shift happened because three things converged. First, generative video models were distilled and quantized down to sizes a phone can handle, so a usable result arrives in seconds rather than minutes. Second, interfaces were redesigned around templates and presets, which moved the creative decision from "which parameters do I tune" to "which look do I want." Third, the feedback loop collapsed: shoot, generate, preview, publish — all inside one app, with no export-import shuffle between devices.
The practical consequence is that "how do I make a cool effect" stopped being a technical question and became an editorial one. You no longer need to understand compositing math. You need a clear visual thesis, a small set of reusable looks, and a habit of testing fast. That is a far easier skill to build, and it is the skill this guide is built around.
That said, the shortcut has limits. Understanding where in-app generation shines — and where it quietly falls apart — is what separates a creator who posts consistently good-looking video from one who posts a lot of mediocre video very quickly.
How in-app effect generation works under the hood
You do not need to read model papers to use these tools well, but a rough mental model of the pipeline helps you debug bad output instead of blaming the app.
Intake: prompts, references, and templates
Every in-app effect starts with an input package. That package usually contains some combination of a text prompt, a reference image or frame, a motion instruction, and a style preset. Templates are simply pre-filled versions of the same package — someone else already made the choices you would have made, and they are selling you the shortcut.
The quality of the result is dominated by the quality of the intake. A vague prompt like "cool cinematic effect" gives the model almost nothing to work with. A prompt that names the subject, the camera behavior, the lighting, and the mood gives it a target. If you can only improve one habit this month, improve this one.
Mobile model routing and latency budgets
On a phone, the app is constantly making a trade-off between fidelity and patience. Most modern apps handle this with routing: a fast, lightweight model produces the live preview, and a heavier model renders the final export. Some apps also do a hybrid, where the first frame is generated on-device and the rest is refined in the cloud.
This matters because the preview is not the deliverable. If the preview looks slightly soft or the motion is a little rubbery, that is often acceptable — check the export before you reject an idea.
Preview, caching, and export
Because generation is expensive, apps cache aggressively. Re-running an edit that only changes a text overlay should not require a full regeneration, and good apps avoid it. When you notice that a change is not showing up, the culprit is usually a stale cache rather than a model failure. Forcing a fresh render by altering one meaningful parameter — not the text, but the motion strength or a seed value — usually resolves it.
Export settings follow the platform, not the app. Vertical 9:16, 1080×1920, 30 or 60 frames per second, and a bitrate high enough that gradients do not band. Exporting at 4K and letting the platform downscale is usually worse than exporting at the native resolution, because heavy downscaling can introduce its own artifacts.
In-app generation vs. desktop-grade pipelines
This is the decision most creators get wrong, because they treat it as a loyalty question. It is not. It is a scheduling question.
Where the shortcut wins
In-app effects win on anything that depends on timeliness. Trend-driven content, daily posting schedules, behind-the-scenes clips, product drops, and reaction formats all benefit from a pipeline measured in minutes. The output quality is genuinely good enough for a phone screen, which is where the overwhelming majority of views happen.
The shortcut also wins on learning speed. Because each attempt is cheap in time, you can test ten variations of a hook in an afternoon and let the data pick the winner. That is a structural advantage no amount of desktop polish can replicate.
Where a full pipeline still matters
Move to a heavier workflow when the video needs consistency across many shots, needs precise control over a specific element, or needs to match a client's brand exactly. Multi-scene narrative pieces, product commercials, and anything with a legal or brand review process benefit from a pipeline where you can lock parameters, version your project, and reproduce a result months later.
A useful rule: if the video has to look the same twice, build it in a pipeline with real version control. If the video only has to look good once, use the shortcut.
A repeatable workflow: from idea to posted video
The following workflow fits inside a single phone session and produces consistent results once it becomes habit.
1. Lock the visual thesis in one sentence
Before you open the app, write one sentence: "A skateboarder at dusk, shot from below, with heavy motion blur and a warm sodium haze." That sentence is your filter. Every effect decision either serves it or gets cut.
Creators who skip this step end up stacking effects because each individual one looked interesting in isolation. The result is visual noise with no point of view, and viewers scroll past it without remembering anything.
2. Build a three-look pack
Instead of hunting for a new effect every day, define three looks you will reuse for the next month. A workable starter pack might be: a clean, high-contrast look for talking-head clips; a stylized, slightly surreal look for b-roll; and a punchy, saturated look for hooks and thumbnails.
Reusing three looks makes your feed instantly recognizable, and it drastically reduces the time you spend choosing. Novelty is valuable, but familiarity is what builds a returning audience.
3. Shoot for the effect, not around it
Most bad AI effects are shot badly and then blamed on the model. Three shooting rules cover most of it:
- Frame for the transformation. If the effect warps the background, leave background in the shot. If it isolates a subject, make sure the subject is clearly separated from what is behind them.
- Keep the camera stable. Handheld shake plus generated motion equals mush. A cheap tripod or a leaned phone does more for output quality than any preset.
- Light the subject, not the scene. Soft, frontal light on faces gives the generator a clean canvas. Backlit subjects confuse motion estimation and produce wobbling edges.
4. Generate, sort, and cut
Generate in batches of three to five, never one at a time. Then sort ruthlessly: keep the clip that serves the thesis, discard the rest without regret. If none of the batch works, change the prompt rather than generating more of the same.
When you cut, lead with motion. The first half-second decides whether the rest gets watched, and motion in the opening frame holds attention far better than a static title card.
5. Publish with a hook-first edit
Assemble the final clip backwards from the hook. Decide what the viewer sees first, then build the clip that earns that opening. Add captions for sound-off viewing, keep text out of the bottom 20 percent of the frame where interface elements sit, and export at native vertical resolution.
Then post it and move on. The point of the shortcut is volume; treating any single post as precious defeats the entire approach.
Prompt patterns that hold up under compression
Mobile models are compressed, which means they respond to clear, concrete language and poorly to abstract adjectives. A few patterns consistently outperform:
Subject + action + camera + light + mood. "A ceramic mug of black coffee, steam rising, slow push-in, window light from the left, quiet morning mood." Each element removes one guess the model would otherwise make badly.
Name the camera behavior explicitly. "Static locked-off shot," "slow dolly forward," and "handheld follow" produce very different results. If you leave it blank, you get whatever the model defaults to, which is usually a slow, generic drift.
Use negative phrasing sparingly. Mobile pipelines handle "no text, no watermark, no extra limbs" better than long lists of exclusions. Keep it to three or four items at most.
Reuse successful prompts as templates. Save the prompts that work in a notes app with a short label. Over a few months you build a personal prompt library that is worth more than any preset pack you can buy.
Speed vs. fidelity: choosing the right level of generation
The single most useful decision in this workflow is matching the level of generation to the job.
Use the fastest available setting for hooks, transitions, and anything under two seconds on screen. Nobody will ever see the detail, and speed is what lets you test more ideas.
Use a mid-tier setting for the main body of a clip — the three to eight seconds where a viewer is deciding whether to keep watching. This is where slightly better motion coherence pays off, because that is where wobble is most visible.
Reserve the slowest, highest-fidelity setting for the money shot: the single moment you would put in a thumbnail or a portfolio. One high-quality hero moment per video is plenty.
Track your own results rather than trusting general advice. A simple note of "setting, time to render, did I keep the clip" over twenty videos will tell you exactly where the break-even point is for your content.
Quality control checklist before you post
Run through this list every time, in this order. It takes under a minute once it is memorized.
- Faces and hands. Check the frame where the subject is most in motion. Distorted hands and shifting facial features are the most common failure mode.
- Text legibility. Watch on the smallest screen you own. If a caption is hard to read at that size, it is too small.
- Edge behavior. Look at the boundary between subject and background. Crawling, shimmering edges signal a motion estimation problem, usually fixable with better lighting or a more stable shot.
- Audio sync. Generated effects do not care about your audio, but your audience does. Check that any lip movement still matches.
- Aspect and safe zones. Confirm the export is vertical and that captions avoid the interface strip at the bottom.
- The sound-off test. Watch it muted. If the point does not land without audio, rewrite the captions.
- The first-frame test. Freeze on frame one. Would you stop scrolling? If not, the hook needs work, not the effect.
Common mistakes that quietly ruin in-app effects
Stacking too many effects. Each layer adds a chance of visual failure and subtracts clarity. One strong effect beats four competing ones almost every time.
Ignoring the compression reality. Effects that depend on fine texture — fabric weave, hair strands, distant foliage — lose the most detail when a platform re-encodes your file. Favor bold shapes and high contrast instead.
Chasing every trend preset. Trend presets get attention precisely because everyone uses them, which also means your clip looks like a thousand others. Adopt the trend's structure and substitute your own look.
Never checking the export. Previews lie, and they lie in the optimistic direction. Always watch the exported file, not the in-app player.
Generating without a thesis. If you cannot say what the effect is for in one sentence, it is decoration, not communication.
Skipping captions. A large share of viewing happens with sound off. Captions are not accessibility theater; they are the primary channel for many viewers.
Building a reusable effect library
After a few weeks of consistent practice, you will have accumulated prompts, look settings, and shooting setups that reliably produce results. Treat that as an asset.
Organize it in three layers. Prompts go in a plain notes file with a short label and a one-line description of the output. Looks go in the app as saved presets, named by purpose rather than by mood — "talking head warm," not "golden vibe." Shooting setups live as a short checklist you run before every session, covering light placement, phone height, and background separation.
Then schedule a monthly review. Look at what performed, delete the presets you did not touch, and add one new look. A library that grows without pruning becomes as slow to use as having no library at all.
FAQ
Do in-app effects look worse than desktop-generated ones?
On a phone screen, the gap is much smaller than most people expect. The difference becomes visible in multi-shot sequences where consistency matters, in fine detail like fabric texture, and in anything that will be viewed on a large display.
How long should a generated effect clip be?
Shorter than you think. Two to four seconds holds attention well. Anything past eight seconds needs a narrative reason to exist.
Why does my effect look great in preview and bad after posting?
The platform re-encodes your file, and heavy downscaling or aggressive compression can introduce banding and shimmer. Export at native resolution, avoid very fine textures, and increase contrast slightly before exporting.
Can I use the same effect on every post?
You can, and it will help you build a recognizable look. But rotate at least one element — the camera behavior or the color treatment — so the feed does not feel like a single video repeated.
What should I do when the model produces a distorted face or hand?
Re-shoot with better frontal light and a more stable camera first. If that fails, reframe so the problem area is smaller in the frame, or shorten the clip so the distorted frame never lands on screen for long.
Is it worth learning a desktop editor if I mostly post short-form?
Learn it eventually, but not first. The habit of shipping consistently matters more at the start, and in-app tools teach you what your audience responds to faster and more cheaply.
How do I keep quality from drifting down when I post daily?
Standardize on a small set of looks and a fixed pre-publish checklist. Quality drifts when decisions are made from scratch every day; a template turns a creative decision into a routine one.
The bottom line
In-app effect generation is not a lesser version of "real" video production. It is a different production model built for a different constraint: the need to publish often enough to learn. Used carelessly, it produces a fast feed of forgettable clips. Used with a visual thesis, a three-look pack, a tight shooting routine, and a genuine quality check before publishing, it becomes the fastest route from idea to a video that actually performs.
Start with one look and one sentence. Ship it today. Then iterate tomorrow.

Alexander
More Blogs
Read MoreMontaggio video rapido: transizioni e software per l'AI
Guida pratica al montaggio video rapido con AI: transizioni fluide, software, workflow, coerenza visiva, errori da evitare e FAQ operative.
Building an AI Video Production Workflow From Concept to Cut
A practical guide to planning, generating, editing, and finishing AI-assisted videos with consistent characters, clear shot lists, and reliable review loops.
A Repeatable Post-Production Workflow for Polished AI Video
Build a repeatable AI video post-production pipeline: organize assets, cut story-first, design transitions, refine audio, and review versions calmly.