
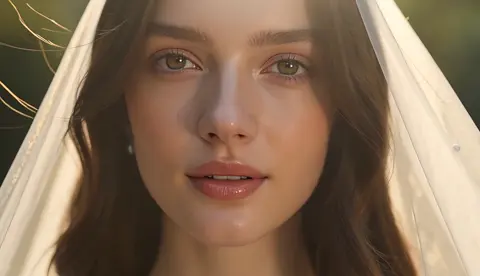
Luma Ray 2 vs Avatar Video Apps: Better Motion Workflow
Oct 13, 2026

Why Motion Fidelity Now Beats Talking-Head Polish
For several years, the fastest route to a polished explainer video was a synthetic presenter reading a script over a soft-focus office background. That approach solved a real problem: it removed the need for a camera crew, a studio, and a human who could deliver forty takes without blinking wrong. Avatar-first tools earned their place in onboarding decks, internal training, and localized product walkthroughs.
The limitation was never the face. It was everything around the face. Once viewers learned to recognize the signature of a synthetic presenter — the steady cadence, the gently drifting background loop, the shoulders that never quite move — the illusion stopped carrying weight. Attention shifted to the one thing those tools could not fake: believable motion in a believable world.
That is where modern text-to-video models change the conversation. Luma Ray 2 and similar engines treat movement as the primary subject. They simulate how fabric folds when someone turns, how dust catches a low sun, how a camera pushes through a doorway instead of sliding across a flat plate. If your audience has already seen a hundred synthetic presenters, the differentiator is no longer how clean the lip sync is — it is whether the scene feels like it was filmed rather than assembled.
This guide is about building that capability into a repeatable workflow. It covers where motion-first generation wins, where avatar tools still make sense, how to write prompts that produce controlled camera movement, and how to quality-check output before it reaches a client or a public channel.
How Luma Ray 2 Differs From Avatar-First Video Tools
The two categories are often compared as if they compete directly. They mostly do not. They solve different production problems, and the smarter move is usually to understand the boundary between them.
Avatar-centric platforms are built around a script. You write or paste text, choose or create a presenter, and the system handles speech synthesis, lip sync, and a limited set of background or slide layouts. The output is deterministic: the same script produces roughly the same video, which is exactly what you want for a hundred localized training modules.
Luma Ray 2 is built around a shot description. You describe a scene, a subject, a movement, and a camera behavior, and the model generates continuous frames that include physics, lighting changes, and parallax. The output is probabilistic: the same prompt produces variations, and your job is to steer rather than dictate.
Where each approach naturally wins
| Production need | Avatar-first tools | Motion-first models like Luma Ray 2 |
|---|---|---|
| Scripted narration at scale | Strong | Weak without a separate voice pipeline |
| Consistent human face across many clips | Strong with a fixed presenter | Requires reference frames and re-rolls |
| Cinematic environment shots | Limited | Strong |
| Physical interaction with objects | Minimal | Strong |
| Multi-language delivery | Strong | Depends on separate audio workflow |
| Product hero sequences | Limited | Strong with camera control |
The practical takeaway
If your deliverable is information transfer — compliance training, onboarding, a scripted explainer in six languages — an avatar tool is still the efficient choice. If your deliverable is atmosphere, product desire, or narrative tension, a motion-first model gives you footage that a synthetic presenter simply cannot generate. Many teams end up running both: avatar narration for the spine of the video, generated motion shots as B-roll and transitions.
The Capabilities That Actually Matter for Motion
Marketing pages list dozens of features. In practice, four capabilities determine whether generated clips are usable in a real edit.
Physically plausible movement
Watch a generated clip twice. On the second pass, look at weight. Does a character's step land with the mass you would expect? Does a thrown object arc naturally? Does water behave like water? Physically plausible motion is what separates footage you can cut into a sequence from footage that only works as a two-second abstract texture.
Coherent motion across a shot
The hardest problem in generative video is not the first frame or the last frame — it is keeping the middle from dissolving. Faces drift, hands multiply, backgrounds rearrange themselves. A model that holds identity and geometry across several seconds is worth far more than one that produces a beautiful single moment.
Camera motion control
Camera language is the fastest way to make a generated clip feel intentional. A slow push-in reads as focus. A lateral tracking shot reads as observation. A rising crane shot reads as revelation. When a model lets you specify camera behavior separately from subject behavior, you gain directorial control instead of hoping the composition lands well.
Lighting and material consistency
If your sequence cuts between three generated shots, the light direction should agree. A model that respects consistent light temperature and material response across shots saves hours of grading and makes a multi-shot sequence feel like one location rather than three unrelated renders.
A Repeatable Motion-First Video Workflow
The difference between people who get usable output and people who give up is almost never the model. It is the process around it. Here is a workflow that scales from a single hero clip to a ten-shot sequence.
Step 1: Write the shot list before you write a single prompt
Start with a one-page treatment. List each shot with four fields: subject, action, camera, and duration. For example:
- Shot 3 — Subject: cyclist in a yellow rain shell. Action: rounds a corner, leans into the turn. Camera: low tracking shot, slight upward tilt. Duration: four seconds.
This forces you to think in coverage rather than in single images. It also tells you in advance which shots can be generated and which need stock footage or a practical shoot.
Step 2: Lock the style with reference frames
Gather three to five reference images that define palette, contrast, and lens character. Keep them consistent — mixing a warm golden-hour reference with a cold blue one will pull every generation in two directions at once. If the model supports image-to-video, generate a still frame first, approve it, then animate from it. This is the single highest-leverage habit in the entire workflow, because it converts a creative decision into a fixed asset.
Step 3: Structure prompts in layers
A prompt that actually works reads like a camera sheet, not a paragraph of adjectives. Use this order:
- Shot type and subject
- Action and its timing
- Environment and light
- Camera movement
- Lens and texture
- Constraints to avoid
An example: "Medium tracking shot following a woman in a charcoal coat walking through a rain-slick market at dusk, she glances left at a fruit stall and continues, warm sodium lights reflecting on wet stone, camera moves left to right at walking pace, 35mm lens with shallow depth of field, no text overlays, no extra people in frame."
The constraint line matters more than beginners expect. Naming what you do not want — extra limbs, warped signage, flickering lights — reduces re-rolls significantly.
Step 4: Generate in batches and select ruthlessly
Produce four to six variations of every shot rather than one. Judge them at the sequence level, not individually: a clip that looks odd alone often cuts perfectly as a bridge between two others. Keep a shortlist folder and name files by shot number so your editor is not guessing later.
Step 5: Assemble, then repair with sound
Generated footage is forgiving when you add sound design. Footsteps, fabric rustle, room tone, and a low musical bed do more for believability than another round of regeneration. Cut to a temp track first, then decide which two or three shots genuinely need a re-roll.
Camera Motion Control: A Practical Vocabulary
Camera direction is the most underused lever in AI video. Learn these five moves and you can build a coherent visual language across an entire project.
Push in and pull out
A slow push toward a subject signals rising importance or intimacy. A pull out signals context, isolation, or conclusion. Keep the speed low — roughly five to ten percent of frame per second. Fast pushes read as a zoom artifact rather than a camera move.
Tracking and follow shots
When the camera tracks at the same speed as a walking subject, the subject stays anchored while the world slides behind them. This is the most reliably impressive generated move because it demonstrates parallax, which the eye reads as depth.
Orbit and arc
Circling a stationary subject reveals shape and volume — ideal for product hero shots. Keep arcs under ninety degrees; beyond that, background continuity usually breaks.
Crane and rise
Starting low and rising exposes scale. It works best when the shot ends on a wide, informative composition. Pair it with a subject that is already in motion so the movement has a reason to exist.
Handheld drift
Small, irregular motion makes a scene feel documentary and immediate. Specify a subtle amount; heavy handheld on generated footage amplifies existing artifacts instead of hiding them.
Keeping Characters and Style Consistent Across Shots
Consistency is the difference between a sequence and a slideshow. Three techniques do most of the work.
Anchor your protagonist visually
Generate a clean character reference — neutral pose, even light, plain background — and reuse it as an image input for every shot the character appears in. Describe the character the same way every time: same garment, same hair, same accessories. Vague descriptions produce a different person in every clip.
Fix the light, not the look
Decide the direction and color of your key light and repeat it in every prompt. "Window light from camera left, cool daylight, soft shadows" is a reusable anchor. Contradicting light between shots is the most common reason a sequence feels disconnected, even when the art direction is otherwise strong.
Build a transitions kit
Rather than fighting for perfect continuity, plan two or three recurring transitions: a whip pan, a foreground wipe, a match cut on movement. Transitions hide small inconsistencies and give the edit rhythm. Sequence-level thinking beats clip-level perfection every time.
When to Combine Avatar Narration With Generated Motion
Hybrid production is often the most efficient answer, and it is worth designing deliberately rather than treating it as a fallback.
Use a synthetic presenter for anything that must be word-perfect: compliance statements, pricing explanations, step-by-step interface walkthroughs. Use motion-first generation for the connective tissue: an establishing shot of the office, a product being handled, a customer walking through a doorway, a closing atmospheric beat.
A practical structure for a three-minute product video looks like this: forty-five seconds of generated environment and product motion, ninety seconds of narrated walkthrough with either an avatar or a real screen capture, then a thirty-second generated close. The generated footage carries emotion; the narrated section carries information. Each does what it is good at.
One caution: match the color grade between the two sources. Generated cinematic footage and flat screen-capture footage in the same timeline look like two different projects unless you bring them into a shared look with a grade or a subtle filmic LUT.
Common Mistakes and How to Avoid Them
Overloading the prompt
Ten competing ideas in one prompt produce a mushy average of all of them. One shot, one idea, one camera move. Split complex actions into separate shots and let the edit create the meaning.
Skipping the still-frame stage
Animating straight from text means every variable is in play at once. Generating and approving a still first reduces the search space dramatically and gives you a reusable asset if you need to regenerate later.
Judging clips in isolation
A clip that feels wrong on its own often works perfectly in context. Preview your shortlist in a rough sequence before deleting anything.
Ignoring duration
Most models produce better motion in short bursts. Three to five seconds of high-quality movement beats ten seconds of drift. Build longer sequences from cuts rather than from single long generations.
Forgetting audio
Silent generated footage always looks artificial, no matter how good the physics. Budget time for sound design from the beginning, not as a final polish step.
Regenerating instead of reframing
Sometimes the fix is not a new generation but a crop, a speed ramp, or a mirror flip. Cheap editorial fixes should always be tried before expensive re-rolls.
A Pre-Export Quality Checklist
Run this list before anything leaves your timeline.
- Motion is physically plausible at normal speed and at half speed.
- Faces and hands hold their structure throughout the shot.
- Background geometry does not shift or melt during camera movement.
- Light direction and color temperature match adjacent shots.
- No stray text, watermarks, or warped signage appears in frame.
- Shots are cut to the audio rhythm rather than the other way around.
- Any narrated or captioned content has been verified humanly for accuracy.
- The final export has been watched once at full volume on headphones and once on phone speakers.
That last item catches more problems than any other single check. Most viewers will see your video on a small screen with poor audio, and that is the version that has to work.
Frequently Asked Questions
Is a motion-first model a complete replacement for an avatar video tool?
No. It replaces the visual layer of production, not the narration layer. If your video is fundamentally a person explaining something, you still need text-to-speech or a real voice, plus a way to keep the presenter consistent. The two categories complement each other more often than they compete.
How long should a generated shot be?
Three to five seconds is the sweet spot for most scenes. Physically complex actions — running, fighting, water — often work best at two to three seconds. Assemble length through editing, not through a single long generation.
Do I need professional editing skills to use this workflow?
You need basic editing literacy: cutting to a beat, matching shots, and adjusting color. The generative part replaces the shoot, not the edit. If you can assemble a rough cut in any editor, you can produce a finished piece.
How many variations should I generate per shot?
Four to six is a reasonable starting point for hero shots and two to three for supporting shots. Track which prompts consistently produce usable results and build a personal prompt library from them.
How do I keep a character looking the same across many clips?
Reuse one approved reference image as input, describe the character with identical wording every time, and keep lighting consistent. Accept that small differences between shots are normal and plan transitions that disguise them.
When is generated motion the wrong choice?
When accuracy is the deliverable. Product interfaces, legal statements, medical instructions, and anything with visible text should be captured, screen-recorded, or narrated rather than generated. Generated footage is best at mood, movement, and environment — not at factual precision.
What is the biggest workflow upgrade for a beginner?
Write the shot list first. Almost every disappointing result traces back to prompting a scene rather than planning a shot. A one-page treatment with subject, action, camera, and duration will improve output quality more than any parameter tweak.
The Bottom Line
The shift from talking-head polish to genuine motion fidelity reflects a broader maturation in AI video production. Audiences have learned to recognize the shortcuts, and the work that holds attention now depends on believable movement, controlled camera language, and consistent light across shots.
Build the process — treatment, still frame, layered prompt, batch selection, sound design, quality check — and the model you use becomes a detail rather than a gamble. Choose avatar narration when the message must be exact. Choose motion-first generation when the scene must be felt. Then cut the two together, because the most convincing AI video is rarely produced by a single tool.

Alexander
More Blogs
Read MoreVidu Q4 Alternatives: 4K AI Video Models Compared (2026)
Vidu Q4 alternatives compared: Kling 4.0, Seedance 2.5, Wan 3.0, and Runway Gen-4 — 4K support, input modes, durations, audio, and what each costs in credits on Domer.
Top 4K AI Image Generators in 2026: 5 Models Compared on Real Costs
The top 4K AI image generators on Domer compared: Flux 3 Klein, Nano Banana 2.1, GPT Image 2.5, GPT Image 2, and Nano Banana Pro — 4K credit costs, reference limits, and speed.
Nano Banana 2.1 vs GPT Image 2.5: Which Image Model Should You Use? (2026)
Nano Banana 2.1 vs GPT Image 2.5 Flare compared: credit costs per resolution, aspect ratios, reference images, text rendering, and which tasks fit each model.