

Mobile Video Transition Effects: A Complete Editing Guide
Oct 13, 2026
Why Transitions Make or Break a Mobile Edit
Most viewers never consciously notice a good transition. They notice bad ones instantly: a hard cut that lands mid-blink, a spin that spins for no reason, a dissolve that drags a beat past the moment it should have ended. On a phone screen, where the frame is small and the viewer's thumb hovers over the scroll, that split-second judgment decides whether they keep watching.
Think of transitions as punctuation. A hard cut is a period. A match cut is a semicolon joining two ideas. A whip pan is an exclamation mark. A long cross-dissolve is an ellipsis meaning time has passed. Editors who understand this grammar stop decorating their timeline and start writing with it.
Mobile editing changes the economics of that decision. You are usually cutting short-form work: a product demo, a travel recap, a vertical ad, a talking-head explainer. Every second of dead air costs retention, so transitions carry double duty. They smooth a jump between two shots, and they compress time. A well-placed speed ramp can collapse a twelve-second walk into a two-second beat change, and the audience will read it as energy rather than as a trick.
This guide is not a catalogue of fifty effects. It is about when a transition earns its place, how to build one that renders smoothly on a phone, how to design its sound, and how to use AI-assisted tools to generate assets you could never shoot yourself.
The Rendering Reality of Editing on a Phone
What Your Hardware Actually Constrains
A modern phone decodes high-bitrate footage comfortably, but it does so inside a thermal budget. The real bottlenecks are memory bandwidth and heat, not raw clock speed. Stack a blur-heavy transition, a color grade, and two 4K layers on top of each other, and the device starts dropping frames, usually right around the tenth minute of editing. That stutter is not a flaw in the transition. It is your timeline asking for more than the chip can deliver in that moment.
Practical fixes: build long projects in a lower-resolution timeline, close background apps while editing, remove a thick case if the phone runs hot, and preview effects at reduced quality rather than full.
Preview Versus Export: Managing Expectations
Most mobile editors preview at half or quarter resolution. Edges look soft, glow looks muddy, and motion looks smoother than it will in the finished file. Never judge a transition in preview. Render a short test clip and watch it on the device you intend to publish for, usually a phone held at arm's length, because that is the only honest screening room you have.
Proxy Media and Playback Settings
A proxy workflow generates lightweight copies of your footage for editing, then relinks the originals at export. On mobile, many apps create these automatically when you import 4K or log footage. If your editor offers the option, leave it on. It is the single biggest quality-of-life upgrade for transition-heavy timelines, because smooth scrubbing is what lets you align the peak of a movement to the exact frame of a cut.
The Four Families of Transition Effects
Almost every transition, whether built in, downloaded, or generated, belongs to one of four families. Knowing the family tells you what it is good at and how much it will cost your device.
Cut-Driven Transitions
Invisible cuts, match cuts, cut-on-action, whip pans, and J and L audio cuts. These are the lightest options because they barely touch the frame, and many cost nothing beyond the cut itself. They also read as the most professional. Trailer editors lean on them for exactly that reason: the audience feels momentum without ever seeing an effect.
Motion Transitions
Zoom pushes, spins, slides, glitch shakes, and camera-whip moves animate the entire frame, so they need more graphics time. Duration matters here. Use 0.2 to 0.4 seconds for punchy social edits and 0.6 to 1 second when you want a cinematic feel. Anything longer starts to feel like a slideshow with extra steps.
Texture and Overlay Transitions
Light leaks, film burns, grain washes, ink drops, paper tears, and flare wipes layered over a cut. They hide the seam and set a mood instantly. A library of eight to twelve clips that match your color palette will cover nearly every situation you encounter, and adding a new one should be a deliberate decision rather than an impulse download.
Generated and Blended Transitions
Style transfer, morphs between two shots, and AI-generated in-between frames. These are the heaviest to render and the most impressive when they land, because they can connect two shots that share nothing at all in common.
A quick decision rule: if the two shots share a shape, a movement, or a color, use a cut-driven transition. If they share only a mood, use a texture. If they share nothing, generate the bridge.
A Practical Workflow: Adding Transitions Step by Step
Step One: Lock the Rough Cut
Finish the story before you touch a single effect. Trim the shots, fix the order, and watch the whole thing through once without any transitions at all. This sounds slow, but it prevents the most common waste of time in mobile editing: designing a beautiful transition into a shot you later delete.
Step Two: Mark Only the Cuts That Deserve Emphasis
Go through the timeline with fresh eyes and flag every cut point. Then delete half your flags. A transition on every cut is visual noise, and the audience stops feeling the rhythm entirely. Reserve effects for scene changes, time jumps, location changes, and the moment immediately before a payoff.
Step Three: Choose a Family by Emotional Intent
Ask what the cut is doing. Compressing time? Use a speed ramp or a soft dissolve. Spiking energy? Use a whip or a glitch. Maintaining continuity across a similar shape? Use a match cut. Announcing a gear change or product reveal? Use a texture wipe with a sound hit underneath it.
Step Four: Tune Duration, Easing, and Alignment
Duration is the most common mistake. Keep most transitions between 0.2 and 0.5 seconds on a short-form edit. Easing matters too: ease in and ease out so the motion accelerates naturally instead of snapping linearly. Then align the transition so the peak of the movement lands exactly on the cut, not a few frames before or after. Half a frame off is visible on a 60 fps timeline, and the fix is always to nudge rather than to replace the effect.
Step Five: Design the Sound Before the Visual
The ear accepts a cut that the eye would question. A swoosh, a riser, an impact hit, or a room tone shift can carry a transition that looks mediocre on its own. Place the whoosh so its peak coincides with the visual peak, then trim the visual to the audio rather than the other way around.
Step Six: Preview at Full Quality, Then Test-Export
Export a five to ten second segment around each transition and watch it on the target device. Check for stutter, audio drift, and color banding. Testing in small pieces is faster than exporting the full project five times, and it catches problems while they are still cheap to fix.
Match Cuts and Geometric Alignment in Detail
A match cut works because the viewer's eye is already tracking something across the frame. If that something continues into the next shot in roughly the same position and direction, the brain reads the two shots as one continuous movement rather than two separate clips.
The construction is mechanical. End shot A with a subject, an edge, or a shape occupying roughly the same screen position as the start of shot B. Keep the direction of travel consistent. Keep the horizon line consistent when both shots contain one. Keep the color temperature within a reasonable range so the cut does not flash.
On mobile, the practical trick is comparison. Many editors let you hold a frame or enable an onion-skin overlay, which lets you see the last frame of A and the first frame of B at the same time. If they do not line up, do not force it. Hide the mismatch by pushing both shots slightly in the same direction, so a small camera move masks the jump. Sometimes the cleanest solution is to shoot a bridging insert: a hand, a doorway, a shadow passing over the lens. Ten seconds of inserts can rescue an entire edit.
Time Remapping, Speed Ramps, and Velocity Edits
Speed ramps are the transition most associated with mobile-first editing, and they are also the most overused. A good ramp has a reason: it either highlights a specific moment or compresses an uninteresting stretch of time.
The recipe is consistent. Shoot at a high frame rate, ideally 60 or 120 fps, so you have material to slow down. Let the moment breathe in slow motion, then ramp back to real time exactly at the cut, so the outgoing shot is accelerating as the incoming shot begins at normal speed. In a curve editor, set a keyframe where the slow motion begins, a second keyframe at the moment of impact, and a third after the cut where speed returns to normal.
Two details separate polished ramps from clumsy ones. First, place the slowdown on the action itself, not on the pause before it, because a slow ramp over stillness just looks broken. Second, decide what happens to audio. Decoupling the audio and adding a whoosh is usually cleaner than letting a pitched-down voice track play through the ramp.
When interpolation options are available, optical flow produces smoother ramps than simple frame blending. It can also warp busy backgrounds, so watch for melting textures and switch to a basic blend, or soften the ramp, if artifacts appear.
Using AI Tools for Transition Assets and In-Betweens
Frame Interpolation and Clean Slow Motion
Interpolation tools synthesize intermediate frames between existing ones. They are useful for two jobs: turning ordinary footage into smooth slow motion, and creating a gradual morph from one shot into another when both share a subject or composition. Feed the tool a short clip rather than a long one, keep the motion simple, and upscale afterward if the output resolution is lower than your timeline.
Generating Textures, Light Leaks, and Overlays
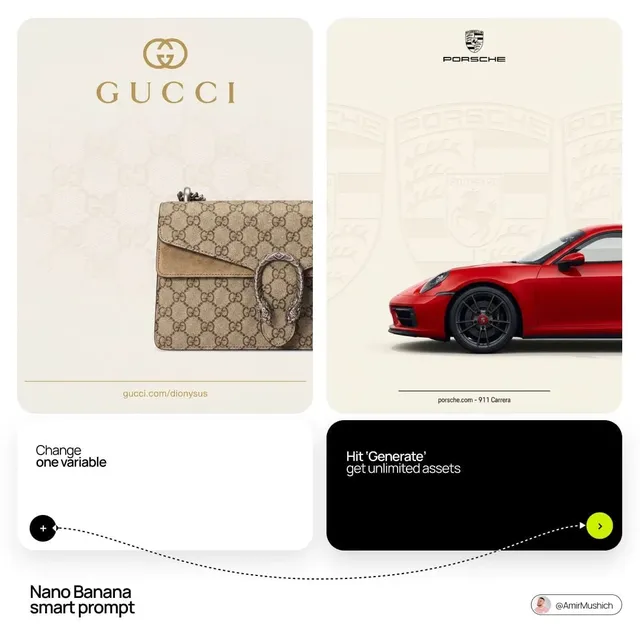
Generative image and video tools can produce seamless loop overlays that would otherwise require a shoot day and a lighting rig. Prompt for exactly what you need: a vertical light leak in warm orange on a black background, seamless loop, no text, no watermark. Generate at your delivery aspect ratio so you do not have to re-crop, and composite the result with a screen or add blend mode so the black background disappears.
Style Blending and Morph Transitions
Image-to-video models can blend two stills into motion, which makes them ideal for transitions between shots that share nothing structurally. Push the last frame of shot A and the first frame of shot B through the same model with a shared style prompt, then cut at the midpoint where the two have blended into something in between. Keep the aspect ratio matched, keep the motion prompt consistent between the two runs, and upscale before compositing, since generated frames are often delivered below timeline resolution. Treat these clips as premium assets: one or two per edit, reserved for the biggest moment.
Sound Design and Rhythm: The Invisible Transition
Transitions live on musical structure. Drop markers on the beat grid before you place anything, then decide which beats deserve a cut. A useful rule is to cut on the beat rather than on the bar, because the bar is usually too far apart to feel responsive in short-form work.
Layer sound in three parts. A whoosh carries the motion. An impact or a sub hit marks the landing. An ambience or room tone underneath keeps the two shots in the same acoustic world. Three layers is enough for most edits; four or more starts to sound cluttered on phone speakers, which is where most of your audience will hear it.
Finally, run the mute test. Watch the edit with the sound off. If any transition becomes confusing without audio, it is being carried entirely by sound, and it needs to be shortened, simplified, or replaced with a clean cut.
Mistakes That Make Mobile Edits Look Amateur
- Putting a transition on every cut. Fix: keep effects for scene changes and payoffs, and let the rest be hard cuts.
- Making the transition longer than the shot it covers. Fix: keep transitions shorter than a third of the shortest adjacent shot.
- Reversing the direction of motion between shots. Fix: match the direction of travel on both sides of the cut.
- Mixing aspect ratios. Fix: reframe every clip to your delivery ratio before you start editing.
- Ignoring frame rate mismatches. Fix: shoot and edit at one frame rate, and conform other clips before adding them.
- Overusing glow and blur overlays. Fix: reduce opacity and blend mode until the texture supports the story instead of covering it.
- Skipping sound design. Fix: add a whoosh and an impact to the two or three most important transitions in the edit.
- Judging quality in the preview window. Fix: always export a test clip and watch it on the target device.
- Cropping horizontal footage into vertical without reframing. Fix: use automatic subject tracking or keyframed crops rather than a center cut.
Export Settings, Quality Control, and Common Questions
Export settings depend on where you are publishing, but a reliable baseline for vertical social video is 1080 by 1920 at 30 or 60 fps matching your timeline, H.264 at 10 to 20 Mbps for broad compatibility, and H.265 when you need a smaller file. Keep audio at a healthy bitrate, then watch the full export once at 100 percent on a phone before you publish. Banding in gradients and stutter in ramps are the two problems that only appear after compression, and both are easier to fix in the timeline than to apologize for in the comments.
How long should a transition be?
For short-form work, 0.2 to 0.4 seconds for motion transitions and 0.4 to 0.8 seconds for dissolves. If the transition is long enough to notice as a separate event rather than a bridge, it is probably too long.
Why does a transition look smooth in the preview but stutter on export?
Previews render at reduced resolution and often skip frames to keep up. Export renders every frame at full quality, which exposes effects that were technically too heavy for your device. Simplify the effect, lower the timeline resolution, or shorten the transition.
Can I use AI-generated overlays and morphs in commercial work?
That depends on the license attached to the specific tool and model you use. Check the terms, keep records of what you generated and where, and prefer tools that grant commercial use clearly.
What if I have no footage for a match cut?
Shoot bridging inserts. A hand passing the lens, a door closing, a shadow crossing a wall, or a close-up of a texture can connect two unrelated shots and cost you thirty seconds of filming.
Do I need expensive gear to make transitions look good?
No. A phone on a small tripod, consistent lighting, and careful frame alignment will beat expensive hardware used carelessly. Sound design and timing matter more than sensor size at this scale.

Alexander
More Blogs
Read MoreMontaggio video rapido: transizioni e software per l'AI
Guida pratica al montaggio video rapido con AI: transizioni fluide, software, workflow, coerenza visiva, errori da evitare e FAQ operative.
Building an AI Video Production Workflow From Concept to Cut
A practical guide to planning, generating, editing, and finishing AI-assisted videos with consistent characters, clear shot lists, and reliable review loops.
A Repeatable Post-Production Workflow for Polished AI Video
Build a repeatable AI video post-production pipeline: organize assets, cut story-first, design transitions, refine audio, and review versions calmly.