
Utwórz
How to Scale Influencer Video Content With AI Workflows
Nov 4, 2026


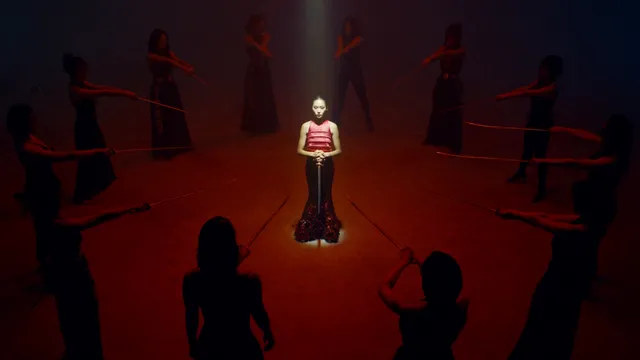
Scaling influencer video is not a matter of pressing a generate button more often. It is a production design problem. The creators and brands that publish consistently do not simply own more tools; they run a repeatable system that connects creative briefs, visual references, generation, editing, review, and distribution. When those parts fit together, a small team can produce a steady stream of on-brand clips without turning every upload into a bespoke project. This guide explains how to build that system, choose the right AI approach for each format, and keep quality under control as volume rises.
Start With a Content Operating System, Not a Tool List
AI video tools change quickly. A workflow built around one interface will age badly. A workflow built around clear inputs, standards, and handoffs will survive tool changes. Start by defining the operating system behind your influencer content: the content pillars, the recurring formats, the publishing cadence, the technical specs, the approval path, and the places where assets live.
A practical example is a creator with three pillars: practical education, product proof, and personality-led behind-the-scenes. The weekly cadence might be five short videos: two talking-head explainers, two product demonstration clips, and one lifestyle montage. The specs are fixed: vertical 9:16, 15 to 30 seconds, burned-in captions, a hook in the first two seconds, and a clear end card. Those decisions remove dozens of small questions from every production cycle.
When evaluating tools, score them against your operating needs rather than their feature list. Look for output consistency, control over framing and motion, export flexibility, audio support, collaboration features, and sensible data handling. Give each criterion a simple score and test the tool on the same brief before adopting it. Do not add more than two generators to the core pipeline until the review process is stable. Tool sprawl feels productive, but it usually creates incompatible files, inconsistent looks, and more editing work.
Map the Pipeline From Idea to Published Clip
A scalable pipeline has clear stages, and each stage has an owner. The exact software matters less than the handoffs.
Intake and briefing
Every video should begin with a brief that fits on one page. Include the audience, the single promise, the proof or demonstration, the desired action, the tone, must-say points, must-avoid points, reference links, and the target platform. Add a line for rights and consent status when a real person or product is involved. A one-page brief prevents the most common failure in AI video production: generating attractive footage that does not support the message.
Shot planning and prompt design
Break the script into shots before generating anything. Each shot needs a framing choice, an action, a camera behavior, a lighting direction, a duration, and a reference image or clip if one exists. A simple shot list is enough. For a thirty-second clip, six to nine shots are usually sufficient. Write prompts from the shot list, not from a blank page. This keeps the visuals tied to the narrative and makes it easier to replace one bad shot without regenerating the entire sequence.
Generation and assembly
Generate alternate takes for the shots that carry the most risk, such as a close-up of a face, a product label, or a hand interacting with an object. Select by continuity first and beauty second. Assemble in an editor where you can control timing, sound, captions, and color. Keep a version naming convention such as project-date-shot-take so that nobody publishes the wrong file. AI generation is only one part of the assembly; the edit is where pacing and clarity are won.
Review and publishing
Use two reviews. The first is a quality pass for visual continuity, audio, captions, and platform cropping. The second is a brand and claims pass for tone, accuracy, consent, and disclosure. After publishing, archive the final file, the approved shot list, the prompt set, and the reference pack. That archive becomes the starting point for the next batch and reduces the time spent reinventing the same visual language.
Choose the Right AI Video Approach for Each Format
Not every influencer video needs full generative production. The best workflow uses the simplest method that satisfies the brief.
| Format | Useful AI role | Human focus |
|---|---|---|
| Talking-head explainer | Script drafting, voice cleanup, captioning, background generation | Performance, claims, likeness approval |
| Product demonstration | B-roll generation, macro shots, clean background plates | Product accuracy, label visibility, feature proof |
| Lifestyle montage | Scene generation, transitions, color matching | Continuity, mood, audience fit |
| UGC-style testimonial | Script variants, rough cut assembly, subtitle styling | Authenticity, consent, disclosure |
| Educational explainer | Motion graphics, visual metaphors, generated backgrounds | Accuracy, pacing, comprehension |
A talking-head video often needs only a good script, a clean capture, and light post-production. Generating a synthetic presenter may be unnecessary and can weaken trust. A product demonstration, by contrast, may benefit from generated macro shots that would be expensive to film. A lifestyle montage can use AI to create supplementary scenes, but the edit still needs a human eye for rhythm and brand fit. Choose the approach that reduces production friction without adding a new layer of risk.
Build a Prompt and Asset Library That Keeps Output Consistent
Consistency does not come from writing longer prompts. It comes from reusing the right references and the same visual grammar across shots.
Character and wardrobe references
Create an approved reference pack for each recurring influencer or persona. Include a neutral headshot, a full-body image, two or three expressions, the approved wardrobe, and a do-not-change list. The do-not-change list is especially important: it might specify hair length, eyewear, tattoo placement, product color, or a signature accessory. If a real creator is involved, confirm in writing how their likeness may be used and for how long. Consent is part of the production system, not an afterthought.
Camera, light, and color grammar
Define a small visual vocabulary. For example: handheld medium shots for energy, locked-off close-ups for product detail, soft window light for lifestyle scenes, and a warm neutral palette with one accent color. Use the same terms in every prompt and brief. If every shot is described with a different lens, lighting style, and color mood, the final edit will feel like a collage from different projects.
Reusable prompt blocks
Build prompt blocks for subject, environment, camera, lighting, style, and exclusions. A base subject block might describe the person, wardrobe, and expression. An environment block might describe the room, time of day, and background activity. A camera block might specify framing and movement. Keep the language short and concrete. When a shot fails, change one block at a time so you learn what caused the problem. Save successful combinations in a shared library with a note about what they are good for.
Create a Review Loop That Catches Drift Early
Reviewing only at the end is expensive. Check the work at three points: after the shot list, after the first generated frame of each risky shot, and after assembly.
The early review asks whether the shot plan tells the story. The frame review catches likeness drift, wardrobe changes, impossible hands, unreadable labels, and inconsistent lighting before you generate a full sequence. The assembly review checks pacing, captions, audio, and platform readiness. A simple scoring rubric helps a team stay consistent: continuity, clarity, brand fit, and platform readiness, each scored from one to five. Anything below three goes back with a specific note. A note that says the shot feels off is not useful; a note that says the product label is hidden at second four and the hand looks unnatural is actionable.
Batch reviews where possible. Instead of reviewing one clip at a time, review a set of ten with the same rubric. This trains the team to spot patterns and makes approval faster. Keep a running list of recurring defects and fix the reference pack or prompt library when the same problem appears three times.
Scale Volume Without Scaling Rework
Volume grows safely when production is organized by setup rather than by individual video. If ten clips need a kitchen scene, generate and select all kitchen shots together. If six clips need the same presenter, lock the reference pack and wardrobe before starting. Batching reduces setup time and exposes continuity problems earlier.
Use a variant matrix instead of making endless one-off versions. Choose two or three hooks, two visual treatments, and two endings. That gives you a manageable set of combinations without producing dozens of near-duplicates. Set stop rules: if two generations fail to produce a usable shot, simplify the shot, change the reference, or move the idea to a different format. Do not keep generating in the hope that a better result will appear. The goal is a predictable output, not a lucky accident.
Also protect the human bottleneck. If one editor reviews every frame and writes every caption, the pipeline will stall at that person. Document the rubric, create templates for captions and end cards, and train a second reviewer on the brand standards. Automation should remove repetitive assembly work, not remove accountability for the final result.
Repurpose One Shoot Into Many Deliverables
A single strong concept can support a primary vertical video, two cutdowns, a horizontal version, a carousel of stills, and a set of text posts. Plan those derivatives before production so that the shots cover the needed crops. A wide establishing shot may work for horizontal, while a close-up may be better for vertical. Captions must be checked at every aspect ratio.
Create a hook bank for each content pillar. Hooks are not clickbait; they are clear openings that tell the viewer what problem or idea is coming. Test different openings against the same body footage. For localization, keep product names and claims stable while adapting idioms and cultural references. Do not publish the same clip everywhere with only a new caption. Change the opening, the pacing, or the proof point so that each platform gets a version that feels native.
Measure Quality and Throughput Together
Scaling is not successful if output rises and quality falls. Track both sides of the equation. Useful throughput metrics include videos published per week, cycle time from brief to publish, and first-pass approval rate. Useful quality metrics include rework rate, caption error rate, retention, watch-through, saves, and the quality of comments. For commercial content, add conversion or qualified traffic, but interpret it alongside the creative treatment rather than as a single verdict.
Review the dashboard weekly. If throughput rises but retention falls, the problem is usually the hook or the pacing. If first-pass approval falls, the reference pack or brief is probably too vague. If rework is concentrated in one format, simplify that format or add a specialist review step. The decision rule is simple: fix the earliest stage that explains the defect. Do not solve a briefing problem by adding more editing.
Common Mistakes and How to Fix Them
Tool sprawl is the most common mistake. Teams adopt five generators and end up with inconsistent looks and incompatible files. Fix it by keeping one primary generator and one editor until the review process is stable.
Vague briefs are the second. If the brief does not state the promise, the proof, and the must-avoid points, the generator will fill the gap with generic choices. Use a one-page template and require references.
Missing reference packs cause likeness drift. Build approved character, wardrobe, and environment references before the first batch. Ignoring audio is another frequent problem. Poor sound makes good visuals feel amateur, so plan voice, music, and sound effects early.
Too many variants create rework. Use a matrix and stop rules. Over-automation is also a trap: AI can draft, generate, and assemble, but a human must approve claims, consent, likeness, and final quality. Finally, keep an archive. Without naming conventions and stored prompt sets, the team cannot repeat what worked.
Frequently Asked Questions
Do I need multiple AI video tools to scale?
No. A small team can go far with one primary generator, one editor, and a simple asset library. Add a second tool only when it solves a specific, repeated gap, such as better product shots or cleaner caption workflows. More tools increase comparison work and make consistency harder.
How do I keep an influencer likeness consistent across clips?
Use a written consent and usage agreement, an approved reference pack, locked wardrobe rules, and a frame-level review step. Change one visual variable at a time when testing. If a likeness still drifts, reduce the number of risky angles and rely on simpler framing.
Can AI fully automate influencer video production?
It can automate parts of scripting, generation, assembly, and captioning. It should not automate accountability. Strategy, claims, consent, likeness approval, and final editorial judgment remain human responsibilities. The practical goal is fewer repetitive tasks, not an unattended pipeline.
What should I automate first?
Start with brief templates, shot lists, version naming, caption drafts, and first-pass assembly. These steps are repetitive and easy to check. Leave high-risk creative choices and claims review manual until the workflow is proven.
How do I avoid video that looks generically AI-made?
Use specific references, believable camera behavior, real product details, imperfect environments, and strong sound design. Cut on action, vary shot length, and remove any shot that does not carry information. A human edit is often the difference between a synthetic demo and a credible influencer clip.
How many videos can a small team manage?
The number depends on review capacity, not generation speed. Start with a batch of five to ten videos per week, measure first-pass approval and rework, then increase volume only when the quality metrics stay stable. A calm pipeline with predictable output beats a large pipeline that needs constant rescue.

Alexander
More Blogs
Read MoreAlternative a Synthesia: guida al video AI professionale
Scopri come scegliere un'alternativa a Synthesia e costruire un workflow video AI professionale, dalla sceneggiatura alla distribuzione finale.
How to Extract Transcripts from Any Video: Workflow Guide
A practical workflow for extracting accurate transcripts from any video: audio prep, ASR choices, automation, QA, captions and SEO reuse.
Optimize 1080p Video Workflows on Integrated Graphics Rigs
Learn how to plan, edit, and render smooth 1080p video on integrated graphics with practical memory, proxy, codec, and AI-assisted workflow tips.