

Script to Animation: Building an AI Video Workflow That Works
Oct 13, 2026
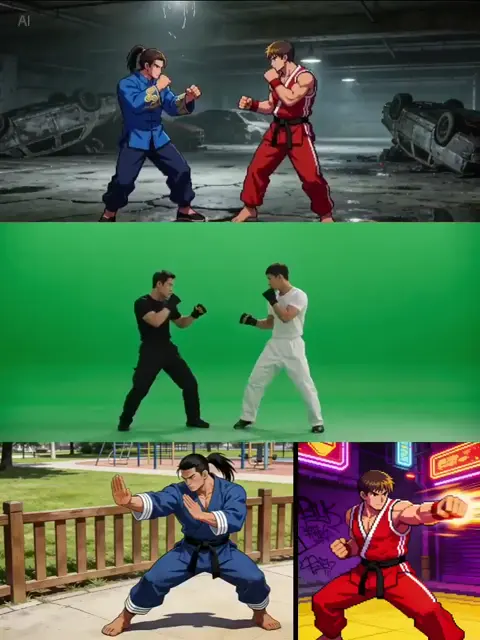
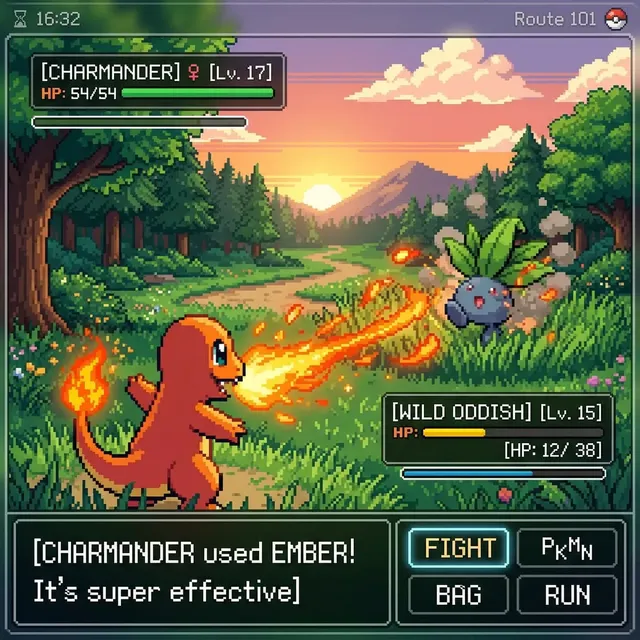
Turning a written script into an animated video used to require a studio: storyboard artists, character designers, animators, compositors, and weeks of render time. Today, a single creator with a laptop can produce a coherent animated short by moving through a chain of specialized tools. The catch is that the chain is fragile. Every hand-off — script to shot list, shot list to still image, still image to motion, motion to final edit — is a place where consistency breaks and pacing collapses.
This guide lays out a repeatable workflow for script-to-animation production with AI. It covers how to write a script that generates well, how to choose the right generation method for each shot, how to lock down visual style and character identity, how to direct motion and pacing, and how to assemble the pieces into something that feels intentional rather than assembled.
From Script to Screen: What AI Animation Pipelines Do Well
Text-to-video and image-to-video systems have matured fast, but they are not uniform in quality. Understanding their strengths and blind spots is the difference between a project that finishes and one that stalls on shot fourteen.
These models are genuinely strong at:
- Atmosphere and establishing shots. City skylines, landscapes, interiors, weather, and lighting changes are reliable and often beautiful on the first or second attempt.
- Single-action beats. A character turns, reaches, opens a door, walks three steps, looks up. Short, unambiguous actions land consistently.
- Stylized looks. Anime cel shading, watercolor, claymation, 2.5D parallax, retro Saturday-morning cartoon, painterly realism — all achievable with the right reference and wording.
- Camera moves. Slow push-ins, lateral dollies, orbit shots, and drone-style reveals are now generated rather than faked.
They remain unreliable at:
- Long continuous takes with multiple actions and dialogue
- Precise hand interaction with props
- Two or more characters exchanging dialogue in one shot
- Physics that must stay internally consistent across a sequence
- Legible on-screen text, signage, or logos
The practical conclusion is simple: treat every model as a shot generator, not a scene generator. Your job as director is to decompose the scene into shots the model can actually deliver, then rebuild the illusion of continuity in the edit.
The Five Stages of a Script-to-Animation Pipeline
A well-run project moves through five stages. Skipping one typically costs more time later than it saves now.
Stage 1: Script and beat breakdown
Write the script normally, then mark every beat where something changes: a decision, a reveal, a location shift, an emotional turn. Beats become scenes; scenes become shots.
Stage 2: Shot list and storyboard stills
Convert each beat into one or more shots with a stated subject, action, framing, and duration. Generate still frames for the key shots before animating anything. Stills are cheap to iterate and expose composition problems early.
Stage 3: Motion generation
Animate the approved stills or generate motion directly from text prompts. Keep clips short at this stage; length adds risk without adding value.
Stage 4: Sound design and voice
Record or synthesize dialogue and narration, then lay in music, ambience, and effects. Audio is what makes separately generated shots feel like one continuous world.
Stage 5: Edit, upscale, and delivery
Assemble on a timeline, trim to rhythm, stabilize and retime as needed, upscale, color grade, and export for the target platform.
Writing a Script That Animates Well
Screenwriting for humans and screenwriting for generators overlap, but they are not identical. A few adjustments dramatically raise your hit rate.
Write visible actions, not inner states
"Maya realizes she has been betrayed" gives a model nothing to render. "Maya's smile fades; she slowly sets the photograph face-down on the table" gives it a subject, a prop, a motion, and an emotional read. If a beat cannot be expressed as something visible, express it through a reaction shot, an insert, or the voiceover track.
One idea per shot
Split compound sentences. "He runs down the alley and vaults the fence while the drone closes in" is three shots, not one. Each shot gets a single primary action, and if the action has a clear start and end, generation becomes far more predictable.
Keep shots short by design
Most generated clips work best between three and six seconds. Write with that rhythm in mind. A sixty-second short built from fifteen four-second shots has more energy and far fewer artifacts than one built from four fifteen-second shots.
Treat dialogue as an audio problem first
Generating believable lip sync inside a moving, angling shot is still the hardest ask in the stack. The reliable pattern is to generate the visual performance — a listening reaction, a wide of the conversation, an over-the-shoulder — and place the spoken line on the audio track. Reserve close-up talking shots for moments that truly need them, and expect to iterate more there.
Note the un-generatable moments early
If the script hinges on a character reading a handwritten letter or counting exact change, decide now whether that becomes a motion-graphics insert, a sound cue, or a rewrite. Flagging these early prevents a late-stage bottleneck.
Choosing a Generation Method Shot by Shot
Not every shot should be made the same way. Mixing methods is not a compromise — it is standard practice, and it is how you keep the pipeline moving.
Text-to-video
Best for establishing shots, abstract transitions, environmental motion, and anything where exact character identity does not matter. Fastest path from idea to moving image. Weakest at identity consistency.
Image-to-video
Feed an approved still and let the model add motion. This is the workhorse for character shots because the composition, wardrobe, and lighting are already locked. Choose this whenever a shot must match a previous one.
Hybrid approaches
- Animate over stills. Pan, parallax, and depth-shift a single artwork for contemplative beats. Inexpensive, stable, and stylistically strong.
- Rotoscope and mask. Animate a base performance, then paint over or composite elements that must stay precise.
- Motion graphics inserts. Titles, phone screens, maps, and documents are far cleaner when built as graphics than generated.
- Frame interpolation. Generate at a lower frame rate and interpolate to smooth motion where the model struggles.
A quick decision table helps when you are staring at a shot list:
| Shot type | First choice | Why |
|---|---|---|
| Establishing / landscape | Text-to-video | No identity to preserve |
| Character close-up | Image-to-video | Locks face and wardrobe |
| Dialogue exchange | Wide + audio-led | Avoids lip-sync risk |
| Prop or document insert | Motion graphics | Text stays legible |
| Dream / transition | Text-to-video with style prompt | Failure looks intentional |
| Continuing action | Image-to-video, seeded | Matches prior shot |
Building a Style Bible for Consistency
A style bible is a short document that defines the visual rules of your project. It exists so that you — and any collaborator — can describe the same look the same way every time. Without one, your film will drift from painterly to plastic over twenty shots.
A working style bible contains:
- A one-line visual thesis. "Hand-painted watercolor with heavy paper texture and a warm ochre palette."
- Three to five reference images. These matter more than adjectives. Attach them wherever the tool accepts references.
- A locked palette. Four to six hex values for dominant, secondary, and accent colors.
- Lens and framing rules. For example, 35mm-equivalent lens, eye-level framing, no fisheye, shallow depth of field on close-ups only.
- Lighting rules. Overcast diffusion, single warm practical source, cool moonlight for night scenes.
- A reusable style prompt block. Twenty to forty words you paste into every generation.
- A negative list. Terms that consistently ruin your look: plastic skin, extra fingers, oversaturated neon, lens flare, watermark, split screen.
Treat the style prompt block like a constant in an equation. Change only the subject and action between shots, and the outputs will look like they belong to the same film.
Keeping Characters Recognizable Across Dozens of Shots
Identity drift — the slow mutation of a face, hairline, or jacket across a sequence — is the single most common quality problem in AI animation. It happens because each generation starts fresh unless you give it anchors.
Build a character sheet first
Create four to six clean stills of the character: front three-quarter, profile, full body, and a close-up. Approve them before animating anything. These become your identity anchors for the rest of the project.
Use reference-driven generation
Where a tool supports multiple reference images or subject conditioning, supply the character sheet rather than a single frame. Multi-image references reduce drift dramatically compared to prompts alone.
Lock what you can
Use the same seed for a run of shots, keep wardrobe and hair unchanged within a scene, and avoid mixing aspect ratios mid-sequence. If the tool exposes identity strength or reference weight, raise it for close-ups and lower it for wide shots where pose matters more than face detail.
Control the framing you ask for
Identity holds best at medium and close framing. Very wide shots invite the model to invent detail. If a wide is required, generate it once, then reuse it as a background plate and composite or return to tighter coverage for the character.
Accept controlled variation
Small changes in lighting and angle between shots read as filmmaking, not error. The goal is not pixel-identical faces; it is a viewer who never doubts they are watching the same person. Audiences forgive a slightly different nose. They do not forgive a character who changes species between scenes.
Directing Motion, Camera Language, and Pacing
Motion prompts are direction. The vocabulary you use determines whether a shot feels like a film or like a slideshow with vibration.
Name the camera move explicitly
"Slow push-in," "static locked-off shot," "lateral tracking left," "gentle handheld follow," "crane up revealing the valley." One move per shot. Two moves in a prompt usually produces a smear.
Specify motion amplitude
Words like subtle, slow, gentle, and minimal reduce the model's tendency toward exaggerated, rubbery movement. Reserve strong verbs for moments that should feel violent or kinetic.
Match energy to the edit
Cut on action: finish a gesture in one shot, begin the next shot mid-gesture. Match eyelines so conversations read as continuous even when the two sides were generated separately. Use a wide after a run of close-ups to reset geography, and a close-up after a wide to refocus attention.
Vary shot length deliberately
Uniform shot lengths create a metronomic feel. A common rhythm is a slightly longer opening shot, a series of short cuts through the middle, and a held final shot that lets the viewer breathe. Build this rhythm into the shot list rather than discovering it in the edit.
Plan transitions as shots
A whip pan, a match cut on a shape, or a darkness-to-darkness cut between scenes can be generated as its own clip. Designing transitions deliberately is what separates a polished short from a stack of unrelated clips.
Voice, Music, and Sound Design
The audio track is the connective tissue. Viewers forgive imperfect motion far more readily than a hollow, silent world.
Voiceover and dialogue
Synthesized voices are now good enough for narration and secondary characters. Record yourself for the lead if you can — human performance covers a lot of visual inconsistency. Keep a consistent tone and pace across the whole script by generating or recording all lines in one session with identical settings.
Lip sync strategy
For direct-to-camera lines, generate a fairly static head-and-shoulders shot, then apply a lip-sync pass. For everything else, place the line over a reaction shot, a wide, or an insert. Audiences read intent from context, and this approach removes the highest-risk generation from your critical path.
Ambience and foley
Every scene needs a floor of sound: room tone, wind, traffic, the hum of a fridge. Add footsteps, cloth movement, and prop handling on the beat. These small cues do more for continuity than any visual fix.
Music
Choose one motif per emotional thread and reuse it. Duck music under dialogue by three to six decibels, and let it swell in the gaps between lines. Silence is also a tool — a beat with no music at all makes the next cut land harder.
Editing, Upscaling, and Final Delivery
Assembly is where separately generated shots become a film. Work in a non-linear editor you know well — Resolve, Premiere, Final Cut, or a lighter option like CapCut — and keep the project organized.
Assemble rough first
Lay every approved clip on the timeline in script order with no effects. Watch it start to finish. Problems with pacing, clarity, and continuity are obvious at this stage and expensive to fix later.
Trim aggressively
Cut the first and last half-second of most generated clips; that is where motion ramps up and artifacts gather. Retime slightly — 95 percent or 105 percent speed — to fix sluggish or frantic movement.
Stabilize and clean
Use stabilizer on handheld-style shots, and a light denoise or grain pass to unify clips that came from different generation runs. A subtle film grain layer across the whole timeline hides more inconsistencies than any single fix.
Upscale last
Upscale after the edit is locked so you are only processing final footage. A 1080p master is enough for most platforms; reserve 4K for large-screen or client delivery.
Grade and export
Apply one look to the full timeline rather than per clip. Export at the platform's preferred resolution and frame rate, add captions if the video will be watched muted, and keep the project file so revisions do not require regenerating anything.
Common Mistakes and Troubleshooting
Generating too long. If clips feel mushy and drifting, they are too long. Cut them shorter and cut more of them.
Writing prompts like briefs. Long paragraphs of description dilute the signal. Lead with subject, then action, then camera, then style.
Changing style mid-project. Introducing a new adjective or reference image halfway through guarantees a visible seam. Lock the style block before shot one.
Skipping storyboard stills. Generating motion from an unapproved composition wastes the most expensive resource you have: time.
Ignoring the audio bed. A technically clean sequence with no ambience will feel unfinished no matter how good the visuals are.
Chasing one perfect shot forever. Set an attempt limit per shot — often five to eight generations — then move on or change approach. A slightly imperfect shot that exists beats a perfect shot that does not.
FAQ
How long should each generated clip be?
Three to six seconds is the sweet spot for most tools. Longer clips tend to drift, warp, or lose subject identity. If a beat needs more time, cover it with two or three shorter shots and let the edit carry the duration.
Do I need a storyboard before generating motion?
Not a hand-drawn one, but you should approve key stills. Stills are fast to change and reveal composition, palette, and character problems before you spend time on motion. A shot list plus six to ten approved frames is usually enough for a one-minute piece.
Why does my character's face change between shots?
Because each generation starts from a different starting point and a slightly different prompt. Fix it by using reference images, consistent seeds, identical style wording, and tighter framing. Also check that your prompt did not introduce a new adjective — words like "cinematic" and "dramatic" can shift rendering styles between runs.
Can I generate an entire scene in a single prompt?
Rarely, and not reliably. Multi-action, multi-character scenes exceed what current models handle consistently. Break the scene into shots and rebuild continuity in the edit; the result is both more controllable and more cinematic.
What resolution should I generate at?
Generate at the highest setting your tool supports natively, then upscale once at the end. Generating at low resolution and upscaling early locks in softness and artifacts that later passes cannot repair.
How do I handle lip sync on a tight timeline?
Convert as many lines as possible into off-screen dialogue over reaction shots, wides, and inserts. Reserve direct lip-sync for the two or three moments where seeing the character speak is essential to the story.
Is it worth mixing generated footage with real footage or motion graphics?
Often yes. Motion graphics handle text, screens, and diagrams cleanly, and a single real-world shot can ground an otherwise stylized world. Hybrid timelines are normal in professional AI-assisted work, not a sign of a shortcut.
The through-line in all of this is preparation. Every hour spent on a script that describes visible actions, a shot list with deliberate pacing, a locked style bible, and a character sheet pays back several times over during generation. The tools will keep improving, but the workflow — plan small, generate short, anchor identity, cut to rhythm, and finish with sound — is what turns a script into a film that holds together from first frame to last.

Alexander
More Blogs
Read MoreVidu Q4 Alternatives: 4K AI Video Models Compared (2026)
Vidu Q4 alternatives compared: Kling 4.0, Seedance 2.5, Wan 3.0, and Runway Gen-4 — 4K support, input modes, durations, audio, and what each costs in credits on Domer.
Top 4K AI Image Generators in 2026: 5 Models Compared on Real Costs
The top 4K AI image generators on Domer compared: Flux 3 Klein, Nano Banana 2.1, GPT Image 2.5, GPT Image 2, and Nano Banana Pro — 4K credit costs, reference limits, and speed.
Nano Banana 2.1 vs GPT Image 2.5: Which Image Model Should You Use? (2026)
Nano Banana 2.1 vs GPT Image 2.5 Flare compared: credit costs per resolution, aspect ratios, reference images, text rendering, and which tasks fit each model.