

Video Effects Software Then vs Now: AI Fusion Workflow Guide
Oct 13, 2026

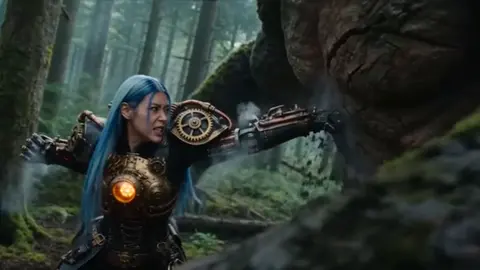
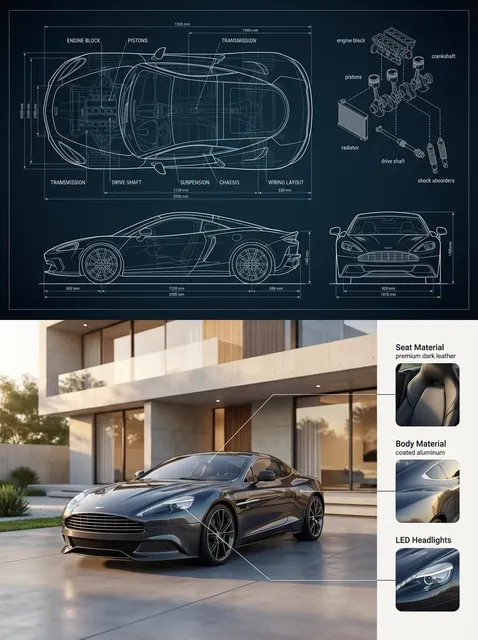
The conversation around video effects software often gets stuck on feature lists: how many effects, presets, nodes, or plugins. That framing misses the real change. A modern effects workflow is less about stacking filters and more about directing a system that can generate, refine, and maintain visual continuity across an entire project. The shift from manual layer-based editing to AI fusion pipelines changes who can execute ambitious ideas and how quickly those ideas survive production pressure. This guide compares the old mental model with the new one, then gives you a practical workflow for music videos, product spots, narrative shorts, explainers, and social campaigns.
If you learned editing through keyframes, trackers, and render queues, your instincts are still valuable. Timing, composition, rhythm, and story remain the foundation. The difference is that many technical bottlenecks that once consumed days can now be handled by models that understand reference images, motion, depth, and audio context. The challenge moves from how do I build this effect to how do I specify it clearly and keep it consistent.
Why the Old VFX Toolkit Still Matters
Legacy digital content creation tools dominated because they gave artists precise control. After Effects, Nuke, Fusion, and similar platforms turned video into a stack of layers, masks, trackers, and expressions. A skilled compositor could isolate a subject, rebuild a background, add particles, and match camera movement frame by frame. That craftsmanship still matters. AI does not remove the need for taste; it changes where taste is applied.
What legacy software did well
Manual tools excelled at repeatable technical tasks. Rotoscoping, planar tracking, chroma keying, color matching, and 3D camera solving became reliable once you learned the interface. A studio could build a pipeline around project files, shared assets, and render farms. The output was deterministic. If a shot looked wrong, you could inspect every parameter, adjust a curve, and re-render. That predictability made legacy software the backbone of broadcast, advertising, and film post-production.
Where manual pipelines broke down
Manual workflows struggle with speed and scale. A single complex shot might require tracking, masking, cleanup, relighting, and compositing passes. Multiply that by dozens of shots, and the schedule becomes fragile. Character consistency across cuts is especially expensive. You may need motion capture, facial rigs, wardrobe references, and manual animation to keep a performer recognizable. Small changes cascade through the project. A new camera angle can invalidate hours of tracking. A client note about wardrobe can force a re-render of every affected layer. These bottlenecks are not about skill; they are about architecture.
The Core Change: From Compositing Layers to Generating Frames
The biggest difference between older effects work and current AI fusion pipelines is the source of the image. In a traditional workflow, you build a shot from captured footage and synthetic elements. In a generative workflow, you often describe the shot, provide references, and let a model synthesize or transform frames while you guide continuity. The editor becomes a director of constraints: subject identity, style, camera behavior, lighting, and pacing.
Layer-based thinking
Layer-based thinking assumes every element is separate. Foreground, background, text, particles, and color grades live on different tracks. This is powerful for control, but it creates a linear chain of dependencies. If the background changes, the foreground matte may need adjustment. If the foreground moves, the tracking data must be updated. The more layers you add, the more fragile the shot becomes.
Generative synthesis as a directing medium
Generative synthesis treats the shot as a set of relationships. You define what must stay stable and what can vary. A character reference keeps the face and wardrobe consistent. A style reference controls color, texture, and film grain. A camera instruction controls lens length, depth of field, and movement. The model fills in the gaps, but you still make creative decisions. The important shift is that iteration becomes faster. You can test five camera moves before lunch instead of building one over two days.
Consistency: The Hardest Problem in AI Video
Consistency is where amateur AI videos fall apart. A character looks different in every shot. A product changes shape. A location shifts from night to day without warning. Modern pipelines solve this with reference locking, not luck. The goal is to create a visual contract that every generated shot must obey.
Character and style locking
Character locking means giving the system a stable identity reference. This can include face images, full-body poses, wardrobe details, and expression notes. Style locking means defining the visual language: color palette, contrast, grain, lens artifacts, and animation style. When both are locked, you can generate new angles without losing recognition. The best results come from references that are clean, well-lit, and consistent. A blurry reference produces blurry continuity.
A practical reference strategy
Build a small reference board before generating. Include one master character image, one style frame, one location frame, and one camera example. Write a short continuity note that lists what must never change: hair color, logo placement, time of day, mood, and clothing silhouette. Then generate a test shot. If the test drifts, adjust the reference set before scaling to more shots. This saves enormous time later because you catch identity problems before they multiply.
Camera Language, Lenses, and Cinematic Control
Camera language is not just movement. It is lens choice, depth of field, shutter feel, framing, and the emotional distance between the viewer and the subject. Older tools required you to simulate these qualities manually with 3D cameras, motion blur, and depth passes. AI fusion systems can interpret camera instructions and apply them across shots, but only if you specify them clearly.
What lens control changes
Lens control affects storytelling. A wide lens makes a room feel expansive or distorted. A long lens compresses space and isolates the subject. A shallow depth of field directs attention. When you can describe and lock these qualities, your generated footage starts to feel like a coherent film rather than a collection of clips. You can also match existing footage more easily by referencing its lens behavior.
Common mistakes with virtual camera moves
One common mistake is asking for too much movement. A push-in, orbit, crane rise, and rack focus in the same shot can confuse the model and the audience. Another mistake is ignoring shot size. If every shot is a medium close-up, the edit feels flat. Plan a sequence with wide, medium, and close shots. Also avoid changing lens language between shots of the same scene unless you intend a stylistic break. Consistency in camera grammar makes AI-generated footage feel intentional.
Audio-Visual Coherence in Modern Effects Workflows
Audio is not a final step. It is a continuity tool. Multimodal models can use audio timing, rhythm, and tone to guide visual effects. This is especially useful for music videos, trailers, and social content where cuts land on beats or dialogue cues. When audio and visuals are planned together, effects feel motivated rather than decorative.
Multimodal timing
Multimodal timing means the system understands relationships between sound and image. A drum hit can trigger a light flash. A bass drop can motivate a camera shake. A line of dialogue can determine when a character turns. You do not need to hand-key every accent if you provide an audio reference and a clear instruction. The result is tighter pacing and fewer awkward cuts.
Sound-led effects decisions
Start with a scratch track. Mark the moments that need emphasis. Then design effects around those moments instead of adding effects and hoping the audio fits. This approach also helps with client review because stakeholders react to rhythm quickly. If the sound-led cut works, the visual polish becomes easier to justify.
Scalable Architecture Without the Complexity
A modern effects workflow depends on pipeline design. Older monolithic setups were powerful but heavy. Newer systems split tasks into stages: analysis, generation, compositing, audio sync, color, and delivery. This modular approach lets you iterate on one stage without rebuilding everything. It also makes collaboration easier because reviewers can comment on specific outputs.
Pipeline stages
A practical pipeline has five stages. First, ingest and organize references. Second, generate or transform shots with locked identity and style. Third, composite and clean up where needed. Fourth, sync audio and refine pacing. Fifth, grade, finish, and export multiple aspect ratios. Each stage should have a clear owner and a checklist. Without checklists, small drift becomes big rework.
Iteration and review loops
Fast iteration is only useful if feedback is structured. Use timecode comments, not vague notes. Ask reviewers to identify whether an issue is identity, motion, lighting, or pacing. This makes revisions faster and prevents endless tweaking. Keep a version log so you can compare changes. A good review loop turns AI speed into reliable output.
A Step-by-Step Modern Effects Workflow
This workflow works for short-form and long-form projects. It assumes you have a script, treatment, or mood board, and that you want to combine generated footage with practical edits and sound design.
Step 1: Define the visual contract
Write a one-page visual contract. Include character identity, wardrobe, color palette, lens style, grain, aspect ratio, and must-keep details. Add examples for each. This contract becomes your reference for every generation and edit. If a shot violates it, fix the reference before fixing the shot.
Step 2: Build a shot library
Break the project into shots. For each shot, note size, movement, subject action, background, lighting, and audio accent. Generate still frames first. Stills are cheap to review and easy to compare. Once the stills match the contract, move to motion tests.
Step 3: Generate controlled variations
Generate three to five variations per shot, not fifty. Too many options create decision fatigue. Compare them side by side for identity, motion, and composition. Choose the closest option, then refine with specific notes. Keep the best take and archive the rest in case the edit changes.
Step 4: Composite and polish
Not every shot needs heavy compositing, but most need polish. Clean edges, stabilize unwanted movement, remove artifacts, and match color. If you use traditional tools for this stage, treat them as a finishing layer rather than the main engine. The goal is to make generated footage feel native to the edit.
Step 5: Finish with audio and color
Lock picture first, then finish audio. Add sound design, music, and dialogue cleanup. Apply a consistent grade that supports the visual contract. Export versions for the target platforms: horizontal, vertical, and square if needed. Check text safe areas and loudness standards before delivery.
Tool Selection Criteria That Actually Matter
When choosing tools, look beyond the demo reel. Ask how the system handles identity, style, camera language, and audio sync. Check whether you can export clean plates or layered assets for further editing. Consider collaboration features, review workflows, and render speed. A tool that produces beautiful single clips but cannot maintain consistency across a sequence will slow you down.
Other criteria include input flexibility, output resolution, and how well the tool fits your existing editor. If you work in a team, permissions and version history matter. If you work solo, speed and simplicity matter more. The best tool is the one that lets you finish projects, not the one with the longest feature list.
Quality Control Checklist Before Delivery
Before you export, review identity consistency across every shot. Check that wardrobe, hair, logo placement, and product details match. Watch for flicker, warping, and unnatural motion. Confirm that camera direction stays coherent. Listen for audio sync issues and abrupt level changes. Review color consistency in skin tones, skies, and brand colors. Finally, watch the entire piece at normal speed without pausing. If anything pulls you out of the story, fix it.
Common Pitfalls and How to Avoid Them
One pitfall is over-prompting. Long, contradictory descriptions confuse the system. Use clear, prioritized instructions instead. Another pitfall is ignoring shot size variety. Mix wide, medium, and close shots to create rhythm. A third pitfall is using low-quality references. Garbage in, garbage out still applies. A fourth pitfall is treating AI output as final. Plan for compositing, sound, and color. A fifth pitfall is skipping audio planning. Sound-led edits feel more professional. A sixth pitfall is generating too many options. Limit variations and make decisions faster.
FAQ
Do I still need traditional editing software?
Yes, for most professional work. Traditional editors and compositors are excellent for timing, cleanup, text, color, and audio finishing. AI tools accelerate generation and transformation, but they do not replace editing judgment.
How do I keep a character consistent across many shots?
Use a strong identity reference, write a continuity note, and test one shot before scaling. Lock wardrobe, hair, and distinguishing features. If drift appears, fix the reference set rather than correcting every shot individually.
Is AI fusion only for fantasy or sci-fi effects?
No. It works for realistic product shots, talking-head enhancements, background replacement, weather effects, and stylistic grading. The key is specifying the visual contract clearly.
What resolution should I generate at?
Generate at the highest practical resolution for your final delivery, or generate lower for tests and then finish at full resolution. Always check how the tool handles upscaling, grain, and fine details like text and logos.
How do I avoid unnatural camera movement?
Choose one primary movement per shot. Add secondary motion only when motivated by the subject or audio. Reference real camera behavior and keep lens language consistent across a scene.
Can AI handle audio sync automatically?
Some multimodal systems can align visuals to audio cues, but you should still review timing manually. Use a scratch track and mark key accents before generating motion.
What is the biggest mistake beginners make?
They chase novelty instead of continuity. A simple effect that stays consistent across a sequence is more convincing than a spectacular effect that breaks the visual world every few seconds.
How many test generations should I do?
Three to five per shot is usually enough. Review stills first, then motion. If none work, the problem is likely the reference or the instruction, not the number of attempts.
How do I fit AI effects into a tight deadline?
Prepare references before generating, lock the visual contract early, and review in batches. Keep a shot library with approved stills so motion generation starts from a known good place.
Will clients accept AI-assisted effects?
Many clients care about the result, schedule, and budget. Be transparent about your process, deliver polished work, and focus reviews on story and brand consistency rather than the tool used.
Final Thoughts
The real upgrade is not a single piece of software. It is a workflow that combines reference discipline, generative speed, editorial judgment, and audio-visual planning. Legacy tools taught precision. AI fusion pipelines add leverage. When you define what must stay consistent and what can vary, you can move faster without losing the craft that makes effects feel intentional. Start with a clear visual contract, build a shot library, generate controlled variations, and finish with the same care you would apply to any professional edit.

Alexander
More Blogs
Read MoreMontaggio video rapido: transizioni e software per l'AI
Guida pratica al montaggio video rapido con AI: transizioni fluide, software, workflow, coerenza visiva, errori da evitare e FAQ operative.
Building an AI Video Production Workflow From Concept to Cut
A practical guide to planning, generating, editing, and finishing AI-assisted videos with consistent characters, clear shot lists, and reliable review loops.
A Repeatable Post-Production Workflow for Polished AI Video
Build a repeatable AI video post-production pipeline: organize assets, cut story-first, design transitions, refine audio, and review versions calmly.