
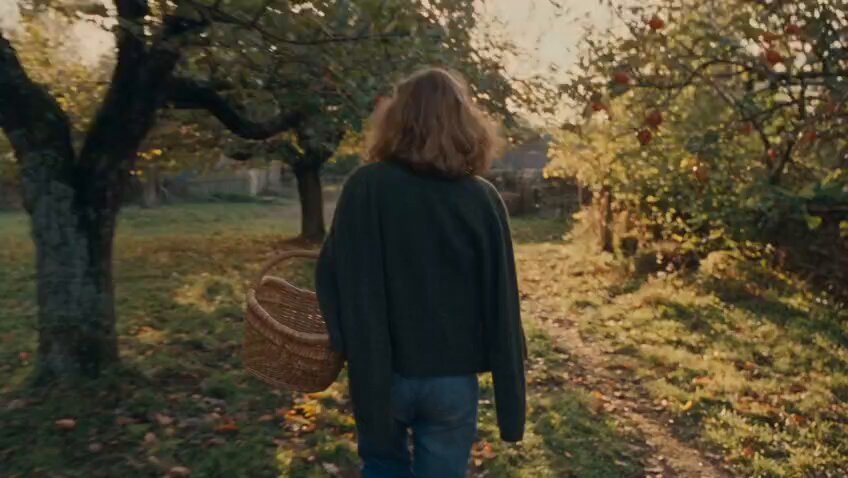
A Practical AI Video Production Workflow for Creators
Oct 13, 2026
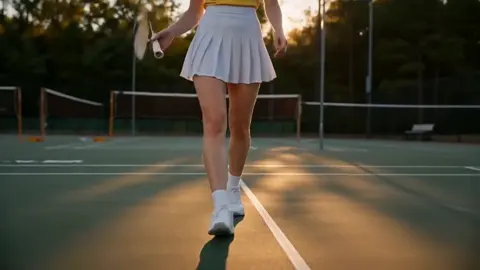

Why AI Video Needs a Workflow, Not Just a Tool
Generative video has moved past the demo stage. What used to be a party trick — a five-second clip of a cat surfing — is now a legitimate production asset used in ads, explainers, social campaigns, training material, and even short films. The bottleneck has shifted. It is no longer "can AI generate this shot?" but "can I generate this shot consistently, on schedule, and at a quality level I would actually publish?"
That shift changes what matters. Creators who treat generative video as a single button press tend to produce a folder full of unrelated clips that never become a finished piece. Creators who treat it as a pipeline — with defined stages, review points, and handoffs — produce work that looks intentional.
This guide lays out a neutral, tool-agnostic workflow for AI video production. It covers how to plan shots, choose the right generation approach for each moment, prompt effectively, maintain visual consistency, use AI assistants as a directing aid, edit and finish the result, and quality-check before delivery. You can run this workflow with any combination of models and editors; the sequence matters more than the specific logo on the dashboard.
A useful mental model: think of yourself as a director with a very fast, very literal crew. The crew can execute almost anything you can describe clearly, but it will not fill in gaps or question a bad instruction. Your job is to remove ambiguity before generation starts, not after.
The Four Stages of an AI Video Pipeline
Every efficient AI video project moves through four stages. Skipping or blurring them is the single most common reason projects stall.
Stage 1: Development and Previsualization
This is where you decide what the video is about, who it is for, and what it must accomplish. Write a one-page brief: audience, message, runtime, aspect ratio, tone, and the single action you want the viewer to take. Then break the script into shots. A 30-second piece usually needs 6–10 shots; a 90-second piece needs 15–25.
For each shot, note four things: subject, action, camera behaviour, and lighting mood. These four attributes map almost directly onto how you will later prompt a generation model, so doing this work now saves enormous time later.
Stage 2: Generation
This is the render-and-iterate stage. You produce candidate clips, review them quickly, and keep or discard. The goal here is coverage, not perfection — you want at least two viable options for every shot so that editorial choices stay open.
Stage 3: Assembly
Import the selected clips into an editor, arrange them against your script, and cut for rhythm. Most AI-generated footage benefits from being trimmed shorter than generated, because models tend to front-load motion and settle into a static look in the final second.
Stage 4: Finish and Delivery
Colour, sound, captions, graphics, and export presets live here. This stage is where AI footage stops looking like AI footage — a consistent grade and a well-built sound bed do more for perceived quality than any single generation upgrade.
Choosing the Right Generation Approach for Each Shot
There is no universal best model. There is only the right tool for a specific shot, budget, and deadline. Build a small decision framework instead of defaulting to whichever tool you used last.
Text-to-Video vs Image-to-Video
Text-to-video is fastest for exploration and for shots where the environment matters more than the subject. Image-to-video is more controllable: you lock the composition, wardrobe, and colour palette in a still image, then animate it. For any shot that must match a previous shot, start from a generated or photographed still.
A practical rule: use text-to-video for establishing shots, landscapes, and abstract transitions; use image-to-video for characters, products, and anything that needs to look identical across cuts.
Motion Transfer, Avatars, and Performance Tools
When a shot depends on a specific human performance — a gesture, a walk, a dance — motion-driven approaches beat pure text prompts every time. Record a reference performance on a phone, then transfer it. This gives you readable, natural movement that no adjective in a prompt will reliably reproduce.
Avatar and talking-head tools are worth using when dialogue delivery is the point. Accept their stylistic limits: they are strongest in medium and close shots, and they can look uncanny in wide shots or heavy motion.
Resolution, Duration, and Aspect Ratio Decisions
Generate at the highest resolution you can afford, then downscale for delivery. Upscaling AI footage after the fact tends to amplify artefacts, especially in faces and fine texture. Keep individual generations short — three to six seconds is a sweet spot for control — and build longer sequences in the edit rather than in one long prompt.
Aspect ratio should be decided before generation, not after. If you need both a vertical and a horizontal version of the same piece, generate a slightly wider safe frame and crop, or plan two separate generation passes with different prompts. Reframing a vertical clip into a horizontal timeline usually destroys composition.
Writing Prompts That Survive Generation
Prompting for video is different from prompting for images. A prompt that produces a beautiful still may produce a muddled clip, because motion introduces timing, physics, and continuity problems.
The Shot Prompt Formula
A reliable structure: subject and wardrobe, action with timing, camera position and movement, lighting and time of day, lens and film quality, then style anchors. For example: "A cyclist in a navy rain jacket, riding slowly left to right across frame, camera tracks alongside at wheel height, overcast dawn light with wet asphalt reflections, 35mm anamorphic look, muted teal grade."
Note what this prompt does: it specifies one action, one camera behaviour, and one lighting condition. Prompts that ask for three actions in one shot almost always collapse.
Constraints and Style Anchors
Add short constraint phrases to suppress common failures: "stable face," "no text overlays," "consistent wardrobe," "steady camera." Keep them brief — long negative lists can confuse the model more than they help.
Style anchors should be reusable. Create a small set of five to seven phrases describing your project's look, and append them to every prompt in that project. Consistency across shots is worth more than variety within them.
Iterating Without Losing the Take
When a generation is 80% right, do not rewrite the prompt from scratch. Change one variable at a time: first the camera move, then the lighting, then the subject detail. Save the prompts and settings that worked, along with the output files, in a simple log. After twenty shots you will have a project-specific playbook that makes every later session faster.
Keeping Characters, Props, and Locations Consistent
Continuity is where amateur AI video reveals itself. A jacket changes colour between cuts, a room rearranges itself, a face subtly morphs. These errors are small individually and fatal collectively.
Build a reference kit before you generate anything: a character sheet with front, profile, and three-quarter views; a location plate; and product stills if relevant. Generate these as images first, refine them until they are right, then use them as starting frames for video generations.
For recurring characters, keep the description text identical in every prompt. Do not paraphrase "dark curly hair" into "curly dark hair" mid-project; treat the character description as a config file rather than prose you improvise.
Lighting continuity matters just as much. Decide on a sun direction and a colour temperature for each scene and repeat those phrases in every prompt in that scene. If a shot needs a different angle, describe the new angle but keep the lighting language unchanged.
Finally, review consistency at the sequence level, not the clip level. Watch ten shots back to back with the sound off and note every break in continuity. You will spot problems that were invisible when judging clips individually.
Using AI Assistants as a Directing Aid
Agentic assistants — tools that read your script, propose shot lists, suggest camera moves, and give feedback on drafts — have become genuinely useful in the last generation of creative software. They are best understood as a first assistant, not a director.
Use them for the tasks that are tedious rather than taste-driven. Generating a first-draft shot list from a script, converting a paragraph of action into a structured prompt template, proposing alternate camera angles for a scene, and flagging pacing problems in a rough cut. All of these save real hours.
Do not delegate the decisions that define the piece: the emotional register of a scene, the choice of what to leave out, the rhythm of the final cut. Assistants optimise toward plausible averages, which is precisely the opposite of what makes work memorable.
A practical loop that works well: write the script yourself, ask an assistant for a shot breakdown, edit that breakdown by hand until it reflects your intent, then use assistant-suggested prompt structures to execute it. You keep authorship; the assistant absorbs mechanical work.
Editing, Sound, and Finishing
AI-generated footage rarely arrives edit-ready, and that is normal. Treat generation as the shoot and editing as the film.
Start by laying all selected clips on a timeline in script order with no effects. Watch it through once and cut anything that does not earn its place. Aim to remove 20–30% of runtime in this first pass; pacing almost always improves.
Colour next. Apply one look across the entire sequence rather than grading shot by shot — a unified grade is what makes disparate generated clips feel like one film. Slight film grain or a subtle vignette can smooth over small differences in texture between shots from different models.
Sound is the highest-leverage finishing step. Add room tone under dialogue, foley for footsteps and object handling, and a music bed that matches the emotional arc. Sound design also covers AI artefacts: a subtle ambience track under a slightly wobbly shot makes the movement read as intentional camera work.
Captions and graphics come last. Keep type consistent with your brand, burn in only what the delivery platform requires, and always check safe areas on vertical exports.
A Quality Control Checklist Before Delivery
Run the same checklist on every project. Consistency in review is what prevents embarrassing mistakes from reaching an audience.
- Continuity: characters, wardrobe, props, and locations match across cuts.
- Anatomy: hands, eyes, teeth, and jewellery hold up when paused on a single frame.
- Motion: no warping, melting, or impossible physics in the middle of actions.
- Text: any on-screen text is legible, correctly spelled, and inside safe areas.
- Audio: dialogue is intelligible, music does not clip, and levels are consistent end to end.
- Pacing: the piece holds attention without sound; if it sags muted, it will sag with audio too.
- Export: correct resolution, frame rate, aspect ratio, and file size for the target platform.
- Rights and disclosure: you have the rights to any reference material and you follow the disclosure rules of the platform you publish on.
Pause the timeline on individual frames rather than trusting playback. Fast motion hides a remarkable amount of damage.
Common Mistakes and How to Avoid Them
The same handful of errors appear in almost every struggling AI video project.
Prompting for a whole scene instead of a shot. Models handle one action well and three actions poorly. Break scenes into individual shots and generate them separately.
Generating before designing. Without a shot list, you accumulate footage rather than build a film. Spend twenty minutes planning before the first generation.
Ignoring continuity until the edit. Fixing a mismatched character after twenty shots exist means regenerating several of them. Build reference images first.
Chasing perfect individual clips. A shot that is 90% right usually cuts fine inside a sequence. Perfectionism at the clip level destroys schedules.
Skipping sound. Viewers forgive imperfect visuals far more readily than bad audio. Budget real time for the mix.
Using one model for everything. Different shots have different needs. A small stable of three or four tools, each used for what it does best, outperforms loyalty to a single platform.
FAQ
How long does a typical AI video project take?
A 30-second piece with 8–10 shots usually takes one to two days of focused work: several hours for planning and reference images, several hours for generation and iteration, and half a day for editing, sound, and delivery.
Do I need editing experience to make this work?
Basic editing skills are essential. Generation gets you raw material; the cut determines whether the result feels professional. Learn trimming, basic colour, and audio levels before chasing advanced generation techniques.
How many generations should I expect per usable shot?
Plan for roughly four to eight attempts per shot when starting out, dropping to two or three once you have a project-specific prompt playbook. Image-to-video workflows generally need fewer attempts than pure text prompts.
Can I mix footage from different generation tools in one video?
Yes, and it is often the smart choice. Unify the result with a single colour grade, consistent sound design, and a shared aspect ratio. Small texture differences disappear once the grade is applied.
What is the biggest quality upgrade for the least effort?
Sound design. Room tone, foley, and a well-chosen music bed improve perceived production value more than any change to your generation settings.
How do I keep a series visually consistent across episodes?
Maintain a written style guide: fixed character descriptions, a locked colour palette, lighting phrases per location, and a saved set of prompt templates. Treat it as a production bible and update it after every project.

Alexander
More Blogs
Read MoreVidu Q4 Alternatives: 4K AI Video Models Compared (2026)
Vidu Q4 alternatives compared: Kling 4.0, Seedance 2.5, Wan 3.0, and Runway Gen-4 — 4K support, input modes, durations, audio, and what each costs in credits on Domer.
Top 4K AI Image Generators in 2026: 5 Models Compared on Real Costs
The top 4K AI image generators on Domer compared: Flux 3 Klein, Nano Banana 2.1, GPT Image 2.5, GPT Image 2, and Nano Banana Pro — 4K credit costs, reference limits, and speed.
Nano Banana 2.1 vs GPT Image 2.5: Which Image Model Should You Use? (2026)
Nano Banana 2.1 vs GPT Image 2.5 Flare compared: credit costs per resolution, aspect ratios, reference images, text rendering, and which tasks fit each model.