
AI Video Synthesis Workflow: A Practical Production Guide
Oct 13, 2026
How AI Video Synthesis Fits Into a Real Production Pipeline
AI video synthesis has moved well past the demo stage. The useful question is no longer whether a model can produce a few seconds of plausible motion, but whether you can build a repeatable pipeline that outputs a finished, on-brief video without burning days on retries. That shift changes what matters most. Instead of hunting for the single "best" model, experienced creators treat synthesis as one station on an assembly line: planning at the front, generation in the middle, editorial and sound at the back.
When synthesis is treated as a pipeline component rather than a magic box, three things improve immediately. First, your hit rate goes up, because you stop asking a single model to do everything. Second, your revision cycles get shorter, because every shot has a written brief and a reference frame before a single frame is generated. Third, your output looks deliberate rather than generated, because editing, sound design, and color do the same work they do in conventional production.
This guide walks through that pipeline end to end. It covers how to choose models per shot, how to write prompts that hold up across a sequence, how to keep characters and locations consistent, how to handle dialogue and music, and how to run quality control before you publish. Nothing here depends on a specific vendor. The goal is a workflow you can rebuild with whatever tools you have access to now and swap out as the tooling changes.
One framing note before diving in: treat generation as photography, not as animation. You are essentially directing a very fast, very literal camera crew that has never read your script. Everything that makes a shoot go well on a real set, clear direction, references, continuity notes, and a shot list, makes synthesis go well too.
Choosing the Right Model for Each Shot
Most disappointing AI video comes from using one model for every shot because it happened to be open in a browser tab. Model selection should be a deliberate decision based on the shot type, the amount of control you need, and how much iteration you can afford.
Text-to-video, image-to-video, and video-to-video
The three main generation modes solve different problems, and mixing them inside a single project is normal.
| Mode | Best for | Main weakness |
|---|---|---|
| Text-to-video | Establishing shots, abstract sequences, mood pieces, B-roll | Weak control over exact composition and identity |
| Image-to-video | Character shots, product shots, anything needing a locked composition | Motion can feel restrained or drift from the source |
| Video-to-video | Restyling, relighting, cleanup, framerate and resolution transformations | Artifacts compound if the input is noisy |
A practical default: build your key visual as a still, then animate it with image-to-video. Stills are cheap and fast to iterate, so you can lock composition, wardrobe, lighting, and framing before you spend time on motion. When the still is right, the animated result is usually right within two or three attempts.
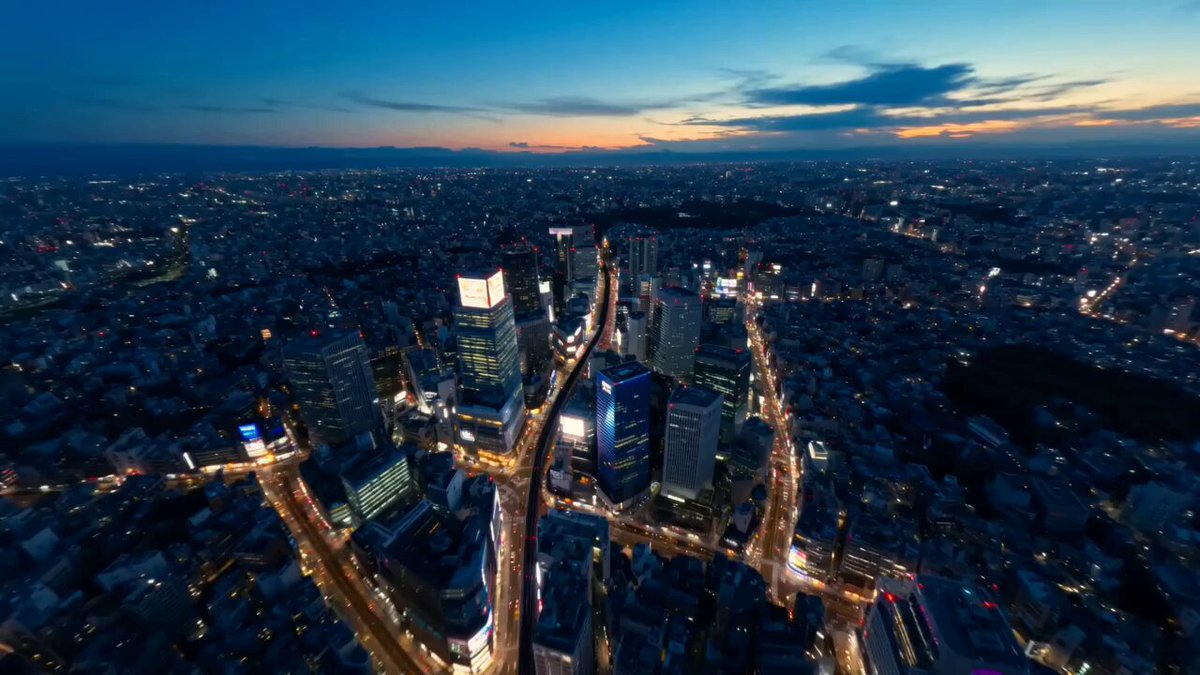
Use text-to-video for anything where exact composition does not matter: aerial establishing shots, texture inserts, abstract transitions, weather, crowds, and background plates. Use video-to-video when you already have usable footage and want a different look rather than a different scene.
Matching model strengths to shot types
Different engines have genuinely different personalities. Some excel at photoreal humans and skin detail but struggle with fast camera moves. Others handle stylized motion and physics well but produce uncanny faces at close range. Some are exceptional at short, punchy clips and degrade quickly on longer durations. Others are slower but hold a sequence together better.
Build a small internal scorecard instead of relying on memory. For each model you have access to, note four things: the shot types where it wins, its maximum reliable clip length, how it handles camera movement instructions, and a rough sense of how many attempts a usable clip usually takes. After a few projects, that scorecard becomes the most valuable document in your workflow, because it turns model choice from guesswork into routing.
Also decide early whether you need physics-accurate motion, stylized motion, or simply attractive motion. A model that renders water and fabric beautifully may be the wrong choice for a clip that needs to show a mechanism working correctly.
A Step-by-Step Workflow From Script to Final Cut
Here is a pipeline that holds up across commercial work, narrative shorts, and social content. It is intentionally front-loaded: most of the effort happens before generation, which is where the savings actually come from.
Script and shot list
Write the script as you normally would, then break it into a shot list with one row per generated clip. Each row should contain the duration, the shot size, the camera move, the subject action, the lighting condition, and the emotional beat. A shot list turns a vague creative idea into a set of independent, testable tasks, which is exactly what generation needs.
Keep individual clips short. Three to eight seconds is the sweet spot for most models: long enough to establish action, short enough to avoid drift and identity collapse. If a scene needs twenty seconds, plan three or four shots and cut between them. Cutting is cheaper than generating, and it usually looks better.
Reference frames and visual anchors
Before generating any motion, create still references for every recurring element: characters, wardrobe, locations, props, and lighting. Even a rough frame gives the model far more to work with than text alone, and it gives you something concrete to approve before spending time on animation.
Store references in a structured folder with consistent naming: project, scene, shot, and variant number. This sounds bureaucratic until the first time a client asks for "the version from last Tuesday," at which point it saves the project.
Prompt construction
Write prompts in layers so you can debug them. A reliable structure looks like this:
- Subject: who or what, with specific physical detail.
- Action: a single clear verb phrase, present tense.
- Camera: shot size, angle, lens character, movement, and speed.
- Lighting: source, direction, quality, and time of day.
- Environment: location, weather, background activity.
- Style: medium, film stock or render look, color palette, mood.
- Negatives: artifacts to avoid, such as extra limbs, warped hands, text, logos, jumpy motion, or flicker.
Keep action to one beat per clip. If you write "she walks in, sits down, opens the laptop, and smiles," you will get four half-finished actions. Split it into four shots or cut three of them.
Generation and iteration
Generate in small batches with a single variable changed between attempts. If you alter the prompt, the seed, and the camera instruction at once, you learn nothing from the result. Change one thing, compare, and keep a note of what worked.
Set a budget for attempts per shot before you start, for example five. When you hit the limit, either simplify the shot or change the model. This rule prevents the classic trap of spending an afternoon on a shot that a different engine would have nailed on the second try.
Assembly and finish
Import usable clips into your editor, lay them against a scratch track, and cut for rhythm before you polish anything. Most generated footage becomes dramatically better with three interventions: trimming to the strongest half-second, adding a subtle push or drift in post to hide static or jittery motion, and sound design. Do not skip the first pass because the clips look good in isolation. Pacing is what makes a sequence feel intentional.
Prompting Patterns That Raise Your Hit Rate
Prompting for video is not the same as prompting for images. Motion introduces time, and time introduces new failure modes: drift, flicker, morphing, and physics that quietly stop obeying the rules.
Describe motion, not just appearance. A prompt that only describes a scene will give you a still that happens to move slightly. Add explicit motion language: "slow dolly in," "handheld follow," "fabric rippling in a crosswind," "steam rising and dissipating." Motion words give the model something to animate.
Anchor your camera. Vague camera language produces vague camera behavior. Choose one move per shot and specify its speed. "Slow 15-degree orbit around the subject, locked horizon" beats "dynamic camera work" every time.
Use physical and lighting cues for realism. Words like subsurface scattering, soft key from camera left, overcast diffusion, and shallow depth of field push results toward photographic rather than rendered.
Reduce competing subjects. Models handle one primary subject and one secondary element far better than five. If a shot needs a crowd, generate it wide and far away, or composite it in post.
Write negatives as a short list. Long negative lists often backfire by confusing the model. Keep it to the failure modes you actually saw in previous attempts.
Iterate on structure, not adjectives. If a shot keeps failing, the problem is usually the shot concept, not the wording. Simplify the action, shorten the duration, or change the camera to something the model handles well.
Consistency Across Shots: Characters, Style, and Space
Consistency is the single hardest problem in AI video, and the answer is rarely a better prompt. It is usually a better system.
For characters, lock a reference image set: front, three-quarter, profile, and full body, under consistent lighting. Generate all shots of that character from those references rather than from text descriptions. Where the tool supports it, reuse the same seed or identity reference across a scene.
For style, build a small style kit: a color palette, a lighting rule, a lens rule, and a texture rule. Apply the same four descriptors to every prompt in the project. This is the video equivalent of a look book, and it prevents the common problem of a sequence that feels like four different films stitched together.
For space, draw the geography. A simple top-down sketch of where the camera and subject sit in each shot does more for continuity than any prompt trick. It stops you from generating a scene where the window is on the left in one shot and the right in the next.
When consistency still fails, consider compositing. Shooting a clean plate, then placing a generated character into it, frequently reads better than generating the whole environment. The same applies in reverse: generate the environment, then insert a photographed or separately generated element.
Sound: Voice, Music, and Lip Sync
Sound is where AI video projects are most often won or lost. Audiences forgive slight visual imperfection far more readily than they forgive bad audio.
Start with a scratch voice track recorded on a phone. Timing your cuts to a real performance gives you a rhythm that generated dialogue rarely matches. Even if you replace the voice later, the scratch track shapes the edit.
For synthesized speech, prioritize natural pacing over perfect timbre. Slight imperfections in tone are far less noticeable than flat, evenly spaced delivery. Add small pauses, vary sentence length, and avoid long unbroken paragraphs in the script.
For lip sync, match shot framing to the quality of the sync you can achieve. Close-ups demand precision; medium shots and profile angles are more forgiving; wide shots hide almost everything. When sync is unreliable, cut away to reaction shots and environmental inserts, and let the audio carry the line.
Music should be chosen after the rough cut, not before. A track chosen against a locked edit feels composed for the piece; a track chosen in advance forces the edit into someone else's rhythm. Layer ambience and foley under dialogue, keep music low in the mix when words are present, and use a short silence before a key moment to make it land.
Editing, Upscaling, and Delivery Specs
Generated clips arrive as raw material. A short finishing pass separates a professional result from a technical demo.
- Trim hard. Cut into motion. Starting a clip a half-second late usually improves it.
- Stabilize selectively. Apply stabilization only where jitter is visible; over-stabilizing creates a floating, artificial feel.
- Upscale deliberately. Upscale before color grading, not after, so grain and sharpening behave consistently across the timeline.
- Grade for cohesion. A shared grade is the fastest way to make clips from different models look like one film. Match black levels first, then color temperature, then saturation.
- Finesse with grain and texture. A light, consistent grain layer hides small artifacts and unifies disparate sources.
- Deliver in the right aspect ratios. Generate at the highest resolution you can and crop down for vertical, square, and widescreen versions rather than regenerating for each format.
Export settings should follow the platform, not habit. High bitrate for web playback, moderate bitrate for messaging apps, and always check the first three seconds on a phone screen before publishing. That is where most viewers actually watch.
Quality Control Checklist Before You Publish
Run the same checklist on every project. It takes ten minutes and catches the majority of embarrassing errors.
- Hands, faces, and teeth at full resolution, frame by frame, on every shot with a person.
- Text and logos, including background signage, which models frequently garble.
- Continuity: wardrobe, props, time of day, and screen direction between adjacent shots.
- Motion integrity: no flicker, no warping at frame edges, no objects that appear or vanish.
- Audio sync at three points: the start, middle, and end of every spoken line.
- Loudness consistency across the whole piece, not just between scenes.
- First three seconds on a small screen with sound off, since many viewers watch muted.
- Last shot. Endings are frequently the weakest generated clip because attention went to the opening.
Common Mistakes and How to Avoid Them
Generating before planning. The most expensive mistake. An hour of shot listing saves a day of retries.
Chasing one perfect clip. Perfectionism on a single shot stalls the entire project. Capture three good options and move on.
Overlong clips. Anything past ten seconds invites drift. Cut instead of generating longer.
Ignoring the edit. No amount of generation quality survives bad pacing. Cut to a scratch track early.
Neglecting sound. Viewers notice audio problems first. Budget real time for voice, music, and mix.
Using one model for everything. Different engines have different strengths. Route shots accordingly instead of fighting a tool.
Skipping references. Text descriptions alone rarely hold a character or location together across a sequence.
Publishing without QC. A single warped hand in a hero shot can undermine an otherwise strong piece.
Frequently Asked Questions
How long should a generated clip be?
Between three and eight seconds for most models. Shorter clips are more stable, easier to cut, and faster to iterate. Build longer sequences by cutting multiple shots together.
Do I need a powerful local machine?
Not necessarily. Many workflows run entirely in a browser, and cloud generation removes hardware constraints. Local processing helps when you have large volumes of footage or strict data requirements, but it is not a prerequisite for good results.
How do I keep a character consistent across shots?
Use a locked reference image set and generate from references rather than text. Keep lighting, lens, and framing rules identical between shots, and reuse seeds where the tool allows it. When consistency still breaks, composite instead of regenerating.
What is the fastest way to improve output quality?
Improve your input. Better reference stills, simpler actions, one camera move per shot, and shorter durations will do more for quality than any prompt wording change.
Should I generate in vertical or widescreen?
Generate at the highest resolution available and crop for each delivery format. Regenerating per aspect ratio multiplies your workload and produces inconsistent results across versions.
How many attempts should a shot get?
Set a cap, typically five. If a shot has not produced a usable clip by then, simplify it, change the model, or cut it. Persistence beyond that point rarely pays off.
How important is music and sound design?
Extremely. Audio carries more perceived production value than visuals in short-form content. A well-mixed, simply shot piece outperforms a visually ambitious piece with weak sound almost every time.
Can I mix footage from multiple models in one video?
Yes, and most ambitious projects do. A shared color grade, consistent grain, and deliberate cutting between shots are what make a multi-model timeline read as one unified piece rather than a sampler.
The through-line across all of this is simple: AI video synthesis rewards preparation. Models will keep improving, resolutions will keep rising, and new engines will keep arriving. The teams that produce consistently strong work are not the ones with early access to every tool. They are the ones with a shot list, a reference library, a sound plan, and the discipline to stop generating and start editing.

Alexander
More Blogs
Read MoreVidu Q4 Alternatives: 4K AI Video Models Compared (2026)
Vidu Q4 alternatives compared: Kling 4.0, Seedance 2.5, Wan 3.0, and Runway Gen-4 — 4K support, input modes, durations, audio, and what each costs in credits on Domer.
Top 4K AI Image Generators in 2026: 5 Models Compared on Real Costs
The top 4K AI image generators on Domer compared: Flux 3 Klein, Nano Banana 2.1, GPT Image 2.5, GPT Image 2, and Nano Banana Pro — 4K credit costs, reference limits, and speed.
Nano Banana 2.1 vs GPT Image 2.5: Which Image Model Should You Use? (2026)
Nano Banana 2.1 vs GPT Image 2.5 Flare compared: credit costs per resolution, aspect ratios, reference images, text rendering, and which tasks fit each model.