

AI Video Generators From Concept to Cut: A Practical Workflow
Nov 6, 2026
Why Concept to Cut Is the Right Mental Model
Most AI video projects fail before the first frame is generated. The problem is rarely the model. It is the absence of a production process. A team writes a cinematic prompt, generates a few clips, discovers that the character changes face between shots, the voice does not match the scene, and the final assembly feels like a collection of unrelated demos. The technology looks impressive in isolation but collapses under the weight of a real narrative.
The phrase concept to cut is useful because it frames AI video as a pipeline rather than a slot machine. A concept becomes a script. A script becomes a shot list. A shot list becomes generated assets. Those assets become an edit. The edit becomes a finished piece with sound, pacing, captions, and delivery standards. When you treat each stage as a decision point, AI video generators stop being novelty tools and start behaving like production partners.
This guide is designed for creators, marketers, trainers, and small studios who want a repeatable workflow. It does not promise that one model will solve every creative problem. It shows how to choose the right model for each shot, keep visual continuity under control, integrate audio early, and edit with story discipline. The goal is simple: move from a rough idea to a polished cut without losing time, coherence, or creative intent.
Map the Workflow Before You Choose a Tool
Tool selection should come after workflow design. Start with a one-page production map that lists the stages of your project. For most short-form and explainer videos, the map looks like this:
- Brief: the audience, promise, tone, duration, and distribution channel.
- Script: spoken lines, on-screen text, and the narrative arc.
- Shot list: every shot with subject, action, camera, duration, and audio intent.
- Generation: the model or method used for each shot, plus fallback options.
- Assembly: a rough edit in a non-linear editor with temporary audio.
- Audio: voice, ambience, music, sound effects, and loudness control.
- Quality control: visual continuity, captions, safe areas, rights, and export settings.
Once that map exists, tools become interchangeable parts. An avatar-led platform may handle the presenter shots. An image-to-video model may handle atmospheric cutaways. A text-to-video model may generate complex b-roll. An upscaler or frame interpolation step may improve motion. The workflow stays stable even when the underlying model changes.
A useful rule is to build the smallest possible proof of concept first. Create a thirty-second version with one character, one location, and three shots. This reveals model behavior, caption legibility, audio sync quality, and edit friction before you commit to a longer piece. If the proof of concept feels coherent, scale it. If it feels fragile, fix the workflow rather than adding more tools.
Build a Brief That Survives Generation
Start with a one-sentence promise
Write the core promise in one sentence: what the viewer should understand, feel, or do after watching. Everything else should support that sentence. If the promise is to explain a software feature, do not spend half the runtime on cinematic landscapes. If the promise is to create a brand mood, do not overload the edit with feature labels. A clear promise acts as a filter for every generated shot.
Turn characters into specifications
AI models respond better to specifications than to adjectives. Instead of describing a character as friendly and professional, define age range, wardrobe, hair, facial hair, accessories, posture, speaking pace, and visual reference. Create a character bible with front-facing, three-quarter, and profile references. Add notes on lighting and color temperature. The more specific the character sheet, the easier it becomes to reject off-model generations quickly.
Write shots as instructions, not moods
A shot prompt should include subject, action, setting, framing, camera movement, lighting, lens feel, and negative constraints. For example: a medium close-up of a presenter in a quiet studio, seated at a desk, speaking directly to camera, soft key light from the left, shallow depth of field, no text overlays, no extra hand gestures. This is more useful than a poetic description of innovation and trust. Mood words can guide style, but production words guide execution.
Choose Models by Shot, Not by Hype
Avatar-led shots
Avatar platforms such as Synthesia are strongest when the video depends on a clear presenter, scripted narration, and consistent framing. They are efficient for training modules, product walkthroughs, internal announcements, and localized explainers. The tradeoff is often flexibility. If the scene needs complex camera movement, physical interaction, or a highly specific cinematic look, avatar output may feel too static. Use avatar tools for the shots that need trust and clarity, not for every shot in the piece.
Scene-led and image-to-video shots
Scene-led models are better for b-roll, conceptual visuals, and dramatic transitions. Image-to-video workflows are especially useful because a strong starting frame anchors composition and style. For complex action, generate a clean still first, then animate it with restrained motion instructions. If a model can accept start and end frames, use them for shots that must land on a specific composition. This reduces the number of unpredictable variations you need to review.
Test matrix and fallbacks
Before production, run a small test matrix. Pick three representative shots: a presenter close-up, a movement shot, and a detail insert. Generate each with two or three models using the same brief. Compare facial stability, motion artifacts, text rendering, color consistency, and generation time. Keep a fallback plan for each shot type. A shot that fails in a premium model may succeed in a simpler image-to-video workflow, and a budget model may be sufficient for backgrounds that will be blurred in the edit.
Keep Characters and Style Consistent Across Shots
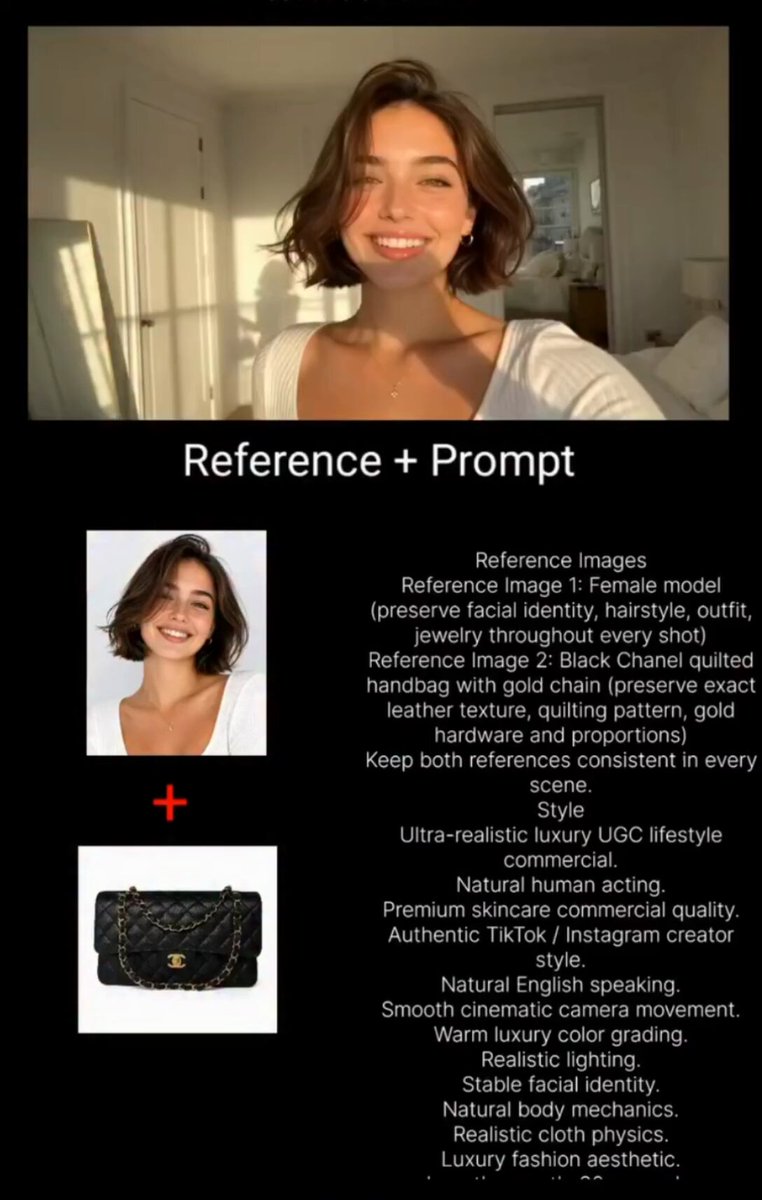
Consistency is the difference between a generated demo and a usable video. Start with a reference pack: character images, wardrobe details, location references, color palettes, and examples of the desired framing. Use the same reference assets across shots whenever the model supports image conditioning. If the tool offers seed control, lock the seed for variations of the same setup. If it supports multi-image fusion or reference weighting, use it to preserve facial structure and clothing without overfitting every frame.
Create a style bible for the project. Define the color grade, contrast, lens character, and camera height. Note which shots are allowed to break the pattern. A training video may need neutral lighting and direct eye contact. A brand film may need warmer tones and more negative space. The style bible prevents each generation from drifting into a different visual universe.
Review continuity in motion, not just in still frames. Watch three consecutive shots without stopping. Does the character appear to age, change posture, or shift wardrobe? Does the light direction flip? Does the background layout contradict the previous shot? Small inconsistencies become obvious in sequence. Fixing them early is cheaper than rebuilding the edit later.
Generate in Small Batches and Review Against the Brief
Generate in small batches of three to five variations per shot. Large batches create decision fatigue and make it easy to accept a flawed clip because it looks impressive at first glance. Review each batch against a short checklist: story clarity, character match, motion quality, text legibility, audio compatibility, and technical resolution.
Use a simple verdict system. A clip is a keeper if it satisfies the brief and can survive the edit. It is a maybe if the performance is weak but the visual can be rescued with trimming, stabilization, or sound design. It is a reject if the face, hands, text, or motion creates an uncanny distraction. Do not try to repair a fundamentally broken generation with editing tricks. Regenerate with a clearer prompt or a different model.
Keep a generation log. Record the model, prompt, reference assets, seed if available, and any post-processing used. This is especially valuable when a client asks for a revision three weeks later. A log turns a lucky generation into a repeatable recipe.
Treat Audio as Part of the First Cut
Audio is not a final polish step. It shapes pacing, credibility, and emotional clarity. Generate or record voiceover early enough to test timing against the visuals. If the script sounds unnatural when spoken, rewrite it before generating more shots. For avatar videos, check lip sync and pronunciation. For narrated b-roll, decide whether the voice should lead the edit or follow the visual rhythm.
Build a basic sound bed with three layers: voice, ambience, and music. Keep ambience subtle so it does not compete with dialogue. Use music to support transitions and emotional beats, not to fill every second. Add sound effects only where they clarify action. A door closing, a keyboard click, or a whoosh can make a generated shot feel grounded, but too many effects make the piece feel like a trailer for itself.
Captions deserve early attention as well. Generated visuals may leave less room for text than expected. Test caption length, contrast, and safe areas on mobile. If the video will be localized, keep text overlays separate from generated frames so they can be replaced without regenerating the entire shot.
Edit for Story, Not for Demo Reel
A common mistake is editing AI video like a highlight reel. Every shot looks expensive, so the temptation is to keep every shot. Story discipline means cutting anything that does not advance the promise. Start with a rough assembly using the best available clips, even if some are placeholders. Watch it without music. If the story is unclear, no soundtrack will fix it.
Use handles around each clip so you can trim without losing sync. Favor simple cuts over decorative transitions. A clean cut keeps attention on the performance and the idea. Save transitions for changes in time, location, or perspective. When a generated shot has unstable motion, shorten it, cover it with a cutaway, or use it as a brief accent rather than a sustained moment.
Color correction should unify the piece without erasing the model work. Apply a consistent grade, adjust contrast, and match skin tones across shots. If one clip is noticeably softer, add a subtle sharpen or use it in a wider context where detail matters less. The goal is coherence, not uniformity.
Quality Control and Delivery Checklist
Before export, run a structured quality check:
- Story: does the first ten seconds establish the promise?
- Continuity: do characters, wardrobe, props, and locations remain stable?
- Motion: are there warped hands, drifting faces, or unnatural camera moves?
- Text: are captions legible, correctly spelled, and inside safe areas?
- Audio: is voice clear, music balanced, and loudness consistent?
- Technical: are resolution, frame rate, aspect ratio, and codec correct for each platform?
- Rights: do you have permission for references, voices, music, and locations?
- Backup: are project files, generated assets, and final exports archived?
Deliver separate versions for the intended channels. A horizontal master may need a vertical crop with repositioned captions. A social cut may need a stronger opening frame. A training video may need chapter markers and a transcript. Planning these outputs during the edit prevents rushed re-exports later.
Common Mistakes and FAQ
Common mistakes
- Writing cinematic prompts before writing a clear script.
- Using too many models without a shot-by-shot reason.
- Ignoring character references until the edit stage.
- Generating large batches and accepting the least flawed clip.
- Adding music before testing whether the story works silently.
- Forgetting captions, safe areas, and mobile framing.
- Treating every shot as a hero shot instead of building rhythm.
FAQ
Do I need one platform for the whole workflow? No. A mixed workflow is often stronger. Use avatar tools for presenter clarity, image-to-video for controlled shots, and a traditional editor for assembly and sound. The key is to document which tool handles which shot type.
How do I keep a character consistent without training a custom model? Build a strong reference pack, reuse the same character descriptions, lock seeds where possible, and review shots in sequence. If the model supports image conditioning or multi-image references, use them consistently. Avoid changing wardrobe or lighting unless the story requires it.
When should I regenerate instead of editing around a flaw? Regenerate when the flaw affects identity, dialogue, or the main action. Edit around flaws in background motion, brief hand gestures, or transitional moments. If the viewer will notice the problem before the message, regenerate.
How long should an AI video be? Make it as long as the promise requires and no longer. Short explainers often work best at sixty to ninety seconds. Training content can run longer if it is chaptered and paced. Test retention before expanding runtime.
What is the best way to start a first project? Choose one character, one location, and three shots. Build a thirty-second proof of concept with temporary audio. Review it on mobile and desktop. Once the workflow feels stable, add complexity one variable at a time.

Alexander
More Blogs
Read MoreAI Video Production From Concept to Final Render: A Workflow
A practical guide to AI-assisted video production, from brief and shot list to prompt design, audio, editing, and final quality control.
Free Video Transcription and Editing Workflow: A Practical Guide
Build a reliable free video transcription and editing workflow with practical tool choices, caption tips, quality checks, and AI handoff points.
Automated Video Transcription: A Practical AI Workflow
Learn a reliable automated video transcription workflow with AI, from audio prep and speaker labels to quality checks, captions, and searchable transcripts.