
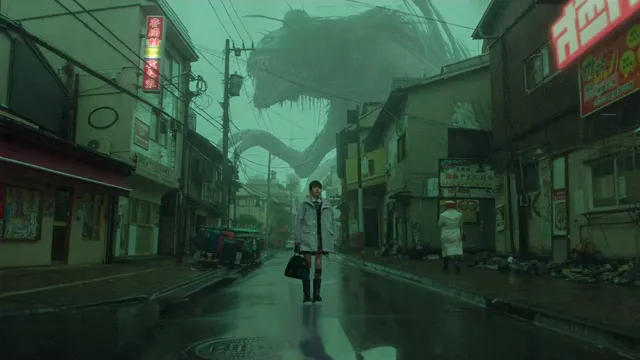
AI Video Production From Concept to Final Render: A Workflow
Nov 6, 2026
Why modern video production is a workflow problem, not a tool problem
Most people who try AI video for the first time make the same mistake. They open a text-to-video field, type one sentence, and judge the entire medium by the four-second clip that comes back. If the clip looks strange — hands that melt, a background that drifts, a face that changes identity between frames — they conclude the technology is not ready. A week later they see a polished forty-second brand film made with the same class of models and assume there must be a secret tool nobody told them about.
There usually isn't one. The difference is almost always workflow. A shot list that gives every generation a narrow, achievable job. Reference images that lock down look and character. Audio built before the edit instead of after it. And a finishing pass that treats generated footage exactly the way an editor treats footage from a camera.
That shift in framing matters because it changes what you practice. Instead of hunting for the model that will magically produce a finished video, you build a repeatable pipeline: brief, script, shot list, prompt, generate, select, assemble, grade, mix, deliver. Each stage has a clear output and a clear failure mode, and each can be improved independently.
The practical benefits are real. Iteration becomes cheap, so you can test five visual directions before committing. Reshoots stop meaning a second location day. A single creator can produce a campaign that previously required a small crew. But the constraints are equally real, and ignoring them is where most beginner projects fall apart.
Current video models still struggle with long continuous takes, precise physical interaction, readable on-screen text, complex hand movement, and consistent characters across many shots. A production that respects those limits looks professional. A production that fights them looks like a demo reel of near-misses. Everything below is a way of designing around those limits rather than pretending they don't exist.
The four layers of a modern AI video stack
Before touching a single prompt, it helps to understand that an AI video project runs on four separate layers. Beginners collapse them into one and then can't diagnose why something looks wrong.
The model layer
This is the generation engine itself: text-to-video models, image-to-video models, upscalers, and frame-interpolation tools. Each model has a personality. Some are exceptionally good at cinematic camera movement and poor at faces. Others render skin and fabric beautifully but flatten dramatic lighting. Some are fast and cheap enough to use as a sketchpad; others are slow and expensive but produce a usable final frame.
The correct approach is not to crown a winner but to assign roles. Use a fast model for visual exploration and blocking. Use a high-fidelity model for hero shots that will appear on screen for more than two seconds. Use an upscaler for the final pass. Professionals routinely mix three or four engines inside a single thirty-second piece and nobody in the audience can tell.
The orchestration layer
Orchestration is everything that turns a pile of clips into a coherent film: project folders, naming conventions, a shot tracker, and a written prompt log. This layer is unglamorous and it is the single biggest predictor of whether a project finishes.
A minimal orchestration setup is a spreadsheet with one row per shot. Columns: shot number, duration, description, prompt used, model used, seed if available, best take, status. When you have sixty generations across twelve shots, memory fails. The log is what lets you return two days later and regenerate a shot that matched.
The asset and audio layer
Reference images, character sheets, product photography, logos, music beds, voiceover, and sound effects live here. Generated video is only as consistent as the references feeding it. If you can supply a clean still of your subject from three angles, image-to-video will hold identity far better than any amount of descriptive text.
Audio deserves its own place in the stack because it drives the edit more than most beginners expect. A voiceover with a fixed rhythm effectively dictates shot lengths. Build it early and cut picture to it.
The finishing layer
The finishing layer is where generated footage stops looking generated: color correction to unify shots, film grain or subtle texture to mask model-specific artifacts, speed ramps, transitions, titles, and sound mixing. A two-minute grade and a consistent grain pass will do more for perceived quality than another hundred prompt variations.
Stage one: brief, script, and shot list
A brief for an AI video project is shorter than a traditional one, but it must be sharper. Write three lines: who the video is for, the single feeling it should produce, and the one action it should prompt. If you cannot state the feeling in one sentence, the project will drift into a montage of attractive but meaningless shots.
The script comes next, and here you should write for duration in seconds, not pages. A thirty-second piece is roughly 70–85 spoken words, or about eight to twelve shots. Write the voiceover first if there is one. Read it aloud with a stopwatch. This is the moment most projects discover they have written a ninety-second script for a thirty-second slot.
Then build the shot list. Each row needs a duration, a subject, an action, a camera behavior, a lighting note, and a purpose. Purpose is the column people skip and later regret. If a shot doesn't establish, explain, escalate, or resolve, delete it.
A useful discipline is to mark every shot as either "needed" or "nice." Generate the needed shots first. When the edit is assembled, you will usually find that half the nice shots are unnecessary, and the ones you keep will have been chosen against real footage rather than in the abstract.
Finally, decide your aspect ratio and resolution at the brief stage, not in the edit. Vertical 9:16 changes composition, subject distance, and how much text fits. Generating horizontal footage and cropping it later produces compositions with dead space and cut-off subjects.
Stage two: prompt engineering that survives iteration
Prompt writing for video is closer to writing a camera report than to writing poetry. The most reliable prompts follow a fixed order: subject, action, environment, camera, lighting, style, and technical qualifiers. Holding that order constant lets you change one variable at a time, which is the only way to learn what a model actually responds to.
Here is a before-and-after comparison. Weak prompt: "a woman drinking coffee in a beautiful cafe, cinematic." Strong prompt: "medium close-up, a woman in her thirties in a cream linen shirt lifts a ceramic cup and takes a slow sip, seated at a marble table in a sunlit Parisian cafe, shallow depth of field, warm afternoon light from a window on the left, subtle steam, 35mm film look, slow handheld drift to the right."
The difference isn't length. It's specificity of action and camera. The model needs to know what moves and how the camera moves, because those two decisions determine whether the result feels like a film or like a slideshow.
Four rules that consistently improve output:
- Describe one action per clip. Two actions in one prompt usually produce a muddled blend of both. Split them into two shots.
- Name the camera behavior explicitly. Slow dolly in, static lock-off, handheld follow, crane down. Ambiguity produces aimless drift.
- Anchor the light source. "Soft window light from the left" beats "nice lighting" every time, and it also keeps lighting consistent across shots.
- Avoid negative instructions where the model ignores them. Instead of "no text, no watermark," reframe toward what should be present, and fix residue in post.
Keep a prompt library. When something works, save the full string plus the reference image and the seed. In a month you will have a personal vocabulary of phrases that reliably produce the look you want, and that vocabulary is worth more than any generic prompt template.
Stage three: generating visuals and keeping them consistent
Consistency is where amateur AI video reveals itself instantly. A character whose jacket changes color, a product whose label reshuffles, a location whose architecture mutates between shots — all of these break the illusion faster than shaky motion ever will.
The most effective technique is a character or product reference sheet. Generate or photograph your subject in neutral lighting from front, three-quarter, and profile angles. Feed those stills into every image-to-video generation for that subject. Text descriptions alone cannot maintain identity; the model needs pixels.
Second, lock the look with a style reference. Pick one frame you love and reuse it as the visual anchor across the whole piece. When shots drift in color temperature or contrast, the edit becomes an endless correction exercise.
Third, work shot by shot and select aggressively. Generate four to six takes per shot, watch them muted at double speed in a grid, and keep only the ones that hold up at full size. A useful habit is to judge a take on its first and last frame: if both are clean and the motion between them is plausible, it will cut.
Fourth, accept the length limit. Most models produce clips in the four-to-ten-second range before coherence degrades. Design your edit around short shots. Fast-cutting sequences with strong audio hide minor imperfections far better than a single long take with a wobbling background.
Fifth, plan for the seams. If a shot needs to be twelve seconds, generate two overlapping six-second segments from the same reference and blend them with a whip pan, a match cut on movement, or a brief dissolve masked by sound. Editors do this with real footage too; it's not a workaround, it's craft.
Stage four: audio, voice, and sound design
Sound is the fastest quality upgrade available in AI video, and it is the stage most often skipped. An audience forgives slightly uncanny visuals when the audio is rich and confident. They notice instantly when the audio is thin.
Start with voiceover if the piece has one. Generate or record it, then edit the voiceover itself before building picture. Remove breaths, tighten pauses, and set a consistent pace. When you cut picture to a finished voice track, sync problems disappear.
Next, lay a music bed. Choose tempo by edit rhythm, not by genre preference. A 30-second spot with eight cuts wants roughly one cut per two bars. Duck the music 4–6 dB under the voice with a gentle sidechain rather than a hard volume drop.
Then add sound design, which is where generated footage most often gives itself away. Footage of a person walking through an office with no footsteps, no cloth movement, no keyboard clicks, and no room tone reads as synthetic even when the image is flawless. Add three layers: spot effects for visible actions, ambient room tone for the environment, and a low bed of texture to glue everything together.
Finally, check the mix on three systems: headphones, laptop speakers, and a phone speaker. Dialogue that sounds full in headphones frequently vanishes on a phone. If your piece will live on social platforms, that phone check is the only one that matters.
Stage five: edit, grade, and quality control
Assemble in a simple order: voiceover on the timeline first, then hero shots, then connective tissue, then music and effects. Resist the urge to polish any individual shot before the whole sequence exists. Rough cuts reveal structural problems that no amount of grading fixes.
Grading generated footage requires unification more than creativity. Apply a base correction to every clip: normalize exposure, neutralize white balance, and match contrast. Then add a single look across the timeline — a subtle film emulation, a slight halation, a gentle grain — so that clips from different models feel like they came from one camera. A consistent grain pass is the cheapest consistency trick in the entire pipeline.
Quality control should be systematic, not vibes-based. Watch the full piece three times with three different questions in mind:
- Story pass. Does each shot earn its place? Where does attention drop?
- Technical pass. Look for warped hands, morphing faces, flickering backgrounds, text artifacts, and audio clicks. Pause on every cut.
- Delivery pass. Check safe margins for platform UI overlays, confirm captions are burned in or attached, verify loudness targets, and export in the right codec and bitrate.
Keep a delivery checklist in your project folder. After the third project you will have caught the same four mistakes enough times to stop making them.
Common mistakes that waste the most time
Generating before writing. Without a shot list, every generation is a lottery ticket. You accumulate dozens of pretty clips that cannot be assembled into anything.
Chasing one perfect take. Models are stochastic; a shot that fails six times may succeed on the seventh with a slightly different prompt. Set a limit — five attempts, then simplify the shot.
Ignoring the first frame. In image-to-video workflows, the start frame determines 80% of the result. A blurry or oddly framed reference produces a blurry, oddly framed clip no matter how good the prompt is.
Skipping reference sheets. Identity drift across shots is nearly guaranteed without visual references. Ten minutes building a character sheet saves hours of regeneration.
Overlong shots. Beginners request ten-second continuous takes because they look impressive in isolation. In an edit, they read as slow. Cut shorter than feels comfortable.
No prompt log. Two days later you have a shot that works and no idea how you made it. Log everything as you go, not afterward.
Treating the grade as optional. Ungraded generated footage from multiple models looks like a compilation, not a film. One consistent look ties it together.
A realistic one-day workflow for a thirty-second spot
A concrete schedule makes the pipeline tangible. This plan assumes one person, one voiceover, and roughly ten shots.
Morning, first hour — brief and script. Write the three-line brief, draft the voiceover, and time it aloud. Adjust the script until it lands between 70 and 85 words.
Hour two — shot list and references. Build the ten-row shot list with durations, actions, and camera notes. Gather or generate three reference stills per recurring subject. Choose one style anchor frame.
Hours three and four — generation block one. Generate takes for the five most important shots. Work in batches, keep the prompt order consistent, and log every result immediately. Select as you go rather than saving review for later.
Hour five — review and revise. Watch all takes muted. Mark the keepers. Regenerate the two weakest shots with simplified prompts.
Hour six — generation block two. Fill in the remaining connective shots. These should be shorter and simpler; do not spend your best energy here.
Hour seven — audio. Record or generate voiceover, clean it, lay the music bed, and add sound design layers. Lock the audio timeline.
Hour eight — edit. Cut picture to locked audio. Add transitions and titles. Watch the rough cut once without stopping and note every moment your attention drifts.
Hour nine — grade and mix. Apply base correction to every clip, then one unified look. Balance the mix and check on a phone speaker.
Hour ten — QC and export. Run the three passes. Export, then watch the exported file — not the timeline — before delivering. Export settings often introduce issues the timeline never showed.
FAQ
Do I need a powerful computer to produce AI video?
For browser-based generation and editing, a mid-range laptop with a stable connection is enough. Local generation and heavy 4K grading benefit from a discrete GPU and fast storage, but most solo creators work entirely in the cloud and only need local horsepower for the final edit.
How long should a single AI-generated clip be?
Aim for two to five seconds per shot in the final edit, even if the model can produce longer. Short shots cut better, hide artifacts, and give you more control over pacing. Reserve longer takes for deliberate slow moments, and only after you have verified the motion holds up.
Why do characters change appearance between shots?
Because text prompts describe a category, not a specific person. Fix this with reference images used consistently across every generation, and by keeping wardrobe, lighting, and framing notes identical in each prompt. Character sheets are the single highest-leverage investment in a multi-shot project.
Is it better to generate video from text or from an image?
Image-to-video wins whenever consistency matters: products, people, branded environments. Text-to-video is better for abstract textures, establishing shots, and rapid exploration. Most professional workflows start with text for ideation and finish with image-to-video for the shots that must match.
How do I handle text and logos in generated footage?
Treat on-screen text as a post-production task. Generate clean plates without text, then add typography in your editor where you control the font, spacing, and timing. Attempting to render readable text inside a video model is currently unreliable and will cost you far more attempts than it saves.
What is the fastest way to improve output quality?
Improve the audio and unify the grade. Both are fast, both are within your control, and both change perceived quality more than switching models. Only after those two are solid should you spend time hunting for a better generation engine.
How many takes should I generate per shot?
Four to six is a sensible default. Fewer and you accept whatever appears first; more and you burn time reviewing near-identical variants. If none of six takes work, the prompt is the problem — simplify the action and try again.
Can AI video replace a traditional shoot entirely?
For some formats, yes: explainers, abstract brand films, social cutdowns, and concept pitches. For anything requiring precise human performance, complex physical interaction, or recognizable talent, a hybrid approach works better — shoot the hero moments and generate the surrounding world. The goal is a finished film that communicates clearly, not purity of method.

Alexander
More Blogs
Read MoreFree Video Transcription and Editing Workflow: A Practical Guide
Build a reliable free video transcription and editing workflow with practical tool choices, caption tips, quality checks, and AI handoff points.
Automated Video Transcription: A Practical AI Workflow
Learn a reliable automated video transcription workflow with AI, from audio prep and speaker labels to quality checks, captions, and searchable transcripts.
How to Integrate AI Video Ads Into Your Platform Workflow
A practical guide to planning, producing, and distributing AI-generated video ads across channels, with hooks, formats, testing, and QA tips.