
After Effects + AI: Hybrid Video Editing Workflow Guide
Oct 13, 2026

Why hybrid post-production beats a single-tool approach
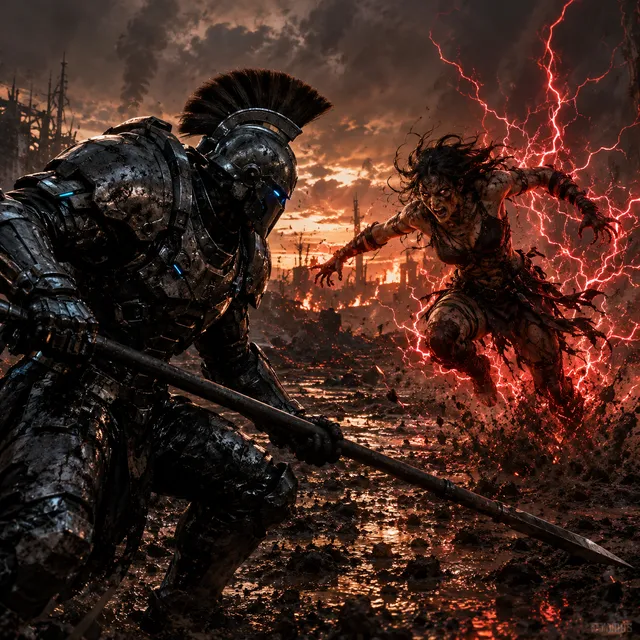
Generative video tools have transformed the front end of production. You can prototype a camera move, a stylized environment, or a crowd plate in minutes instead of booking a shoot day. But generated footage almost never arrives finished. Motion drifts between shots, edges go soft, on-screen text warps, and the hero moment that looked brilliant in a thumbnail falls apart at full resolution. That is exactly where a compositing application earns its keep.
After Effects still offers the most granular control over keyframes, mattes, tracking, expressions, and render order in the industry. The winning pattern is not AI replacing editors, and it is not treating AI output as a curiosity. It is a relay: generative tools produce raw ingredients, and the compositor assembles, refines, and finishes them.
Three practical reasons this hybrid model works:
- Volume. Generation gives you ten variations of a shot where a traditional shoot gave you one take. Choice is a creative advantage when you know how to triage.
- Control. You can repair the small percentage of a generated clip that breaks the illusion instead of discarding the entire clip.
- Iteration cost. The most expensive part of production has always been revision cycles. Generation collapses the ideation loop; compositing protects the quality bar.
The editors who thrive are the ones who stop treating these as competing philosophies. Treat generated footage as a plate, not as a finished shot. Plates get tracked, graded, matted, and blended. That mental shift alone fixes most of the frustration people hit in their first week of mixing tools.
Where each tool should sit in the pipeline
A clean division of labor saves days. Generative tools own ideation, coverage, and impossible shots: drone moves you never flew, environments that do not exist, crowd extensions you cannot afford to stage. After Effects owns continuity, integration, typography, and finishing. Anything that requires frame-accurate timing, keyframed animation, or a precise alpha channel belongs in the compositor.
What changes when you adopt this mindset
You start building proxy workflows instead of downloading whatever file the generator spits out. You start logging prompts and seeds next to timecodes. You start planning shot lists around what is cheap to fix in post. None of this requires a new job title, only a small change in how you sequence the work.
Getting generated footage into After Effects cleanly
The first real hurdle is ingestion. Generated clips often arrive as compressed files with inconsistent frame rates, variable frame timing, and color that does not match your camera footage. Dropping them straight onto a timeline invites sync drift and banding that no amount of grading can rescue.
Codecs, frame rates, and color
Convert everything to a predictable intermediate before you start cutting. A standard intermediate codec in a high-bit-depth color space gives you headroom for grading and prevents the render engine from fighting long-GOP compression. Force a constant frame rate at your project rate. If your sequence is 24 fps and a clip arrives at 30, interpret it deliberately rather than letting the software guess.
Color management deserves the same discipline. Set your project to a consistent working space, then convert generated clips with an input transform rather than eyeballing a curve. Generated footage frequently has a slightly different white point than camera footage, and a technical transform is faster and more reversible than a manual correction.
The project skeleton that survives revisions
Build a reusable project file instead of starting from scratch every time.
- A folder structure that separates raw generation, prepared plates, comps, and exports.
- Pre-built compositions for common deliverables in landscape, vertical, and square formats.
- A text layer style guide with approved fonts and safe-area guides.
- A solids-based reference layer for grain, vignette, and letterbox framing.
This skeleton turns a three-hour setup into a three-minute import. It also means a second editor can open your project and understand it, which matters the moment a deadline moves.
Handling alpha and matte channels
Most generators cannot export a clean alpha channel. Plan for that. Either generate against a flat background that you can key or roto, or generate a separate depth or matte pass if the tool supports it. When neither is available, isolate the subject with a combination of a rotoscope brush for the outline and a luma or chroma key for the interior. Blending the two gives you a matte that holds up at 200% zoom.
Automating the boring parts with scripts and watch folders
The fastest editors are not faster at clicking. They have removed clicking from the process. Automation is where After Effects quietly outpaces newer, cloud-only tools, because its scripting layer can talk to almost anything.
Watch folders and render templates
Set up a watched directory where your generator drops finished clips. A small script can detect a new file, transcode it to your intermediate format, stamp it with metadata, and place it in the prepared-plates folder. Add a render template that applies your standard color transform and you have removed an entire manual step from every single shot.
Expressions that behave like a small toolkit
Expressions are not just for motion. A few practical ones pay for themselves immediately:
- Auto-fit text. Keeps lower thirds and captions inside safe areas when copy length changes.
- Stagger controllers. Drives a delay across many layers from a single slider, which is invaluable for animated caption stacks.
- Time remap helpers. Normalizes footage interpreted at odd rates so speed ramps stay predictable.
- Link and loop utilities. Point dozens of layers at one master control instead of adjusting them individually.
Batch pre-processing for large projects
When you are handling a hundred generated clips, do not open them one at a time. Use a batch script or an external encoder to normalize resolution, frame rate, and audio sync in one pass. Then import the folder as a single sequence. This one habit routinely cuts hours off a mid-sized project and prevents the subtle drift that creeps in when clips are treated inconsistently.
Pre-production: from prompts to shot lists and style frames
The most valuable use of AI in a compositing workflow happens before you touch a timeline. Prompt-driven ideation is essentially cheap previsualization, and previsualization is where projects are won or lost.
Turning prompts into a shot list
Write your prompts as if you were writing a shot list, because that is what they become. Each entry should describe subject, action, camera behavior, lens character, lighting direction, and mood. A prompt that says only a location produces a wallpaper. A prompt that says a slow dolly-in on a subject at golden hour, 50mm, shallow depth of field, warm rim light produces something you can actually cut into a scene.
Keep a shared document with prompt, seed, duration, and intended timecode. When a director asks for the shot with the blue corridor again, you will not be hunting through a downloads folder.
Style frames and look development
Generate still frames first. Stills are faster, cheaper, and easier to compare side by side. Assemble a look book of six to ten approved frames before animating anything, then use those frames as visual references throughout the edit. This gives your colorist and your motion designer a target, and it gives you a defensible answer when a stakeholder wants to know why the palette shifted.
The rule of diminishing returns
Generation is intoxicating because it is fast. Set a hard limit per shot, perhaps three rounds of prompts, then move to compositing with the best option. Past a certain point you are not improving the shot, you are avoiding the harder work of integration.
Blending generated shots with live-action plates
This is the craft section, and it is where hybrid workflows either sing or fall apart. Integration problems are almost never caused by the generated content itself. They are caused by mismatches in motion, optics, grain, and light.
Matte generation and rotoscoping
Start with the automated rotoscope tool in your editor, then refine. Automated mattes are excellent on clear silhouettes and unreliable on hair, transparent fabric, and motion blur. Split the work: use the automated pass for the body, then hand-paint the difficult edges frame by frame. Feather aggressively and add a small amount of matte choke to avoid the halo that appears when a generated subject is composited over a darker plate.
Tracking, camera solves, and parallax
A shot will never feel real if the camera move does not match. Use a point tracker for simple stabilization and a full camera solve when you need 3D text, signage, or an environment extension to sit in the scene. Generated footage with synthetic motion sometimes confuses the solver, so add manual trackers on high-contrast features and lock them before solving. If a shot has almost no parallax, do not force a 3D solve. Fake it with a corner-pin and a slight scale animation, which is faster and often looks better.
Matching grain, color, and lens character
Grain is the tell. Generated clips are often too clean, camera footage is often too noisy, and the mismatch reads instantly as compositing. Match both directions: add fine grain to the clean element, denoise the noisy one lightly, and unify with a shared grain layer on top of the whole comp. Then match lens character. Add subtle chromatic aberration at the frame edges, a gentle vignette, and a touch of defocus in the corners if the plate has it. Finally, grade in a shared node or adjustment layer stack so both elements receive the same contrast curve.
Keeping characters and style consistent across scenes
Consistency is the single hardest problem in generative production. A character that looks right in shot four can look like a different person in shot five, and audiences notice immediately even if they cannot articulate why.
Reference-locking techniques
Lock a small set of references: one clean portrait, one full body frame, one profile, and one frame in motion. Feed those references into every generation for that character and keep the same style descriptors in every prompt. When the tool supports it, reuse the same seed family across a scene and vary only the camera language.
Fixing drift in post
When drift is unavoidable, fix it in the compositor instead of regenerating. Practical options include:
- Grade matching. Use a reference frame and match skin tone, exposure, and contrast with a curves adjustment per shot.
- Face replacement. Track a clean still of the character onto the drifting shot, then blend with a soft matte.
- Wardrobe and detail patching. Clone or paint small inconsistencies such as a collar shape or a logo position.
- Continuity grading for sequences. Apply one shared look to an entire scene so small differences read as lighting variation rather than error.
Document which fix you used. When the client asks for a revision two weeks later, you will want to know why shot six has an extra adjustment layer.
Hardware, render queues, and the patience budget
Compositing is resource-hungry, and generative work adds its own load. Two things eat time: render-bound effects and disk-bound media. Address both.
GPU versus CPU workloads
Many effects are now GPU-accelerated, but not all, and mixing them carelessly can slow a render dramatically. Keep heavy particle, simulation, and 3D work on the GPU where supported, and reserve CPU-heavy operations for a final pass. If a render feels slower than it should, check whether a single processor-bound effect is forcing the whole comp back onto the CPU.
Proxy strategy that actually helps
Build proxies for high-resolution generated plates and edit against them. Switch to full resolution only for final effects checks and delivery. Keep a separate comp for the high-resolution render so you are not accidentally previewing at full quality all day.
Queue discipline
Render in batches overnight and use a render queue or an external render manager rather than exporting comps one at a time. Purge caches between large projects. Save incremental versions before a long render so a crash does not cost you an afternoon. Boring advice, but it is the difference between a smooth delivery and a panicked one.
Mistakes that break hybrid workflows and how to fix them
Most failures fall into a handful of recognizable patterns.
- Generating before planning. Prompts without a shot list produce beautiful clips that do not cut together. Fix it by writing the sequence first.
- Importing compressed files directly. Long-GOP footage causes sync drift and render errors. Transcode to an intermediate.
- Ignoring frame rate mismatches. Interpret footage deliberately and lock the project rate early.
- Skipping the camera solve. Forced 3D tracking on low-parallax shots creates sliding elements. Use a corner pin instead.
- Over-relying on automated mattes. They fail on hair and transparency. Always refine the edges by hand.
- Forgetting grain and lens character. Integration fails on texture, not on content.
- No version naming. Untracked comps produce accidental regressions. Adopt a strict convention.
- Unlimited generation rounds. Set a cap per shot and move on.
Each of these has a cheap fix, but only if you catch it early. A five-minute checklist before the edit begins prevents nearly all of them.
A concrete 60-second brand film, end to end
Here is how the pieces fit together on a realistic project.
Stage one: concept and shot list. Ten shots, each with a prompt, intended duration, and camera description. Approve style frames before generating motion.
Stage two: generation. Produce four variations per shot, cap it there, and select one. Log prompts and seeds as you go.
Stage three: ingest. Transcode everything to a constant frame rate intermediate, apply a shared input color transform, and organize into prepared plates.
Stage four: assembly. Cut the sequence to a scratch track, then lock timing before any compositing begins. Timing changes after compositing are expensive.
Stage five: integration. Track camera moves, build mattes, add grain and grade to unify generated and live-action elements.
Stage six: graphics and type. Animate titles with expressions so vertical and square versions adapt automatically.
Stage seven: finishing. Grade the whole piece under one look, mix audio, and export deliverables in every aspect ratio.
A project of this size is realistic in a few focused days when the pipeline is prepared and considerably longer when it is improvised. The difference is almost entirely in stages three and four, which are the stages people skip when they are in a hurry.
FAQ
Do I need to know how to code to automate this workflow?
No. Watch folders, render templates, and a handful of expressions cover most of the benefit. A little scripting knowledge helps on large projects, but you can build a reliable pipeline with no code at all.
Can generated footage match real camera footage convincingly?
Yes, when motion, optics, grain, and color are matched deliberately. Most failed composites are caused by mismatched grain and a slight camera-move discrepancy, not by the source footage being synthetic.
How many generations should I allow per shot?
Three to four rounds is a practical ceiling. Beyond that, the marginal improvement is smaller than the improvement you would get from thirty minutes of compositing.
What is the fastest way to fix character drift?
Grade matching plus a tracked face replacement using a clean reference still. Regenerating an entire scene is slower and rarely more consistent.
Should I edit in the compositor or in a dedicated editor?
Assemble in a dedicated editor and finish in the compositor. Long timelines with heavy effects get sluggish, and keeping the assembly separate makes revisions far easier to manage.
What resolution should I generate at?
Generate at or slightly above your delivery resolution so you have room to reframe and stabilize. Upscaling a low-resolution source is possible, but it rarely survives a close look on a large screen.
How do I keep a team consistent across a project?
Standardize the project skeleton, naming conventions, and look development documents. Consistency is a process problem far more often than it is a talent problem.

Alexander
More Blogs
Read MoreMontaggio video rapido: transizioni e software per l'AI
Guida pratica al montaggio video rapido con AI: transizioni fluide, software, workflow, coerenza visiva, errori da evitare e FAQ operative.
Building an AI Video Production Workflow From Concept to Cut
A practical guide to planning, generating, editing, and finishing AI-assisted videos with consistent characters, clear shot lists, and reliable review loops.
A Repeatable Post-Production Workflow for Polished AI Video
Build a repeatable AI video post-production pipeline: organize assets, cut story-first, design transitions, refine audio, and review versions calmly.