
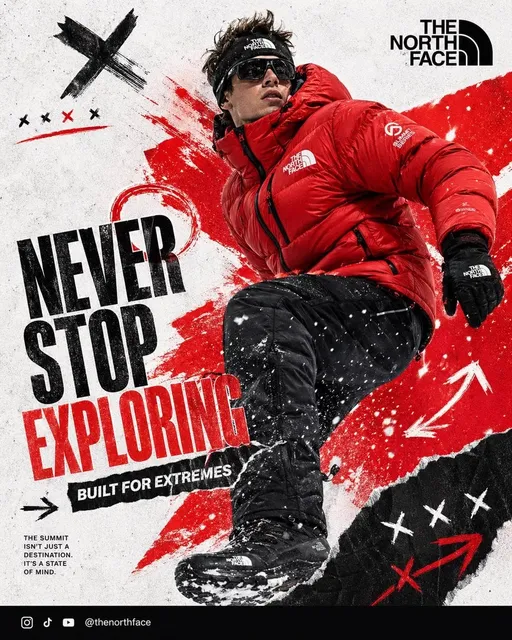
AI Advertising Video Workflow: From Brief to Final Cut
Oct 13, 2026

Why AI Changed the Economics of Ad Production
Advertising video has always been the most expensive asset in a marketing budget. A single thirty-second spot traditionally required a director, a crew, talent, location permits, insurance, and a post house. Even modest product videos could consume weeks of coordination before the first frame was ever shot. That cost structure forced marketers into a trade-off: spend big on a handful of hero videos, or settle for static images and basic motion graphics.
AI generation collapses that trade-off. When a text prompt or a product photo can become usable footage in minutes, the bottleneck shifts from production capacity to creative judgment. The scarce resources are no longer cameras and crews. They are clear briefs, brand discipline, and the ability to evaluate dozens of variations quickly. Teams that understand this shift stop treating AI as a novelty and start treating it as a production line with its own inputs, quality gates, and handoffs.
This guide walks through a practical, tool-agnostic workflow for AI-assisted advertising video: how to brief a system, how to generate footage from text and from stills, how to handle voice and music, how to edit and grade the results, and how to run quality control before anything ships. It is written for marketers, small studio owners, and in-house creative teams who need repeatable output rather than one-off experiments.
The Pre-Production Layer: Briefing an AI Video System
The most common failure in AI video production happens before a single frame is generated. Someone types a vague sentence into a prompt box, gets something odd, and concludes the technology is not ready. In reality, the technology reflects the brief. A fuzzy brief produces fuzzy footage.
Write a one-page creative brief first
Before opening any generation tool, write a single page that answers six questions: Who is the audience? What is the single message? What is the emotional register — calm, urgent, playful, premium? What is the runtime and aspect ratio? What brand elements must appear? What must never appear?
That last question matters more than people expect. Advertisers often know exactly what they want and have never articulated what they cannot tolerate: no distorted logos, no mismatched product colors, no ambiguous gestures, no visual claims that imply a result the product cannot deliver.
Build a reference kit
Gather a small, curated set of reference assets: three to five stills that capture the target look, two or three video references for pacing and camera movement, the official product photography, the logo lockup, and the brand color values. Keep this kit in one folder with consistent naming. Every generation session starts by opening it.
The reference kit does two jobs. It steers the generation itself, especially when using image-to-video or style references. More importantly, it gives reviewers a fixed target, which prevents the endless round of subjective notes that kills projects.
Decide what the AI should and should not own
Not every part of an ad benefits from generation. A useful division of labor looks like this: AI handles B-roll, environment establishing shots, abstract transitions, and alternate scene variations. Human teams should retain product close-ups where accuracy is contractual, any shot where a real spokesperson is on camera, and the final structural edit. This split keeps quality high where it matters and keeps generation where it is genuinely faster.
Text-to-Video: Turning a Script Into Usable Footage
Text-to-video is the fastest way to explore a concept. It is also the fastest way to generate beautiful footage that has nothing to do with your product. The discipline that separates the two is a shot list.
Convert the script into a shot list
Take your script and break it into discrete shots, roughly two to five seconds each. For each shot, write one line describing the subject, the action, the camera, and the light. A shot list turns a paragraph of copy into a set of independent generation tasks, each of which can be retried, replaced, or discarded without disturbing the rest of the edit.
The anatomy of a strong prompt
An effective prompt usually contains five elements in this order:
- Subject and product: what is on screen, described precisely, including material and color.
- Action: the single movement happening in the shot. One action per shot reads far better than three.
- Camera: static, slow push in, handheld follow, orbit, crane up. Camera language is the strongest lever on perceived production value.
- Light and atmosphere: soft window light, golden hour haze, hard studio key with deep shadow, overcast daylight.
- Style: photographic realism, editorial fashion, documentary, macro product, retro film.
A weak prompt says: "a person using our app." A strong prompt says: "close-up of hands holding a matte black smartphone, thumb scrolling once, screen glow reflecting on skin, slow dolly in, soft morning window light, shallow depth of field, realistic photography."
Iterate in small batches, not single attempts
Generate four to six variations of the same shot rather than one. Compare them side by side. Pick the closest, then generate four to six refinements of that direction with small prompt changes. This pattern converges faster than typing entirely new prompts each time, because you are refining a known good direction instead of restarting.
Image-to-Video: Animating Product Stills and Lifestyle Photography
If your brand already has strong photography, image-to-video is often the highest-return technique in the entire workflow. It preserves the exact product appearance while adding motion, which solves the single biggest complaint advertisers have about generated footage: it does not look like our product.
Choose images that have small motion potential
Not every still animates well. The best candidates share a few traits: a clear subject separated from the background, some inherent motion cue such as steam, fabric, liquid, or hair, and enough negative space for a camera move. Images with flat, even lighting animate into flat, even video. Images with dimensionality and depth animate into something that feels shot.
Keep motion restrained
Beginners ask for dramatic movement and get warping. Professionals ask for subtle motion and get realism. A useful rule: the amount of motion should be small enough that a viewer would not notice it if the shot were shown for only one second. A gentle drift, a slow push, a slight parallax shift, and a soft light change are usually enough to make a still feel alive.
Control consistency across shots
For multi-shot ads, consistency matters more than any single frame. Use the same product image, the same lighting description, and the same lens language across all shots in a sequence. If your tool supports keyframe control or start and end frames, use the final frame of one shot as the opening frame of the next. That technique — sometimes called frame chaining — produces transitions that feel intentional instead of assembled.
Voice, Music, and Sound Design
Audio is where AI advertising videos are most often exposed as amateur work. Viewers forgive imperfect visuals more readily than they forgive a robot voice reading copy with the wrong emphasis.
Script for the ear, not the page
Read your script aloud before generating anything. Mark the stressed words in each sentence. Short sentences with concrete nouns outperform elegant marketing prose in a voiceover. If a line takes more than four seconds to say naturally, split it.
Pick a voice that matches the register
Synthetic voice quality has improved to the point where a well-chosen voice is indistinguishable from a decent studio read for narration and explainer work. Choose based on these criteria:
- Pace: a slightly slower narrator reads as more trustworthy for premium products.
- Warmth: neutral warmth works broadly; heavy character voices limit where the ad can run.
- Consistency: the same voice across a campaign builds recognition faster than variety.
Always generate two or three takes with different pacing and pick by listening at low volume. Problems with emphasis and unnatural pauses are most obvious when the audio is quiet.
Treat music as structure, not decoration
Choose music after the edit is locked, or at least after the shot timing is settled. Music should mark the beats of your structure: the reveal, the feature montage, the call to action. If you cut to the music rather than the other way around, you will end up re-cutting every time you swap the track.
Sound design is the cheapest quality upgrade available. Add a subtle whoosh on a transition, a soft click when a UI element appears, and low room tone under dialogue. These details cost almost nothing and make generated footage feel finished.
Editing and Enhancement: Making Generated Footage Feel Intentional
Generation is not the end of the process. Raw clips almost always need a pass through an editor to become an advertisement.
Assemble a rough cut before polishing anything
Drop every acceptable clip onto a timeline in script order and watch it end to end with sound. Resist the urge to fix individual shots until you have seen the whole thing. Many shots that look weak in isolation work fine in context, and some that look impressive in isolation destroy the pacing.
Normalize color and grain across sources
Generated clips rarely share identical color science. Apply a single base correction — consistent white balance, a shared contrast curve, and matched saturation — to every shot. Then add a light, uniform film grain across the entire timeline. Unifying texture is the single fastest way to make clips from different sources feel like one production.
Cut on motion, not on stillness
When trimming a generated clip, place your cut where movement is already happening. Cutting mid-motion hides imperfections in the clip's start and end frames, which are usually the weakest part of any generation.
Use enhancement tools sparingly
Upscaling, sharpening, and frame interpolation all help. Overusing them produces a plastic look with halos around edges and smeared textures on fabric and skin. Apply upscaling once, sharpen lightly if at all, and check the result at 100 percent zoom on a real screen rather than in a preview window.
Building a Repeatable Production Pipeline
Advertisers do not need one good video. They need a system that reliably produces acceptable videos on a schedule. Here is a five-stage pipeline that works for most small and mid-sized teams.
Stage one: brief and shot list
Output: a one-page brief, a reference kit, and a shot list with prompts drafted for each shot. Time: one to two hours.
Stage two: generation sprints
Output: four to six variants per shot. Run these in parallel blocks of time rather than scattering them across the day. Batch generation keeps your judging criteria consistent, because you compare everything within one session.
Stage three: selection and assembly
Output: a rough cut with temp audio. Be ruthless. If a shot has a visible artifact that survives review, regenerate rather than trying to fix it in post.
Stage four: audio and polish
Output: final voiceover, music, sound design, color normalization, and grain pass.
Stage five: quality control and export
Output: platform-ready files. Never skip this stage; it is where most embarrassment is avoided.
Name and version everything
Adopt a naming convention such as campaign_shot###_v02.mp4 and keep a simple log of which prompt produced which file. When a client asks for the version from three weeks ago with the warmer lighting, you will find it in seconds instead of regenerating it badly.
Quality Control: The Checklist Before Delivery
Run the following checks on every export. It takes ten minutes and prevents the majority of published errors.
- Product accuracy: logos legible, colors correct, packaging shape unchanged, no invented features.
- Text integrity: any on-screen text free of spelling errors and rendering artifacts.
- Anatomy and physics: hands, reflections, and shadows behave plausibly.
- Audio sync: voiceover matches lip movement or narration beats, with no clipped syllables.
- Loudness consistency: dialogue and music levels even across the full runtime.
- Safe zones: captions and key visuals inside the area that platform interfaces do not cover.
- Aspect ratio: separate exports for vertical, square, and horizontal placements.
- First three seconds: does the ad communicate something in the time before a viewer can scroll?
Common Mistakes and How to Avoid Them
Chasing cinematic spectacle over message. Generated footage makes it easy to produce sweeping, expensive-looking shots that say nothing. Anchor every shot to a message from the brief.
Using too many distinct visual styles in one ad. Three styles in thirty seconds reads as chaos. Pick one and commit.
Ignoring the first frame. On most platforms, the opening frame is the thumbnail. Design it deliberately rather than accepting whatever the first frame happens to be.
Skipping legal review on claims. Generated visuals can imply outcomes the product does not deliver. Have someone check every visual claim against what marketing is allowed to say.
Over-generating. Producing two hundred clips when twenty would do wastes the most valuable resource in the process: your attention. Cap the number of variants per shot and move on.
Format Adaptation and Cutdowns
One master cut is rarely enough. Plan for a family of versions from the start, because retrofitting a horizontal edit into a vertical one is far more work than cutting both from the same shot pool.
Keep a vertical safe area in mind during generation, and choose camera framings that survive a crop. Generate a few shots with extra headroom and side margin so that a square or vertical version does not lose the product. Then produce at least three lengths: a full version for the primary placement, a fifteen-second cut for pre-roll, and a six-second bumper focused on a single idea.
Captions matter for sound-off viewing. Burn in or upload subtitles for every version, and check them on a phone at arm's length, which is how most of your audience will actually see them.
Frequently Asked Questions
How long does an AI-assisted advertising video take?
A focused thirty-second ad with narration, music, and captions typically takes a solo creator one to two days, most of which is selection and editing rather than generation. Campaigns with multiple formats and lengths scale roughly linearly with the number of cuts.
Can generated video replace a live shoot entirely?
For B-roll, environments, abstract sequences, and animated product moments, yes. For testimonials, demonstrations requiring exact real-world behavior, and anything involving a real spokesperson, live footage remains more reliable and, in many cases, cheaper than fixing generation artifacts.
How do I keep the product looking correct?
Start from real product photography using image-to-video rather than describing the product in text. Keep motion subtle, avoid shots where the product rotates through angles you have not supplied, and review every clip at full resolution before assembly.
What resolution should I export?
Export at the highest resolution the platform accepts and your editing hardware handles comfortably, then produce downscaled versions. Upscaling after the fact rarely looks as clean as exporting natively at the target size.
Is AI-generated advertising video allowed on major platforms?
Most platforms permit it, but disclosure rules and advertising standards vary by region and by industry. Check current platform policies and local advertising regulations, and keep documentation of what was generated versus filmed.
How much does the workflow cost?
Costs vary by tool and by volume. The meaningful budget question is not per-clip pricing but total time spent: a tight brief and a capped number of variants usually reduces total spend more than tool selection does.
Final Thoughts
The teams getting the most from AI advertising video are not the ones with the most exotic tools. They are the ones with disciplined briefs, curated reference kits, restrained motion, careful audio, and an unglamorous quality-control checklist. Generation is fast; judgment is what turns speed into an advertisement that a brand is willing to put its name on.
Start small. Pick one product, write a one-page brief, build a shot list of eight shots, and run the five-stage pipeline end to end. Once that first cut survives review, you have something more valuable than a single video: a repeatable process you can hand to anyone on the team.

Alexander
More Blogs
Read MoreVidu Q4 Alternatives: 4K AI Video Models Compared (2026)
Vidu Q4 alternatives compared: Kling 4.0, Seedance 2.5, Wan 3.0, and Runway Gen-4 — 4K support, input modes, durations, audio, and what each costs in credits on Domer.
Top 4K AI Image Generators in 2026: 5 Models Compared on Real Costs
The top 4K AI image generators on Domer compared: Flux 3 Klein, Nano Banana 2.1, GPT Image 2.5, GPT Image 2, and Nano Banana Pro — 4K credit costs, reference limits, and speed.
Nano Banana 2.1 vs GPT Image 2.5: Which Image Model Should You Use? (2026)
Nano Banana 2.1 vs GPT Image 2.5 Flare compared: credit costs per resolution, aspect ratios, reference images, text rendering, and which tasks fit each model.