

AI-Integrated 3D Video Editing Software: A Practical Guide
Oct 13, 2026

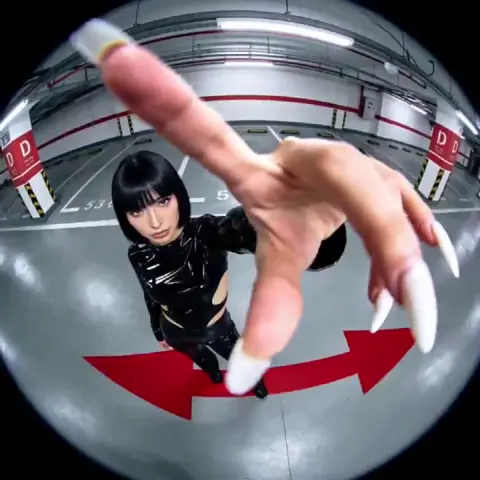
3D video editing used to mean a hard split: model and animate in one application, composite in another, then spend days on cleanup nobody sees. AI has compressed much of that distance. A small team can now generate props, retarget motion, isolate subjects, relight a shot, and upscale a final render without ever leaving a single project file.
That shift creates a new problem. Nearly every editing suite now advertises itself as AI-powered, and the labels rarely tell you what the tool actually does for your pipeline. This guide breaks down the real capability categories, the decision criteria that separate a useful purchase from an expensive demo, and a practical end-to-end workflow you can adapt to your own productions.
Why AI Became Central to 3D Video Editing
The economics of 3D production have always been brutal in one specific place: iteration. Changing a camera angle, swapping a prop, or adjusting a character's gait late in a project can mean re-rendering, re-keying, or rebuilding entire sequences. Manual labor scales linearly with complexity, and complexity is exactly what 3D work sells.
AI changes the slope of that curve in three ways.
First, it moves tedious deterministic work to machines. Rotoscoping, planar tracking, marker removal, and deflickering are all tasks where a model can produce a usable first pass in seconds instead of hours. Even when the result needs cleanup, starting at 85 percent is a different job than starting at zero.
Second, it makes generation plausible. Text-to-image and text-to-video models can produce concept frames, background plates, texture variations, and even short motion clips that fit into a 3D scene as elements rather than as finished shots.
Third, it improves the quality of the final image itself. Denoising, upscaling, motion blur synthesis, and frame interpolation let a project shot at lower settings or rendered at reduced sample counts still look finished. That matters for freelancers on laptops as much as for studios.
The practical consequence is that 3D editing is becoming less about executing every step by hand and more about directing a set of semi-autonomous processes. That is a different skill, and it rewards different habits: clear references, tight naming conventions, and a willingness to throw away a generated result rather than nurse it.
Defining What "AI-Integrated" Actually Means
The phrase gets used loosely, so it helps to sort features into layers.
Layer one: assistive tools. These sit inside a conventional editor and speed up existing operations. Auto-reframe, auto-color match, speech-to-text captions, automatic subject masks, and smart audio ducking belong here. They rarely change your workflow, but they shave hours.
Layer two: generative tools. These create new material. Text-to-image for concept art, image-to-3D for props, text-to-video for inserts and backgrounds, motion transfer from a reference clip, voice synthesis for scratch dialogue. Generative features change what you can attempt, not just how fast you attempt it.
Layer three: agentic or pipeline tools. These orchestrate multiple steps from a single prompt or brief, producing a rough assembly you then refine. They are the least predictable and the most overpromised. When they work, they are transformative. When they fail, they fail loudly and late.
A genuinely well-integrated suite has all three layers but keeps them separable. If a tool forces you to accept its generated timeline as the starting point, you have lost the ability to bring your own structure. Prefer software where AI output arrives as an editable layer, a node, a clip, or a scene object.
What to Ignore in Marketing Copy
Watch for three tells. A tool that only shows cherry-picked outputs and never shows a failed generation is hiding its iteration cost. A tool that does not document export formats is likely locking you in. A tool that describes results as "cinematic" without specifying resolution, frame rate, or duration is describing a mood, not a deliverable.
The AI Feature Categories That Matter Most
Not every feature deserves equal weight. These are the categories that most often decide whether a project ships on schedule.
Asset generation and texturing
Image-to-3D and text-to-3D pipelines can produce base meshes, environment props, and texture maps quickly. Quality varies wildly by subject. Hard-surface objects with clear silhouettes — crates, tools, furniture, vehicles — convert well. Organic forms, hands, and complex cloth still need human modeling.
For texture work, AI-assisted material generation is genuinely useful. You can produce believable surface variation for concrete, fabric, or brushed metal in a fraction of the time, then refine tiling seams manually. The rule: use generated textures as a starting layer, never as a final map on a hero asset.
Motion, animation, and retargeting
Motion capture without a suit has matured quickly. Video-based mocap and pose estimation let you drive a rig from a phone recording, which is transformative for solo creators and small teams. Retargeting tools then map that motion onto your character, with cleanup handles for foot sliding, contact points, and root motion.
Physics-aware tools also deserve attention. Secondary animation — hair, cloth, cables, debris — is where projects lose the most time, and AI-assisted solvers reduce the number of simulation passes required to land a believable result.
Rotoscoping, masking, and tracking
This is the most universally reliable AI category. Segmentation models isolate subjects, hair, and semi-transparent elements well enough that most shots need only edge refinement. Combined with planar and 3D camera tracking, you can place generated elements into live footage with far less manual work than a decade ago.
Where it still struggles: fast motion blur, heavy occlusion, reflective surfaces, and subjects crossing each other repeatedly. Budget cleanup time for those shots and consider shooting to avoid them.
Scene layout and camera assistance
Some editors now suggest camera moves, auto-frame subjects, or rebuild rough geometry from a video clip. Scene reconstruction from footage is especially useful for virtual production and set extensions, since it gives you a camera that matches the plate.
Treat these features as accelerators for previsualization, not as replacements for a shot list. A camera suggestion is only valuable if you already know what the shot needs to communicate.
Upscaling, denoising, and finishing
Upscaling and denoising are the quiet heroes of modern post. Rendering at lower sample counts and cleaning up afterward can cut render time substantially. Frame interpolation can rescue a project shot at a lower frame rate or convert a sequence for slow motion.
The risk is artifacting. Interpolation produces warping around fast edges and overlapping limbs, and aggressive upscaling can invent detail that looks plastic. Always compare the processed version against the original at 100 percent zoom before committing a whole sequence.
Audio-driven and dialogue tools
Speech-to-text, automatic dialogue replacement, voice isolation, and audio-driven facial animation are increasingly standard. Audio-driven lip sync in particular saves enormous time on stylized or animated characters, where frame-by-frame mouth animation is otherwise the bottleneck.
Matching the Tool to the Deliverable: A Decision Framework
The right software depends far less on feature lists than on what you actually have to hand over.
Start with the deliverable, not the feature
Short-form vertical content with fast turnaround rewards tools with strong auto-reframe, captioning, and template systems, plus fast generative fill for backgrounds. Episodic or narrative work rewards robust editing, color management, and compositing depth. Product and architectural visualization rewards precision — accurate materials, measured lighting, and reliable render engines. VFX-heavy work rewards tracking quality, EXR handling, and multi-layer compositing.
Write down your last three deliverables and their biggest time sinks. Then evaluate tools against those specific sinks rather than against a demo reel.
Interoperability and round-tripping
Check what happens when assets need to travel. Can the tool export USD, Alembic, FBX, or OpenEXR with render passes intact? Can it round-trip a project to a conventional 3D suite or a node-based compositor? Does it preserve timecode and color space?
The most painful failures happen mid-project, when a shot must move from a generative tool into a traditional pipeline and metadata is lost. Test one round trip before you commit a whole production.
Hardware, render economics, and total cost
Some tools run locally and lean on your GPU. Others process in the cloud and charge by usage. Neither is inherently better, but they fail differently: local tools bottleneck on VRAM and heat, cloud tools bottleneck on upload time and variable cost.
Estimate a realistic iteration count. A shot that needs twenty revisions is a very different cost profile from one that needs three. If you cannot predict iterations, favor tools with predictable local processing, or budget for variance.
Team skills and learning curve
A powerful node-based system is a liability if nobody on the team understands node graphs. Conversely, a simplified interface becomes a ceiling once your ambitions grow.
A reasonable middle path: pick one primary editor with depth, and one lightweight generative tool for quick elements. Give the generalists the simple tool and the specialists the deep one, and define a shared export standard so work can move between them.
A Practical End-to-End Workflow
Here is a workflow that works for a small team producing a two- to four-minute 3D-driven piece.
1. Pre-production and look development
Write the shot list first. Then generate reference frames and mood boards with an image model, and lock a small set of approved looks. Keep these as color and lighting references, not as literal frames to recreate. This step typically takes a day and saves a week.
2. Asset assembly
Build a shot-by-shot asset list. Generate base geometry and textures for background and midground objects, then model or buy hero assets. Establish a naming convention before generating anything — a folder of final_v3_new files will cost more than the generation did.
3. Scene building and layout
Block the scene with simple primitives, set camera positions, and confirm the timing with a playblast. Only after the blocking reads clearly should you add detail. AI layout assistants can propose camera moves, but approve them against your shot list rather than accepting them by default.
4. Animation pass
Capture or generate motion, retarget to your rig, then clean contact points and root motion by hand. Do a deliberate pass for secondary motion. If your tool supports physics-aware simulation, run it early so the timing informs the edit.
5. Lighting, rendering, and compositing
Match generated elements to your plate's light direction and color temperature. Render at moderate samples and let denoising do the rest, but verify on a short test sequence first. Composite in layers so that fixes stay localized.
6. AI cleanup and finishing
Run upscaling, deflicker, and interpolation as a final pass on the locked edit. Grade after cleanup, not before, since most cleanup tools shift color subtly. Export a master plus platform-specific versions, and archive your project files with all AI-generated intermediates labeled by model version so future revisions remain possible.
Hybrid Pipelines: Generative Tools Beside Traditional 3D Suites
The most stable setups are hybrids. Traditional 3D suites remain excellent at precise geometry, rigging, and physically accurate lighting. Generative tools excel at breadth: filling backgrounds, producing texture variants, and generating elements too expensive to model.
The connecting discipline is standardization. Agree on resolution, frame rate, color space, and unit scale before anyone generates anything. Agree on which tool owns which type of asset. Agree on where generated content is allowed to appear — typically as background, midground, or temporary placeholder, and rarely as a hero element.
A useful mental model: generative tools expand your art department, but they do not replace your pipeline. Anything that enters the final frame should pass through the same review and versioning process as a hand-built asset.
Common Mistakes That Derail AI-Assisted 3D Projects
Generating before designing. Without references, you burn hours evaluating random output. Lock a look first.
Accepting the first result. Generative tools reward volume. Expect to produce many candidates per usable element and budget time for selection.
Skipping the blocking stage. Beautiful assets in a poorly staged scene still read badly. Block in primitives and confirm the cut works first.
Ignoring consistency. Characters, lighting, and props that drift between shots destroy believability, even when each individual shot looks good.
Over-trusting interpolation and upscaling. Watch for warped edges, smeared motion, and invented texture. Compare against the original.
Losing provenance. Track which model and settings produced each asset. When a client asks for a change months later, that record is the only way to reproduce it.
Assuming AI removes the need for craft. It removes drudgery, not judgment. Taste, pacing, and composition still decide whether the result is good.
Quality Control Checklist Before You Export
Work through this list on every delivery.
- Play the full cut at normal speed without stopping to note problems.
- Check the first and last frame of every AI-processed shot for pop or drift.
- Inspect edge quality on every masked or rotoscoped element.
- Verify consistent color temperature and light direction across cuts.
- Confirm frame rate, resolution, and scan type match the delivery spec.
- Listen for artifacts in isolated or synthesized dialogue.
- Confirm no unintended text, logos, or watermarks appear in generated frames.
- Watch the export once on a phone, once on a large display.
- Archive the project with labeled intermediates and a short readme describing the process.
FAQ
Do I need a dedicated AI editor, or can I add AI tools to my existing software?
For most small teams, extending an existing editor is cheaper and less disruptive. Dedicated AI platforms make sense when generation is the core of the work rather than an occasional assist.
Is AI-generated 3D content usable in commercial work?
It depends on the tool's licensing terms and your jurisdiction. Review the terms of each model you use, especially for likeness, trademarked characters, and training-data claims, and keep documentation of what you generated and when.
How accurate is video-based motion capture?
For full-body locomotion with clear lighting and a single subject, it is often good enough after cleanup. For hands, facial nuance, and interactions with props, expect significant manual work or a dedicated capture session.
Should I render at full quality or use AI upscaling?
Test both on a representative shot. Upscaling can save substantial render time, but hero shots with fine detail often still benefit from a clean high-sample render.
What is the biggest time saver in practice?
Masking and rotoscoping. Across most projects, subject isolation and tracking deliver the largest measurable reduction in manual hours.
How do I keep an AI-assisted project reproducible?
Record model names, versions, prompts or settings, and seed values where available. Store generated assets alongside the project rather than in a temporary cache.
Where 3D Video Editing Is Heading Next
The direction is clear: editing environments are becoming orchestration layers. Instead of a single application that does everything, you get a project space where generative models, physics solvers, tracking engines, and finishing tools are all addressable from the same timeline.
That makes a few skills more valuable, not less. Shot design, reference gathering, and quality control become the differentiators when execution is cheap. So does restraint. The teams that produce the best work with these tools are not the ones generating the most; they are the ones who know precisely which generated element belongs in the cut and which one belongs in the bin.
Start small. Pick one project, apply a single AI-assisted step — say, subject isolation or background generation — and measure the time you saved. Then expand the pipeline one step at a time, keeping your export standards tight and your archives organized. That approach compounds, and it survives the next round of tool changes far better than a wholesale rebuild.

Alexander
More Blogs
Read MoreVidu Q4 Alternatives: 4K AI Video Models Compared (2026)
Vidu Q4 alternatives compared: Kling 4.0, Seedance 2.5, Wan 3.0, and Runway Gen-4 — 4K support, input modes, durations, audio, and what each costs in credits on Domer.
Top 4K AI Image Generators in 2026: 5 Models Compared on Real Costs
The top 4K AI image generators on Domer compared: Flux 3 Klein, Nano Banana 2.1, GPT Image 2.5, GPT Image 2, and Nano Banana Pro — 4K credit costs, reference limits, and speed.
Nano Banana 2.1 vs GPT Image 2.5: Which Image Model Should You Use? (2026)
Nano Banana 2.1 vs GPT Image 2.5 Flare compared: credit costs per resolution, aspect ratios, reference images, text rendering, and which tasks fit each model.