

How to Make an AI Music Video: A Complete Workflow Guide
Oct 1, 2026
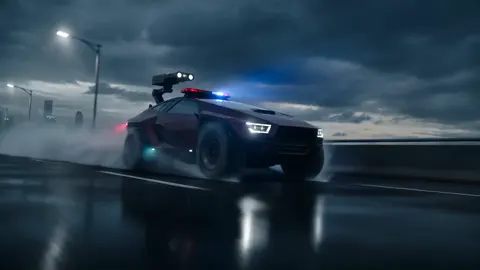
What an AI Music Video Pipeline Actually Looks Like
A music video used to be a budget problem before it was a creative one. You needed a location, a crew, a lighting package, a camera operator who understood rhythm, and a colorist who could make a muddy interior look like a mood. Generative video collapsed most of those constraints into software. What it did not collapse is the need for direction.
A working AI music video pipeline has five stages, and only one of them involves generating clips:
- Song analysis — tempo, structure, lyric timing, energy curve.
- Look development — visual bible, palette, character sheet, style language.
- Generation — shots produced from prompts and reference images, with heavy iteration.
- Assembly — cutting to the beat, matching motion, building the arc.
- Finishing — grade, audio mix, captions, delivery formats.
The bottleneck has moved. You can produce a hundred clips in an afternoon, so the scarce resources are now taste, continuity, and organization. Teams that treat generation as the whole job end up with a folder of beautiful clips that refuse to become a film. Teams that treat it as the last stage of pre-production — a camera you happen to own — ship videos that feel intentional.
A realistic ratio to plan around: three to five generations for every shot that survives the edit. If your song needs forty cuts, budget for 120–200 generated clips, plus the time to review them.
Start With the Song, Not the Timeline
The single most common failure mode is opening a video tool before understanding the track. Before you write a single prompt, do this:
- Split the stems. Pull vocals, drums, bass, and everything else into separate files with a stem separator. You now have a waveform you can read.
- Build a tempo map. Find the BPM and mark bar lines. If the track drifts or has a rubato section, mark those transitions manually instead of trusting a grid.
- Chart the structure. Write down timestamps for intro, verse, pre-chorus, chorus, bridge, and outro. Mark where energy rises and where it drops.
- Time the lyrics. Line-by-line timings turn into shot durations. A four-second lyric line is a four-second shot unless you deliberately overlap.
- Name the one idea. A music video needs a visual premise the audience can feel in the first fifteen seconds. "Singer performing in a room" is not a premise; "a person driving away from a city that keeps rebuilding itself behind them" is.
Put all of it into a shot list spreadsheet with columns for timecode, section, lyric line, energy level, shot description, engine, reference image, status, and notes. This document becomes your edit plan and your progress tracker. It sounds bureaucratic for an art form. It is also the reason the project finishes.
A useful scale check: a three-and-a-half-minute song typically carries 35–60 cuts. AI clips tend to work best at five to ten seconds each, trimmed to four to six seconds on the timeline, so generate with a little extra headroom at both ends. Never generate exactly to length — you will want handles for transitions.
Choosing a Video Engine: Decision Criteria
Text-to-video and image-to-video tools are not interchangeable. Evaluate candidates on seven axes before you commit hours to one:
- Realism versus stylization. Some engines excel at photoreal skin and fabric; others shine at animation, painterly textures, or graphic abstraction.
- Prompt adherence. How literally does it follow camera direction, wardrobe, and blocking instructions?
- Motion coherence. Watch hands, wheels, reflections, and crowds. Physics failures are the fastest way to break a viewer's immersion.
- Input modes. Text-only, image-to-video, multi-image reference, video-to-video restyling, and audio-conditioned lip sync are different capabilities.
- Camera control. Separate tokens for dolly, crane, orbit, and handheld give you editorial flexibility later.
- Duration and resolution per clip. Longer native clips reduce stitching artifacts; higher native resolution survives punch-ins.
- Rights and consent terms. Confirm commercial usage terms, watermarks, and any restrictions on depicting real people or cloned voices.
Match the Engine to the Shot Type
Photoreal performance shots need one class of tool. Stylized dream sequences need another. Abstract texture plates and transitions often come from a third. Lip-sync shots need an engine that accepts an audio track and drives mouth shapes from it — and even then, keep those shots short and framed at medium or closer so imperfections pass quickly.
Mixing Engines Without Breaking the Look
Using multiple engines is normal and often better than forcing one tool to do everything. The trick is to unify them in post: generate every clip in the same aspect ratio, then apply one grade, one grain layer, one lens treatment, and one set of letterbox or framing conventions. Color and texture are what make a mixed-tool video read as a single film.
Run a Pilot Test Before You Commit
Before generating forty shots, generate three. Use the same prompt, the same reference image, and the same camera direction across each candidate engine. Review them side by side for skin tone, motion, and prompt obedience. Two hours of testing saves a weekend of regenerating a look you cannot match.
Building a Visual Bible and Character Sheet
A visual bible is a short document that answers: what does this film look like, and what is allowed in it? Include:
- Palette. Five to seven hex values, with a dominant and two accents.
- Lighting plan. Key sources, time of day, practical lights, contrast level.
- Lens language. Wide establishing shots, medium performance coverage, macro inserts, and how often handheld appears.
- Wardrobe and hair. Exact garments and colors per act, since these are the details models drift on most.
- Locations. Three to five environments, described in concrete nouns rather than moods.
- Motifs. Recurring objects — a lighter, a phone screen, a passing train — that give the edit connective tissue.
- Grade reference. A film stock, a photographer, or a specific still you can point at.
Next, build a character sheet. Generate or photograph a neutral front, three-quarter, and profile view on a plain background, in the hero outfit, at even lighting. Save it at high resolution. This single asset improves consistency more than any prompt trick, because most modern engines can condition on a reference image rather than a description.
Then write your style string: one reusable block of prompt text describing look, lens, lighting, and grain. Paste it at the end of every prompt in the project. Change only the subject, action, and camera move between shots. This is how a hundred separate generations end up feeling related.
Consistency Techniques That Actually Survive Editing
Consistency problems rarely show up while you are generating. They show up when two shots sit next to each other in the edit. Techniques that hold up:
- Condition on images, not adjectives. Reference images beat the words "brown hair, denim jacket" every time.
- Reuse seeds when available. A locked seed plus a fixed style string plus a new environment gives you variation inside a stable look.
- Keep wardrobe constant across a section, not across the whole video. Change clothes only at act boundaries, where the audience expects a break.
- Protect the face with framing. Silhouettes, back-of-head shots, extreme close-ups on hands or instruments, and reflections are legitimate coverage that hide drift instead of exposing it.
- Generate pairs. Produce two takes of the same prompt with minor seed changes, then pick the stronger one. This is faster than fixing a bad take in post.
- Repair locally. Face swap, relight, rotoscope, and inpainting tools can rescue a shot where only one element is wrong.
- Keep a shot log. Engine, prompt, reference, seed, take number, and status. When a client asks for a change three weeks later, the log is the difference between a ten-minute fix and a full rebuild.
Accept that perfect continuity is not the goal. Emotional continuity is. Viewers forgive a jacket that reads slightly different in a wide shot; they do not forgive a chorus that does not land.
Editing to the Beat: Assembly Workflow
Import the master audio first, then build the tempo grid in your editor. Place markers on every bar, and heavier markers on section changes. Now lay your clips onto the timeline as rough blocks matching the shot list durations.
The first pass is about rhythm, not polish. Lock the cuts to beats and half-beats. In verses, let shots breathe at six to eight seconds. In choruses, cut every two to three seconds. Hit the downbeat of a new section with your biggest visual change — a new location, a color shift, a scale jump from wide to macro.
Cut Points and Transition Logic
- Hard cut on percussion, especially snare and kick.
- Match cut when two shots share a shape, a motion direction, or a color mass.
- Whip pan or speed ramp to bridge energy jumps between sections.
- Dissolve for dream sequences and bridges, used sparingly so it still means something.
- Luma or light-flash transition for a chorus reveal, once per video at most.
Match action across cuts where possible: a hand entering frame left, followed by a hand entering frame left. The eye reads it as one continuous gesture even when the shots come from different generations.
Technical Conform
Pick one frame rate — 24 fps for a filmic feel, 30 fps for a cleaner digital look — and conform everything to it. Upscale or downscale clips to a single master resolution before you grade; mixing native resolutions creates visible sharpness shifts. Work with proxies if your machine struggles, then relink at full quality for the export.
The Audio Layer: Vocals, Foley, and Final Mix
Even with a finished master, video changes the mix. Treat audio as a second production pass:
- Spoken intro or outro. A voice segment before the first beat buys you atmosphere and can be generated or recorded cleanly in a treated room.
- Ad-libs and doubles. Layered vocal textures widen a chorus. Clone or synthesize only with documented consent from the performer whose voice is being modeled.
- Foley. Footsteps, fabric, doors, keys, rain on glass. Small sounds make generated images feel physical.
- Risers and impacts. A reverse cymbal into a chorus, a low impact on the first frame after a cut.
- Ambience beds. City hum, wind, or room tone at roughly 18–22 dB below the music, so the picture never feels sterile.
Route your session into buses: music, sound effects, and dialogue. Duck effects under vocal lines with a sidechain or simple volume automation. Finish with a limiter and check loudness against your distribution target, typically around -14 LUFS integrated for streaming platforms with a true peak ceiling near -1 dBTP. Always check the mix in mono on a phone speaker — that is where most viewers will watch.
If the song itself is AI-generated, keep the stems. Being able to extend the intro by four seconds or trim a repeated chorus for pacing is worth far more than a perfect static master.
A Three-Act Example, Shot by Shot
Concept: a night-drive narrative for an indie pop track, 3:20 long, chorus landing at 0:45 and 1:55.
Act one (0:00–0:45): Eight wide shots establishing an empty highway — dashboard lights, rain beading on glass, headlights sweeping a guardrail, an overhead sign passing. Camera moves are slow dollies and static locked frames. Cool palette, heavy contrast, minimal cuts.
Act two (0:45–2:15): Twenty shots intercutting performance and environment. Close-ups of the singer in the passenger seat, hands on the wheel, neon reflections crawling across a face, a rearview mirror insert, an empty back seat. Chorus cuts land every two seconds, alternating between tight and medium framing. This is where you spend most of your generation budget, because faces and hands are the hardest subjects and need the most takes.
Act three (2:15–3:20): Ten shots resolving the drive — parked at a viewpoint, dawn light replacing neon, a walk away from the car, a slow aerial pull-back, a final wide with the figure small in frame. Longer holds, warmer grade, fewer cuts, one dissolve into the last shot.
Total: roughly 38 clips at five to eight seconds each, trimmed to average four and a half seconds. Time estimate for a solo creator: three to five hours of pre-production, four to eight hours of generation and review, five to eight hours of editing, and two to three hours of finishing.
Common Mistakes and a Pre-Export QA Checklist
Watch for these patterns:
- Generating before deciding what the video is about. Beautiful footage with no premise reads as a demo reel.
- No reusable style string. Every shot looks like a different film.
- Clips that move without purpose. Motion should serve the beat or the story, not just prove the tool works.
- Lip sync on wide shots. Keep sync shots tight and short.
- Wardrobe and hair drift between acts. Lock them per section.
- Mixing photoreal and stylized footage with no bridge. Use a transition or a shared grade to connect them.
- Ignoring delivery formats. If the video goes vertical for social platforms, plan crops during generation, not after.
- Skipping rights checks. Confirm commercial licensing, music clearance, likeness consent, and any platform disclosure requirements for synthetic media.
Before export, run this checklist: character continuity across every adjacent cut, artifact scan on hands, eyes, teeth, and background text, cut rhythm against the grid, sync accuracy at every lip-sync shot, color consistency across engines, single master resolution and frame rate, safe margins for titles and captions, loudness and true peak, and export presets matched to each destination.
FAQ
How long does an AI music video take to produce?
For a three-minute song, expect 15–25 hours of focused work for a solo creator, split roughly evenly between planning, generation, and post. Pre-production time pays for itself; every hour spent on the shot list tends to remove two hours of re-generation.
Do I need editing experience?
You need basic timeline skills: cutting, trimming, markers, and audio levels. Advanced compositing is optional. The skills that matter most are rhythm and continuity judgment, which come from watching music videos carefully and noticing where cuts land.
What if the character's face changes between shots?
Condition on reference images, reuse seeds, and re-frame the shot so the face is smaller, turned, or partially obscured. For hero shots, use a repair pass with face swap or inpainting rather than regenerating from scratch.
Can I generate the song and the video with AI?
Yes, and it is a legitimate workflow. The advantage is stem access for pacing edits; the disadvantage is that you must verify licensing for both the audio model and the video model before publishing commercially.
What resolution should I generate at?
The highest your tools support without unacceptable generation times, since downscaling is always safe and upscaling is not. Generate at the final aspect ratio — you lose substantial quality when cropping a 16:9 clip into a 9:16 frame.
How many shots do I need per minute?
A comfortable average is 12–18 cuts per minute for pop and rock, fewer for ambient or ballad material. Let the energy curve of the song decide, not a fixed rule.
How do I keep a series of videos visually linked?
Keep the style string, palette, grade, and framing conventions. A recurring location, object, or transition is enough to signal that two videos belong to the same world.
Turning this into a repeatable system is the real payoff. Once your shot list, style string, character sheet, and QA checklist exist as templates, the second video takes half the time of the first — and the third one starts to feel less like a project and more like a production line you control.

Alexander
More Blogs
Read MoreAI Transcription for Video Workflows: A Practical Guide
Build a reliable AI transcription pipeline for video: model choice, speaker labels, timestamps, quality checks, and workflow automation.
AI Background Replacement Workflow for After Effects
Learn a practical workflow for replacing video backgrounds in After Effects using AI mattes, cleanup, compositing, and motion matching for believable shots.
Cross-Border AI Video Production for Luxembourg Agencies
A practical guide for Luxembourg video agencies building cross-border AI workflows: planning, localization, visual consistency, review, and delivery.