

AI Portrait Editing: How to Pick the Best Face Photo App
Oct 13, 2026

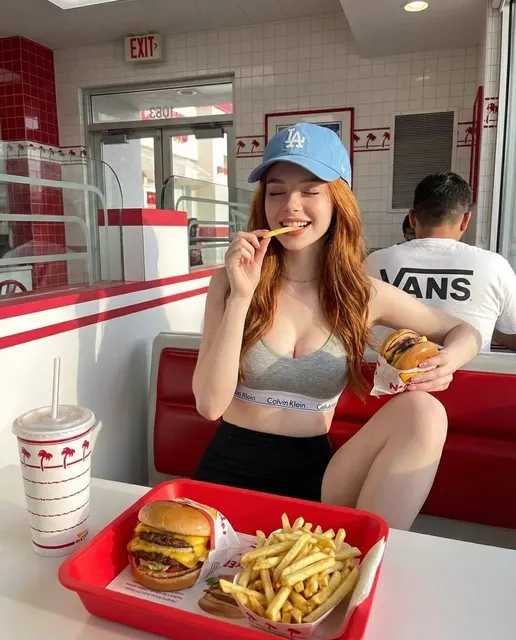

Faces are the hardest subject in photography to retouch. Skin carries pore texture, color variation, fine hair, and tiny asymmetries that the human eye reads instantly as either alive or artificial. A global blur that flatters a landscape turns a portrait into wax. That is why face-aware editing became one of the first genuinely useful applications of AI in consumer photo tools: instead of applying one uniform correction across the whole frame, the software builds a structural map of the face and works inside it.
Knowing how that map is built, and where it breaks, is what separates a retoucher who gets predictable results from someone who keeps switching apps hoping the next one will finally behave.
Why AI Changed Portrait Editing
Manual portrait retouching is a long chain of small decisions. Remove a blemish. Even out skin tone. Reduce redness. Lift the eyes. Soften a shadow under the nose. Each step is easy on its own; doing two hundred of them consistently, on a deadline, across a hundred images from the same shoot, is not. Fatigue creeps in, and by image sixty the skin on the left cheek looks different from the skin on the right.
AI addresses exactly that failure mode. A face-aware editor detects the same landmarks on every image, applies the same corrections at the same strength, and does it in a fraction of a second. The value is not that the machine is more artistic than you. It is not. The value is repeatability. It gives you a consistent baseline so your creative decisions start from a stable point instead of from whatever mood you were in at image forty.
There is a second shift too. Older tools offered sliders that acted on pixels globally: brightness, contrast, saturation, blur. AI tools offer operations that require understanding, like opening the eyes, evening the skin tone, or removing an object crossing the shoulder. That is a different kind of interface, and it changes what you can safely delegate.
How AI Face Editing Actually Works
Facial landmark detection and segmentation
Every face-aware tool starts by locating the face and placing a set of landmarks on it: eye corners, brow lines, nose tip, lip contour, jaw edge, ear position. Some systems use sixty-eight points, others use hundreds or thousands. From those points the software derives masks, one for skin, one for eyes, one for lips, one for hair, one for teeth.
The quality of those masks determines almost everything downstream. A mask that leaks a few pixels past the lip edge creates a halo. A skin mask that includes the eyebrow produces the telltale smudged brow that makes AI edits obvious from across the room. When you evaluate an app, zoom to 200 percent on the hairline, the lips, and the inner eye corners. That is where segmentation failures show up first.
Generative inpainting and relighting
Newer tools go beyond masking. Inpainting models can synthesize plausible skin, hair, or background where something has been removed. Relighting models estimate the direction and quality of the existing light, then add or subtract light on the face to match. Both are powerful and both are easy to overuse. Generative fill is best treated as a repair tool for small areas, such as a stray hair, a reflective patch, or a distracting object at the frame edge, rather than as a way to rebuild a face.
Skin-aware smoothing versus blur
The classic beginner mistake is to smooth skin with a blur. Blur destroys texture everywhere, including the eyelashes and the fine hairs along the jaw. Skin-aware smoothing instead identifies high-frequency noise such as pores and small blemishes, then reduces it while preserving edges and larger structures. If a tool's skin slider makes the eyelashes soft, it is blurring. If it leaves eyelashes crisp and only tightens the pore texture, it is genuinely skin-aware.
What Separates a Great Face Editor from a Filter
Naturalness at the edges
The mark of good AI retouching is that nothing announces itself. Check transitions: the boundary between smoothed cheek and untreated neck, between retouched skin and the hairline, between lips and surrounding skin. Good tools feather these transitions automatically. Weak tools produce visible bands that survive all the way into the exported file.
Batch consistency and speed
If you shoot events, weddings, or product catalogs, batch behavior matters more than any single slider. Look for the ability to copy face settings across a selection, to apply a preset without overwriting per-image manual work, and to preview a face adjustment on a thumbnail grid rather than one image at a time. Speed matters too. A face pass that takes four seconds per image is fine for ten portraits and painful for six hundred.
Local control and masking
Full automation is convenient and limiting. The best tools let you paint a mask, exclude an area from a face pass, or dial a global face preset down to thirty percent on one cheek. That flexibility is what lets you keep a signature look instead of accepting whatever aesthetic the tool ships with by default.
Export and color integrity
AI processing can shift color slightly, especially in shadows and in the red channel, which is exactly where skin tones live. Before committing to a tool, run a test. Edit a portrait, export to your usual format, and compare the exported file against the original in a color-managed viewer. If skin tones drift toward orange or gray, you will spend the difference in extra grading time.
A Repeatable Portrait Workflow, Step by Step
1. Cull and calibrate
Pick the images worth retouching and set your monitor to a known brightness. Retouching skin on a display that is too bright guarantees you will over-smooth.
2. Fix global exposure and color before touching faces
Face-aware corrections sit on top of the base image. If the white balance is wrong, the AI is evening out the wrong colors. Correct exposure, contrast, and color at the frame level first.
3. Run face passes in a fixed order
A reliable sequence: blemish removal, then skin tone evening, then skin texture, then eye enhancement, then teeth and lips, then contouring. Doing texture before blemishes hides the blemishes instead of removing them and leaves dark spots under a smooth surface.
4. Shape light with dodging and burning
Local light shaping does more for a portrait than any smoothing slider. Slightly brighten the forehead, nose bridge, and chin, then deepen the jaw and the sides of the face. Keep it subtle. A ten to fifteen percent change reads as good lighting rather than as editing.
5. Recover texture last
After all the smoothing, add a small amount of grain or texture back to the skin. Real skin has variation. A completely even surface is the clearest signal that a portrait went through heavy processing.
6. Handle hair, background, and edges
Check stray hairs across the face and neck, the transition along the jaw, and anything distracting at the frame edges. Background cleanup is usually invisible when done well and glaring when skipped.
7. Grade, sharpen, and export
Apply your look, sharpen selectively so that eyes and lips benefit while skin usually does not, and export. Always review the export rather than only the preview inside the app.
Common Mistakes That Make AI Retouching Obvious
- Smoothing the whole face at full strength. Skin loses all texture and starts to look like a mask.
- Ignoring the neck and hands. Retouched faces sitting above untreated necks are one of the most common tells.
- Over-whitening eyes and teeth. Pure white sclera and teeth look unsettling; real ones are slightly off-white and shadowed.
- Combining three tools with overlapping skin passes. Stacked smoothing compounds, because each pass sees already-smoothed skin as a new baseline.
- Using generative fill on large areas of a face. Facial geometry is highly recognizable, and even good models produce slight structural drift.
- Working at 100 percent zoom only. Zoom out regularly. Most retouching problems are visible only at normal viewing size.
Keeping a Consistent Look Across a Whole Shoot
Consistency is a workflow problem more than a software problem. Build one preset per lighting scenario, such as window light, harsh sun, or studio strobe, and apply it as a starting point rather than as a finished edit. Write down the values you settle on. When you return to a shoot two weeks later to deliver an extra image, those notes are the difference between a matching frame and an obvious late addition.
Also decide how much variation you allow between subjects. Uniform treatment across different skin tones usually means the preset was tuned for one of them and is now under-correcting or over-correcting the others. Test your preset on the lightest and the darkest skin in the set before applying it to anything. In most catalogs, the goal is not identical faces but a single visual language, and that language is set by light, contrast, and color rather than by the smoothing slider.
Matching the Tool to the Job
Solo creators and social content
Volume and speed dominate. You want one app that handles face retouching, background cleanup, and export in a single pass, with presets you can reuse across a week of posts. Fine-grained control matters less than a good default that looks acceptable on a phone screen.
Portrait and wedding photographers
You need batch behavior, non-destructive editing, and the ability to override automation locally. Confirm that the tool writes to your existing catalog or round-trips cleanly, because a retouching app that breaks your library structure costs more time than it saves. Also check how it handles a mix of skin tones in the same ceremony.
E-commerce with models
Consistency across a catalog is the whole game. The same face at slightly different brightness across twenty product pages looks like a mistake rather than a style. Look for locked presets, version history, and predictable export naming so that image thirty matches image three.
Motion and video portraits
Frame-to-frame stability is everything. A model that produces slightly different results on consecutive frames creates a shimmering effect that viewers notice immediately. Test on a short clip of someone turning their head before committing to a subscription or a longer project.
Ethics, Consent, and Client Expectations
Face editing touches identity, so expectations need to be explicit. Agree in advance on what retouched means for a given job. Is it blemish removal and light evening, or does it also include reshaping features? Many clients assume the first and are surprised by the second. Keep a copy of the original file, and if an image will be used in advertising, check the platform and regional rules about altered facial and body features, which increasingly require some form of disclosure.
There is also a practical quality argument for restraint. Aggressive reshaping and slimming produce images that look dated quickly and that subjects often dislike, because they do not recognize themselves in the result. The best portrait retouching is the kind a viewer cannot point to, only feel.
FAQ
Do AI face editors work on dark skin tones?
Quality varies significantly. The most common failure is a smoothing model trained mostly on lighter skin that flattens texture and drains warmth from darker tones. Test any tool on the full range of skin you photograph before relying on it for client work.
Should I retouch before or after color grading?
Retouch first on a neutral base, then grade. Grading changes contrast and saturation, which changes how visible your retouching is. Retouching after a grade means you are correcting against a moving target.
How much skin smoothing is too much?
If the skin on the nose has less texture than the skin on the neck, you have gone too far. Texture should be reduced rather than eliminated, and it should remain consistent across the face.
Can AI replace a retoucher?
It replaces repetitive labor, not judgment. The tool can even out skin across four hundred images; it cannot decide that a particular subject looks better with the scar left in.
Is a subscription photo editor worth it?
Only if you use the batch and library features. For occasional single-image edits, a one-time-purchase tool with a good face mask will usually do everything you need at a fraction of the ongoing cost.
What should I check before editing faces in video?
Look for temporal stability and the ability to track a face through motion, head turns, and partial occlusion. Single-frame quality is not a reliable predictor of video performance.
Bringing It All Together
The best face editing app is the one whose masks are clean, whose smoothing preserves texture, and whose batch behavior matches how you actually work. Evaluate tools on those three things rather than on marketing screenshots, and test them on your own images under your own lighting. Then build one workflow, write it down, and use it every time: global corrections first, face passes in a fixed order, light shaping, texture recovery, and a final export check. That sequence will do more for your portraits than any single slider, and it will keep working when the next generation of tools arrives.

Alexander
More Blogs
Read MoreVidu Q4 Alternatives: 4K AI Video Models Compared (2026)
Vidu Q4 alternatives compared: Kling 4.0, Seedance 2.5, Wan 3.0, and Runway Gen-4 — 4K support, input modes, durations, audio, and what each costs in credits on Domer.
Top 4K AI Image Generators in 2026: 5 Models Compared on Real Costs
The top 4K AI image generators on Domer compared: Flux 3 Klein, Nano Banana 2.1, GPT Image 2.5, GPT Image 2, and Nano Banana Pro — 4K credit costs, reference limits, and speed.
Nano Banana 2.1 vs GPT Image 2.5: Which Image Model Should You Use? (2026)
Nano Banana 2.1 vs GPT Image 2.5 Flare compared: credit costs per resolution, aspect ratios, reference images, text rendering, and which tasks fit each model.