
Create
AI Scene Design and Story Direction: A Filmmaker's Workflow
Oct 1, 2026
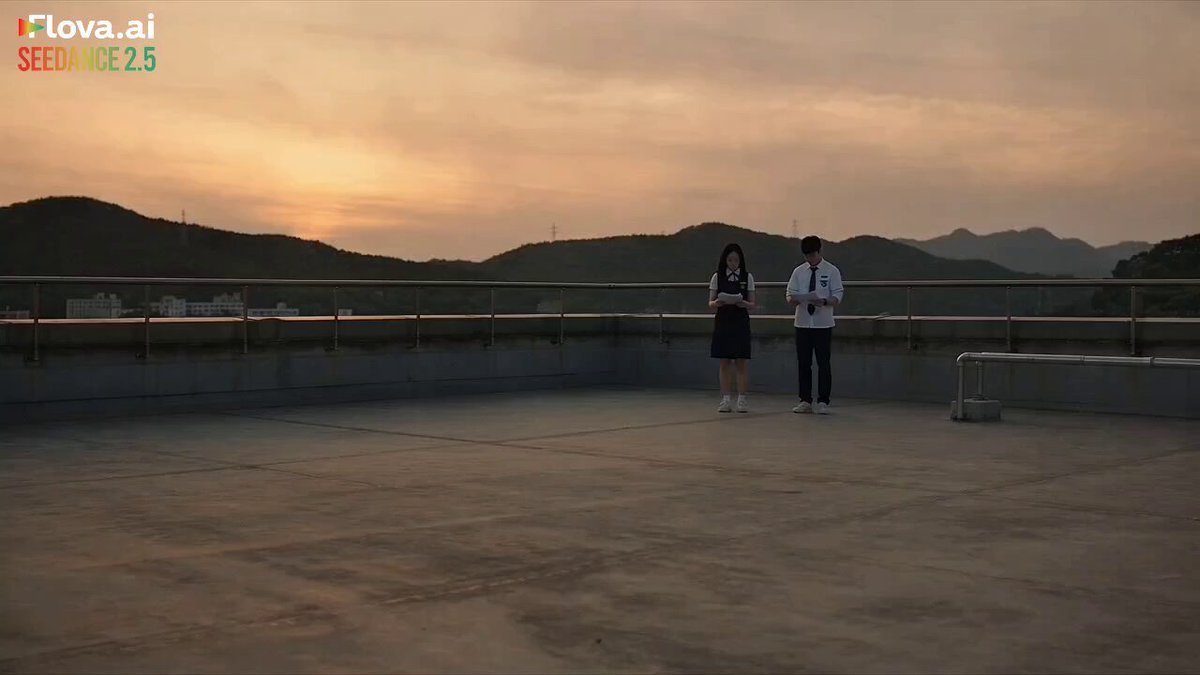

Why Scene Design Still Decides Whether an AI Film Works
Generative video has collapsed the distance between an idea and a moving image. A shot that once required a crew, a location permit, and a lighting package can now be produced in a browser tab. That shift is genuinely revolutionary, but it moves the bottleneck rather than removing it. Rendering is no longer the hard part. Deciding what to render, and then making a hundred separate generations feel like one continuous film, is the hard part.
That is the work of scene design and story direction. It is the discipline of translating intention into image: choosing what the audience sees, when they see it, how long they hold on it, and what emotional temperature the frame carries. AI tools do not replace that discipline. They amplify it. A director with a clear plan gets a film. A director with only a folder of striking clips gets a demo reel.
The practical goal of this guide is to give you a repeatable workflow you can run from first idea to final export. It covers planning, shot design, prompt construction, visual consistency, lighting, pacing, tool selection, and review loops. It assumes you are working with a mix of text-to-video, image-to-video, and image generation tools, and that you want the result to feel authored rather than assembled.
Build a Story Spine Before You Open Any Tool
The most common failure in AI filmmaking is starting with a prompt. Prompts are seductive because they produce instant reward, but a prompt without context produces a shot without a purpose. Start with structure instead.
A simple three-layer approach works: beat sheet, scene cards, shot list. The beat sheet is one page. It lists what changes for the protagonist and in what order. The scene cards turn each beat into a location-based unit with a clear function. The shot list is where cinematic decisions actually get made.
From beat sheet to shot list
A shot list does not need to be elaborate, but it does need columns that force decisions. A workable template:
| Column | What it captures |
|---|---|
| Scene | Number and short slug |
| Purpose | What the scene accomplishes in the story |
| Location | Interior or exterior, specific place |
| Time of day | Dawn, day, dusk, night |
| Emotional turn | From what, to what |
| Shots needed | Wide, medium, close, insert |
| Duration | Rough estimate in seconds |
| Continuity notes | Wardrobe, props, weather, injuries |
Filling this table before generating anything saves hours. You will discover, for example, that three consecutive scenes happen at dusk, which means you should lock a single dusk palette and reuse it rather than reinventing it each time.
The one-sentence scene intention
Write one sentence per scene describing the change. Not "a sad scene" but "she realizes the letter is gone and decides to lie about it." That sentence governs every downstream choice: whether the camera moves or stays locked, whether the light is soft or hard, whether the shot is close or distant. If you cannot write the sentence, you do not have a scene yet.
Designing the Shot: Framing, Lens, Movement
Scene design is camera grammar. Even in a fully synthetic pipeline, the audience reads shot size and camera movement as meaning. A wide shot says context and isolation. A close-up says interiority. A slow push-in says rising pressure. A handheld shot says instability.
The good news is that modern video models respond well to standard cinematography vocabulary, as long as the vocabulary is unambiguous.
Camera language that survives translation into prompts
Use industry terms rather than adjectives. "Cinematic" is nearly meaningless to a model. "85mm shallow depth of field, slow dolly-in, overcast window light from camera left" is specific and reproducible.
Shot sizes worth mastering:
- Extreme wide, wide, and establishing shots for geography and scale
- Full shot for body language and wardrobe
- Medium and medium close-up for dialogue and reaction
- Close-up and extreme close-up for emotion and detail
- Insert shots for objects, hands, screens, letters, keys, weapons
Movement vocabulary worth mastering:
- Static locked-off for tension and formality
- Slow push-in and pull-out for realization and release
- Tracking and following shots for momentum
- Crane and drone moves for scale
- Handheld and shoulder-mounted for immediacy
- Whip pan for transitions and energy
Lens language is the most underused lever. Focal length changes the psychological relationship between subject and background. Wide lenses exaggerate space and distance. Long lenses compress and isolate. Depth of field separates the subject from the world or merges them.
A reusable prompt pattern
A consistent structure produces consistent results and makes troubleshooting possible. Try this order:
- Shot size and subject
- Action in progress
- Lens and depth of field
- Camera movement
- Lighting source and direction
- Color palette and mood
- Texture, film stock, or grain
- Aspect ratio and technical spec
Example: "Medium close-up, woman in a wool coat turns slowly toward a rain-streaked window, 85mm shallow depth of field, subtle push-in, soft overcast daylight from camera left, desaturated teal and amber palette, fine 35mm grain, 2.39:1."
Every element earns its place. When a shot fails, you can change one variable at a time instead of rewriting everything and losing track of what worked.
Keeping Characters and Sets Consistent Across Scenes
Consistency is where AI filmmaking is won or lost. Audiences will forgive a slightly artificial texture. They will not forgive a coat that changes color between cuts or a face that becomes a different person in the reverse angle.
Build a character bible
For each principal character, prepare a small reference set: front, side, and three-quarter views in consistent lighting, plus a wardrobe note and a list of distinguishing details. Hair length and parting, eyewear, scars, jewelry, the exact shade of a jacket. Keep these as reference images and reuse them in every shot that features the character.
A character bible is not just for faces. It is for silhouette. If a character reads clearly in silhouette, they will read clearly in a wide shot where facial detail is minimal.
Continuity checks that catch real problems
A continuity board is a single page listing, per scene:
- Time of day and weather
- Wardrobe state, including damage or wetness
- Props and their positions
- Injuries or makeup changes
- Screen direction, meaning which way the character faces
- Eyeline direction in dialogue
Screen direction is the one most often ignored and most damaging. If a character exits frame right in one shot, they should enter frame left in the next when the geography is continuous. Break that rule and the audience feels disoriented without knowing why.
Practical tactics for consistency
- Reuse a fixed prompt prefix for a character and change only the action and camera
- Generate coverage in batches while the reference state is loaded
- Change one variable at a time when fixing a shot
- If only a background element is wrong, consider whether a crop, a replacement insert, or a cut to a different angle solves it more cheaply
- Keep a "hero frame" per scene as the visual anchor and compare every new generation against it
Lighting and Mood as Directorial Controls
Lighting is the fastest way to make AI footage feel intentional. Three questions drive most decisions: where is the light coming from, how hard or soft is it, and what color is it.
Name real sources rather than abstractions. Practical lamp, window light, overhead fluorescent, firelight, neon signage, moonlight, headlights, phone screen glow. Each carries an emotional signature. Fluorescent reads as institutional and cold. Firelight reads as intimate and unstable. Screen glow reads as solitary and modern.
Three questions drive most decisions: where is the light coming from, how hard or soft is it, and what color temperature does it carry?
Useful lighting terms for prompts:
- High-key, meaning bright and low contrast, for comedy and safety
- Low-key, meaning dark with deep shadows, for tension and mystery
- Rim light and backlight to separate a subject from a background
- Silhouette for anonymity and dread
- Negative fill, or deliberately crushed shadows, for weight
- Practical sources visible in frame for realism
Color can carry the arc of the whole film. A warm, saturated opening and a cold, desaturated midpoint tells the audience something has gone wrong before a single line of dialogue lands. Choose a palette per act, not per shot, and keep it narrow: two or three dominant hues with one accent.
Pacing, Transitions, and the Edit
Pacing is rhythm, and rhythm comes from variation. If every shot is four seconds long, the film feels mechanical no matter how beautiful the images are.
Generate coverage instead of long single shots
Most video models perform best in short durations. Lean into that. Generate three to six second clips and build sequences from coverage rather than trying to produce one continuous take. Coverage also gives you options in the edit, which is where performance is really found.
Rough duration guidance by shot type:
- Action and impact shots: one to two and a half seconds
- Dialogue and reaction: three to five seconds
- Establishing shots: two to four seconds
- Emotional holds: whatever the moment needs, often longer than you think
Transitions that hide seams
The best transition in AI video is the cut, because a hard cut asks the audience to accept a new frame without comparison. Techniques that work especially well:
- Cut on action, mid-movement, so motion carries across the join
- Match cut on shape, color, or composition
- Whip pan or motion blur to mask an inconsistent frame
- Insert shots as punctuation or as a bridge between angles
- Sound bridges, where audio from the next scene begins before the picture cuts
Long cross-dissolves tend to expose inconsistency, because the audience sees two frames at once. Use them deliberately, for dream logic or time passing, not as a patch.
Choosing Tools Without Getting Overwhelmed
There is no single best video model. There is only the best model for a particular shot in a particular project. Evaluation criteria matter more than brand loyalty.
Decision criteria that actually predict results
- Shot type fit: does the model handle the specific content, such as human faces, animals, vehicles, water, or fast action?
- Control surface: text-only, image-to-video, keyframe interpolation, or motion brush tools
- Motion coherence under complex movement
- Maximum duration and whether extension is supported
- Resolution and aspect ratio options
- Consistency support for characters and styles
- Iteration speed, because speed changes how brave you are
- Licensing terms for the way you plan to publish
Run a small test: generate the same three shots on each candidate tool before committing a project to it. Hero shot, dialogue shot, and complex motion shot. The results will tell you more than any comparison article.
A hybrid pipeline that works
A dependable production flow looks like this:
- Script and shot list in plain text
- Concept stills generated with an image model to lock composition, palette, and character reference
- Image-to-video for hero shots where framing must be exact
- Text-to-video for texture, inserts, and background plates
- Upscaling and frame interpolation where smoothness is needed
- Assembly and color in a nonlinear editor such as DaVinci Resolve or Premiere Pro
- Sound design, music, and dialogue treatment
- Final grade, titles, and export
Sound is half the illusion
Underinvested audio makes even strong visuals feel amateur. Lay in room tone, footsteps, cloth movement, and ambience beneath every scene. A punch or a door slam needs a sound that lands on the frame. Dialogue scenes benefit from consistent reverb characteristics so cuts do not reveal that each line was generated separately.
Review Loops: Iterating Without Losing the Story
Iteration is where taste gets applied. The risk is that iteration drifts, and you end up polishing shots that no longer serve the film.
The three-pass review
Pass one: story. Watch with the sound off and at normal speed. If you cannot follow what happens and why, no amount of visual polish will fix it. Cut whole shots here rather than trimming frames.
Pass two: continuity. Watch with the sound on, pausing at every cut. Check wardrobe, props, eyeline, screen direction, and lighting direction. Fix high-visibility problems first, because audiences notice faces and hands before they notice background.
Pass three: polish. Look for warping, extra fingers, morphing textures, unstable text, and jitter. Replace individual shots or extend a clean frame with a different angle rather than regenerating an entire sequence.
Mistakes that cost the most time
- Prompt-first filmmaking: beautiful shots that do not connect
- Prompt overloading: contradictory instructions that cancel each other
- Regenerating an entire sequence to fix one shot
- Ignoring screen direction and eyelines
- Inconsistent color between scenes that should share a palette
- Uniform shot lengths that flatten rhythm
- Treating sound as an afterthought
- Jumping between too many tools mid-project and losing coherence
A Compact Production Checklist
Before you generate anything:
- Write the beat sheet and the one-sentence intention for each scene
- Lock the shot list with durations and continuity notes
- Prepare character reference images and a palette per act
- Choose two to three tools and test them on a hero shot
While you generate:
- Keep prompt structure consistent and change one variable at a time
- Batch shots that share lighting and wardrobe state
- Save hero frames for every scene
- Log which prompt produced which take
Before you export:
- Run the three-pass review
- Check every cut for continuity and direction
- Balance dialogue, effects, and music levels
- Confirm aspect ratio, resolution, and captions
FAQ
Do I need real filmmaking knowledge to direct AI scenes?
You need vocabulary more than equipment. Understanding shot sizes, lens behavior, lighting direction, and pacing gives you precise control over what a model produces. Most of that can be learned from a few hours of study and a lot of deliberate practice.
How long should each generated clip be?
Short clips of three to six seconds are usually the sweet spot. They give you enough motion to work with and enough options in the edit. Try to generate coverage rather than long takes, and let the edit create the sense of duration.
Can AI hold a character consistent across many scenes?
With effort, yes. Use reference images, keep a fixed descriptive prefix for the character, generate related shots in the same session, and treat wardrobe as a locked variable. Expect to regenerate some shots, and build that expectation into your schedule.
Should I storyboard with still images first?
Almost always, yes. Stills let you solve composition, palette, and character look quickly and cheaply. Once a still works, image-to-video gives you a much tighter path to a usable shot than text alone.
How do I handle dialogue scenes?
Generate each angle separately and think in shot-reverse-shot terms. Keep eyelines consistent, maintain screen direction, and use a stable audio treatment so the cuts do not feel like different rooms. Reaction shots do most of the emotional work, so budget time for them.
Is it better to make one long generation or many short ones?
Many short ones, in most cases. Long generations accumulate artifacts and reduce your editing choices. A sequence built from coverage also lets you control pace, which is where a film starts to feel alive.
The through-line in all of this is intention. Tools will keep changing, frame rates will rise, and new control surfaces will appear. What stays constant is the director's job: decide what the audience should feel, then use every available lever to earn that feeling. Scene design, continuity, light, rhythm, and sound are those levers. Use them deliberately and the technology disappears behind the story, which is exactly where it belongs.

Alexander
More Blogs
Read MoreAutomate Video Transcripts with AI: A Practical Workflow Guide
Learn how to turn video into accurate transcripts with AI automation, timecodes, speaker labels, SEO-friendly formatting, QA checks, and reusable workflows.
Change an iPhone Video Thumbnail: Mobile Workflow Guide
Learn how to change an iPhone video thumbnail with a reliable mobile editing workflow, from frame selection and cover design to export checks.
Boise Video Agencies: AI Workflow Guide for Local Teams
Discover how Boise video agencies can use AI video workflows to plan, produce, and deliver local campaigns with consistent brand voice and audio.