
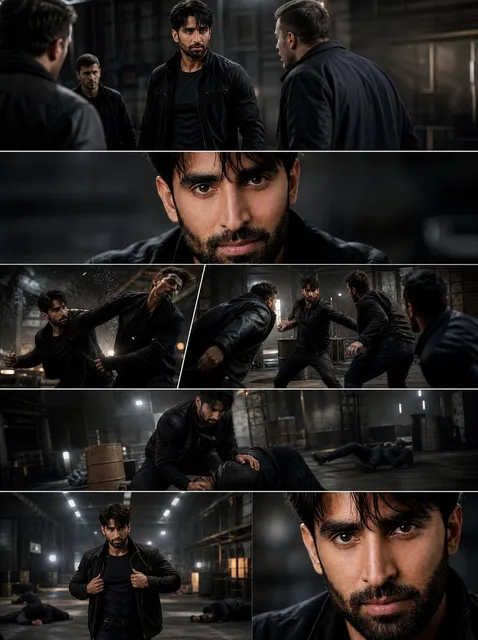
AI Storyboard Workflow: Plan Cinematic Video Shots Faster
Oct 1, 2026


Why Storyboards Still Decide Whether a Video Works
Most videos fail before a single frame is rendered. Not because the camera move was wrong or the grade was flat, but because nobody agreed on what the scene was actually about. A storyboard is the cheapest place in the entire pipeline to make mistakes — a bad idea there costs a page, not a shoot day with a crew standing around. AI has not changed that economics. It has changed how fast you can produce and discard those pages, which is a much bigger deal than it sounds.
A working storyboard does three jobs at once. It translates a script into visual decisions: who is in frame, how tight, from where, and for how long. It aligns a team — director, editor, sound designer, client — around a single shared picture of 'finished.' And it exposes story gaps while they are still free to fix. A storyboard that only looks pretty is decoration. A storyboard that answers staging, pacing, and coverage questions is pre-production.
The three questions every board must answer
- Where is the camera, and what is it looking at?
- What changes between the first frame and the last frame of the shot?
- What does the audience learn or feel here that they did not know one shot ago?
If a panel cannot answer all three, it is a mood board, not a storyboard. That distinction matters when you start handing images to other people, because a mood board invites opinions about taste while a storyboard invites decisions about coverage.
What AI Actually Changes in Pre-Visualization
The honest answer: AI compresses the distance between an idea and a look. Traditionally you sketched, or you hired a storyboard artist, or you shot reference with a phone. Each step cost hours or money, so you did fewer of them. With an AI-assisted pipeline you can generate twenty interpretations of the same beat in the time it used to take to draw one, and that volume changes your decision-making. You stop defending the first idea and start comparing options.
The second change is communication. Rough thumbnails used to require explanation. A clean keyframe with plausible lighting lets a client, an editor, or a sound designer react to the actual shot instead of to your description of it. That reduces the number of expensive misunderstandings per project far more than it reduces drawing time.
The three layers worth separating
Treat your board as three distinct layers, because they use different tools and fail in different ways.
- Script layer. Beats, scene intent, emotional turn, dialogue. This is where the story is decided, and it should be locked before you generate anything.
- Shot layer. Shot list, framing, camera movement, duration, transitions, on-screen action. This is the plan your editor and cinematographer will actually work from.
- Frame layer. Key images, lighting, palette, lens character, texture. This is the layer AI is best at, and the layer people mistakenly start with.
Where AI is strong, and where it still breaks
AI is strong at variation, mood, lighting simulation, and filling a rough composition with plausible detail. It is weak at narrative logic, continuity across many shots, precise staging between characters, and anything requiring exact repetition — hands, props, clothing details, on-screen text, or a specific camera move carried from one shot to the next. Plan around that split: use AI to explore and to communicate, and use human judgement for continuity and story order. A board that is 100% generated and 0% decided is a very expensive slideshow.
A Repeatable AI Storyboard Workflow
This is the sequence that holds up under deadline pressure. It works for a 30-second product spot, a documentary segment, or a short film scene.
Step 1: Lock the script and the beat sheet
Write the beat sheet as durations, not paragraphs. A format like 'Hook: 0–3s. Problem: 3–10s. Product reveal: 10–16s' forces you to commit to timing. A minute of finished video almost always needs more beats than people expect — twelve to twenty. Assign an emotional target to each beat: curiosity, tension, relief, delight. Once the beat sheet is locked, stop rewriting it, because every later stage depends on it.
Step 2: Break each beat into shots
A beat is not a shot. Convert each beat into one to four shots and record them in a table with these columns: shot number, duration, framing, camera movement, subject action, audio, and notes. Keep durations realistic — two to five seconds for most dialogue-free shots, longer only when the audience needs to read detail.
Example row: S07 | 3.5s | Medium close-up | Slow push in | Talent lifts the box, pauses | soft click SFX | hold beat before reveal.
That single row contains more production value than a page of adjectives, because everyone downstream can act on it.
Step 3: Build one reusable style block
Write a single prompt template and reuse it for every frame, changing only the shot-specific parts. A reliable ordering looks like this:
[subject + wardrobe] + [action] + [location + time of day] + [framing + lens] + [lighting] + [color palette] + [mood keywords] + [image quality or film look]
Keep the last four blocks frozen across the whole project. That habit does more for consistency than any advanced technique. When shot 12 looks like it belongs to a different film, it is almost always because someone rewrote the lighting phrase.
Step 4: Generate keyframes, not every frame
You do not need an image for every second of screen time. Budget six to twelve keyframes per minute of finished video: one per shot at minimum, plus extra frames where the composition changes meaningfully inside a shot. Generate three to five variations per keyframe, then choose quickly. Rename files immediately using the shot number, for example S07_v2_approve.png, because unlabelled folders destroy more projects than bad prompts ever do.
Step 5: Assemble an animatic
Drop the approved frames into a timeline, hold each one for its planned duration, and add temporary music and scratch narration. Watch it twice: once for logic and once for rhythm. Almost every problem you would have discovered on set is visible here — a shot that lingers, a transition that snaps, a beat that arrives too late. Fixing it takes minutes instead of reshooting.
Writing Shot Prompts That Survive Rendering
Prompts are not spells. They are briefs written for a collaborator with no memory and no taste, so specificity beats poetry every time.
Camera vocabulary worth memorizing
Use standard framing terms instead of adjectives: extreme wide establishing shot, wide, medium wide, medium, medium close-up, close-up, extreme close-up, over-the-shoulder, insert. For movement, name it precisely: slow push in, pull back, lateral truck, handheld follow, crane rise, orbit, static locked-off. Naming the movement is also a reminder to ask whether you need it. Most shots are better locked off, and stating 'static' in the prompt prevents the model from inventing drift.
Lighting, lens, and palette language
Lighting phrases that translate well include single hard key with deep negative fill, soft north-window light, practical neon at night with wet pavement, golden-hour backlight with haze, overcast diffusion, and high-contrast chiaroscuro. Lens language: 24mm wide with mild distortion, 50mm natural perspective, 85mm portrait compression, anamorphic flare, shallow depth of field at f/1.8. Palette: desaturated teal and amber, muted earth tones, pastel daylight, monochrome with one accent color. Pick one phrase per category and keep it stable for the whole project.
Negative prompts and cleanup rules
Always exclude text, watermarks, logos, extra limbs, extra fingers, deformed hands, duplicated faces, blurry faces, cluttered backgrounds, and harsh HDR halos. Then check each selected frame at 100% zoom before it enters the board. A storyboard panel with six fingers damages a room's confidence in the whole presentation faster than a rough composition ever will. Cropping is also a legitimate fix: if a frame is perfect except for one detail, reframe it.
Keeping Characters, Wardrobe, and Locations Consistent
Consistency is a documentation problem more than a generation problem. Create a character sheet for each principal: three angles, one wardrobe description written in words, hair, approximate age, and distinguishing features. Write the wardrobe as text you can paste — 'charcoal wool overshirt, olive tee, silver watch on left wrist' — rather than trusting a model to remember a reference image across sessions.
Do the same for locations. A location bible should list time of day, weather, key light direction, and two or three recurring set details that appear in every shot there. Then lock what can be locked: fixed seeds where the tool supports them, the same style block, the same aspect ratio, the same reference images. Name files with the shot number and version. When a discrepancy appears, fix it at the sheet rather than patching one frame, otherwise the next shot will drift again and you will spend the afternoon chasing continuity instead of finishing the board.
Choosing Tools for Each Stage of the Pipeline
No single tool wins every stage. Think in categories and pick the option with the least friction for that specific job.
| Stage | What you need | Typical options |
|---|---|---|
| Script and beats | Structure, timing, revision history | Any screenplay or outline app |
| Shot breakdown | Tables, duration math, sharing | Spreadsheets or a shot-list tool |
| Keyframe images | Style control, reference images, seeds | Midjourney, Stable Diffusion, ComfyUI, or a hosted equivalent |
| Motion tests | Short image-to-video clips | Runway, Kling, Pika, Luma, Sora-class tools |
| Animatic editing | Timing, temp audio, versioning | DaVinci Resolve, Premiere Pro, Final Cut |
| Review | Timestamped comments, approvals | Frame.io or any review board |
A few selection rules. If your project depends on a recurring character, prioritise tools with strong reference-image handling over tools with the flashiest motion. If you need to iterate quickly, prioritise speed and cheap re-rolls over maximum resolution. If you are working with a client, prioritise whatever makes review and versioning easiest, because collaboration cost usually exceeds generation cost. And if a tool cannot reproduce a look you already approved, it is the wrong tool for that shot, no matter how impressive its demo reel is.
Designing Sound and Timing Before You Shoot
Sound is a pre-production decision, not a post-production rescue. Build a scratch track early: temp music, ambient bed, key sound effects, and a rough voice-over. Then cut your animatic to that track instead of cutting the track to the animatic. You will immediately discover that a '3-second' shot is really 2.2 seconds of screen time, and that the reveal needs half a second of silence before it lands.
Write audio into the shot list. Note whether a shot is dialogue, voice-over, or silent, and whether a sound effect carries the transition. A shot with no sound purpose is often a shot you can delete, which is one of the fastest ways to tighten a rough cut before anyone shoots anything.
Common Mistakes and How to Fix Them
- Starting with images instead of beats. Fix: lock the beat sheet first, even if it looks ugly on the page.
- Generating hundreds of frames. Fix: cap variations at three to five per shot and choose within minutes, not hours.
- Rewriting the style block mid-project. Fix: freeze lighting, palette, and lens phrases and treat any change as a formal revision.
- Ignoring duration. Fix: put a number on every shot before you generate it.
- Skipping the animatic. Fix: always watch the whole sequence in order with sound before calling the board finished.
- No file naming convention. Fix: shot number, version, status — every file, every time.
- Storyboarding only the exciting shots. Fix: board the connective tissue. Coverage is what makes editing possible.
- Treating AI frames as final deliverables. Fix: they are communication tools. The finished video is better when the board is honest rather than beautiful.
Reviewing, Approving, and Handing Off the Storyboard
Do the review in one place with timestamped comments, and require notes to reference the shot number. A board that receives notes like 'shot 3 feels slow' is easy to fix; 'I do not like the middle' is not. If you run a review meeting, walk through the animatic in real time and stop only where a decision is needed.
Before handoff, run a checklist: every beat is covered, every shot has a duration and a framing, character and location sheets are attached, the animatic plays start to finish, audio notes exist, and file naming is consistent. Then export a single PDF or slide deck in shot order with the duration printed under each panel. Handoff quality is a preview of production quality, and the crew reads that signal immediately.
FAQ: AI Storyboards in Practice
Do I still need a storyboard artist? For high-end work, yes — a good artist makes choices a model cannot, especially about staging and performance. AI helps you arrive at the meeting with clearer intent, which makes the artist's time more valuable, not less.
How long should an AI storyboard take? For a 60-second piece, plan two to four hours for beats and the shot list, one to two hours for keyframes, and under an hour for the animatic. The first project takes longer; the workflow is what saves time on the second one.
Can I use AI frames in the final edit? Sometimes, for stylized or animated sequences. For live-action, treat them as pre-visualization unless the tool supports the exact motion, continuity, and resolution your scene requires.
What resolution should keyframes be? Anything you can read comfortably at full screen. Oversized renders slow iteration without improving any creative decision.
How do I stop a client fixating on the wrong details? Label panels clearly as pre-visualization and annotate the intent underneath each one — what the shot is for, not just what it looks like. Intent annotations redirect feedback toward structure.
What if the animatic feels boring? Usually the problem is beats, not shots. Vary duration, cut on action, and delete anything that does not change what the audience knows or feels.
A storyboard is a decision document. AI makes it faster to write, cheaper to revise, and easier to share — which means the only remaining reason to walk onto a set without a plan is deciding you do not want one.

Alexander
More Blogs
Read MoreThumbnail efficaci per TikTok e YouTube: guida pratica
Come progettare thumbnail che fermano lo scroll: strumenti, workflow, criteri di test e ottimizzazione per TikTok e YouTube, con esempi pratici.
Cómo descargar portadas de Reels de Instagram con criterio
Guía práctica para descargar, elegir y reutilizar portadas de Reels de Instagram sin perder calidad, con flujos de trabajo, errores y consejos de diseño.
AI Voiceover and Music Workflows for Better Video Sound
Build a repeatable workflow for AI voiceover and generated music: script prep, voice selection, mixing levels, loudness targets, and QA checks.