
Create
AI Video Tools for Short Films: A Visual Storytelling Guide
Oct 1, 2026
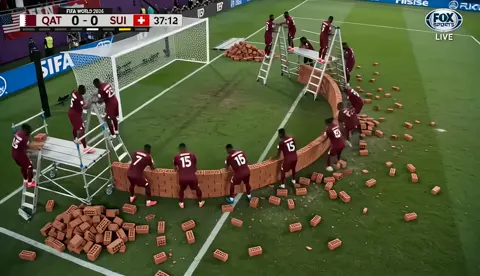
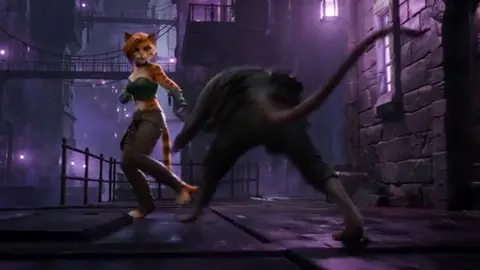
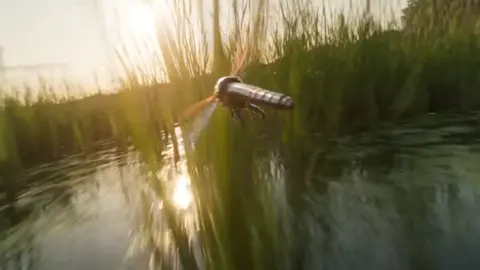
Short films have always been where filmmaking grammar gets stress-tested. They are cheap enough to experiment with and long enough to carry a real emotional arc. What has changed is the production layer underneath them: generative video tools now handle shots that once required a crew, a lighting package, and a location permit. The result is not a replacement for craft. It is a compression of the feedback loop. An idea becomes a moving image in an afternoon, and that moving image can be revised in minutes.
This guide is workflow-first. It covers how to choose generation models shot by shot, how to write prompts that survive contact with a render, how to keep a character's face and wardrobe stable across a cut, how to direct camera motion with words, how to build a soundtrack that makes synthetic footage feel expensive, and how to deliver a finished film that holds up on a festival screen or a vertical feed. Nothing here depends on a single vendor. The principles travel.
Why the short format fits AI-assisted production so well
A three-to-eight minute film is roughly 60 to 140 shots. That number matters, because generative video still struggles with long uninterrupted takes. Short-form storytelling is naturally cutty: close-ups, inserts, reaction shots, establishing beats. Every cut resets the model's burden. You are not asking one generation to be coherent for four minutes; you are asking sixty generations to be coherent for four seconds each, stitched by editing.
There are three other structural advantages.
Iteration economics. Generation is measured in time, not in film stock. A shot that costs twenty minutes to attempt can be attempted five times. Traditional production punishes retries; AI production rewards them, as long as you have a selection process.
Scope discipline. A short has room for one idea, one turn, and one visual system. That constraint is a gift when you are learning a tool. You can define a look — sodium-vapor night, bleached desert noon, fluorescent office — and hold it for the whole runtime.
Sound-first thinking. Because image generation is now fast, the bottleneck has moved to audio. Filmmakers who plan their sound early get a disproportionate quality jump, because audiences forgive soft image far more readily than they forgive flat, silent-feeling scenes.
What has genuinely changed is control. Earlier generations produced dreamlike drift; current systems accept reference images, first and last frames, camera-motion instructions, and in some cases native dialogue. That control is what turns a demo reel into a narrative.
Choosing the right generation model for each shot
There is no single best model. There is a best model for a shot type, a deadline, and a consistency requirement. Treat your toolset as a bench of specialists rather than a single camera.
What to evaluate before you commit
- Maximum clip length and resolution. A model that gives you ten seconds in one pass saves you stitching and reduces drift.
- Reference adherence. How faithfully does it keep a face, costume, or product when you supply an image? This is the single most important capability for narrative work.
- Camera vocabulary. Does it understand "slow dolly in," "handheld tracking," "crane up," or only vague motion? Explicit motion control is worth more than extra resolution.
- Frame control. First-frame and last-frame conditioning lets you cut precisely and chain shots.
- Native audio and lip sync. Useful for dialogue beats and ambience; risky if you need precise performance timing.
- Iteration speed and predictability. A slightly weaker model that returns a usable take in ninety seconds usually beats a stronger model that returns a surprise in ten minutes.
A practical mapping of shot types to tool families
| Shot type | Best-fit approach |
|---|---|
| Establishing wide, landscape, city | Text-to-video with strong cinematic presets |
| Character close-up with dialogue | Image-to-video anchored to a reference still, with audio added separately |
| Action and chase beats | Motion-control or camera-driven models, short duration, high frame rate |
| Inserts, hands, objects, food | Image-to-video from a still; often better generated as stills first |
| Transitions and match cuts | Last-frame-to-first-frame chaining |
| Slow, atmospheric holds | Any model with stable motion; upscale and interpolate afterward |
Names worth knowing in each family include Sora, Runway, Kling, Luma Dream Machine, Pika, Veo, Hailuo, and Stable Video Diffusion, with still-image generators such as Midjourney or Flux supplying keyframes and look development, and dedicated upscalers or frame interpolators handling the final polish. The right answer is often a stack: stills from one tool, motion from a second, upscaling from a third, sound from a fourth.
Hybrid stacks beat single-tool loyalty
A useful habit is to build one hero shot with three different engines and compare. Judge them on face stability, motion physics, and how much of the frame you would need to hide in post. Whichever wins becomes your default for that shot class for the rest of the project. Consistency of pipeline matters more than consistency of brand.
Pre-production: from logline to shot list
Generative filmmaking fails most often in pre-production, not in the render. If you cannot describe the shot, the model cannot invent it for you in a way that cuts together.
Beat sheet before prompts
Write the film as eight to fifteen beats in plain prose. Each beat is one dramatic action: she finds the letter, he misses the train, the lights go out. Do not describe camera angles yet. When the beats read cleanly on their own, you have a story. When they do not, no amount of visual polish will rescue it.
Shot list template
For each beat, list shots with five fields:
- Shot ID and duration (for example, SC04B, 4 seconds)
- Framing and lens feel (medium close-up, 50mm equivalent, shallow depth)
- Subject and action (what physically happens in the frame)
- Camera behaviour (locked off, slow push, handheld follow)
- Light and palette (window light from frame left, cool shadows)
This list becomes your production schedule. Sort it by location and lighting setup, then generate every shot that shares a look in one batch. Batching is how you keep tone consistent and avoid re-tuning prompts twenty times.
Prompt architecture that survives generation
Effective prompts follow a predictable order: subject, action, environment, camera, lighting, lens and format, style, constraints. A worked example:
"A tired night-shift nurse in pale blue scrubs, walking down an empty hospital corridor, pushing a metal cart, slow tracking shot from behind at shoulder height, fluorescent overhead light with slight green cast, 35mm anamorphic look, shallow depth of field, muted cinematic grade, no text, no extra people."
Two rules matter more than any word list. First, one action per shot. If a prompt contains two actions, the model will choose one and improvise the rest. Second, keep prompts between twenty and forty words for action shots; longer prompts dilute attention and produce mushier motion. Save the long, lyrical descriptions for still-image keyframes, where there is no temporal budget to spend.
Keeping characters and sets consistent across shots
Consistency is the craft problem of AI filmmaking. Faces drift, jackets change colour, rooms rearrange themselves. The fix is a reference system, not a magic prompt.
Build a character sheet first
Generate or photograph three to five images of each principal: front, three-quarter, profile, and full body, all in neutral light with a plain background. Add one wardrobe detail shot for anything distinctive — a scar, a specific jacket, a pair of glasses. These stills become your anchor images, pasted into every image-to-video generation that features that character. If you later need a different angle, generate it as a still first, approve it against the sheet, and only then animate it.
Chain shots instead of isolating them
When two shots share a character and location, generate the first, take its final frame, and use that frame as the opening image of the next shot. This last-frame-to-first-frame chaining produces continuity that no text prompt can match. It also gives you a reliable way to build longer scenes out of short clips.
Control the environment like a set
Treat each location as a set with fixed rules: light direction, colour temperature, key props, and the axis of action. Write those rules at the top of the shot list and copy them into every prompt for that location. If a shot violates the axis — a character looking one way in shot 4 and the opposite way in shot 5 — audiences read it as confusion even if they cannot name why.
Repair drift in post
Perfect consistency is not required if you edit well. Cut on motion, cut to close-ups, and use inserts to bridge mismatches. Where a face drifts badly, tools that replace a performance onto a consistent reference, or generative inpainting to fix a sleeve or a hand, will usually cost less time than re-generating ten takes.
Directing motion: camera language in a text box
Camera movement is the most underused lever in AI video, and the most misunderstood. Models distinguish between subject motion and camera motion reasonably well, but only if you state them separately: "the subject turns to look at the window" is not the same as "the camera slowly pushes in." Keep them in separate clauses.
Useful vocabulary to test in your preferred models:
- Locked off / static frame — essential for dialogue and for shots you intend to stabilise in the edit.
- Slow push in — tension, dawning realisation.
- Dolly out — isolation, reveal of context.
- Tracking shot, following — pursuit, momentum.
- Orbit around subject — reveals detail, useful for objects.
- Handheld sway — documentary realism, anxiety.
- Crane up / pedestal down — scale and transition.
- Rack focus — shifts attention without a cut.
Add a speed qualifier: slow, steady, drifting, sudden. Motion without a pace reads as generic. And remember that generated movement is harder to stabilise than generated stillness; if a shot is one of ten in a fast sequence, a locked-off frame with good subject action is often the smarter build.
Sound design: the cheapest way to make footage feel expensive
Audiences hear production value before they see it. A synthetic shot with layered foley and a confident music bed reads as intentional. The same shot with a single ambient loop reads as unfinished.
Build your sound in four layers:
- Ambience. One bed per location, consistent across every shot in that scene. Room tone is continuity glue.
- Foley. Footsteps, cloth, doors, cups, keys. This is where the scene becomes physical.
- Dialogue and ADR. Record lines separately and cut them to picture rather than chasing generated lip sync. Slight timing imperfections are invisible when the performance is committed.
- Score or drone. One motif, restated. Even a two-note figure gives the film an identity.
A practical mix target: dialogue peaking around minus twelve to minus six decibels, music sitting well underneath at roughly minus eighteen, with ambience just audible under everything. Keep loudness consistent for streaming delivery, and check the mix on a phone speaker — that is where most viewers will actually hear it.
A complete end-to-end workflow
Here is a pipeline that holds up for a five-minute short made by one or two people.
Step 1: Script and beat sheet. Two to three pages, eight to fifteen beats, one emotional arc.
Step 2: Shot list. Sixty to one hundred and twenty shots, each with duration, framing, action, camera, and light.
Step 3: Look development. Ten to fifteen still images defining palette, lens feel, and wardrobe. Approve these before generating a single frame of motion. Changing your look here costs minutes; changing it after fifty renders costs days.
Step 4: Animatic. Cut the stills to a temporary voice track and a placeholder music cue. Get the rhythm right on paper. Most films that fail in AI production were never edited as an animatic first.
Step 5: Generate hero shots. Make the five shots that carry the story — the opening image, the turn, the climax, the final frame. Lock these before generating coverage. They establish the visual benchmark everything else must match.
Step 6: Batch the coverage. All shots from one location, one lighting setup, and one character batch together. Generate three to five alternatives per shot and label them clearly.
Step 7: Select and assemble. Cut the best takes to the temp audio. Expect a first assembly to be ten to twenty percent longer than target; the trims you make now are where the film finds its pace.
Step 8: Pick-ups. Generate replacements only where the edit demands them. This is the moment to fix eye lines, add inserts, and simplify anything that confuses.
Step 9: Sound, grade, and titles. Finalise dialogue, layer foley, lock music, apply a single consistent grade, and add clean title cards.
Step 10: Deliver. Export masters at the specs you need and keep a textless version for future use.
Quality control and common mistakes
Watch every shot twice: once at normal speed, once frame by frame. Look for melting hands, wandering eyes, changing hair length, and light direction that flips mid-shot. Check that motion ends where you need it to for the cut.
The recurring mistakes are remarkably consistent across projects:
- Writing scene direction instead of shot direction. "They argue in the kitchen" is not a shot. Specify who is in frame and what the camera does.
- Overloading prompts. Three ideas in one prompt yields one idea rendered poorly.
- Generating without an edit plan. Hours of beautiful footage that cannot be cut together is the most common failure mode.
- Ignoring light direction. Continuity of light matters more than continuity of face.
- No temp audio. Silent assemblies always look worse than they are, and you will make bad cuts as a result.
- Judging shots in isolation. A take that looks strange alone can be perfect in a two-second cut.
- Solving story problems with generation. If a scene does not work as a beat sheet, no model will fix it.
Delivery, format, and where the work goes next
Decide your frame early. A 2.39:1 crop feels cinematic but wastes vertical pixels; 16:9 is the safest festival and streaming default; 9:16 is a different film, not a crop, and should be framed for phones from the shot list onward.
For festivals and screenings, deliver high-bitrate 1080p or 4K at 24 frames per second with a stereo mix and burned-in or sidecar subtitles. Many festivals prefer runtimes under ten minutes, and some ask for a note on how the film was made; a short, factual production description is usually enough. Keep a textless master, a subtitle file, a poster frame, and a one-line synopsis ready to go — programmers and platform editors ask for these constantly, and having them prepared makes your film easier to place.
Where this is heading is less about novelty and more about craft. As shot lengths, reference fidelity, and audio control keep improving, the differentiator will not be access to models — everyone has that — but the discipline of planning, selecting, and cutting. The filmmakers who thrive will be the ones who treat generation as a camera department and editing as the place where the story actually happens.
FAQ
Do I need an expensive workstation to make an AI short film?
Rarely. Most generation happens on remote servers, so a mid-range laptop handles prompting, editing, and sound. Local generation models exist for those who want them, but they demand a strong GPU and patience. If you are starting out, spend your budget on a good pair of headphones and a reliable external drive instead.
How long does a five-minute AI short take?
A realistic timeline for one person is two to four weeks part-time. Pre-production and the animatic take a few days; generation and selection take the bulk of the time; sound and grade take two or three focused days. The variable that stretches timelines most is inconsistency — solving it with reference sheets early saves more time than any faster model.
Can these tools handle dialogue scenes?
Yes, but approach them as a hybrid. Generate the performance and the framing, then record or synthesise clean dialogue separately and cut it to picture. Precise lip sync is improving quickly, but committed vocal performance still carries a scene better than perfect mouth shapes.
Should I disclose that AI tools were used?
Disclose plainly, in one sentence, in your festival submission notes or description. Audiences are far more interested in whether the film works than in how it was made, and clear disclosure removes ambiguity later.
What if a model simply cannot produce the shot I need?
Change the shot. Rewrite it as a close-up, an insert, or an off-screen sound cue. Constraints have always shaped visual style, and a limitation that forces you to cut away from an impossible action often improves the scene by making the audience imagine it.
How many generations should I expect per finished shot?
Three to five for coverage, sometimes ten or more for hero shots with faces and precise motion. Track which prompts produce usable takes and reuse those structures. Over a project, your hit rate should climb steadily — that improvement is the real skill you are building.

Alexander
More Blogs
Read MoreFrom Text to Short Film: A Practical AI Video Workflow
Learn how to turn a written idea into a polished short film with AI video tools: scripting, model choice, shot consistency, sound design, and editing.
AI Transcription and Seamless Video Editing Workflows
Learn how AI transcription enables text-based editing, faster reviews, accessibility, and reliable post-production workflows from rough cut to final delivery.
Photorealistic AI Video Production: A Practical Workflow Guide
Learn a repeatable workflow for photorealistic AI video: model selection, shot planning, prompt design, continuity, audio, and quality control.