
AI Video Workflow Guide: Build a Reliable Shot-to-Edit Pipeline
Oct 13, 2026
Why a Repeatable Workflow Beats Chasing New Models
Every few weeks another video engine appears with sharper textures, longer clips, or smoother camera moves. The temptation is to rebuild your process around each release. That cycle is expensive: you relearn interfaces, re-test prompts, and rebuild project files, while your actual output quality stays roughly the same. The creators who ship consistently treat models as interchangeable parts inside a stable pipeline.
A pipeline is portable. Your shot list, continuity notes, prompt library, reference images, and edit timeline belong to you, not to any single platform. When an engine changes its style, raises prices, or removes a feature, you can swap it out without starting over. That portability is the real insurance policy in a market that moves faster than any documentation can follow.
It also makes collaboration simpler. A client, editor, or sound designer can read your shot list and understand the intent without knowing which engine produced frame one. Consistent naming, consistent folder structure, and consistent prompt formats let other people step in without a briefing call.
Finally, a workflow makes iteration cheap. AI video output is probabilistic. The same prompt produces different results on different runs. If your process assumes multiple attempts and quick comparison, you stop gambling and start directing. You generate options with intent, review them against criteria, and keep the takes that serve the story.
The Four Stages of an AI Video Pipeline
Almost every AI video project, from a six-second social hook to a two-minute brand film, moves through the same four stages. Naming them explicitly helps you decide where a problem actually lives.
Development
You define the premise, runtime, delivery format, tone, and must-have shots. The output is a short script, a shot list, and a reference board. Most failed AI videos skip this stage and try to find a story after generating pretty clips.
Generation
You convert shot descriptions into prompts, produce candidate clips, and log what worked. This stage is about volume and control: many attempts, tight constraints, clear records of settings and references.
Assembly
You import the strongest clips into an editor, order them against the shot list, and fix pacing. This is where missing inserts or reaction shots become obvious, so keep generation tools open while you edit.
Finishing
You repair artifacts, stabilize motion, upscale if needed, add voice, sound effects, ambience, music, captions, and color. Then you export per platform and review on more than one screen.
Each stage has its own failure modes. Bad pacing is an assembly problem, not a generation problem. Muddy dialogue is a finishing problem. Diagnosing the stage correctly saves hours of pointless re-generation.
Pre-Production: Turning a Rough Idea Into a Shot List
Start with one sentence: a barista reveals a new seasonal drink to a skeptical regular. That sentence gives you a subject, a conflict, and an ending. Everything else is coverage.
Next, write a shot list with fixed columns so you can sort, filter, and hand it to an editor. A practical template:
| Shot | Subject and action | Setting and light | Camera | Duration | Notes |
|---|---|---|---|---|---|
| 1 | Barista places cup on counter | Warm interior, window light from left | Slow push in, eye level | 3s | Hands must be clean, no text on cup |
| 2 | Regular customer raises an eyebrow | Same interior, same light direction | Medium close-up, static | 2s | Same wardrobe as shot 4 |
| 3 | Steam rises from the drink | Macro, backlit | Locked off, slight tilt | 2s | Generate five options |
| 4 | Customer smiles and lifts the cup | Same interior | Slight handheld drift | 3s | Match eyeline to shot 2 |
The Notes column is the most valuable one. It records the constraints that cause the most rework: text on props, hand positions, wardrobe continuity, light direction, and screen direction.
Then decide delivery specs before generating anything. Aspect ratio, frame rate, and safe areas for captions all affect composition. Cropping a horizontal shot into a vertical frame later almost always damages framing, especially in close-ups.
Finally, build a reference board. Ten to twenty images that communicate palette, lens feel, and production design. Reference images do more for consistency than paragraphs of adjectives, and many engines accept them directly.
Prompt Architecture: Instructions a Model Can Follow
A prompt is a brief, not a poem. The most reliable structure is a sequence of concrete clauses: subject and action, environment, lighting, camera, style, technical constraints.
Example: mid-shot, woman in a wool coat lifts a paper cup, steam visible, narrow cobblestone street at dawn, soft overcast light, slow dolly right, muted teal and amber palette, shallow depth of field, 24 fps look.
Five habits separate prompts that work from prompts that waste renders.
First, change one variable at a time. If you alter lighting, camera, and wardrobe in the same revision, you cannot tell which change fixed the shot.
Second, front-load what matters. Most engines weight the beginning of a prompt more heavily, so put the subject and action first and the stylistic flourish last.
Third, use camera vocabulary deliberately: static, slow push in, dolly out, pan left, handheld drift, crane up, orbit. Cinematic is not a camera instruction, and neither is epic.
Fourth, state what you do not want in plain language when the tool supports it: no on-screen text, no extra fingers, no logo. Keep the list short; long negative lists often confuse rather than constrain.
Fifth, keep a prompt library. Save every prompt that produced a usable shot, organized by shot type: close-up, wide establishing, product hero, transition, reaction. Your library becomes a competitive advantage because it encodes tested knowledge instead of guesswork.
How to Evaluate and Compare Video Models
Comparing engines by demo reels is misleading, because demos are curated. Build a small personal test suite instead and score each candidate on the dimensions that actually affect your work.
Motion coherence. Generate a clip with a walking subject and a moving camera. Watch for flicker, warping, melting geometry, and backgrounds that seem to boil. Stable motion matters more than texture density.
Prompt adherence. Run four prompts: a close-up, a wide landscape, an action beat, and a product shot. Note how much of each instruction survived. Some engines need short, plain phrasing; others reward detailed cinematic language.
Character and style consistency. Generate three clips of the same person in different settings. Check face structure, hair, wardrobe, and palette. Engines that drift between realism and illustration create uneven cuts.
Resolution, duration, and aspect ratios. Note native resolution, maximum clip length, and which aspect ratios are supported without cropping. Test how output survives upscaling; a clean lower-resolution clip often beats a high-resolution clip full of artifacts.
Speed and predictability. If a generation takes minutes, you explore fewer ideas. If it takes seconds, you can iterate. Measure real wall-clock time for a typical shot rather than trusting marketing numbers.
Terms and integration. Check commercial usage terms, watermarking, and whether the tool offers an API or batch processing. If you plan to scale, manual clicking becomes the bottleneck.
Score each dimension from one to five, weight them for your project type, and compare totals. For social work, weight speed and visual punch. For narrative work, weight consistency and adherence. For product work, weight geometry accuracy and lighting control.
Matching Engines to Shot Types
No single engine wins every category. Assign tools to jobs and stop expecting one to do everything.
Short social hooks
Prioritize speed and first-frame appeal. Close-ups, food, fashion, and simple gestures render well in most modern engines. Use vertical framing from the start and keep the hook readable without sound.
Product and e-commerce shots
Product geometry demands accuracy. Test with the actual product photo and watch for label distortion, warped edges, and invented reflections. A hybrid approach is usually best: real product imagery, generated environment or camera move, composited in post.
Narrative dialogue scenes
Favor engines with strong image-to-video and reference support. Focus on eye contact, body language, and shot-reverse-shot continuity. Generate multiple takes per line and select for natural pacing; AI performances often need trimming to feel conversational.
Stylized and abstract visuals
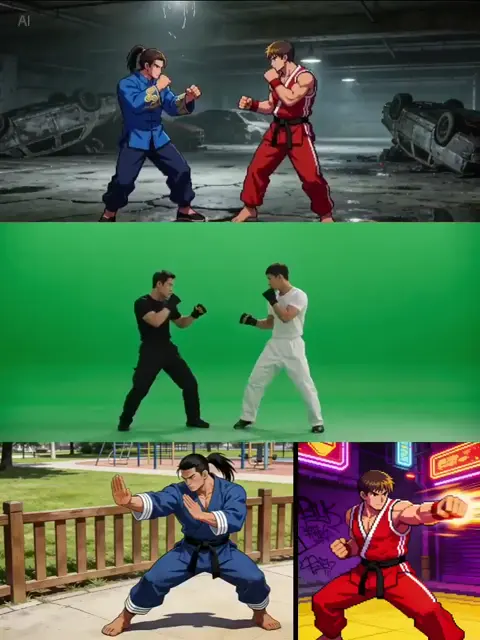
For music videos, title sequences, or dream sequences, lean into engines that excel at artistic cohesion. Video-to-video and style transfer shine here. Loosen prompt specificity slightly and let the engine propose, then refine the best results.
B-roll and texture plates
Slow, simple motion such as clouds, water, fabric, or city traffic at night is where AI video looks most believable. Generate these in batches and build a personal stock library you can reuse across projects.
Continuity Systems That Keep Characters and Props Consistent
Consistency is the hardest part of AI video and the one most often ignored until the edit. Treat it as a documentation problem you can solve with discipline.
Create a character sheet for each recurring person: a reference image, a written description of face, hair, age range, and wardrobe, plus notes on posture and typical expressions. Reuse the exact same reference image across shots rather than a similar one; small differences compound.
Build a prop log. If a cup, phone, or vehicle appears in several shots, record its color, shape, and which hand holds it. Screen direction also belongs here: if a character walks left to right in one shot, keep them moving that way in the next unless you deliberately want to signal a reversal.
Log lighting direction relative to the subject: key light from camera left, warm lamp behind camera right. Flipping light direction between shots reads as a mistake even to viewers who cannot name what feels wrong.
Use a naming convention for every file: project, shot number, take, tool, and version. When you return to a project after two weeks, the filename tells you what you are looking at without opening it.
Finally, generate a clean plate for hero shots, meaning the same framing without the moving subject, so you can repair or extend the shot later without regenerating the whole scene.
Assembly, Repair, Upscaling, and Sound
Bring the best takes into an editor and cut against the shot list. Trim generously: AI clips often include dead frames at the start and end, and tightening them instantly improves pacing. Cut on motion, match eyelines, and preserve screen direction.
Repair before you upscale. Object removal, face cleanup, flicker reduction, and stabilization tools handle most small problems. Compare repaired and original frames side by side; occasionally the fix flattens texture or smears details. If a shot is fundamentally broken, regenerate it instead of spending an hour patching.
Upscale last, after the cut is locked, so you do not waste processing time on clips you drop. Keep the original files.
Sound does more for perceived quality than resolution. Add a room tone under every scene, place footsteps and cloth movement, and keep music below dialogue. If you use generated voice, direct it with punctuation and pacing notes, then manually tighten gaps. Subtitles should be checked line by line; automatic transcription mangles product names and jargon.
A worked example
A 30-second product story: twelve shots, four of which are hero frames. Budget three attempts per simple shot and eight per hero shot, roughly 44 generations. Expect to discard about a third of them. Editing takes an hour, sound and captions another hour. If your engine takes 90 seconds per clip, that is over an hour of pure waiting, which is the strongest argument for choosing a faster engine or running generations in parallel while you edit other shots.
Troubleshooting: Common Failures and Practical Fixes
Melting or shifting faces. Reduce motion complexity, shorten the clip, add a reference image, or switch to an engine with stronger identity retention. Avoid extreme head turns within a single generation; split them into two shots.
Flicker and texture crawl. Lower the requested detail, remove hyper-specific texture language, and stabilize in post. Very high detail prompts can push engines past what they can hold consistently.
Hands and fingers. Keep hands out of frame, partially occluded, or in motion. If hands are essential, generate the shot, then composite a real photograph of hands for hero moments.
Invented text and logos. Avoid prompts that mention signs, labels, or packaging. Add text in post, where you control spelling and placement.
Camera drift when you asked for static. State locked-off, static camera, no movement explicitly, and note that any subject motion may still introduce drift. Generate two versions and pick the steadier one.
Color shifts between clips. Grade the final timeline rather than each clip, using a shared look and a reference frame from the hero shot. Slight desaturation helps unify mismatched sources.
Awkward pacing. Most AI clips are too slow for social and too fast for drama. Speed up or slow down in the edit, and consider adding a short transition to bridge tone changes.
Weak audio-visual sync. Cut to the sound rather than stretching the sound to the picture. Shortening a shot by four frames often fixes a synchronization problem that feels impossible to solve otherwise.
FAQ
How many generations should I expect per shot? Simple static shots often work within three to five attempts. Character-driven or action-heavy shots may need eight to fifteen. Plan for multiples from the beginning, and keep a log so you can reproduce a lucky result.
Can I use AI video for paid client work? Often yes, but the terms differ per tool. Check licensing, commercial usage, and whether output can be used in advertising. Combining generated footage with real assets usually produces the most defensible result.
Do I need a powerful computer? Cloud tools run on a mid-range laptop with a stable connection. Local generation requires a capable GPU and plenty of storage, plus tolerance for longer setup and troubleshooting.
How do I keep a character consistent across many shots? Use one strong reference image, a written character sheet, consistent lighting direction, and the same engine and version for the whole sequence. Change one variable at a time and re-check the earlier shots after each change.
What aspect ratio should I choose? Decide from the destination: vertical for short-form feeds, widescreen for presentations and long-form platforms, square for some social placements. Generating in the wrong ratio and cropping later costs composition.
Is image-to-video better than text-to-video? Image-to-video gives you more control over composition and identity, which matters for products and characters. Text-to-video is faster for exploration and abstract visuals. Many workflows use both.
How do I avoid wasting time on bad takes? Generate low-resolution drafts first, review them as a contact sheet, and only then produce high-quality versions of the winners. Review in batches rather than one clip at a time.
What should I keep in my project folder? Script, shot list, prompt library, reference images, character sheets, continuity log, original generations, repaired versions, final exports, and a short notes file recording what worked and what failed. That last file is what makes the next project faster.
Bringing It Together Without Overbuilding
The goal is not a ten-page process document. It is a set of habits that survive contact with a deadline: write the shot list before opening any generator, prompt with one change at a time, keep references and continuity notes in one place, review takes in batches, repair before upscaling, and treat sound as part of the picture rather than an afterthought. Start with one short project, run it end to end, and write down three things that went wrong. Fix those three in the next project. Within a handful of cycles you will have a personal pipeline that is faster than any tutorial, because it is built from your own constraints, your own tools, and your own taste. Models will keep changing; a disciplined workflow is what lets you change with them.

Alexander
More Blogs
Read MoreVidu Q4 Alternatives: 4K AI Video Models Compared (2026)
Vidu Q4 alternatives compared: Kling 4.0, Seedance 2.5, Wan 3.0, and Runway Gen-4 — 4K support, input modes, durations, audio, and what each costs in credits on Domer.
Top 4K AI Image Generators in 2026: 5 Models Compared on Real Costs
The top 4K AI image generators on Domer compared: Flux 3 Klein, Nano Banana 2.1, GPT Image 2.5, GPT Image 2, and Nano Banana Pro — 4K credit costs, reference limits, and speed.
Nano Banana 2.1 vs GPT Image 2.5: Which Image Model Should You Use? (2026)
Nano Banana 2.1 vs GPT Image 2.5 Flare compared: credit costs per resolution, aspect ratios, reference images, text rendering, and which tasks fit each model.