

AI Video Workflows: From Script to Final Cut, Explained
Oct 13, 2026
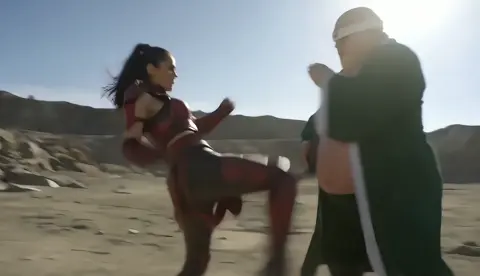

Two years ago, dropping a generated clip into a client deck was a gamble. The shot would flicker, hands would melt, and someone would ask whether the budget could stretch to a real camera. That conversation has changed. Synthetic footage now appears in product explainers, social campaigns, training libraries, and documentary B-roll without anyone feeling the need to announce it.
What changed is not that the models became perfect. It is that production teams learned where the seams are and built processes around them. The interesting question has moved from "can this tool make a clip?" to "which tool makes the right clip, and how do I keep forty of them looking like they came from the same film?"
This guide covers the model families worth knowing, a workflow that holds up under deadline, decision criteria for choosing tools, the continuity techniques that separate professional output from a folder of pretty accidents, and the mistakes that quietly consume entire weeks.
Where AI Video Actually Fits in a Production Pipeline
Generative video earns its keep in three places, and recognising them early saves a lot of arguing.
The first is previsualization. Animating a rough version of a scene before anyone books a location or builds a set changes the conversation from opinion to evidence. A director can watch a camera move, discover it reads as confusing, and fix it for the cost of a few minutes of rendering.
The second is coverage that would never otherwise exist. A documentary about container shipping does not have the budget for aerial shots of six ports on three continents. A training module about a rare machine failure does not justify a film crew. Generated sequences fill those gaps as connective tissue, not as the centrepiece.
The third is volume. Localized versions, seasonal variants, aspect-ratio adaptations, and split tests used to be a logistical headache. Once the core footage exists, producing twelve variants is closer to a spreadsheet exercise than a shoot.
The economics shift accordingly. Traditional production scales linearly: more shots means more crew, more travel, more setup. Generative production scales with reference quality and review time. The bottleneck stops being camera time and becomes taste — deciding which of thirty acceptable clips belongs in the timeline.
There are still places where a camera wins without much argument: live events, unscripted human moments, testimony, intricate physical performance, and anything where the audience needs to believe a specific person said a specific thing on a specific day. Plan around those rather than fighting them.
The Five Model Families and What Each One Is For
Video models are often discussed as if they were interchangeable. They are not. Each family solves a different production problem, and reaching for the wrong one is the fastest way to burn an afternoon.
Text-to-video generation
Prompt in, clip out. These models excel at establishing shots, environmental B-roll, abstract transitions, and mood pieces — anything where atmosphere matters more than exact blocking. They struggle with precise choreography, counted actions, and legible on-screen text. Use them to open a scene, not to carry a performance.
Image-to-video and first-frame animation
Here you supply a still and the model animates forward from it. This is the workhorse of most professional pipelines because it hands you control at the moment that matters most: frame one. If you can generate or photograph a strong opening frame, the model's job becomes easier and the result tracks your visual direction far more closely. Character reference workflows, product shots, and architectural fly-throughs all live here.
Video-to-video restyling and conversion
These transform existing footage: a change of season, a change of grade, a shift into an illustrated or archival look. They are the most efficient way to stretch one shoot into several campaign variants, and to make newly generated shots sit convincingly beside archive material.
Performance, avatar, and lip-sync models
Driven by audio or motion input, these animate a face or figure. They underpin localized training content, dubbed interviews, virtual presenters, and dialogue-heavy scenes. Quality varies dramatically between models and between languages. Test with your actual script, in your actual language, rather than a stock sample sentence, because mouth shapes for one language can be excellent while another looks distinctly wrong.
Restoration, upscaling, and frame interpolation
The least glamorous family and the most indispensable. These tools raise resolution, smooth motion, remove noise, and repair compression artifacts. A mediocre generation that has been patiently upscaled and interpolated frequently beats a technically superior clip delivered in the wrong aspect ratio.
Continuity Is the Real Skill
Ask anyone who has shipped an AI-assisted video what the hard part was and you will hear the same answer: one beautiful clip is easy, forty consistent clips are hard.
Character drift is the loudest failure. A face morphs slowly across two seconds, a jacket shifts from olive to teal, a scar migrates to the other cheek. Location drift is quieter but just as damaging — the light source flips between shots, or a room quietly gains a window.
Four habits reduce drift dramatically.
Build a reference bible before you render anything
Generate or capture a small library of approved images for every recurring character and location. Six to twelve images per subject is usually enough: front, three-quarter, profile, full body, and a couple of lighting states. Treat that library as canon and attach it to every subsequent generation. It feels slow on day one and saves days by day four.
Write shot descriptions as structured data
Instead of "a woman looking worried in a café," write a block: subject, wardrobe, location, time of day, lens, lighting direction, colour palette, motion. Copy the block verbatim between shots and change only the fields that must change. Prose drifts; fields do not.
Prefer shorter shots
Models hold coherence better across two to four seconds than across ten. Short shots also cut together with more rhythm, and they give you more editorial flexibility when one generation goes wrong at the three-second mark.
Use motion and sound as camouflage
A whip pan, a match cut, or a musical accent moves the viewer's eye before it can register a flaw. Transitions are not cheating; they are craft, and they have been covering imperfections since the earliest days of editing.
One more note: consistency is partly a format decision. Collage, mixed media, and archival mashups turn drift into texture. Some of the strongest AI-assisted work leans into visual instability rather than fighting it.
A Six-Stage Workflow You Can Run This Week
Stage 1: Script, then shot list, then prompt sheet
Write the piece as if the tools did not exist. Get the structure right — hook, development, turn, payoff. Then break it into shots, then translate each shot into a structured description. Skipping the script stage is the single most common reason these projects feel hollow. A sequence of gorgeous unrelated clips is not a video; it is a mood board with sound.
Stage 2: Win the key frames first
Generate candidate stills, choose the ones that match your intent, and iterate on those before animating. Stills are faster, cheaper, and far easier to judge side by side. Once a frame is approved, animate from it and move on.
Stage 3: Generate coverage, not perfection
Produce three to five variations per shot instead of chasing one flawless take. Variety in the edit bay is worth more than technical polish on a single clip. Use a consistent naming scheme — project_sequence_shot_version — so you can actually find things later.
Stage 4: Assemble rough, then cut hard
Rough-assemble everything, watch it once without pausing, and then start deleting. A clip that looked stunning in isolation often dies on the timeline because it holds a beat too long. Pacing is where human judgement beats any model, and it is the stage most teams rush.
Stage 5: Sound design and mix
Lay down ambience, foley, and music before finalising visuals. Audio carries more perceived quality than most people expect, and you will make different — usually better — cutting decisions once the track exists.
Stage 6: Grade, upscale, and deliver
Apply one colour treatment across every shot. That single step makes disparate generations feel like a single film. Then upscale, stabilise, and export to the delivery specs you were actually asked for, including safe areas for vertical formats.
Audio First: The Decision Most Teams Get Backwards
Most beginners animate first and add sound last. The result is a piece that feels inert no matter how good the images are, and a frantic final day trying to make cuts land on a music bed that was never designed around them.
Reverse the order. Build a rough audio bed — scratch narration, ambience, a temporary music track — before you generate the bulk of your visuals. Then time your shots to that bed. Dialogue-driven shots should be animated against final audio rather than a placeholder, since lip-sync models respond to real timing, not a guess at it.
Two practical notes. First, record scratch narration yourself even if you plan to hire a voice artist; hearing your own reading exposes clumsy sentences immediately. Second, keep a consistent loudness target across every deliverable, because platform normalization varies and a quiet export feels amateur even when the visuals are strong.
How to Choose Between Two Capable Tools
Once you have two or three tools that clear a basic quality bar, the deciding factors are rarely aesthetic. They are operational. Rank candidates in roughly this order:
- Shot-type fit. Does it handle your specific case — talking heads, wide landscapes, fast action, text on screen?
- Controllability. Can you drive camera motion, first frame, subject pose, or a reference image? More control usually matters more than marginally prettier defaults.
- Temporal coherence. Watch the full clip length for flicker, warping, and object permanence, not just the opening second.
- Resolution and aspect-ratio support. Vertical, square, and ultrawide delivery each have different requirements.
- Turnaround. For weekly content, generation speed is a creative constraint, not an afterthought.
- Licensing and commercial clarity. Confirm what you can publish and where before you build a campaign around a tool.
A habit worth building: run the same three test prompts through every candidate. One human face in motion, one complex environment with camera movement, one shot containing specific on-screen text. Those three tests expose most weaknesses in under an hour.
Also worth recording: how long each tool takes from prompt to usable clip, and how many attempts a usable clip requires. A tool with gorgeous output that needs nine attempts is slower than a plainer tool that lands on the second try.
Personalized and Branching Video Without Chaos
Personalized video follows a simple principle: swap variables inside a fixed narrative skeleton that has already been validated. Name, product, locale, season, difficulty level — all of these can change without touching the structure. The discipline is in separating skeleton from variables. If every variant is a bespoke production, you have not built a system; you have built an expensive exception.
Interactive formats add branching, and branching has a cost curve that surprises people. Practical branches usually number between three and six, because production effort grows geometrically while audience patience does not. Design each branch around a choice with a real consequence, and make sure every path reaches a satisfying ending rather than a dead end.
Keep a branching map in a spreadsheet before you generate anything: node, condition, asset requirements, duration. It is much cheaper to discover that a branch requires six new locations on paper than after rendering. And version that map alongside your media, because a change to node four usually ripples through everything downstream.
The Pre-Delivery Quality Gate
Before anything leaves your machine, run the same checklist every time. It takes fifteen minutes and prevents most embarrassing revisions.
- Playback test. Watch the full piece at normal speed on a phone, a laptop, and a large screen.
- First-frame and last-frame check. Do the opening and closing shots read as intentional?
- Continuity sweep. Wardrobe, hair, props, light direction, and colour temperature across cuts.
- Text check. Any on-screen words are spelled correctly and legible at small sizes.
- Loudness and captions. Consistent audio level, accurate captions, and correct caption timing.
- Aspect-ratio export. Every required format rendered, with key content inside safe areas.
- Rights review. Music, likenesses, and generated assets cleared for the intended use.
Print the list and tape it to the wall. Checklists exist precisely because tired people skip steps, and the step you skip is always the one the client notices.
The Mistakes That Cost the Most Time
Chasing resolution before story. A 4K clip of nothing is still nothing. Lock narrative structure first, then worry about pixels.
Over-prompting. Extremely long prompts dilute the signal. Lead with subject and action, then layer style and camera notes.
Treating silence as a finishing touch. Silence makes every cut feel wrong. Rough sound on day one saves days later.
No naming convention. Untracked files turn into an afternoon of scrolling and a missed deadline.
Mixing five visual styles in one piece. Unless it is deliberate, stylistic inconsistency reads as inexperience. Pick a lane and defend it.
Skipping the legal check. Verify music, likeness, and asset rights before publishing, especially for client work.
Deleting the failures. Keep rejected generations. A clip that does not fit this project frequently fits the next one.
Animating before approving stills. You will re-render the same flawed composition five times instead of fixing it once.
Editing to the tool's strengths instead of the story's needs. If a sequence only survives because a model handles it well, the audience can feel the compromise. Cut it and find another way.
FAQ
Do I need a dedicated workstation?
Not necessarily. Browser-based tools handle most production work. Local hardware helps with batch generation, upscaling, and long overnight render queues, but it is an optimisation, not a prerequisite.
How long does a one-minute AI-assisted video take?
With a locked script and an existing reference library, two to four days is realistic for a finished minute: sound, grade, and titles included. The first project always takes longer because you are building the library and learning your tools' quirks.
Can generative video replace a shoot entirely?
Sometimes — animation, explainer content, abstract sequences, and anything set somewhere that would never justify travel. For testimonials, live events, and authentic human moments, a camera still wins.
What still does not work well?
Complex hand interactions, precise on-screen typography, long continuous takes with multiple characters, and physical comedy timing. Plan around those instead of burning a week trying to force them.
Where should a beginner start?
Pick one image-to-video tool, produce a thirty-second piece with five shots, and finish it completely — sound, grade, titles. Finishing teaches more than browsing a dozen tools.
How do I keep quality consistent across a series?
Build a reusable style guide: palette, lens language, pacing rules, reference images, and a fixed shot-description format. Consistency across episodes is what turns clips into a recognisable brand.
Should I outsource or build in-house?
Outsource the first project to learn what "good" looks like under deadline, then bring it in-house once you understand your own review process. The reverse order is expensive.
How do I justify the time investment to stakeholders?
Track variants produced per hour of work. Generative pipelines usually win on volume, not on the first clip, so measure the batch rather than the single shot.
What is the most underrated habit?
Watching your own work with the sound off, then listening with the picture off. Each pass exposes a different class of problem, and both take less time than one round of client notes.
The models will keep improving, and the tool list will keep churning. The teams that get the most from them will not be the ones with the longest subscription list, but the ones with the clearest process — a script, a reference library, a disciplined edit, an audio bed built early, and the patience to finish.

Alexander
More Blogs
Read MoreMontaggio video rapido: transizioni e software per l'AI
Guida pratica al montaggio video rapido con AI: transizioni fluide, software, workflow, coerenza visiva, errori da evitare e FAQ operative.
Building an AI Video Production Workflow From Concept to Cut
A practical guide to planning, generating, editing, and finishing AI-assisted videos with consistent characters, clear shot lists, and reliable review loops.
A Repeatable Post-Production Workflow for Polished AI Video
Build a repeatable AI video post-production pipeline: organize assets, cut story-first, design transitions, refine audio, and review versions calmly.