
Create
Anime AI Art Generation: A Fan Creator Workflow Guide
Oct 13, 2026
Why Anime AI Art Became a Default for Fan Creators
Anime fandom has always been a remix culture. People redraw favorite panels, reimagine characters in new outfits, build wallpapers, and animate short loops for fun. AI image generation did not invent that habit, it compressed the most time-consuming part of it. Where a full illustration used to require sketching, refining lineart, flatting colors, and shading, a generator can now produce twenty plausible roughs in the time it takes to warm up a tablet.
That speed changes how creators work rather than replacing them. The strongest results still come from people with visual vocabulary. They know what a three-quarter turn should look like, why a silhouette reads at thumbnail size, and when a background is stealing attention from a face. A generator is a drafting partner, not an art director.
Three practical shifts matter most:
- Iteration cost drops to near zero. You can test five moods for the same scene before committing to any of them.
- Style exploration becomes cheap. Cel-shaded, watercolor, gritty manga ink, switch and compare in minutes.
- Production leaves the screen. Character sheets, stickers, thumbnail mockups, and short loops all become viable for solo creators.
The catch is consistency. A generator that produces one beautiful frame often struggles to produce the same character twice. Most of the skill in anime AI art is really skill in controlling consistency, with prompts, references, seeds, and adapters working together. The rest of this guide is about building that control deliberately instead of hoping for lucky rolls.
How Anime Image Generators Actually Work
Diffusion in practical terms
Most modern anime generators are diffusion models. Training teaches a network to remove noise from an image step by step. At generation time you start with random noise and let the network denoise it, guided by a text prompt that has been encoded into numbers. Nothing in the pipeline understands anime as a concept. It has learned statistical patterns from large illustration datasets and reproduces them.
The practical consequence is that models conditioned heavily on illustration data produce clean lineart and flat shading naturally, while general-purpose photo models need heavy prompting just to stop rendering skin pores and film grain.
Adapters, checkpoints, and style layers
A checkpoint is the base model. A LoRA is a small add-on that nudges the base model toward a specific character, outfit, or rendering style. ControlNet-style adapters take a pose skeleton, depth map, or line drawing and force the composition to follow it. Together these three layers, base plus style plus structure, explain almost every workflow you will see discussed in fan communities.
Why anime-tuned models behave differently
Anime models tend to have stronger priors for large expressive eyes, simplified noses and mouths, hair rendered as grouped shapes rather than individual strands, and backgrounds painted with fewer, bolder value blocks. They also fail in predictable ways: hands, complex props, and scenes with more than two characters. Knowing the failure modes in advance saves hours of confused troubleshooting.
Choosing a Generator: Decision Criteria That Matter
Prompt adherence versus style fidelity
Some tools follow your wording closely and produce generic-looking anime. Others produce gorgeous stylized output and ignore half of your instructions. Decide which failure mode you can tolerate. For character work, adherence wins. For mood boards and concept exploration, style wins. Testing the same prompt on three tools is the fastest way to feel the difference.
Consistency tooling
Look for reference-image support, character or style adapters, seed locking, and pose control. If a tool has none of these, it can still be useful for one-off concepts, but it will not carry a multi-image project. Consistency features matter more than raw output beauty once you move past single images.
Output quality at the edges
Judge a tool by its weak spots, not by its showcase gallery. Check hands, small props, background crowds, and any text rendering. Also check native resolution and whether upscaling is built in or a separate step you have to manage.
Interface fit
Chat-style interfaces are fast for exploration. Node graphs are better for repeatable pipelines you want to reuse. Mobile apps are good for sketching ideas on the move but rarely for finishing work. Pick based on where you actually spend your time, not on which interface looks most impressive in a demo.
Policy and filters
Every platform applies content filters, and anime fan work frequently trips them, whether through stylized violence, suggestive costumes, or recognizable characters. Read the rules before you build a workflow around a specific tool, because switching later is expensive.
Prompting Characters Without Losing Likeness
Start with a character sheet prompt
Before generating scenes, generate a reference sheet: front, three-quarter, and profile views, neutral pose, plain background. Keep the seeds and prompts that work. This sheet becomes your anchor. Later scenes are variations of it rather than fresh inventions that happen to share a name.
Build an anchor token list
Write down the five to eight attributes that make the character recognizable: hair shape, eye color, signature garment, accessory, body type, and color palette. Put these in the same order in every prompt. Consistency comes from repetition far more than from clever wording.
Use negative prompts surgically
Negative prompts work best for systemic problems rather than one-off mistakes. If the model keeps adding photorealistic skin texture, put that in the negative field. If it keeps adding a hat, that is usually better solved by describing the head clearly in the positive prompt instead of banning hats forever.
Reference images and pose control
When a tool accepts reference images, feed it the character sheet plus a pose reference. Keep those jobs separate: one image for identity, one for structure. Mixing both roles into a single reference usually produces a muddy compromise that does neither well.
Iterate, do not rewrite
Change one variable at a time. Rewriting an entire prompt after a bad result destroys the information you just gained about what caused the problem.
Scenes, Environments, and Anime Lighting
Composition vocabulary
Generators respond well to camera language: wide establishing shot, low angle, over-the-shoulder, dutch tilt, close-up on hands. Pair camera terms with subject terms. A prompt like low angle, character standing on a rooftop, city below will beat something vague like cool rooftop scene every time.
Lighting archetypes that read as anime
- Golden-hour rim light: warm edges, long shadows, emotional scenes.
- Harsh noon: high contrast, hard shadows, action beats.
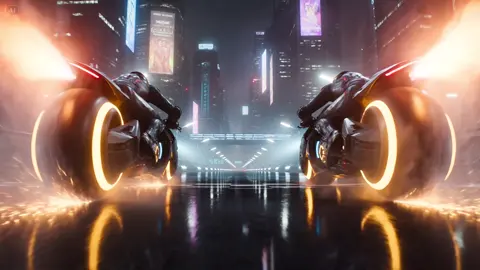
- Neon night: cyan and magenta accents, wet reflective streets.
- Overcast diffuse: soft and muted, ideal for quiet dialogue.
- Backlit silhouette: drama with almost no facial detail.
Naming the lighting archetype usually does more for mood than listing twenty adjectives.
Detail budget
Decide where detail belongs. If the face is the subject, let the background stay loose. If the environment is the subject, push the character toward silhouette. Prompts that demand maximum detail everywhere produce cluttered images that read poorly at small sizes, and they are harder to animate later.
Weather and atmosphere
Particles such as rain, petals, sparks, dust, and snow are cheap atmosphere and can hide weak backgrounds. Use them, but keep them behind the subject so faces stay clean and readable.
From Still Image to Short Motion Clip
Image-to-video basics
The most reliable path to an anime-style clip is to generate a strong still, then animate it. Starting from text alone usually produces drifting, unstable motion. Starting from a finished frame keeps the character design locked and gives the model less room to invent.
Camera moves beat character animation
Subtle parallax, slow push-ins, and gentle pans look convincing and hide the artifacts that plague limb movement. Save dramatic character motion for close-ups or silhouette shots where precision matters less and stylization covers the gaps.
Frame rate and interpolation
Most generators output short clips at low frame rates. Interpolating to a higher frame rate smooths playback, though it can smear fast action. For stylized anime pacing, a lower frame rate with intentional holds often looks better than interpolated smoothness, because it mimics how limited animation actually works.
Shot discipline
Keep clips short, two to five seconds, and cut between shots rather than trying to sustain a single long take. A sequence of four short shots with different camera angles reads as a scene. One long shaky clip rarely does.
A Repeatable Workflow, Start to Finish
Step 1: Brief and reference board
Write one paragraph describing the image, then collect five to ten references for mood, lighting, and costume. This takes ten minutes and saves an hour of random generation.
Step 2: Blockout
Generate wide, cheap, low-detail variations. Ignore flaws in hands and faces and judge composition and mood only. Pick two or three directions worth developing.
Step 3: Refinement passes
Fix one problem per pass: pose first, then costume, then lighting, then background density. Keep a text file with prompts and seeds for every version you like. That file becomes more valuable than any individual image.
Step 4: Finishing
Upscale, then do manual cleanup in a paint program. Redrawing hands, fixing eye asymmetry, and tightening lineart takes minutes and separates a good image from an obviously generated one. This step is where most of the perceived quality gap between creators actually lives.
Step 5: Templates and archive
When a prompt works, save it as a template with placeholders for character, pose, and lighting. Over a few weeks you build a personal library that makes new images faster and more consistent than anything you could improvise.
Community Wisdom: Reading Forum Advice Critically
Settings threads mislead more than they help
Sampler settings, step counts, and guidance values are model-specific. A configuration that produces gold in one checkpoint can produce mush in another. Treat shared settings as starting points, not as truth, and always verify on your own base model.
Separate workflow advice from tool advice
Workflow advice such as build a character sheet first or change one variable at a time transfers between tools and stays useful for years. Tool advice ages quickly. Spend your attention accordingly.
Ask narrower questions
A question like how do I stop the model from changing hair color between images gets useful answers. A question like how do I make good anime art gets opinions. Specificity is the single biggest factor in whether a community thread helps you.
Give back usefully
When you share a result, include the prompt, the model family, and the seed. That norm is what makes communities useful, and it costs you nothing. If you cannot share the exact model, say what class of model it was and what adapter you used.
Common Mistakes, Ethics, and Attribution
Mistakes worth avoiding
- Chasing a single perfect image instead of building a system you can repeat.
- Changing five prompt variables at once, then guessing which one mattered.
- Ignoring composition and blaming the model for a weak frame.
- Skipping manual cleanup, so hands and eyes give the image away instantly.
- Using a photo model with anime keywords and then fighting the output.
- Never archiving prompts, then failing to reproduce a result you loved.
Ethics and norms
Disclose AI involvement when you post. Do not present generated images as officially licensed merchandise or as promotional art for a studio. Avoid training personal adapters on another artist's work without permission, and avoid building a public persona around mimicking one living artist's style. Follow each platform's rules, especially around fan work and commercial use.
Attribution matters too. If a reference image or a tutorial shaped your result, say so. Fandom runs on reciprocity, and creators who share process tend to get better feedback in return, which improves their work faster than any settings tweak.
FAQ
Do I need a powerful GPU to start?
No. Cloud and browser-based tools handle generation for you, and a midrange laptop is enough for cleanup and editing. Local generation gives you more control and privacy, but it is a separate hobby with its own learning curve.
Why does my character look different in every image?
Usually because identity is being described fresh each time instead of anchored. Build a character sheet, write a fixed attribute list, reuse seeds, and keep lighting and camera changes separate from identity changes.
Are anime-specific models better than general ones?
For lineart, flat shading, and expressive faces, yes, by a wide margin. General models still win for mixed media, realism, and scenes that need photographic backgrounds.
How many attempts should I make before changing approach?
If ten to twenty variations all fail in the same way, the problem is structural: wrong model, conflicting prompt tokens, or a composition the model cannot handle. Change strategy rather than retrying.
Can I animate with the same tools?
Yes, via image-to-video. Generate a strong still, then apply a modest camera move. Expect short clips and plan to cut between several of them instead of producing one long continuous shot.
Is AI anime art accepted in fan communities?
It varies widely by space. Many communities allow it with disclosure, others restrict it, and some ban it entirely. Read the rules of each specific community before posting, and never argue with a stated policy.
What should I do about bad hands?
Redraw them. It is faster than prompting dozens more variations, and it teaches you something about anatomy that improves every future prompt you write.
Do I need traditional drawing skills?
Not to begin, but visual fundamentals in composition, value, and anatomy will improve your results faster than any tool upgrade, because you will recognize a bad frame before you generate twenty of them.
How do I keep a consistent style across a set of images?
Fix as many variables as possible: same base model, same style adapter, same lighting archetype, same color palette notes, and a saved prompt template. Then change only the subject and camera.
Can I use generated images commercially?
It depends on the tool's terms, the model's license, and whether the image depicts protected characters. Fan art of an existing franchise raises separate legal and ethical questions from original character work, so treat commercial use as a case-by-case decision rather than a default.

Alexander
More Blogs
Read MoreMontaggio video rapido: transizioni e software per l'AI
Guida pratica al montaggio video rapido con AI: transizioni fluide, software, workflow, coerenza visiva, errori da evitare e FAQ operative.
Building an AI Video Production Workflow From Concept to Cut
A practical guide to planning, generating, editing, and finishing AI-assisted videos with consistent characters, clear shot lists, and reliable review loops.
A Repeatable Post-Production Workflow for Polished AI Video
Build a repeatable AI video post-production pipeline: organize assets, cut story-first, design transitions, refine audio, and review versions calmly.