

Audio Workflow for AI Video: Dialogue, Foley, and Mix
Oct 1, 2026

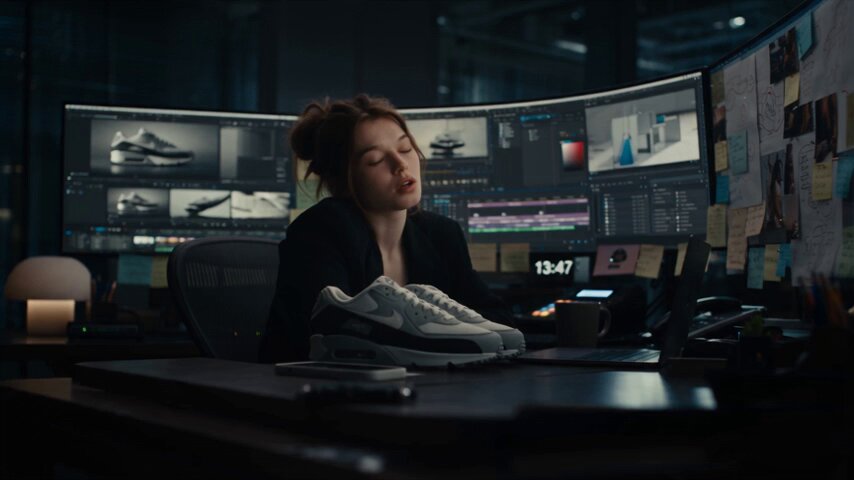
Most AI video failures are not visual. They are audio failures: a voice that does not match the body on screen, an ambience bed that cuts out at the wrong moment, a music cue that lands two frames late, or a mix that sounds fine on headphones and muddy on a phone speaker. Viewers forgive an odd hand. They rarely forgive a line of dialogue that lags behind the mouth.
This is a practical, tool-agnostic workflow for building audio for AI-generated video. It covers dialogue generation and replacement, ambience and foley design, frame-accurate sync, mixing targets, and a delivery checklist you can reuse. Nothing here depends on one specific generator. The same process works whether you assemble shots in a browser editor or a desktop NLE.
Why Audio Decides Whether an AI Video Feels Finished
Generative video has crossed the threshold where motion, lighting, and faces look plausible. Sound has not crossed it at the same speed. Text-to-speech, voice cloning, and procedural sound effects have improved dramatically, but they still fail in predictable ways: flat emotional range, missing breath, unnatural room tone, and timing that ignores the edit.
The result is a widening quality gap. Two videos can have nearly identical visual fidelity, yet one feels professional and the other feels like a demo. The difference is almost always in three places:
- Continuity. Room tone, ambience, and music must be continuous across cuts. A hard ambience cut between two shots of the same location is the single most common giveaway in AI video.
- Motivation. Every sound should have a visible or implied source. If a character steps on gravel, there should be gravel. If a door closes off screen, there should be a door.
- Weight. Dialogue should sit in a space, not float on top of the picture. Reverb, distance, and level all communicate how far away a speaker is.
Once you start treating audio as part of the generation pipeline rather than a post-production afterthought, quality becomes predictable instead of lucky.
Setting Audio Standards Before You Generate a Single Frame
The cheapest audio fix is the one you decide on before rendering. Lock a small set of standards at the start of a project and you avoid re-doing work later.
Define your delivery targets first
Before you write a prompt, decide where the video will live. That decision drives loudness, dynamic range, and sample rate.
| Platform | Integrated loudness | True peak ceiling | Notes |
|---|---|---|---|
| Social vertical (short form) | -14 LUFS | -1 dBTP | Played on phone speakers; keep low end controlled |
| YouTube / long form web | -14 LUFS | -1 dBTP | Wide dynamic range tolerated |
| Podcast-style episode | -16 LUFS | -1 dBTP | Speech-first, minimal music |
| Broadcast / client spec | -23 LUFS | -2 dBTP | Check the spec sheet before mixing |
| Vertical ad | -14 to -12 LUFS | -1 dBTP | Slightly hotter, heavily compressed |
If you only remember one row, remember this: mix to -14 LUFS integrated with true peaks under -1 dBTP and you will be acceptable nearly everywhere.
Standardize sample rate and bit depth
Keep everything at 48 kHz / 24-bit through the edit. Generate at 44.1 kHz if a tool only supports it, but resample once on import rather than letting each element arrive at a different rate. Mixed sample rates create tiny pitch drift that is hard to diagnose later.
Build a naming convention
Clips named scene03_dlg_line02_take1.wav are searchable. Clips named output_final_v3.wav are not. When a project has 80 audio files, naming is the difference between a fast revision and an afternoon of guessing.
Create a reference track
Pick one existing video in your target style and load it into your editor. Before you mix, listen to it once with your eyes closed. This calibrates your ears to the target loudness and density so you are not mixing in isolation.
Dialogue: Getting Voices That Match the Shot
Dialogue carries the most information and causes the most complaints. Treat it as a casting decision, not a text-to-speech setting.
Cast by register, pace, and texture
When choosing or designing a synthetic voice, listen for four attributes:
- Register. Does the pitch match the on-screen body? A low, resonant voice on a small frame reads as dubbing.
- Pace. Generated voices often default to an even, unhurried cadence. Real speech accelerates through unimportant phrases and slows on emphasis.
- Texture. Breaths, mouth noise, and slight rasp make a voice feel recorded rather than rendered. Clean is not always better; slightly imperfect is more believable.
- Accent consistency. If two characters share a region, their accents should share it too, with individual variation.
A useful trick: generate the same line with three different voices, mute the picture, and pick the one you would believe on a phone call. Then check it against the lip movement.
Fixing dialogue instead of regenerating the shot
Regenerating a whole shot to fix one line is expensive in both time and consistency. Most mismatches can be resolved in audio:
- Timing mismatch (audio too long or too short). Use time compression or expansion on the audio rather than the video. Stretching speech by up to about 8 percent is usually inaudible. Beyond that, listeners hear the artifacting.
- Wrong emotional read. Regenerate only the voice, not the shot, then swap the audio into the same timeline position.
- Off-mouth consonants. Nudge the audio 1 to 3 frames earlier. Plosives like P and B are perceived at the moment of the mouth closure, so a small lead often reads as perfectly synced.
- Breathless long lines. Insert a short natural pause or a breath sample rather than speeding up the whole line. Unbroken speech sounds synthetic.
Dialogue cleanup basics
Run a high-pass filter around 80 to 100 Hz on voice to remove rumble that eats headroom. Apply gentle de-essing if the synthetic voice has harsh S sounds, which is common in higher-pitched generated voices. Compress lightly (roughly 3:1 with a slow attack) rather than aggressively; heavy compression on synthetic speech exposes its flatness.
Ambience and Foley: Building a World Around the Frame
Ambience and foley are what make a generated scene feel like a place rather than a render. They are also where you can gain the most perceived quality for the least effort.
Ambience beds that survive the edit
A scene needs at least one continuous ambience bed, and often two layers:
- Base layer. The constant, wide sound of the location: wind, traffic, room hum, crowd murmur. This should run under the entire scene, including across cuts.
- Detail layer. Occasional, closer sounds that give the space dimension: a distant siren, a bird, a pipe knock. Place these irregularly, never on a metronome.
Keep the base bed continuous through the scene, cutting it only where the location changes. If you cut picture inside a location, crossfade the ambience for 12 to 20 frames instead of hard-cutting it. This one habit removes most of the amateur feel from AI edits.
Foley for objects and movement
Foley is the sound of physical interaction. In AI video, where objects sometimes move with slightly wrong physics, foley is your best repair tool: a convincing landing sound makes a slightly floaty jump read correctly.
Practical priorities in order of impact:
- Footsteps. Match surface and shoe type. Add a small variation in level and timing for each step.
- Hand contact. Cups, keyboards, doors, fabric. These are the sounds viewers notice when missing.
- Impacts and weight. A subtle low-frequency thump beneath a heavy object landing adds mass.
- Cloth and movement. Very quiet, but its absence makes characters feel like they are sliding through air.
Generate or record these as short one-shots, then place them by hand at the frame where contact occurs. Automatic placement is fast but rarely as good.
Music: the invisible narrator
Music tells the audience how to feel about a shot that may not have much acting in it. Use it deliberately:
- Entrances should land on cuts or on action beats, not on arbitrary frames.
- Duck under dialogue by 4 to 8 dB rather than turning the music down for the whole scene.
- Leave space. Silence for two seconds before a reveal is more powerful than a swell.
- Watch licensing. If a track is generated or license-free, keep the terms on file with the project, including any attribution requirement.
Sync: Making Sound Land on the Exact Frame
Sync is where AI video workflows differ most from traditional editing, because shot boundaries may not correspond to any real recorded event. You are often inventing the timing rather than matching it.
A frame-accurate alignment routine
Work in this order and you will rarely need a second pass:
- Set your timeline to the same frame rate as your generated clips (typically 24, 25, or 30 fps). Mixed frame rates cause drift that accumulates over a long scene.
- Place dialogue first. Get the mouths right before adding anything else.
- Add foley contacts on the exact frame of impact.
- Add ambience beds to cover the scene, cutting or crossfading at location changes.
- Add music last, so you are fitting it to the sound, not the other way around.
Using sound to direct attention
The audience looks where the sound is. This is a free tool for hiding weak visual areas:
- A sound effect just before a cut makes the cut feel intentional.
- A soft sound off screen pulls the eye away from a distracting background element.
- A sudden silence makes viewers lean in.
- Layering a sound early into the next scene (an audio pre-lap) smooths transitions between shots.
Managing layers without losing control
A typical AI scene can carry five to seven audio layers: dialogue, dialogue reverb, base ambience, detail ambience, foley, music, and any transition effects. Keep them organized:
- Group dialogue, foley, ambience, and music into separate tracks, even if the editor allows unlimited tracks.
- Color-code or label groups.
- Solo by group when troubleshooting.
- Bounce nothing until picture is locked.
The Mix: Levels, Space, and Loudness
Mixing is the process of deciding what the viewer hears and how loudly. Start with balance, then move to space, then loudness.
A starting balance
- Dialogue: reference level, the loudest element in the scene.
- Foley: roughly 8 to 14 dB below dialogue.
- Ambience: 18 to 24 dB below dialogue.
- Music: 10 to 18 dB below dialogue, less during speech.
The exact numbers matter less than the relationships. If dialogue is not clearly on top, the scene will feel cluttered no matter how good each element is.
Creating space
Dry synthetic audio sounds like it was recorded in a vacuum. Three tools fix this:
- Reverb places a voice in a location. Match the decay to the visual space: a long tail for a hall, a very short one for a small room.
- Delay at low levels suggests distance and depth.
- EQ removes the harsh high frequencies that make close, dry audio feel aggressive.
Keep reverb sends consistent across shots of the same location. If the room changes, the reverb should change.
Loudness and limiting
Measure integrated loudness over the whole piece, not the peaks. Apply a limiter last, with the ceiling set to your delivery target (commonly -1 dBTP). Avoid stacking multiple limiters on the master bus; it flattens the dynamics and makes speech tiring to listen to.
Always check the mix on three systems: headphones, laptop or phone speaker, and one mid-range reference if you have it. Phone speaker playback exposes muddiness in the 200 to 400 Hz range and weak dialogue intelligibility.
A Repeatable End-to-End Audio Workflow
Here is the whole process as a sequence you can follow on any project.
- Lock delivery targets. Loudness, peak ceiling, sample rate, and aspect ratio decided before generation.
- Generate picture. Keep shots at a consistent frame rate and resolution.
- Script and cast voices. Decide register, pace, and accent per character before generating lines.
- Assemble dialogue. Place all lines, check lip sync, fix timing with slight stretching and nudging.
- Clean dialogue. High-pass, de-ess, light compression, consistent reverb per location.
- Add foley. Every contact gets a sound; heavier objects get a low-frequency layer.
- Add ambience. One continuous base bed per location, plus irregular details.
- Add music. Fit entrances to cuts and action beats, duck under speech.
- Balance, then process. Balance faders first, then EQ, compression, and reverb.
- Measure loudness. Adjust the master to hit the target, then limit.
- Check on three systems and fix anything that disappears or becomes harsh.
- Export with correct codec settings and keep the project file with audio stems.
Exporting stems (dialogue, music, effects separately) is worth the extra minute. Clients often ask for a version with music removed, or a shorter cut, and stems make that a five-minute job instead of a rebuild.
Choosing Tools: Decision Criteria
You do not need a large stack. You need one option per job, chosen by these criteria.
| Job | What to look for | Typical choice |
|---|---|---|
| Voice generation | Emotional range, breath control, pronunciation editing | Any modern TTS or voice design tool with per-line export |
| Voice replacement | Ability to match an existing take's timing | Voice conversion or re-recording with a matched cadence |
| Sound effects | Searchability by surface and action, license clarity | Curated SFX library or generative foley with commercial terms |
| Ambience | Long seamless loops, no musical content | Field recording libraries |
| Music | Instrumental versions, stem exports | Licensed library or generated score with stems |
| Editing | Frame-accurate nudging, multi-track groups, loudness meter | Any NLE plus a loudness meter plugin |
When evaluating any tool, test it on your own worst case, not its demo: a long emotional line, a noisy crowd scene, a fast action cut. If the tool handles your hard case, it will handle the easy ones.
Common Mistakes and How to Fix Them
Hard-cut ambience between shots. Fix by extending the base bed across the whole scene and crossfading only at location changes.
Dialogue too quiet relative to music. Fix by ducking music under speech rather than raising dialogue, which will clip.
Every sound effect at the same level. Fix by assigning hierarchy: primary action loud, secondary action quieter, background almost subliminal.
No silence anywhere. Fix by leaving two to four seconds of near-silence before an emotional or action beat.
Over-processing synthetic voices. Fix by removing plugins one at a time; usually the de-esser and high-pass are enough.
Ignoring the phone speaker. Fix by checking the mix on a phone with the volume at roughly 60 percent. If dialogue is unclear there, the mix is not finished.
Inconsistent reverb between shots of the same room. Fix by using a single shared reverb send per location.
Exporting without stems. Fix by bouncing stems as part of the delivery step, not as a favor later.
Delivery Checklist and FAQ
Final delivery checklist
- Integrated loudness measured and on target
- True peak under the ceiling, no clipping on any export
- Dialogue intelligible on a phone speaker
- No hard ambience cuts within a location
- Every visible action that should make noise does
- Music ducks under all speech
- Frame rate consistent throughout, no audio drift at the end
- Stems exported and named clearly
- License documentation for music and any library effects saved with the project
Frequently asked questions
How much time should audio take relative to video generation?
For short-form work, a reasonable ratio is one part audio work to two parts visual assembly, and closer to one-to-one for narrative pieces. Budgeting audio time upfront is the most reliable way to avoid a rushed mix at the end.
Should I generate audio inside the video tool or in a separate editor?
Use generation tools for raw material, and finish in an editor. Editors give you frame-accurate nudging, per-track processing, and loudness metering, which generation tools rarely provide at the precision you need.
Is generated voice good enough for professional work?
For narration, explainers, and most social content, yes, provided you control pace and clean it up. For dialogue-heavy narrative with overlapping performances, hybrid approaches still work better: generated voices for background and secondary characters, carefully directed human performance for the leads.
How do I make a scene feel bigger without more sound effects?
Add reverb and reduce high frequencies. A larger space is communicated more by decay time and distance cues than by adding more elements.
What is the fastest single improvement I can make?
Continuous ambience. Most amateur AI edits cut sound at every picture cut. Keep the base ambience bed running under the whole scene and crossfade at location changes, and the edit instantly sounds more like a finished film.
Do I need to normalize each clip before mixing?
No. Normalizing individual clips removes the natural level differences that make a scene feel real. Balance with faders and process the whole mix instead.
How long should I keep project files and stems?
Keep them at least as long as the client relationship lasts, and ideally for the life of the published video. Revision requests arrive months later, and a project with stems turns a rebuild into a quick fix.

Alexander
More Blogs
Read MoreAutomating Video Creation from Transcripts: A Practical Workflow
Turn raw video transcripts into scripts, shot lists, voiceover, captions, and polished video with a repeatable AI workflow that keeps quality high.
Unified AI Video Workflow for Social Media and Web Teams
Learn how to build a unified AI video workflow for social media and web: planning, asset management, generation, consistency, adaptation, QA, and publishing.
Global Video News Agency Workflow: AI, Verification, Speed
Learn how global video news agencies source, verify, package, and distribute footage with AI-assisted workflows that protect speed and trust.