
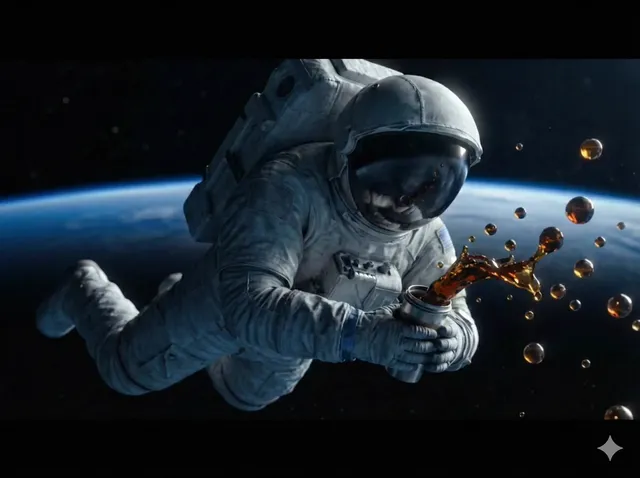
Best AI Video Generators for PC: A Practical Workflow
Oct 13, 2026
Why PC-Based AI Video Generation Changed the Production Pipeline
For most of the last two decades, producing a polished video clip required a chain of specialists: a writer, a shooter, an editor, a colorist, a sound designer. Each handoff added time, cost, and the risk of losing intent along the way. AI video generation compresses that chain. A single creator sitting at a desktop workstation can now describe a shot in plain language and receive a moving image with believable lighting, camera movement, and subject motion in a matter of minutes.
That shift matters most for people who already work on a PC. Desktop workflows bring larger screens for timeline editing, precise control over color and audio, straightforward file management, and the ability to run editing suites side by side with generation tools. You are not fighting a phone keyboard while trying to art-direct a scene. You can park a reference image on a second monitor, keep a prompt library in a text file, and iterate far faster than anyone tapping at a touchscreen.
This guide is a practical, tool-agnostic walkthrough of AI video generation on a PC. It covers how the technology matured, what to look for when choosing software, the modes you will actually use, a repeatable production workflow, prompt craft, hardware realities, common mistakes, and a final quality checklist. The goal is not to claim that AI replaces craft. It is to show you where AI removes friction so your craft has more room to operate.
How AI Video Generation Matured Into a Real Production Tool
Early text-to-video systems were closer to curiosities than tools. They produced short, low-resolution clips with melting faces, drifting backgrounds, and motion that ignored physics. Useful for a demo reel, not for client work. The turning point came from two directions: better generative architectures and better ways of steering them.
Generative adversarial networks trained a generator and a discriminator against each other, which pushed realism forward quickly but often at the cost of stability. Diffusion models took a different route, learning to reverse a noise process step by step. That approach proved far more controllable, and it is the foundation most modern video generators build on. The practical result is that today you can get coherent motion across several seconds, consistent lighting, and recognizable subjects that stay recognizable as they move.
The second shift was accessibility. Where research systems once required server farms and machine learning expertise, current tools run through clean interfaces, accept plain-language prompts, and increasingly run on consumer hardware. Editing, fusion, and compositing features have been folded into the same applications, so a single program can carry an idea from a rough prompt to an assembled sequence.
The third shift is cultural rather than technical. Audiences now watch AI-assisted footage constantly, and they have learned to spot the tells: warped hands, sliding feet, text that dissolves, backgrounds that breathe. That awareness raises the bar. It means the winning workflow is not the one that generates the most clips, but the one that generates clips you can trust in a final edit.
What Separates a Good AI Video Tool From a Great One
Feature lists all look impressive. Real differences show up when you are three hours into a project and need the tool to behave predictably. These are the criteria worth testing before you commit your workflow to any platform.
Output Fidelity and Motion Realism
Watch how the tool handles motion blur, reflections, and cloth. Watch whether objects maintain their shape as the camera moves. A generator that produces beautiful stills but turns arms into noodles is not usable for narrative work. Test with a human subject walking, a hand picking something up, and a camera push-in. Those three shots expose most weaknesses.
Prompt Adherence and Control
Good tools listen. If you ask for a slow dolly left in golden-hour light and receive a static shot at noon, the model is ignoring your direction. Look for granular controls beyond the prompt: camera parameters, motion strength, seed locking, style references, and the ability to lock a first frame. Control is what turns random generation into directing.
Speed, Iteration, and Cost of Experimentation
Generation speed matters less than iteration speed. If a round trip takes four minutes, you will generate cautiously. If it takes forty seconds, you will explore. Tools that let you queue variations, compare outputs side by side, and continue from a previous result encourage the experimentation that produces genuinely good shots.
Editing, Assembly, and Continuity
Generation is only part of the job. You need trimming, speed ramps, transitions, color correction, and audio sync. The best setups let you move from generated clip to assembled sequence without exporting into three different programs. Continuity tools, such as extending a clip or matching the look of a previous shot, save enormous time on multi-shot sequences.
Hardware Fit and Stability
Check whether the tool runs locally, in the cloud, or both. Local generation gives you privacy and no per-render waiting, but demands a strong GPU. Cloud generation offloads the compute but depends on upload speed for large source files. Stability under long sessions is underrated: crashes at hour four cost more than any rendering delay.
The Modes You Will Use Every Day
Most AI video platforms expose four core capabilities. Understanding what each is good for prevents you from forcing the wrong mode to do a job.
Text-to-Video
This is the fastest way to explore. You write a description and receive motion. Use it for mood boards, concept shots, background plates, and anything where the exact composition matters less than the feeling. Text-to-video excels at atmosphere: rain on a window, traffic at dusk, steam rising from a cup. It struggles when you need a specific face, a precise product, or exact text on screen.
Image-to-Video
This is where professional results usually begin. You start with a still you control, either generated, photographed, or designed, and the model animates it. Because composition and subject are already fixed, the output is far more predictable. Image-to-video is the right choice for product shots, portraits, architectural renders, and any sequence where brand accuracy matters.
Still Image Editing and Compositing
Before animating, you often need to fix the frame: remove an object, extend the background, replace a sky, swap a color, add a logo. Editing tools inside the same environment keep the loop tight. You correct the still, animate it, notice a flaw, correct the still again, and regenerate without leaving the app. Compositing also lets you combine elements, such as placing a generated character into a photographed environment.
Video Extension and Scene Stitching
Short clips become useful when they connect. Extension tools take an existing clip and continue it, preserving style and motion direction. Scene stitching helps you build sequences where shot two follows logically from shot one. This is the difference between a folder of attractive clips and an actual piece of edited video.
A Repeatable Workflow From Idea to Finished Clip
Creative work benefits from structure. This six-step loop works for social spots, product videos, explainers, and short narrative scenes.
Step 1: Define the Shot, Not the Story
Beginners write a paragraph describing an entire film. Professionals write one line per shot. Decide exactly what the camera sees in the next three to five seconds: who or what is in frame, what they are doing, where the light comes from, and how the camera moves. Do this for every shot before generating anything. The clarity you gain here saves hours later.
Step 2: Build the Frame as a Still First
Generate or select a still image that already looks the way you want. Fix the composition, the color palette, and the subject before adding motion. This single habit improves output quality more than any prompt trick. If the still is wrong, the video will be wrong, just more expensively.
Step 3: Write a Prompt With Structure
Use a consistent order: subject, action, environment, lighting, camera, mood, technical notes. Keep it to two or three sentences. Redundant adjectives dilute attention. Specific nouns and verbs outperform vague praise words every time.
Step 4: Generate Variations, Then Choose Ruthlessly
Produce several options with small prompt changes or different seeds. Compare them at full size, not in a thumbnail grid. Keep one winner and delete the rest. A bloated library of almost-good clips slows every later decision.
Step 5: Animate and Extend
Move your chosen still into image-to-video. Keep motion subtle at first, then increase. If the shot needs to be longer, extend rather than regenerate, so continuity holds. Re-roll individual shots rather than the whole sequence.
Step 6: Assemble, Grade, and Export
Bring clips into your editor, cut to a rhythm, stabilize any drift, unify color across shots, and add sound. Sound deserves real attention, because audio sells realism more than pixels do. Export at a bitrate appropriate for the destination: higher for YouTube and client delivery, moderate for social feeds that recompress aggressively.
Prompt Craft for Video: What Actually Moves the Needle
Prompting for video is different from prompting for images, because you are describing change over time. Three areas matter most.
Subject, Action, and Camera Are Separate Decisions
State them independently. A weak prompt bundles everything into a mood: a beautiful cinematic scene of a woman in a city. A strong prompt separates elements: a woman in a red coat walks toward the camera on a wet city street, medium shot, slow forward dolly, handheld, overcast afternoon. The second version gives the model three independent instructions and gives you three independent dials to adjust when the result is off.
Use Light and Lens Language
Terms like golden hour, softbox key light, rim light, shallow depth of field, 35mm lens, and low-angle shot carry real meaning in most models because they appear constantly in training data. Lighting vocabulary does more for perceived quality than any other category of words.
Constrain Continuity Explicitly
For multi-shot sequences, repeat the defining details in every prompt: wardrobe, palette, time of day, lens. If the model drifts, lock a reference image and use it as the starting frame for each shot. Consistency is a discipline, not a feature.
Hardware, Local Renders, and Cloud Renders
Local generation is appealing: your files never leave the machine, there are no queue waits, and you can work offline. The trade-off is hardware. Video generation is memory-hungry, and VRAM is usually the bottleneck rather than raw compute. A capable GPU with generous video memory, fast storage for large source files, and enough system RAM to keep an editing timeline responsive will handle most work. Expect fans to spin and expect renders to take minutes rather than seconds on consumer cards.
Cloud generation flips the trade-offs. You get access to powerful hardware without buying it, and results arrive faster on weaker machines. The costs are upload time for large source media, dependence on your connection, and the need to think about where your footage lives.
Many creators land on a hybrid: cloud for heavy exploratory generation, local for final assembly and privacy-sensitive material. Decide based on three questions. How sensitive is the footage? How often do you generate? How much do you value working without a connection? The answers usually make the choice obvious.
Common Mistakes and How to Fix Them
Asking for too much in one shot. If a prompt contains three actions and two location changes, the model will compromise on all of them. Fix: one idea per clip, then stitch.
Skipping the still frame. Animating a mediocre image produces a mediocre video with motion. Fix: perfect the still first.
Ignoring physics and edges. Hands, feet, wheels, and anything touching a surface are where artifacts appear. Fix: frame tighter, keep contact points out of focus, or cut before the motion completes.
Overusing motion. Constant camera movement reads as amateur. Fix: let some shots sit still and let the subject move instead.
Neglecting audio. Silent AI clips feel synthetic even when they look great. Fix: add ambience, room tone, and foley, and match reverb to the apparent space.
Publishing the first acceptable result. The gap between acceptable and good is usually one more round of iteration. Fix: budget time for revision the way you would on any shoot.
Where AI Video Pays Off Most
Short-Form Social Content
Volume is the game here. Multiple variations of the same concept per week, quickly produced and quickly tested, is exactly what these tools do well. Keep a template prompt for your visual identity so every clip stays recognizable.
Marketing and Product Storytelling
Generated environments let you show a product in contexts that would be expensive to shoot: a desert at dawn, an impossible interior, a slow-motion splash. Keep the product itself photographic and generate only the surroundings for maximum credibility.
Education and Explainers
Abstract concepts are hard to film and easy to generate. Diagrams that move, cross-sections that animate, historical settings that would never fit a budget. Combine generated visuals with a clear voiceover and on-screen text.
Previsualization for Film and Advertising
Storyboards are static and animatics are slow. Generated previz lets directors test pacing, framing, and lighting before a single crew member is booked. Even rough generated shots communicate intent to clients far better than a written treatment.
A Pre-Publish Quality Checklist
Run every clip through the same short list before it goes anywhere.
- Does the subject hold its shape for the full duration?
- Are hands, faces, and text free of visible artifacts?
- Is the camera movement intentional rather than drifting?
- Does the color match the surrounding shots?
- Does the audio sit in the same space as the image?
- Is the first frame strong enough to stop a scroll?
- Does the last frame cut cleanly into what follows?
- Is the resolution and bitrate right for the destination?
- Have you watched it once at full screen with sound on?
That last item catches more problems than any technical check.
Frequently Asked Questions
Can a mid-range PC run AI video generation?
Often yes, with patience. Image generation and short video clips are feasible on mid-range GPUs if you keep resolutions modest and clip lengths short. Longer sequences and higher resolutions benefit significantly from more video memory. Cloud options let you work on any machine if local performance is the limitation.
What is the difference between text-to-video and image-to-video?
Text-to-video generates motion from a written description, which is fast but less controllable. Image-to-video animates a still you already approve, which gives you far more control over composition and consistency. Most professional workflows lean on image-to-video for final shots and text-to-video for exploration.
How long should a generated clip be?
Shorter than you think. Three to five seconds is usually enough for a single idea, and short clips hide continuity problems. Build longer sequences from multiple short shots rather than stretching one generation.
Why do faces and hands look wrong?
Those areas contain enormous visual complexity, and small errors are instantly noticeable to viewers. Reduce the problem by framing wider, keeping hands in motion or partially out of frame, and avoiding long static close-ups of faces.
Do I still need an editor?
Yes. Generation produces source material, not finished films. Trimming, pacing, color matching, and sound design happen in an editor and are what make AI footage feel professional.
How do I keep style consistent across many clips?
Reuse a locked reference image, repeat the same lighting and lens vocabulary in every prompt, keep a fixed color palette, and review shots side by side rather than in isolation.
Is AI video good enough for client work?
It is good enough for many categories, particularly backgrounds, product environments, social content, and previz. Disclose your process where it matters, and always review at full resolution. Clients judge the result, not the method.
Bringing It Together
The best AI video generator for PC is not the one with the longest feature list. It is the one that fits your hardware, respects your direction, and slots cleanly into an editing workflow you already trust. Start with a still frame. Write one clear shot description at a time. Generate variations, choose ruthlessly, extend only what works, and finish in an editor with real sound. Do that consistently and the tools stop feeling like magic tricks and start feeling like a camera you can point at anything you can imagine.

Alexander
More Blogs
Read MoreVidu Q4 Alternatives: 4K AI Video Models Compared (2026)
Vidu Q4 alternatives compared: Kling 4.0, Seedance 2.5, Wan 3.0, and Runway Gen-4 — 4K support, input modes, durations, audio, and what each costs in credits on Domer.
Top 4K AI Image Generators in 2026: 5 Models Compared on Real Costs
The top 4K AI image generators on Domer compared: Flux 3 Klein, Nano Banana 2.1, GPT Image 2.5, GPT Image 2, and Nano Banana Pro — 4K credit costs, reference limits, and speed.
Nano Banana 2.1 vs GPT Image 2.5: Which Image Model Should You Use? (2026)
Nano Banana 2.1 vs GPT Image 2.5 Flare compared: credit costs per resolution, aspect ratios, reference images, text rendering, and which tasks fit each model.