
Create
Best AI Video Generators for PC: A Practical Workflow Guide
Oct 13, 2026

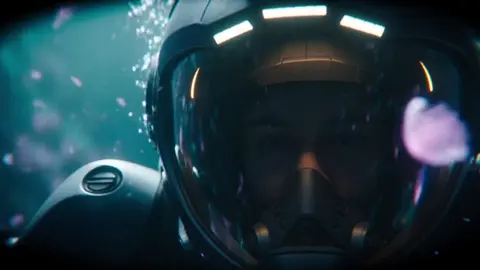

Why Desktop AI Video Workflows Still Matter
Browser-based generators get all the headlines, but most professional AI video work still finishes on a desktop. There are practical reasons for that. A PC gives you persistent project folders, version histories, local asset libraries, and a timeline editor that does not lose state when a tab refreshes. When you are generating forty variations of the same three-second shot, that stability matters more than the novelty of a new interface.
The desktop also wins on screen real estate. Judging motion is hard on a laptop panel at 60% zoom. A calibrated monitor, a second display for reference boards, and a color-managed pipeline will catch problems that a web preview hides — banding in gradients, flicker between frames, mismatched skin tones across cuts.
Finally, the desktop is where AI output becomes a finished product. Generated clips rarely arrive ready to publish. They need stabilization, retiming, sound design, captions, and grading. The best AI video generator for a PC user is therefore rarely a single tool; it is a stack that includes a generator, a local editor, and a small set of utilities for upscaling, denoising, and audio.
What AI Video Generators Actually Do
Before comparing tools, it helps to be precise about the categories, because "AI video" covers several genuinely different technologies.
Text-to-video
You write a prompt, the model produces a clip. Modern systems use diffusion or transformer architectures that predict frames in a compressed latent space, then decode them back to pixels. The practical range is usually two to ten seconds per generation. Longer sequences are built by chaining shots, not by asking for a single minute-long render.
Image-to-video
You supply a still — a photograph, a render, a Midjourney output, a product shot — and the model animates it. This is the workhorse mode for anyone with brand assets, because it preserves composition and identity far better than text alone. If a client hands you a logo or a product photo, image-to-video is how you keep it recognizable.
Video-to-video and motion control
Here the model restyles or retimes existing footage, or transfers motion from a driving clip onto a still character. Tools in this family handle rotoscoping, background replacement, frame interpolation, and style transfer. They are less glamorous than text-to-video but often more useful in real client work.
Supporting capabilities
Most desktop pipelines also lean on voice synthesis, music generation, automatic captioning, and upscaling. A clip generated at 720p that is then upscaled with a dedicated model frequently looks better than a native 1080p render from a weaker generator.
Hardware and Setup: What Your PC Really Needs
GPU and VRAM
If you plan to run models locally, video memory is the single most important specification. Eight gigabytes is enough to experiment with short, low-resolution clips and lighter models. Twelve to sixteen gigabytes opens up more capable checkpoints at 720p. Twenty-four gigabytes and above lets you work at higher resolution with longer frame counts without constant out-of-memory errors.
Raw compute matters too, but VRAM decides what you can load at all. A fast card that cannot fit the model is useless for that model.
CPU, RAM, and storage
Video work is storage-heavy. Generated clips, reference frames, and intermediate renders accumulate quickly. A dedicated NVMe drive for active projects plus a larger drive for archives prevents the constant juggling that slows a project down. Thirty-two gigabytes of system RAM is a comfortable floor; sixty-four removes most friction when an editor, a generator, and a browser full of references are open at once.
The CPU matters less for generation but a lot for encoding. A modern multi-core chip with hardware encoding support will cut export times noticeably.
Display, audio, and peripherals
Two monitors change how you work. Keep the generator and its parameter panel on one, and your timeline, reference board, and notes on the other. A basic audio interface and decent headphones will catch problems in generated audio that laptop speakers hide entirely.
The cloud fallback
Not everyone needs a workstation. If your GPU is modest, hosted generation remains a sensible split: iterate quickly in the browser, then move finals to the desktop for editing. The desktop becomes the assembly and finishing station rather than the render farm.
How to Choose the Right Tool: Criteria That Matter
Marketing pages blur together. These are the criteria that actually separate tools in daily use.
Temporal consistency. Does the subject stay the same person, the same shirt, the same building across cuts? Watch a five-shot sequence, not a single clip.
Control surfaces. Camera movement, seed locking, first and last frame conditioning, motion strength, and region-based editing are what turn a slot machine into a tool.
Iteration speed. Fast, cheap drafts beat slow, perfect renders. You will generate twenty takes and use one.
Clip length and resolution. Know your target: social verticals tolerate short clips and stylized motion; corporate or product work usually needs clean 1080p and stable geometry.
Export fidelity. ProRes, high-bitrate H.264, and image sequences matter if the clip will be graded. A tool that only exports compressed MP4 is fine for social, limiting for broadcast.
Rights and licensing. Confirm how generated output may be used commercially, and whether you can train or fine-tune on your own footage.
Integration. Does it hand off cleanly to your editor, or does it force you through a proprietary timeline?
Documentation and community. Prompt behavior is idiosyncratic. A strong community shortens the learning curve dramatically.
A Practical End-to-End Workflow
Step 1: Pre-production
Write the script first, then a shot list. A thirty-second piece typically needs eight to twelve shots. For each shot, note the subject, the action, the camera, and the mood. This is the document you will translate into prompts, and it prevents the aimless generation loop that eats entire afternoons.
Build a look board: six to ten reference images establishing palette, lens character, and lighting. Consistency across shots comes from this board, not from luck.
Step 2: Generate keyframes
Produce still frames for each shot before animating anything. Stills are faster and cheaper to iterate, and they force you to solve composition while the problem is still simple. Once a still is right, animate it with image-to-video.
Step 3: Generate and select
Generate four to six variations per shot at draft settings. Watch them at full speed, not frame by frame — motion artifacts that look terrifying on a paused frame often vanish in playback. Keep the best take, note the seed, and move on.
Step 4: Assemble
Bring the selects into your editor. Order them, trim to the beat, and add a temporary music track. Problems that are invisible in isolation — a jump in color temperature, a reversed screen direction — become obvious in sequence.
Step 5: Sound and finishing
Generated video is silent, and silence makes AI footage feel synthetic. Add ambience, foley, and a music bed. Then stabilize, retime for pacing, upscale if needed, and grade. A simple contrast curve and a subtle film grain pass do more for perceived quality than another round of generation.
The Tool Landscape: Where Each Generator Fits
Rather than crowning a single winner, map tools to jobs.
Runway remains a strong generalist with a mature editing interface and good motion controls. It suits directors who want fine-grained camera and motion brushing.
Pika is friendly and fast, with playful effects that work well for social content and quick concept tests.
Luma Dream Machine produces fluid, cinematic motion and handles image-to-video cleanly, which makes it a good fit for animating product and architectural stills.
Kling has earned a reputation for realistic human motion and longer coherent takes, useful when a shot depends on believable body language.
Stable Video Diffusion and ComfyUI appeal to tinkerers. The node-based workflow is intimidating at first, but it offers control no hosted tool matches — custom checkpoints, LoRA fine-tuning, ControlNet conditioning, and fully offline operation.
Adobe Firefly inside Premiere Pro and DaVinci Resolve's built-in AI features are less about generating whole clips and more about fixing them: generative extend, object removal, magic mask, and speech enhancement. These belong in every finishing stack regardless of which generator you prefer.
Utility layer: an upscaler such as Topaz Video AI, a denoiser, a voice synthesizer, and a music generator round out the pipeline. Budget time for these, not just for the headline generator.
Local vs Cloud Rendering: Honest Trade-offs
| Factor | Local generation | Hosted generation |
|---|---|---|
| Upfront cost | High (GPU) | Low |
| Per-project cost | Near zero | Metered |
| Privacy | Full control | Data leaves your machine |
| Setup effort | Significant | Minimal |
| Model variety | Whatever you install | Whatever the vendor offers |
| Speed | Depends on your card | Usually fast, occasionally queued |
| Best for | High-volume, confidential, custom work | Quick tests, occasional projects, limited hardware |
A hybrid approach is often best: prototype in the cloud on unfamiliar models, then move repeatable, high-volume tasks to a local setup once the workflow is proven.
Prompt Craft and Shot Design Playbook
Video prompts differ from image prompts because motion must be described. A reliable formula:
Subject + action + camera + lens + lighting + style + duration.
For example: "A ceramicist's hands shaping wet clay on a spinning wheel, slow dolly in, 50mm lens, warm window light from the left, muted documentary color grade."
Practical rules that hold across most models:
- One action per shot. Two verbs produce mush.
- Describe the camera explicitly. "Slow push in," "locked-off wide," "handheld follow." Models default to drifting motion otherwise.
- Name the lighting. Backlit, overcast, neon, golden hour. Lighting is the fastest route to a consistent look.
- Avoid negations. "No people" often summons people. Describe what you want instead.
- Lock seeds for continuity. When two shots must match, change only the action.
- Keep prompts under roughly sixty words. Long prompts dilute attention.
- Use motion strength sparingly. Subtle beats dramatic; dramatic beats broken.
Common Mistakes and How to Avoid Them
Chasing a single perfect generation. Iterating on drafts and selecting afterward is faster and produces better results.
Ignoring the sound design. Audio is half the perceived production value of any clip.
Generating without a shot list. You will end up with beautiful clips that do not cut together.
Mixing resolutions and color spaces. Standardize on one output resolution and one color pipeline before assembly.
Trusting the first frame. Check the last frame too; many models degrade toward the end of a clip. Trim the weak tail.
Over-stylizing. Heavy stylistic prompts date quickly and reduce how much you can reuse the footage.
Skipping stabilization. Even good generations carry micro-jitter that a stabilize pass removes cleanly.
Forgetting backup. Version your prompts and seeds alongside your renders. Reproducing a shot months later without them is painful.
FAQ and Final Checklist
Do I need a powerful GPU to work with AI video on a PC?
No. A capable desktop with a mid-range card can handle editing, upscaling, and finishing while generation happens in the browser. Local generation only becomes necessary when you need volume, privacy, or custom models.
How long should an AI-generated clip be?
Treat two to six seconds as the practical unit and build longer sequences through editing. Asking a model for a long continuous take usually costs you coherence.
Which matters more, prompts or editing?
Editing. A well-cut sequence of average clips outperforms a single flawless generation dropped into a timeline without pacing or sound.
Can AI video output be used commercially?
It depends on the specific tool's terms and on the source material you supplied. Check the license before delivery, and keep a record of which tool produced each shot.
Should I animate stills or generate from text?
Animate stills when identity, composition, or brand assets matter. Generate from text when you are exploring a concept and do not yet know what it should look like.
Checklist before you render the final cut:
- Shot list complete and all shots accounted for
- Consistent seed, prompt, and style notes recorded
- Uniform resolution, frame rate, and color space
- Stabilization and denoise pass applied
- Ambience, foley, and music layered under dialogue
- Captions checked for accuracy
- Upscale only after the cut is locked
- Project files, prompts, and seeds archived together
Build the stack around your actual bottleneck. If you struggle to generate, invest in learning one generator deeply. If you struggle to finish, invest in the editing and audio half of the pipeline — that is where amateur AI video becomes professional work.

Alexander
More Blogs
Read MoreVidu Q4 Alternatives: 4K AI Video Models Compared (2026)
Vidu Q4 alternatives compared: Kling 4.0, Seedance 2.5, Wan 3.0, and Runway Gen-4 — 4K support, input modes, durations, audio, and what each costs in credits on Domer.
Top 4K AI Image Generators in 2026: 5 Models Compared on Real Costs
The top 4K AI image generators on Domer compared: Flux 3 Klein, Nano Banana 2.1, GPT Image 2.5, GPT Image 2, and Nano Banana Pro — 4K credit costs, reference limits, and speed.
Nano Banana 2.1 vs GPT Image 2.5: Which Image Model Should You Use? (2026)
Nano Banana 2.1 vs GPT Image 2.5 Flare compared: credit costs per resolution, aspect ratios, reference images, text rendering, and which tasks fit each model.