
Cinematic AI Storytelling: A Practical Filmmaking Guide
Oct 13, 2026
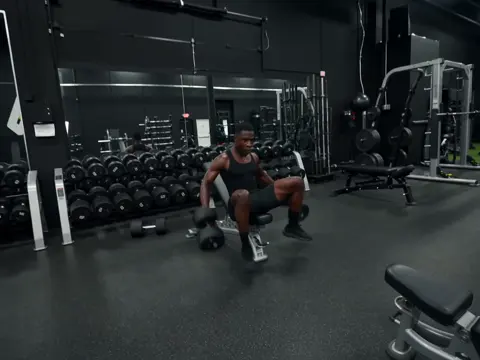
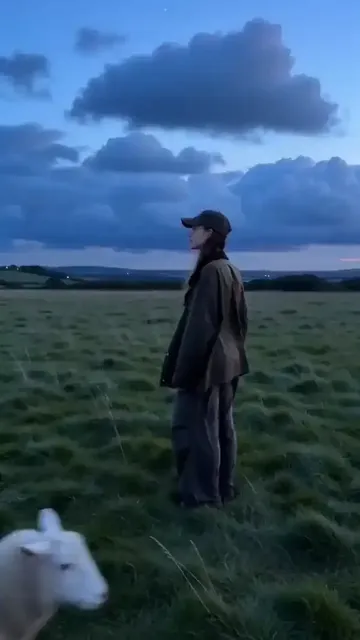
Cinematic AI is not a button that produces films. It is a set of generative tools — diffusion video models, motion controllers, voice synthesizers, and automated editing assistants — that sit inside a production pipeline you still have to design. The creators getting the best results are rarely the ones with the most exotic model. They are the ones who treat generation like a camera department: planned, logged, and reviewed, rather than a slot machine that occasionally pays out.
This guide is a practical walkthrough of that pipeline. It covers how to shape a story before you generate anything, how to pick the right generation mode for each shot, how to write prompts that behave like shot lists, how to keep characters and locations stable, how to design coverage that actually cuts together, and how to finish with sound and platform-ready delivery. Expect workflow detail, decision criteria, and the mistakes that cost the most time.
What Cinematic AI Actually Changes
Traditional production front-loads risk. You commit to a location, a cast, a lighting setup, and a schedule, and mistakes are expensive because they are discovered late. Generative video inverts that math. A shot that would take a crew half a day to relight can be attempted five times before lunch, and the worst outcome is a wasted afternoon rather than a blown budget line. That change is less about money than about permission: it lets you try the strange idea, the expressionist lighting cue, the camera move nobody would have rigged for a test.
The second shift is that previsualization collapses into production. Instead of sketching a storyboard, pitching it, then shooting something different, you can generate a rough version of the actual shot, watch it in sequence, and decide whether the scene works before committing to a polished pass. Animatics stop being a communication tool for other people and become a decision tool for yourself.
What does not change is everything that makes a sequence watchable. Contrast between shots, clear screen direction, motivated cuts, believable performance, and sound design still decide whether an audience stays. A model can render a gorgeous frame. It cannot decide that the frame should hold two seconds longer so a line lands, or that the cut should happen on the breath rather than the word. Those judgments remain yours.
Three practical consequences follow from all of this:
- Volume is cheap, selection is expensive. You will generate far more than you use, so your review process becomes the real bottleneck. Budget time for culling, not just prompting.
- Continuity is a documentation problem. Models forget; you cannot. Locks, reference sheets, and a written continuity log do more for perceived quality than a better model.
- Sound rescues more shots than regeneration. A weak shot with committed sound design reads as intentional; a strong shot with lazy audio reads as unfinished.
The Story Layer Comes First
Before you open a generation tool, spend an hour with text. Not because AI cannot help you write, but because a generated shot without a narrative purpose is just an expensive screensaver. The story layer defines what each shot must accomplish, and that definition is what makes prompt writing fast instead of endless.
Logline, structure, and the shot list
Start with a single sentence that contains a character, a want, and an obstacle. If you cannot write it, the piece is not ready to visualize — no amount of visual polish fixes a missing spine. From there, break the piece into beats: the moment something changes, whether that is information, emotion, or physical position. Three to seven beats is plenty for a two-minute piece; more than that and you are writing a feature in a short-film costume.
Then convert beats into a shot list. A useful shot list has six columns: shot ID, narrative purpose, generation mode, prompt or prompt reference, intended duration, and sound note. The narrative purpose column is the one people skip and the one that saves the most time. When a shot says "establish that she is being watched," you know instantly whether a slow push-in on her face or a wide with a distant figure serves the scene — and you know when a beautiful generation is off-brief and should be cut.
A shot list also lets you batch work. Shots that share a location, a character, and a lighting setup can be generated in one session with the same style block, which improves consistency and reduces context switching.
Narration and dialogue that survives generation
If your piece has voice, write for the ear and for the edit. Short sentences, concrete nouns, and one idea per line. Long subordinate clauses give voice models nowhere to breathe and give you nowhere to cut. Read every line aloud with a stopwatch; if a sentence takes more than about eight seconds, split it.
For on-screen dialogue, write to the cut rather than to the performance. AI-generated speech is most convincing in short bursts, and lip synchronization holds up better on close, calm delivery than on fast overlapping banter. If a scene needs argumentative energy, consider staging it as two separate close-ups rather than a two-shot; you get more control over timing, and you can choose the strongest take of each half independently.
Finally, write a line of text for anything the audience must understand. Relying on a generated visual to communicate a specific fact — a date, a number, a name — is a coin flip. Put it in the dialogue, put it on screen, or cut it.
Choosing the Right Generation Mode
Not every shot should be made the same way. The single biggest quality jump for most creators comes from matching the mode to the job instead of defaulting to text-to-video for everything.
| Situation | Mode to reach for | Why |
|---|---|---|
| Empty establishing environment | Text to video | No continuity burden; prompt describes place, light, and movement |
| Recurring character in a new pose | Image to video from a locked reference | Preserves identity across shots and locations |
| Existing footage needs a new mood | Video to video restyle or relight | Keeps real motion and timing, changes surface |
| Precise product rotation or match cut | Keyframe interpolation or motion control | You define start and end; the model fills the middle |
| Long dialogue scene | Alternating image-to-video close-ups | Easier to control eyeline, timing, and consistency |
Text to video
Text to video is best for shots where identity does not matter: landscapes, textures, abstract transitions, weather, crowds at a distance, and mood pieces. It gives the model the most freedom and therefore the most surprise, which is a feature in an establishing shot and a liability in a scene with returning characters.
Treat the first generation as a scout, not a take. Run a lower-cost pass, watch it at speed, and only then decide the framing, the lens feel, and the movement. It is far cheaper to burn three exploratory generations than to build an elaborate prompt around a shot you eventually cut.
Image to video
Image to video is the workhorse of narrative AI filmmaking, because identity is decided in the still. Generate or photograph a reference frame, approve it, then animate it. The approved still becomes your contract: if the animation drifts from it in wardrobe, hair, or screen position, you regenerate rather than accept.
Two habits pay off here. First, keep the reference frames in a versioned folder with descriptive names so you never animate an outdated design. Second, keep motion prompts modest — one primary movement per shot. Asking for a walk, a turn, a hand gesture, and a camera push in the same generation usually produces mush.
Video to video, relighting, and enhancement
When you have real footage — a phone clip, drone material, a screen recording — video-to-video lets you keep authentic motion while changing the surface: season, time of day, film stock, color palette, even medium. This is the most underrated mode for brand work, because the underlying performance stays human.
Frame-by-frame restyling tends to shimmer; reduce it by lowering the transformation strength, locking grain and color temperature across a sequence, and avoiding heavy transformations on faces in motion. Upscaling and frame interpolation belong at the end of the pipeline, after the edit locks, not on individual clips you may still cut.
The Grammar of a Cinematic Prompt
A prompt is not a description. It is a brief for a very literal, very fast crew member who has never seen a film. The difference matters: description answers "what is in the frame," while a brief answers "what should this shot do."
The six building blocks
Most reliable cinematic prompts can be assembled from six slots:
- Subject: who or what, with two or three distinguishing details rather than ten.
- Action: one clear verb phrase describing motion in the shot.
- Camera: framing, angle, and movement — for example, "slow dolly in, medium close-up, eye level."
- Optics and format: lens character, depth of field, aspect ratio, film grain.
- Light: source, direction, quality — "single practical lamp left of frame, hard shadows, cool daylight spill."
- Mood and grade: the emotional temperature and color treatment, kept identical across a scene.
Order the slots by importance to the shot. If the light is the point, lead with light. Models weight early tokens more heavily, and the earliest tokens should carry the thing you would refuse to compromise on.
Resist adjective stacking. "Beautiful, stunning, epic, ultra-detailed, cinematic" adds noise; "overcast window light, 40mm feel, shallow focus" adds information.
Negative constraints and continuity locks
Just as useful as what you ask for is what you exclude. Standard exclusions include on-screen text, watermarks, distorted hands, extra limbs, warped faces, unwanted lens flare, and modern objects in period scenes. Keep your exclusions in a reusable block so they apply evenly across a sequence.
Continuity locks are the other half. Write one style block per project — aspect ratio, grain, color temperature, contrast curve, lens family — and paste it, unchanged, into every shot. When a sequence later looks subtly inconsistent, the cause is usually a style block that was quietly rewritten between shots.
Character and Location Consistency
Consistency is what separates a demo reel from a film. Audiences forgive soft detail; they do not forgive a character whose jacket changes color between cuts.
Reference sheets and seed discipline
Build a reference sheet per character before you shoot anything: one clean front-facing portrait, one three-quarter view, one profile, plus a full-body frame showing wardrobe and accessories. Approve these like casting photos. Every subsequent shot starts from one of them.
Then be disciplined about recording how each shot was made. Keep a log with the reference frame used, the seed or identifier, the prompt version, and the resulting take numbers. When a shot needs to match one made three days ago, that log is the difference between a ten-minute fix and an afternoon of guessing. Locations deserve the same treatment: a reference frame for each angle of a room, so reverse shots share the same furniture, light direction, and window placement.
A continuity checklist
Run this against every sequence before you consider it finished:
- Wardrobe, hair, and accessories identical across shots of the same character.
- Screen direction consistent — a character moving left to right keeps moving left to right.
- Light direction consistent within a scene; shadows fall the same way.
- Props in the same place; nothing appears or vanishes between cuts.
- Color temperature and grain match across the whole sequence.
- Time of day reads the same in every wide shot of a location.
Shot Design That Cuts Together
Individual shots are easy to admire and hard to assemble. Coverage designed for the edit is what makes a sequence feel directed rather than collaged.
The axis, eyeline, and screen direction
Imagine a line between two characters in conversation. If you generate shots from both sides of that line, their eyelines will point in the wrong direction and the scene will feel like two people talking past each other. Decide the axis before generating and stay on one side of it, or insert a neutral shot — a wide, a cutaway, a detail — if you need to cross it.
The same logic applies to movement. If a character exits frame right, the next shot should show them entering from the left. Keep a note on your shot list for screen direction; it costs five seconds to write and saves entire sequences.
Shot length and the three-second trap
Most generated clips come out looking best in the first two to three seconds, before drift sets in. That is not a limitation to hide; it is a rhythm to exploit. Short shots with clear cuts create momentum, and a sequence of three-second shots feels more deliberate than one long take that slowly dissolves into noise.
Vary the lengths. A pattern of three, three, three, three becomes monotonous; a pattern of two, four, one and a half, five has pulse. Save your longest hold for the shot that carries the most emotional weight, and make sure it is the most stable generation you have — nothing breaks a moment faster than watching a face destabilize during the beat you most needed to land.
Sound, Music, and the Invisible Edit
Sound does more continuity work than any visual fix. Room tone under a sequence glues shots from different locations into a single space. A consistent ambience makes a jump cut feel intentional; silence between two shots makes it feel like an error.
Build your audio in layers. Start with ambience for each location, add foley for actions the audience expects to hear — footsteps, cloth, a closing door — then place dialogue, then score. Music last, because music that arrives before the edit is locked tends to dictate pacing you later regret. Keep score levels low under dialogue; a cue that feels right in isolation is usually three to six decibels too loud against a voice.
For voice, favor clean recordings over heavy processing. Slight compression for consistency, a gentle roll-off of low rumble, and level matching across speakers will do more than any reverb preset. If a generated line feels flat, the fix is usually a shorter sentence or a different read, not more effects.
A Repeatable Production Workflow
The pipeline below scales from a fifteen-second social cut to a multi-minute brand film. The stages stay the same; only the number of iterations changes.
Development and scripting
Write the logline, beats, and script. Keep a running list of constraints: aspect ratio, runtime, platform, brand rules, and any legal restrictions on likeness or location. Everything downstream inherits these constraints, so settle them now.
Previsualization
Generate quick, low-fidelity versions of key shots to test the edit. Stills are enough for framing; short generations are enough for motion. The goal is a rough sequence you can watch end to end, not a beautiful one.
Principal generation
Generate the approved shot list in batches grouped by location and character. Review immediately: approve, note the reason for rejection, and mark whether the fault was framing, motion, identity, or light. Naming the fault is what makes the next attempt faster than the last.
Assembly and sound
Edit for rhythm first with temp sound, then rebuild audio with real elements. Do not polish individual clips before they survive the timeline. A shot that looks mediocre alone often plays fine in context, and a shot you adored alone often dies in the cut.
Finishing and delivery
Lock the picture, then upscale, stabilize, and grade once across the whole piece rather than clip by clip. Export a master at the highest quality you can justify, then create platform versions by re-framing and re-timing rather than re-exporting the same crop everywhere. Vertical versions usually need tighter pacing and larger text than a horizontal master.
Common Mistakes and How to Fix Them
- Generating before writing. If you cannot state the shot's purpose in one line, the prompt will ramble and the take will be unusable. Write the shot list first.
- Changing the style block mid-project. Inconsistency is almost always a rewritten prompt. Freeze the style block and version it deliberately.
- Overloading motion. One movement per shot. If a shot needs a walk and a turn, split it into two shots — you will get better coverage and a better edit.
- Accepting the first take of a hero shot. Hero shots justify five to ten attempts. Background shots do not.
- Fixing in post what should be regenerated. If identity has drifted, regenerate from the reference frame. Warping a wrong face in post rarely ends well.
- Neglecting sound until the end. Sound is not the last step; it is the step that makes everything else believable.
- Exporting one version for every platform. Re-frame and re-time. A one-size export reads as careless on every platform at once.
FAQ
How long should an AI-generated shot be?
Plan for two to four seconds for most shots, with occasional longer holds for emotional beats and shorter cuts for action. If a generation only looks convincing for two seconds, cut at two seconds and use a second angle to cover the rest of the action.
Why do my characters change between shots?
Almost always because the reference changed. Build one approved reference sheet for the character, start every shot from it, and log which version you used. Seed discipline matters more than any individual prompt trick.
Do I need a storyboard for a thirty-second piece?
You need a shot list, not a polished board. Six to ten written shot intentions with purposes attached are enough to keep a short piece coherent and to prevent redundant generations.
How much of the final piece should be AI-generated?
As much or as little as the piece needs. Mixing real footage, graphics, and generated material is normal and usually stronger than an all-generated piece, because each shot can use whichever method suits it best.
What should I export?
Keep a high-quality master and derive platform cuts from it. Match frame rate to your source material, avoid unnecessary re-encoding, and check the first three seconds on a phone before you publish — that is where most viewers decide whether to keep watching.
The through-line across all of it is simple: the tools have made production cheap and selection expensive. The creators who stand out are the ones who plan before they generate, document what they make, and treat sound and editing as first-class craft rather than cleanup. Master that and the model you choose becomes a detail; the film you make is the thing people remember.

Alexander
More Blogs
Read MoreVidu Q4 Alternatives: 4K AI Video Models Compared (2026)
Vidu Q4 alternatives compared: Kling 4.0, Seedance 2.5, Wan 3.0, and Runway Gen-4 — 4K support, input modes, durations, audio, and what each costs in credits on Domer.
Top 4K AI Image Generators in 2026: 5 Models Compared on Real Costs
The top 4K AI image generators on Domer compared: Flux 3 Klein, Nano Banana 2.1, GPT Image 2.5, GPT Image 2, and Nano Banana Pro — 4K credit costs, reference limits, and speed.
Nano Banana 2.1 vs GPT Image 2.5: Which Image Model Should You Use? (2026)
Nano Banana 2.1 vs GPT Image 2.5 Flare compared: credit costs per resolution, aspect ratios, reference images, text rendering, and which tasks fit each model.