
Create
How to Evaluate AI Video Storytelling Tools for Cinematic Work
Oct 13, 2026
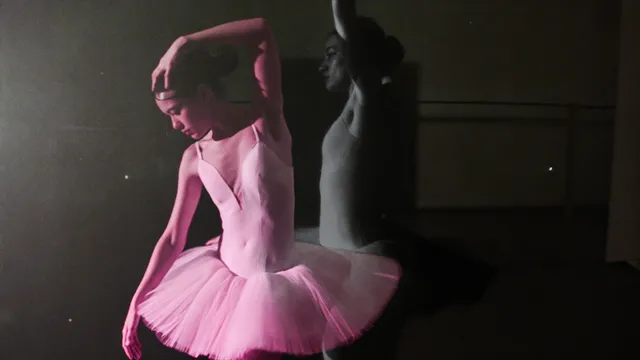

Video storytelling software has moved far beyond simple clip generation. The real question is no longer which tool can create one attractive shot, but which system can hold a narrative together across dozens of shots, revisions, voices, and delivery formats. Creators, marketers, educators, and film teams are all trying to solve the same problem: turn an idea into a watchable story without losing control of pacing, character identity, and visual style. The best AI director tools are not magic buttons. They are production environments with strengths, constraints, and workflow assumptions. This guide gives you a practical framework for evaluating AI video storytelling software, testing it against real creative work, and choosing the option that fits your process.
Start with the Story Problem, Not the Model List
Most comparisons begin with model names, benchmark scores, or resolution charts. That is understandable, but it is also why so many creators end up disappointed. A tool can produce a stunning four-second shot and still be wrong for your project. The more useful starting point is the story problem you need to solve.
Ask yourself what kind of storytelling you actually do. Are you making short vertical videos where speed and hooks matter more than continuity? Are you building a narrative explainer that needs a consistent presenter across multiple scenes? Are you previsualizing a film sequence where camera language, lens choices, and continuity are critical? Are you producing course content where clarity, captions, and repeatable templates matter more than cinematic flair?
Each of those jobs places different demands on an AI video platform. A social-first tool might excel at fast text-to-video generation but struggle with character consistency. A cinematic agent might offer strong scene construction but require more setup time. A template-led editor may be perfect for training videos but too rigid for fiction. If you define the story problem first, you can evaluate features against actual needs instead of marketing claims.
A second useful step is to separate the work into layers: script, story beats, shot design, keyframes, motion, sound, and assembly. Some tools cover all layers. Others are strongest at one. The right choice may be a single end-to-end platform or a small stack that gives you the best result at each stage. The goal is not brand loyalty. The goal is a reliable path from idea to finished video.
What a Modern AI Video Storytelling Stack Actually Does
A capable AI video storytelling stack usually handles several jobs at once, even if the interface makes them feel like a single flow. Understanding those jobs helps you compare tools more fairly.
Script and Beat Planning
At the front end, the system should help turn a rough idea into a structured narrative. That can mean expanding a logline into scenes, breaking a script into beats, or suggesting shot lists. Some platforms include an AI director agent that maps narrative intent to visual sequences. Others leave planning to you and focus only on generation. Both approaches can work, but the planning layer has a major impact on consistency. If the tool cannot understand the difference between a rising action beat and a transition shot, you will spend more time fixing structure manually.
Shot Generation and Continuity
The generation layer includes text-to-video, image-to-video, and hybrid workflows. Text-to-video is useful for exploration and b-roll. Image-to-video gives you more control because you can approve a keyframe before adding motion. Hybrid workflows, where generated images become animated shots, are often the most practical for narrative work. When evaluating continuity, look at whether the tool preserves lighting, wardrobe, set design, and camera direction across shots. A beautiful clip that breaks the visual world of the previous scene is not a storytelling success.
Voice, Music, and Pacing
Storytelling lives in timing. A platform may generate excellent visuals but still feel flat if voiceover, music, and pauses are treated as afterthoughts. Look for tools that let you control speech rate, emotional tone, scene duration, and transitions. If voice generation is included, test pronunciation, accent consistency, and how naturally the voice handles punctuation. If music is included, check whether you can adjust intensity or replace tracks without breaking the edit. Audio is not a finishing touch. It is part of the narrative engine.
A Practical Evaluation Framework for AI Director Tools
Once you know what the stack should do, you can score specific platforms. Use the following criteria and test them with your own material rather than demo prompts.
Visual Coherence and Output Quality
Output quality is more than resolution. Check sharpness, motion realism, facial stability, and how well the tool handles hands, crowds, reflections, and complex backgrounds. More importantly, check coherence across a sequence. Generate five connected shots and ask whether they feel like one scene. Do colors match? Does the light direction stay consistent? Does the environment evolve logically? A tool with slightly softer single frames but strong sequence coherence is often more useful than one with impressive isolated clips that cannot hold a world together.
Directorial Control and Scene Construction
Directorial control is where AI video tools differ most. Some platforms generate whatever the prompt implies. Others let you specify camera movement, shot size, lens feel, pacing, and scene transitions. An agent-based approach can be valuable because it translates story intent into a sequence of production decisions. For example, you might describe a tense conversation in a narrow hallway, and the system proposes an establishing shot, over-the-shoulder coverage, a close-up on a reaction, and a final wide shot. That kind of scene construction saves time and improves narrative clarity. When testing, give the tool a scene with emotional progression, not just a visual prompt. See whether it understands why the camera should move or stay still.
Character Consistency and Multi-Image Reference
Character consistency is the make-or-break feature for narrative video. A character who changes face, hair, age, or clothing between shots pulls the audience out of the story. Strong tools offer multi-image reference, keyframe control, or identity locking. Test with at least three reference images: a front view, a profile, and a different lighting condition. Then generate the same character in wide, medium, and close-up shots. Check whether the tool maintains recognizable features without making every expression identical. You want consistency, not a frozen mask.
Workflow Integration and Handoff
A tool that works well for a solo creator may fail for a team. Consider how projects are organized, whether multiple people can comment or revise, how assets are stored, and whether you can export editable files or only final renders. If your workflow includes traditional editing software, look for clean exports, frame-accurate timing, and separate audio stems. If you work with clients, check review features and version history. The best AI video storytelling software does not trap your work inside its own universe. It hands off assets in formats your team can use.
Speed, Iteration, and Budget Predictability
Speed matters, but iteration speed matters more. A tool that generates a shot in thirty seconds but forces you to restart the whole scene after every change can be slower than a tool that takes two minutes per shot but allows targeted revisions. Look for scene-level regeneration, shot replacement, and the ability to adjust one element without rebuilding everything. Cost predictability is equally important. Understand how longer videos, higher resolutions, and repeated generations affect your budget. A platform that feels cheap for experiments may become expensive for final production if every revision triggers a full re-render.
From Brief to Final Cut: A Repeatable AI Video Workflow
The evaluation framework becomes more useful when you attach it to a real workflow. Here is a repeatable process you can use with almost any AI video storytelling tool.
Step 1: Write a Production-Ready Brief
Start with a one-page brief that includes the audience, the core promise, the tone, the visual references, the required duration, and the delivery format. Add a short character bible if the story includes recurring people. Include wardrobe, age range, personality, and any physical details that must remain consistent. A good brief reduces random generation and gives the AI director clearer constraints.
Step 2: Convert the Script into Shot Cards
Break the script into beats, then turn each beat into a shot card. A shot card should describe the purpose of the shot, the subject, the action, the setting, the camera framing, the lighting, and the emotional temperature. For example, instead of writing a woman walks into a room, write a medium shot of a woman entering a dim office, hesitating at the threshold, warm desk lamp behind her, cool window light on her face, tension before she speaks. That level of detail gives the tool something to direct.
Step 3: Generate Keyframes Before Motion
Generate still keyframes for each shot before animating them. This gives you a fast approval loop. You can reject weak compositions, fix character identity, and adjust lighting while changes are cheap. Once the keyframes look right, use image-to-video or a similar motion stage to bring them to life. This two-stage approach is one of the most reliable ways to improve consistency and reduce wasted generation time.
Step 4: Build Each Scene in Passes
Do not try to perfect every shot in one pass. Build a rough scene with placeholder motion, then review pacing. Replace weak shots, adjust durations, and check continuity. In the second pass, refine camera movement, expressions, and transitions. In the third pass, polish color, sound, and text. Working in passes keeps the story visible while details are still flexible.
Step 5: Assemble, Sound Design, and Polish
Bring the generated shots into an editor or the platform timeline. Trim for pace, add voiceover, music, ambience, and sound effects. Pay attention to the first three seconds and the final beat. Those are the moments audiences remember. Export a master file and a vertical or square version if needed. If captions are required, generate them after the final edit so timing matches the finished cut.
Seven Mistakes That Ruin AI Video Storytelling Projects
Many failures are not caused by bad models. They are caused by workflow mistakes.
- Starting with visuals instead of story structure. If you do not know the narrative arc, every shot becomes a random experiment.
- Using inconsistent character references. Different hairstyles, ages, or wardrobe details break immersion.
- Overloading prompts with contradictory instructions. A single shot cannot be a wide close-up with soft hard light and a moving static camera.
- Ignoring audio until the end. Voice and music change pacing, so they should be part of the early edit.
- Generating long clips when short shots would cut better. Most stories need coverage, not duration.
- Accepting the first good frame without checking sequence continuity. A strong frame can still be wrong for the scene.
- Forgetting delivery format. A cinematic composition may not survive a vertical crop, and vertical-first footage may feel cramped on a wide screen.
How Different Creators Should Choose
No single AI video platform is best for everyone. Use your role and constraints to narrow the field.
Solo Social Video Creators
Prioritize speed, templates, vertical output, captions, and fast iteration. You may not need deep cinematic controls. Look for tools that generate strong hooks, handle text overlays, and let you publish quickly. Test how well the tool maintains a consistent style across a week of posts.
Marketing and Brand Teams
Prioritize brand consistency, review workflows, asset libraries, and export options. You need tools that can lock colors, fonts, logos, and spokesperson identity. Check whether multiple team members can comment without creating version chaos. A slightly slower tool with strong governance is better than a fast tool that produces off-brand output.
Educators and Course Creators
Prioritize clarity, pacing, voice quality, and accessibility. You need clean visuals that support complex ideas, not distract from them. Test whether the tool can generate diagrams, process shots, and consistent presenter segments. Captions and editable scripts are essential.
Filmmakers and Previsualization Teams
Prioritize directorial control, lens language, character consistency, and sequence coherence. You may care more about shot planning than final polish. Look for tools that respect camera direction, aspect ratios, and scene geography. The ability to export animatics for a traditional edit is more valuable than a one-click finished video.
A One-Week Trial Plan to Test Any AI Video Tool
Do not judge a platform by its demo reel. Run a structured trial with your own material.
- Day 1: Create a short script with three scenes, two characters, and one location change. Generate keyframes only.
- Day 2: Animate the approved keyframes and check continuity across shots.
- Day 3: Add voiceover and music. Evaluate pacing and audio controls.
- Day 4: Revise one character, one camera move, and one lighting condition. Measure how targeted the revisions are.
- Day 5: Export in two formats and test the files in your editing software.
- Day 6: Run a team review if relevant. Check comments, version history, and handoff.
- Day 7: Calculate the total time and budget for the test. Compare it with your current workflow.
At the end of the week, you will know more than any feature list can tell you. You will know whether the tool fits your story process.
Feature Checklist for Serious Video Storytelling Software
Use this checklist during evaluation. Not every item is required for every creator, but the gaps should be intentional.
- Script-to-scene planning and beat breakdown
- Text-to-video, image-to-video, and keyframe control
- Multi-image character reference and identity consistency
- Camera direction, shot size, and scene construction
- Scene-level regeneration and targeted revisions
- Voiceover with emotional and pacing controls
- Music, ambience, and sound effect options
- Timeline assembly, trimming, and transitions
- Vertical, square, and widescreen export
- Captions, subtitles, and script export
- Team review, comments, and version history
- Clear budget and speed predictability
FAQ
What is the most important feature in AI video storytelling software?
Character consistency and scene-level control are usually the most important for narrative work. Visual quality matters, but a beautiful tool that cannot hold a character or scene together will create more editing work.
Should I choose a single platform or a stack of tools?
If you need speed and simplicity, a single platform is often better. If you need maximum control, a stack that combines planning, image generation, motion, and audio can produce stronger results. The right answer depends on how often you revise and how much handoff your team requires.
How do I test character consistency?
Generate the same character in wide, medium, and close-up shots across two different scenes. Use at least three reference images, including one profile and one with different lighting. Check whether the face, hair, age, and wardrobe remain stable without becoming rigid.
Can AI video tools handle long-form stories?
They can help, but long-form work usually requires a shot-based workflow. Generate short, purposeful shots, then assemble them in an editor. Trying to generate a long continuous clip rarely produces a coherent story.
What should I avoid when comparing platforms?
Avoid comparing only demo clips, resolution numbers, or generation speed. Test with your own script, your own characters, and your own revision needs. Also avoid tools that lock your assets into a format you cannot export.
Final Thoughts
The best video storytelling software is not the one with the longest model list or the flashiest single-shot demo. It is the one that helps you move from idea to finished narrative with the fewest broken links. Start with your story problem, evaluate character consistency and directorial control, test a real workflow, and measure how well the tool handles revision. Whether you choose an agent-style AI director, a flexible generation suite, or a focused social video tool, the goal is the same: keep the audience inside the story from the first frame to the last. When the technology supports that goal without pulling you out of the creative process, you have found the right platform for your work.

Alexander
More Blogs
Read MoreVidu Q4 Alternatives: 4K AI Video Models Compared (2026)
Vidu Q4 alternatives compared: Kling 4.0, Seedance 2.5, Wan 3.0, and Runway Gen-4 — 4K support, input modes, durations, audio, and what each costs in credits on Domer.
Top 4K AI Image Generators in 2026: 5 Models Compared on Real Costs
The top 4K AI image generators on Domer compared: Flux 3 Klein, Nano Banana 2.1, GPT Image 2.5, GPT Image 2, and Nano Banana Pro — 4K credit costs, reference limits, and speed.
Nano Banana 2.1 vs GPT Image 2.5: Which Image Model Should You Use? (2026)
Nano Banana 2.1 vs GPT Image 2.5 Flare compared: credit costs per resolution, aspect ratios, reference images, text rendering, and which tasks fit each model.