
Free Text-to-Video Tools: Build Animated Scenes With AI
Oct 1, 2026
Why Text-to-Video Is Finally Practical for Solo Creators
A few years ago, generating video from a written sentence meant accepting a blurry, three-second curiosity. Today the same request can produce a coherent shot with believable lighting, camera movement, and a subject that stays roughly the same shape from frame one to frame twenty. That jump in quality is why small studios, teachers, indie marketers, and hobbyist animators are all asking the same question: how much of a finished video can I make without paying for a production crew?
The honest answer is: most of it, if you are willing to learn the shape of the workflow rather than hunting for a single magic button. Text-to-video is not one tool. It is a pipeline of decisions — how you write the shot, what reference you give the model, how you cut the results together, and where you clean up the artifacts that every generator still produces.
This guide walks through that pipeline end to end. It focuses on tools you can start using without a budget: open models you can run locally, web platforms with free tiers, and hybrid approaches that mix generated footage with stock or hand-made elements. The goal is a repeatable process you can run every week, not a one-off experiment.
What "Free" Actually Means in AI Video
Before comparing platforms, it helps to understand that "free" arrives in four different flavors. Each has a different cost in time, hardware, or flexibility, and mixing them up is the fastest way to get frustrated.
Local open-source models
These are model weights you download and run on your own machine. There is no subscription and no per-generation charge. The trade-offs are real: you need a reasonably modern GPU with enough video memory, generation is slower than a hosted service, and you are responsible for installation, updates, and troubleshooting. In exchange, you get unlimited experimentation, full privacy for confidential scripts, and the ability to batch-render overnight. For anyone planning to produce video regularly, this is usually the cheapest long-run option.
Freemium web platforms with daily limits
Many hosted generators let you create a small number of clips per day at no cost. These are ideal for learning prompt behaviour and testing whether a platform's visual style suits your project. The practical constraints are queue times, lower output resolution, and occasional watermarks. The smart approach is to treat the free allowance as a research budget: test one idea per day, save the prompts that worked, and only consider upgrading once you know exactly which model fits your content.
Free trial windows and watermarked exports
Some services offer a short full-feature window. These are useful for a single deadline push — a client pitch, a school project, a launch teaser — but they are a poor foundation for an ongoing channel because the clock is always running. Watermarked exports have the same problem: fine for internal review, unusable for publishing.
The hidden costs: time, iteration, and re-renders
Every free option charges you in iteration. A hosted model might give you four attempts per day; a local model might give you forty but take ten minutes each. Neither is inherently better. What matters is matching the generation speed to your decision speed. If you are still deciding what the video should look like, slow local rendering is actually fine. If you are polishing a nearly finished cut, fast hosted generation saves hours.
Matching the Tool Type to the Shot You Need
Not every shot deserves the same treatment. Choosing the right generation approach per shot is the single biggest quality lever available to a free-tier creator.
Short looping social clips
Vertical, three-to-eight-second clips with one clear subject and one clear motion are the sweet spot for free generators. Think a product rotating on a table, steam rising from a cup, a character turning to camera. These shots need almost no continuity, so artifacts are easy to hide behind a cut or a text overlay.
Narrative sequences with recurring characters
Here consistency is everything. A character that changes jacket colour between shots destroys the illusion instantly. Free workflows solve this with reference images: generate a clean character sheet first, then feed the same reference into every subsequent shot. Some platforms accept an image plus a text prompt; that combination is far more stable than text alone.
Product, UI, and explainer visuals
For these, generative video is often the wrong tool for the main shot and the right tool for the surrounding texture — abstract backgrounds, ambient motion, transitions, slow parallax over a static design. Screen recordings and clean motion graphics still beat generated footage for anything that must be legible and accurate.
Stylized animation and motion graphics
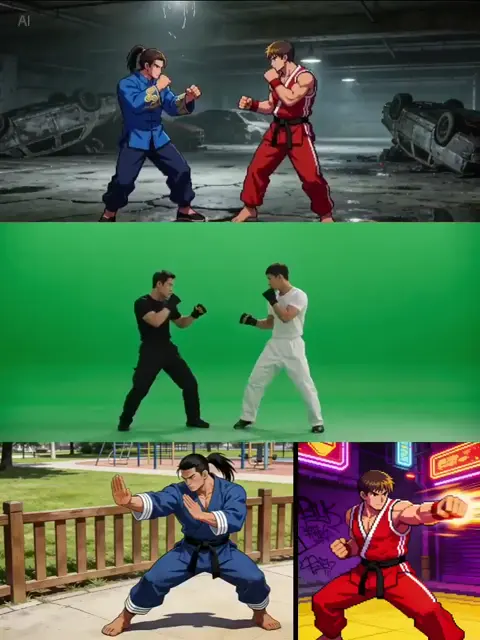
If your target look is painterly, comic-book, claymation, or paper cut-out, text-to-video shines. Stylized output hides realism errors that would be glaring in live-action style. State the style explicitly and keep it identical across every prompt in the project.
The Four-Stage Workflow From Script to Final Cut
A reliable free pipeline has four stages. Skipping any of them is what turns a two-hour edit into a two-day slog.
Stage one: script and shot list
Write the script first, then break it into shots of five seconds or less. Each shot gets one line describing subject, action, camera, and style. Anything longer than five seconds should be split, because most generators start drifting after that point. A simple table with columns for shot number, description, duration, and status will carry you through the entire project.
Stage two: reference frames
Generate or capture a still image for each shot before animating it. Stills are cheap, fast, and easy to revise. Once a still looks right, animating it is far more predictable than asking a model to invent the scene and the motion at the same time. This step also gives you a natural place to enforce character consistency: reuse the same reference image across every shot featuring that character.
Stage three: motion generation
Now animate. Generate three variants per shot rather than one, and keep them all until you have assembled a rough cut. Judging a clip in isolation is misleading — a shot that looks weak alone often works perfectly in sequence, and vice versa.
Stage four: assembly, sound, and polish
Bring the clips into an editor, cut on motion, add music, sound effects, and text. Speed-ramping a clip slightly, or reversing it, can salvage a shot with a weak ending. Colour grading across all clips unifies footage that came from different models or different days.
Prompt Patterns That Produce Clean Motion
Prompt writing for video is different from prompt writing for stills. Motion needs to be described, but not over-described.
Describe the camera before the subject
Models handle camera language remarkably well. Opening with "slow dolly-in, eye level" then describing the subject gives the generator a stable spatial frame to fill. If you lead with three sentences of character description first, the camera often ends up static or chaotic.
One action per clip
"A woman walks to a window, opens it, and looks out at rain" is three shots crammed into one prompt, and the model will usually produce a muddled compromise. Split it. Single-action clips render cleaner and cut together better.
Keep negative guidance short
Long lists of things to avoid tend to confuse rather than constrain. Two or three negative terms at most, and only for problems you actually saw in the previous attempt. Iterating on real failures beats pre-emptive over-specification.
A worked example
Weak prompt: "A cool cyberpunk city with a hero walking and lots of neon and rain and flying cars, cinematic, epic." Strong prompt: "Slow tracking shot, waist height. A figure in a grey coat walks left to right along a wet alley. Neon signage reflects in puddles. Muted teal and magenta palette, shallow depth of field, 24fps film look." The second version specifies camera, subject, action, palette, and texture — five controllable variables instead of a mood board.
Troubleshooting the Most Common Generation Failures
Every generator fails in recognisable ways. Once you can name the failure, you can usually fix it without changing tools.
Character drift across shots
Symptom: hair, clothing, or facial structure changes between clips. Fix: lock a reference image per character, repeat the exact same descriptive phrase in every prompt, and keep the palette identical. If the model still drifts, cut around it — short shots with frequent cuts hide inconsistency far better than long takes.
Morphing hands and faces
Symptom: fingers merge, eyes slide, teeth smear. Fix: reduce motion speed, keep hands out of frame or occupied with an object, and frame the subject in medium or wide shots rather than extreme close-ups. Faces that occupy a small portion of the frame rarely break visibly.
Flicker, texture crawl, and background churn
Symptom: a stable wall or sky shimmers frame to frame. Fix: lower the amount of fine detail in the prompt, reduce motion magnitude, and consider a mild denoise or temporal smoothing pass in your editor. A subtle film grain overlay also masks low-level flicker effectively.
Shots that ignore the prompt
Symptom: output is beautiful but unrelated. Fix: shorten the prompt dramatically. If a twelve-clause prompt fails, try four clauses. Then add back one detail at a time until quality drops, and stop there.
Audio and lip-sync mismatches
Symptom: dialogue does not match mouth movement. Fix: generate the visuals first, then record or synthesise the voice to match the visual timing rather than the other way around. For talking-head shots, keep the head relatively still and let the camera do the movement.
Quality Control Checklist Before Publishing
Run every project through the same checks so you catch problems before an audience does.
- Continuity: does any character, prop, or location change appearance between shots?
- Motion logic: does anything move in a physically impossible direction?
- Cut rhythm: does every cut land on a movement or a beat?
- Legibility: is any on-screen text sharp and correctly spelled?
- Audio balance: is dialogue audible over music on phone speakers?
- First two seconds: does the opening frame communicate the subject instantly?
- End card: is there a clear next action for the viewer?
- Export settings: correct aspect ratio, bitrate, and colour space for each platform?
Most of these take under a minute each. Skipping them is how a good clip ends up with a mangled logo in the corner.
Mistakes That Quietly Burn Your Time
Chasing the perfect single generation. Beginners re-roll one shot twenty times. Professionals generate three variants, pick the best, and move on. The tenth attempt is rarely twice as good as the third.
Building the whole video before editing. Generate a rough cut first, watch it end to end, and only then decide which shots need regeneration. Half the shots you planned to perfect will be cut anyway.
Ignoring resolution until the end. Upscaling a low-resolution clip rarely looks as good as generating at the higher resolution from the start, even if it takes longer. Decide your target resolution before you begin.
Mixing too many visual styles. Three models with three distinct looks in one video reads as chaos. Pick one aesthetic and enforce it in every prompt.
No naming convention. Shot_01_v2_final_really.mp4 is how projects die. Use a simple consistent scheme like project_shot03_take2 from the very first render.
Frequently Asked Questions
Can I really produce a publishable video with only free tools?
Yes, especially for short-form content. The limiting factor is iteration speed rather than output quality. Expect to spend more time on selection and editing and less on generation.
What hardware do I need for local generation?
A recent mid-range GPU with at least eight gigabytes of video memory is a practical starting point. More memory lets you generate longer clips and higher resolutions. If your machine falls short, browser-based tools are the sensible alternative.
How long should each generated clip be?
Between three and five seconds is the reliable zone. Longer clips tend to drift, warp, or lose coherence, and they are harder to cut to music.
Do free tools watermark my output?
Some do, some do not, and policies change. Check the export before you build a workflow around a platform. Local open-source models never watermark.
How do I keep a character consistent without training a custom model?
Use one reference image per character, repeat an identical descriptive sentence in every prompt, and keep lighting and palette constant. Combined, these three habits solve most consistency problems.
Is generated video safe to use commercially?
That depends on the licence of the specific model and the assets you fed it. Read the terms for each tool, avoid uploading copyrighted characters or trademarked designs, and keep a record of which model produced which clip.
What is the fastest way to improve output quality?
Shorten your prompts, generate more variants, and cut faster. Better editing hides weak generation far more effectively than better generation hides weak editing.
Putting It All Together
The reason text-to-video feels difficult is that people treat it as a single creative act. It is actually a chain of small, forgiving steps: write a short shot, make a still, animate a few variants, cut on motion, fix the small stuff. Each step is cheap to redo, which means the whole system is cheap to improve.
Start with one five-second shot this week. Write it as camera, subject, action, palette. Generate three versions. Cut the best one to a music beat. Once that feels routine, expand to a ten-shot sequence and apply the same discipline. The tools will keep changing, and the free tiers will keep shifting, but the workflow — plan short, generate multiple, edit ruthlessly — stays the same no matter which model you open next.

Alexander
More Blogs
Read MoreSynthesia AI Video Platform Integration: A Workflow Guide
Learn how to integrate Synthesia into a repeatable AI video workflow, from scripting and avatars to review, localization, security, and scale.
Sora and ChatGPT for Video: Build a Resilient AI Workflow
Learn how to combine Sora, ChatGPT, and supporting AI tools into a reliable video workflow, from brief to storyboard, generation, review, and delivery.
Video Metrics That Reveal Platform Growth Before Charts Do
A practical guide to the video metrics that actually signal platform and channel growth, plus a repeatable AI video workflow for measuring, benchmarking, and improving output.