
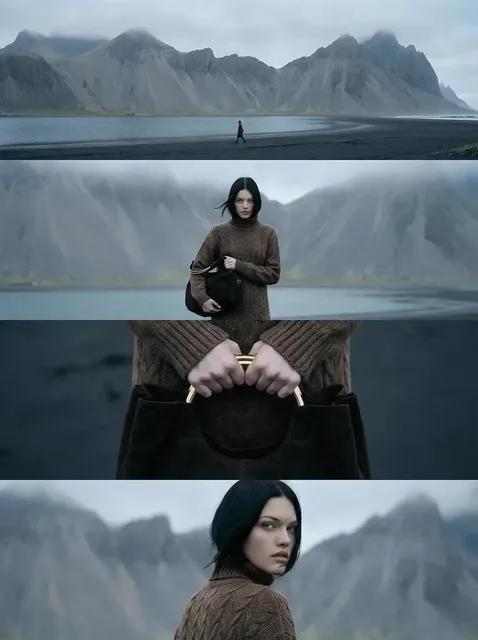
How to Choose an AI Video Generator: Community-Tested Criteria
Oct 13, 2026


Why Community Consensus Beats Marketing Pages
Every vendor ships a demo reel that looks better than reality. Creator forums do something a landing page cannot: they run the same prompt through several tools and publish the results side by side, including the ugly failures. That is why community threads remain one of the most useful research tools in an industry that moves faster than any documentation team can track. Nobody posting there is trying to sell you a subscription. They are trying to avoid wasting a weekend.
A few patterns show up again and again. First, experienced users care more about consistency than about a single beautiful frame. A gorgeous still that dissolves into mush three seconds later is worse than a plain clip that holds together for ten seconds. Second, iteration speed matters more than raw model capability, because almost nobody gets the shot they want on the first attempt. Third, the real measure of a tool is how much cleanup its output needs. If a four-second clip costs twenty minutes of correcting hands, warping backgrounds, and re-timing motion, the tool is generating homework rather than video.
There is also a useful skepticism in these discussions that is worth borrowing. People who generate video daily stop asking which model is best in the abstract and start asking which model is best for this specific shot, at this specific length, with this specific reference image. That reframing is the whole game. A tool that is mediocre at cinematic close-ups may be excellent at stylized motion graphics, and a tool that produces stunning landscapes may be hopeless at two people talking in a room.
So treat community opinion as a set of test results rather than a leaderboard. Read the failures as carefully as the successes, note which prompts and settings were used, and then rebuild those tests with your own material. What follows is a practical, tool-agnostic framework for doing exactly that — covering output quality, usability, feature depth, a repeatable test protocol, use-case matching, prompting habits, pipeline integration, and the mistakes that quietly sink projects.
Output Quality: What to Inspect Frame by Frame
Quality claims are easy to make and hard to verify. When you test a generator, export the raw file at full resolution and step through it frame by frame rather than watching once at normal speed. Playback hides artifacts that single frames expose immediately, and the difference between a clip that survives scrutiny and one that does not usually comes down to four things.
Visual fidelity and detail
Look at texture, edge definition, and micro-detail. Skin should show pores rather than a plastic sheen. Fabric should show weave rather than flat color. Distant signage should degrade gracefully instead of turning into invented glyphs. Resolution numbers matter far less than what survives compression and scaling, which is why a sharp 1080p render often beats a soft 4K render in every real delivery channel, from a phone feed to a laptop screen.
Pay attention to problem surfaces: water, glass, smoke, hair, and reflective metal. These separate models that understand how light behaves from models that simply paint plausible color. Also watch for text, because text is the fastest way to spot fabrication. Any lettering that is not a clean, deliberate element is a sign the model is guessing.
Temporal consistency
Watch a single object across the whole clip. Does a character's jacket change shade between shots? Does a logo drift a few pixels? Does a background building rearrange its windows? Temporal flicker is the most common reason a clip cannot be used commercially, because fixing it frame by frame is slow and tedious.
The practical test is a three-shot sequence: a wide establishing shot, a medium shot of the same subject, and a close-up. If wardrobe, lighting direction, and background geometry stay coherent across all three, the tool is production-ready for a large share of real work. If identity drifts after the second shot, plan on keeping clips short and hiding cuts with inserts.
Motion realism and physics
Generators often animate like dreams: beautiful, weightless, and slightly wrong. Watch how weight transfers in a walk cycle, how cloth folds and settles, how liquid pours, how a thrown object arcs. Look for limb intersections, sliding feet, and camera moves that accelerate without a human reason behind them.
Motion is also where camera language gets tested. A slow dolly-in should feel deliberate. Handheld style should have believable micro-jitter rather than random noise. If a model can follow a described camera move without turning the frame into soup, that is a genuine advantage for narrative work and one of the strongest signals of controllable output.
Escaping the uncanny valley
The uncanny valley is usually a timing problem rather than a rendering problem: micro-expressions that arrive a quarter second late, eyes that do not blink in sync with speech, a head turn that stops a few degrees short. Many tools handle close-ups well and struggle with medium shots where multiple people interact. Test crowded frames on purpose. If two people shake hands without their fingers fusing, you have learned something genuinely useful about the model's limits.
Usability: The Workflow Test
Raw capability means nothing if the interface fights you every step of the way. Usability is where most evaluations should begin, because it determines how many ideas you are willing to try before settling.
Interface and iteration speed
Time yourself. How long from opening the tool to having a first draft? How many clicks to change one word of a prompt and re-render? How easily can you queue variations and compare them side by side? A tool that takes ninety seconds per attempt encourages experimentation. A tool that takes twelve minutes per attempt forces you to batch ideas and gamble on the best one.
Render time and resource use
Track wall-clock time, queue behavior, and stability during peak hours. If you work on a laptop, note fan noise, heat, and battery drain during local generation. If you rely on a browser tool, check whether long renders survive a dropped connection or an accidentally closed tab. Reliability under pressure is part of quality, and it is the part that demos never show.
Control surfaces
Good generators expose control at the right altitude. Useful controls include seeding and variation strength, motion amount, camera path, aspect ratio, frame rate, negative prompt behavior, and reference image weight. Too few controls makes output a lottery; too many turns the tool into a second job. Look for presets you can then refine, since that combination suits both fast drafts and precise work.
Integrations and export
Check the boring things: codec support, alpha channel availability, color space handling, batch export, and whether metadata travels with the file. A generator that outputs ProRes or a clean image sequence slots into an editing timeline smoothly. One that only offers a compressed web download will cost you quality before you have even started editing.
Feature Depth Beyond Text-to-Video
Text-to-video is the headline feature, but it is rarely the one that determines whether a tool stays in your stack. These four capabilities matter more in daily practice.
Image and video conditioning
Most professional work starts from an existing asset: a product photo, a storyboard panel, or a rough animatic. Image-to-video quality often matters more than text-to-video quality, so test it first. Video-to-video features such as restyling, frame interpolation, and shot extension are equally valuable for repairing and lengthening footage you already have.
Camera and motion control
Some tools accept explicit camera instructions; others infer them from language. Both approaches can work. What you want is predictability: if you ask for a slow push-in, you should get a slow push-in most of the time. Test the same instruction five times and measure how wide the variance is. Low variance is worth more than a marginally prettier average result.
Audio, lip sync, and captions
If your deliverable contains spoken words, lip sync accuracy, voice consistency, and caption timing belong on your checklist. Even when you plan to record voiceover separately, having a scratch track aligned to mouth shapes saves significant time in the edit and reveals timing problems early.
Upscaling and finishing
Ask what happens after generation. Built-in upscaling, deflicker, stabilization, background removal, and frame interpolation reduce the number of separate tools in your pipeline. Fewer handoffs means fewer format conversions and fewer places where quality quietly disappears.
A Repeatable Test Protocol for Any Tool
Instead of judging by highlight reels, run the same five-part test on every generator you consider. It takes under an hour and produces comparable notes you can revisit months later.
- Subject close-up, eight seconds, one deliberate camera move.
- Two-person interaction in a medium shot, including hand contact.
- Product shot with a reflective surface and text on the packaging.
- Landscape with water, wind, and moving foliage in the foreground.
- Image-to-video from one of your own reference photos, five seconds.
Score each clip from one to five on four axes: fidelity, consistency, motion, and control. Also record the render time and how many attempts it took to get something usable. That last number is often the most honest metric available, because it describes practical throughput on real work rather than peak quality on a lucky roll.
| Axis | What you are measuring | Red flag |
|---|---|---|
| Fidelity | texture, edges, fine detail | plastic skin, invented text |
| Consistency | identity across shots | wardrobe or background drift |
| Motion | weight, physics, camera | sliding feet, warping limbs |
| Control | predictability of instructions | high variance on repeated prompts |
Run the test twice: once with a lazy three-word prompt and once with a detailed shot list. The gap between the two results tells you how much the tool rewards good direction. Forgiving models are pleasant for brainstorming; precise models reward planning. Both are usable, but they demand different habits, and knowing which one you are holding prevents a lot of frustration.
Matching the Tool to the Job
There is no universal winner, only better and worse fits. Most experienced creators route different tasks to different models, and so should you.
Short-form social
Vertical framing, fast hooks, heavy captioning, and a tolerance for stylization define this category. Speed and volume beat subtle realism. You want quick variants, easy aspect-ratio switching, and reliable mobile-first export. Stylized or animated looks often outperform photoreal attempts here, because audiences forgive stylization and punish uncanny faces within the first second of scrolling.
Product and brand work
Consistency and control dominate. A product's logo, color, and silhouette must not morph between shots. Look for reference-image conditioning, locked seeds, and the ability to reproduce a shot weeks later with the same settings. Budget a human pass for label text and fine detail — generating readable typography is still the weakest part of the stack, and patching it in an editor is faster than regenerating.
Narrative shorts and storyboards
Character continuity across scenes is the hard part. Tools that accept character references, maintain style across a sequence, and allow shot extension are worth the learning curve. Many creators storyboard with stills first, then animate only the panels that carry the story. That hybrid workflow keeps pacing readable before you spend render time on motion.
Education and explainers
Clarity beats beauty. Simple motion graphics, consistent diagram styling, and accurate depiction of processes matter more than photoreal cinematography. Generators that handle technical objects, arrows, and readable overlays with minimal distortion are the right fit, even if their realistic faces are unimpressive.
Prompting and Direction Habits That Raise Quality
Write prompts like a shot list, not a wish. Specify subject, action, environment, lighting, lens, camera movement, and mood, roughly in that order. Keep one dominant action per clip; models struggle when you request four simultaneous events and they average the result into mush.
Describe what you want to see rather than what you want to avoid. Use exclusions sparingly and specifically, and when a result is close, change one variable at a time so you learn what the model actually responds to. Save prompts that work in a personal library with notes about settings. That library compounds faster than any tutorial you will read.
Keep clips short when motion is complex, then stitch. Extending a coherent five-second shot is usually faster and more reliable than coaxing a thirty-second one out of a single generation. Work with real references wherever possible, because a rough reference image communicates composition, palette, and proportion better than three paragraphs of adjectives.
Finally, think in coverage. Generate a wide, a medium, and a close-up of the same moment instead of one perfect shot. Coverage gives you editing options and hides the moments where a specific generation falls apart.
Where AI Video Fits in a Real Editing Pipeline
Generated clips are ingredients, not meals. A reliable pipeline looks like this: script and shot list, reference gathering, generation in small batches, selection and tagging, editing, sound design, color, delivery. Keep generated footage organized by shot number from the first render, and retain the best three takes per shot rather than deleting aggressively.
Expect to repair roughly a fifth of every clip: stabilize a drift, mask a flicker, replace a background, add real text in post. Do that work in your editor rather than regenerating endlessly. Regeneration is the most expensive habit in AI video work, because each attempt consumes time and resets decisions you already made.
Sound is where generated footage stops looking artificial. Room tone, foley, a music bed, and clean voiceover do more for believability than another round of upscaling. If a clip still feels fake after audio, the problem is usually motion pacing, not sharpness.
Mistakes That Derail Projects
Chasing photorealism for its own sake. If your audience watches on a phone, stylized can be better. Realism invites comparison; style invites acceptance.
Ignoring continuity until the edit. Discovering wardrobe drift after the sequence is cut means redoing the scene, not one shot.
Over-prompting. Long prompts full of competing details produce averaged, muddy output. Pick a hierarchy and defend it.
Skipping rights and disclosure checks. Confirm commercial terms, watermark rules, and whether your platform or client requires disclosure of synthetic media. Read the license rather than assuming.
Generating before writing. Without a shot list you accumulate attractive clips that do not cut together, which is the most common way beginners burn a weekend.
Using one tool for everything. Different models genuinely excel at different tasks: realistic faces, stylized motion, upscaling, or image conditioning. Routing is a skill.
Judging a tool from a single session. Performance varies with load and updates. Test across at least a week of normal use before committing your workflow to it.
FAQ
How many attempts should a usable clip take? With a clear prompt and a decent reference, three to six attempts is a reasonable target. If you routinely need twenty, revisit your prompt structure or your tool choice.
Do longer clips always look better? No. Quality usually degrades as duration increases, and motion drift compounds. Generate short, then extend or cut.
Is a local setup worth it? If you need privacy, unlimited experimentation, or offline work, yes — but budget for hardware, setup time, and maintenance. Browser tools win on convenience and quick iteration.
What should I check on entry-level tiers? Watermarks, resolution caps, queue priority, and license terms. Test the workflow rather than the output, and decide from there.
How do I keep characters consistent across shots? Use reference images, lock seeds where available, keep lighting and lens descriptions identical, and generate all shots of one scene in the same session with the same settings.
Should I disclose AI-generated footage? Follow the rules of the platform or client you deliver to, and when in doubt, disclose. Audience trust is harder to regenerate than a clip.
What is the fastest quality win? Better sound and tighter editing. Both are cheaper than another round of generation and both have a larger effect on how real the footage feels.
Final Checklist Before You Commit
Run the five-shot test, score it honestly, and verify render stability across a week of ordinary use. Confirm export formats, license terms, and how the tool behaves when you need twenty variations in a single afternoon. Then choose the tool that matches your most common job, not the one with the flashiest demo reel.
The best generator is rarely the one that wins a single side-by-side comparison. It is the one you can direct reliably, week after week, until producing a shot list feels less like gambling and more like editing.

Alexander
More Blogs
Read MoreVidu Q4 Alternatives: 4K AI Video Models Compared (2026)
Vidu Q4 alternatives compared: Kling 4.0, Seedance 2.5, Wan 3.0, and Runway Gen-4 — 4K support, input modes, durations, audio, and what each costs in credits on Domer.
Top 4K AI Image Generators in 2026: 5 Models Compared on Real Costs
The top 4K AI image generators on Domer compared: Flux 3 Klein, Nano Banana 2.1, GPT Image 2.5, GPT Image 2, and Nano Banana Pro — 4K credit costs, reference limits, and speed.
Nano Banana 2.1 vs GPT Image 2.5: Which Image Model Should You Use? (2026)
Nano Banana 2.1 vs GPT Image 2.5 Flare compared: credit costs per resolution, aspect ratios, reference images, text rendering, and which tasks fit each model.