
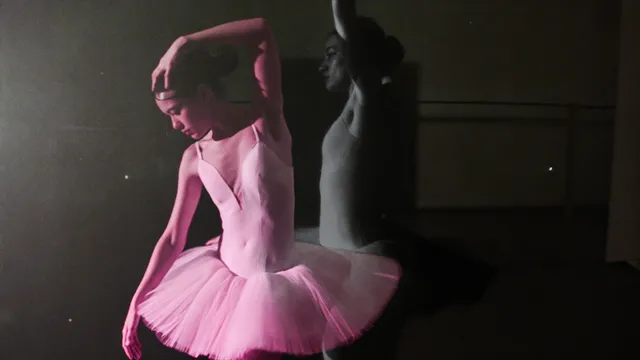
Image to Video AI: A Practical Workflow Guide for Creators
Oct 1, 2026
Why still images are the strongest starting point for AI video
Most people approach generative video by typing a sentence and hoping. That works occasionally, but it is a lottery. Starting from a still image is a fundamentally better method because it removes half the uncertainty from the process. The image already decides composition, lighting, palette, subject identity, and mood. The model only has to answer one question: what happens next?
That single question is much easier to answer well.
Image-to-video workflows have become the default for a wide range of production tasks:
- Product marketing: a hero photo of a bottle, sneaker, or watch becomes a rotating, glinting three-second loop for a paid social ad.
- Portraits and headshots: a single well-lit photo becomes subtle b-roll — a blink, a slight head turn, drifting hair — without booking a studio.
- Concept art and storyboards: illustrators turn a pitch image into an animatic that communicates camera movement to a client.
- Real estate and interiors: a still of a room becomes a slow push-in that makes a listing feel cinematic.
- Archival and personal projects: scanned family photos gain gentle parallax and atmosphere for memorial or documentary work.
- Game and app art: static key art becomes a looping background for a store page or title screen.
The barrier to entry is now mostly conceptual rather than technical. You do not need a camera rig, lighting crew, or a compositing background. You do need to understand what these models can and cannot infer, and you need a repeatable process so that a lucky result becomes a dependable one.
The caveat is important: an image-to-video model cannot know what exists outside the frame. It guesses, and those guesses are where most disappointing outputs come from. Everything in this guide is built around managing that limitation.
How image-to-video models actually work
The source image is conditioning, not a frame to copy
When you upload a still, the model encodes it into a compressed numerical representation. That representation guides the generation process rather than being pasted as frame one. This is why some tools produce a first frame that is almost your image — slightly shifted, slightly re-lit, sometimes with a subtly different face. It is also why higher-quality input images produce noticeably better motion: there is more signal for the model to work with.
Motion priors: what the model already believes
Video models are trained on enormous collections of clips, so they carry built-in assumptions about physics: water flows downhill, fabric creases when it moves, hair responds to air, cameras pan and tilt smoothly, crowds shift in waves. These assumptions are called priors, and they are the reason a model can produce convincing motion from a single frame at all.
The practical consequence is that you are not teaching motion — you are steering it. Prompts work best when they align with what the model already expects and simply specify direction, speed, and camera behavior.
Where the model is effectively blind
The model has no idea what is behind your subject. It also struggles with precise text, logos, jewellery, fingers, teeth, and complex intersections of limbs. If your shot depends on any of those, either remove them from the source image or plan to fix them in post. A cropped portrait will almost always animate better than a full-body shot with hands in frame.
Resolution, duration, and drift
Every additional second of generated video compounds small errors. A four-second clip holds together; a twelve-second clip often dissolves into morphing faces and sliding textures. The reliable strategy is short generations — typically four to eight seconds — chained together, with upscaling and frame interpolation applied afterward. Treat the model as a shot factory, not a scene renderer.
Choosing the right model for the shot
Three axes: speed, fidelity, motion ambition
Models differ along three practical dimensions. Some optimize for iteration speed, letting you test twenty ideas in a few minutes. Some optimize for fidelity, producing clean photoreal detail at the cost of slow renders. Others specialize in ambitious motion — long camera moves, dramatic parallax, physics-heavy scenes — but are less reliable on subtle facial micro-expression.
Very few models are best at all three. Most working creators keep two or three in rotation and pick per shot.
Matching model type to task
| Shot type | What to prioritize | What usually fails |
|---|---|---|
| Portrait, subtle expression | Facial priors, low motion strength | Melting features at high motion |
| Product turntable | Geometry and rotation consistency | Logos and fine text warping |
| Illustration / anime | Stylized training data | Over-realistic re-lighting |
| Landscape or cityscape | Parallax and camera path control | Sky and foliage flicker |
| Smoke, fire, water | Physics-heavy training | Frozen or looping textures |
| Dialogue-driven shot | Pair with a dedicated lip-sync pass | Uncanny mouths from a generic model |
Practical selection rules
First, test with your own image. The same model can be excellent on landscapes and unusable on faces, so benchmark reviews only get you so far. Second, run a three-prompt test — the same image with a subtle, a medium, and a strong motion prompt — before you commit to a model for a project. Third, favour tools that expose seed and motion-strength controls; reproducibility matters far more than a single impressive demo. Finally, consider the whole pipeline: a model that outputs clean, upscalable frames is often more useful than one that produces a beautiful but artifacting clip.
Prompting for motion: what to write and what to avoid
The four-part motion prompt
Keep prompts short and structural. A dependable formula is:
- Subject action — a slight head turn, a step forward, steam rising.
- Camera behavior — slow push in, locked-off static, gentle orbit.
- Atmosphere and lighting — soft window light, golden hour, neon reflections.
- Pace and intensity — calm, gradual, subtle, or energetic and quick.
Example: "Slow push in as the subject turns her head slightly toward camera, hair lifting in a light breeze, soft window light, calm gradual pacing."
That is roughly the right length. Longer prompts dilute control because each clause competes for influence.
Camera vocabulary that models respond to
Models recognize a surprisingly narrow set of camera terms reliably: push in, pull back, pan left, pan right, tilt up, tilt down, crane up, orbit around subject, handheld drift, static lock-off, and rack focus. Use one camera instruction per generation. Asking for a pan and a zoom and an orbit produces mush.
Negative prompts and what to ban
If your tool supports negative prompts, populate them deliberately. Useful bans include: morphing faces, extra limbs, duplicated subject, text artifacts, flicker, jitter, warped hands, sudden cuts, and heavy motion blur. Remove bans that are irrelevant to your shot — a long negative list can suppress legitimate motion.
Prompt anti-patterns
Three habits ruin more generations than anything else: contradictory camera instructions, narrative prompts that describe emotion rather than visible action ("she realizes she is alone"), and motion words with no direction or speed. The model cannot animate an intention. It can animate a head turn.
Step-by-step workflow: from photo to finished clip
Step 1 — Prepare the source image
Cropping and cleanup before generation save enormous time later. Match the aspect ratio to your delivery target (9:16 for vertical social, 16:9 for landscape, 1:1 for feed posts) so the model is not inventing edges. Upscale to at least the final output resolution. Remove watermarks, compression artefacts, and heavy filters. Keep faces sharp and natural — over-smoothed skin animates poorly because there is no texture for the model to carry. If hands are visible and awkward, crop them out.
Step 2 — Define the shot before you generate
Write one sentence describing what changes between the first and last frame. Decide duration. Decide aspect ratio. Decide where the clip will live in the edit. This takes ninety seconds and prevents dozens of wasted renders, because a clip that has no purpose in the timeline is a clip you will never use.
Step 3 — Generate in small batches
Run three to five variations with different seeds at low motion strength, then review side by side. Keep a simple log: source image file, prompt, model, seed, settings, and a note on what worked. Once you find a seed family that behaves well with your subject, reuse it — it is the fastest route to visual consistency across a series.
Step 4 — Pick, then extend
Take the best variation and extend it only if the shot genuinely needs more screen time. Each extension is a new generation, so drift accumulates. Where your tool supports it, use the final frame of one clip as the opening frame of the next to maintain continuity.
Step 5 — Fix and finish
Interpolate to a smooth frame rate, upscale, stabilize if the camera path wobbles, colour-match across clips, and add a light grain pass to unify sources generated at different settings. This finishing stage is what separates "AI-looking" output from footage that reads as intentional.
Keyframe control, consistency, and multi-shot sequences
First-frame and last-frame conditioning
If your tool allows both a starting and ending frame, use it. Defining both ends of the movement dramatically narrows the space of possible outputs, which is exactly what you want when a shot has to land on a specific composition. Build the end frame as a still — a slightly rotated version of the same subject, for example — and let the model interpolate the path.
Keeping a character consistent
Character consistency comes from repetition, not magic. Reuse the same reference image, the same seed family, and near-identical style wording across shots. If a tool offers a character or subject reference feature, use it consistently. Avoid regenerating your character's source image between shots; small changes in lighting or crop compound into an unrecognizable person across a sequence.
Style consistency across shots
Write a short look bible: palette, lens character, grain level, lighting direction, and motion intensity. Apply it as both a prompt constraint and a post-production grade. Unifying ten clips with one grade is faster and more reliable than trying to force the model to match itself.
Shot-to-shot continuity
Keep camera direction consistent between adjacent shots, respect the 180-degree rule, and cut on motion rather than on stillness. For social edits, two to four seconds per shot is usually plenty — the audience needs a reason to stay, not a slow reveal.
Audio, editing, and assembly
Motion is only half of a watchable clip. Layer ambience and foley first: room tone, footsteps, fabric, wind, water. These small sounds do more for perceived realism than any visual upgrade. Add music second, and keep the mix under your voice or key sound.
For narration, generate or record dialogue separately and treat lip sync as its own pass with a dedicated tool. Do not ask a general-purpose image-to-video model to handle precise mouth shapes; you will spend more time fixing it than syncing it.
In the edit, cut generously. Most generated clips are strongest in their first two seconds. Combine three short, confident shots rather than one long wobbly one. Add subtitles for social delivery, since a large share of viewers watch muted, and export at a bitrate that survives platform re-encoding — a moderately compressed high-bitrate master beats a heavily compressed one.
Common mistakes and troubleshooting
Face melts or warps. Usually caused by high motion strength, low resolution, or too much competing detail in the source. Lower motion, upscale the input, and reduce the prompt to one action.
The whole scene drifts or morphs. The clip is too long. Generate shorter and chain clips instead.
Flicker across frames. Often a side effect of aggressive interpolation or inconsistent seeds. Re-run with a fixed seed and gentler interpolation.
Camera instructions ignored. The model simply may not support that control. Try a different model, or use first-and-last-frame conditioning instead of a prompt.
Text and logos scramble. Generate clean plates without text and add typography in your editor. Budget time for this; it is nearly always faster.
Everything is too still. Your prompt probably lacks a concrete action verb, or motion strength is set too low. Add one explicit movement.
Hands and limbs multiply. Hands are a known weak point. Crop them out, or keep them out of the frame's centre of attention.
Colour shifts between clips. Grade the whole sequence together rather than per clip.
Quality control checklist before you publish
Run this pass every time, and you will catch most problems before your audience does:
- Watch the clip muted first: does the motion read without sound?
- Watch at full speed: does anything flicker or jump in the first second?
- Check the face frame by frame for micro-distortion.
- Confirm the first frame matches your brand or thumbnail intent.
- Verify the aspect ratio matches every delivery platform.
- Check for watermark remnants, stray artefacts, or duplicated objects.
- Confirm audio levels and that dialogue sits above the music.
- Ensure subtitles are accurate and inside safe margins.
- Confirm the clip can be cut to length without losing its strongest moment.
- Check that consecutive shots share direction, palette, and motion intensity.
If a clip fails more than two of these, regenerate rather than patch. Fixing a bad generation in post usually costs more than a fresh render.
FAQ
How long should a generated clip be?
Four to eight seconds per generation is the sweet spot. Extend only when the shot demands it, and expect to fix drift with each extension.
Can I use a phone photo?
Yes, if it is sharp, well lit, and free of heavy processing. Upscale it and fix obvious artefacts first — input quality translates directly into motion quality.
Why does the model change my subject's face slightly?
The image is used as guidance rather than as a literal first frame. Lower motion strength, increase input resolution, and keep the face large in the frame.
Do I need different tools for different shots?
Usually, yes. Most professionals keep two or three models available and choose per shot based on whether they need speed, fidelity, or ambitious motion.
How do I keep a character consistent across clips?
Reuse the same reference image, seed family, and style wording. Add a single unifying colour grade in post to tie everything together.
Is it worth generating at higher resolution?
Generate what the model handles well, then upscale. Forcing very high resolution at generation time often produces artefacts rather than detail.
What is the biggest beginner mistake?
Writing long narrative prompts. Describe one visible action, one camera move, and one pace — then stop.
How do I make output look less like AI?
Short clips, low motion strength, real ambience, a grain pass, and a consistent grade across the whole sequence. Polish is mostly in the assembly, not the generation.
The workflow above is deliberately unglamorous: prepare, constrain, generate in batches, and finish. Tools will keep changing, but the underlying discipline of controlling one variable at a time is what turns a still image into footage you can actually publish.

Alexander
More Blogs
Read MoreAI Video Production From Concept to Final Render: A Workflow
A practical guide to AI-assisted video production, from brief and shot list to prompt design, audio, editing, and final quality control.
Free Video Transcription and Editing Workflow: A Practical Guide
Build a reliable free video transcription and editing workflow with practical tool choices, caption tips, quality checks, and AI handoff points.
Automated Video Transcription: A Practical AI Workflow
Learn a reliable automated video transcription workflow with AI, from audio prep and speaker labels to quality checks, captions, and searchable transcripts.